When it comes to running commands on Windows, PowerShell has become somewhat of an ace in the hole. For years enthusiasts were limited to the confines of the Windows command line but in 2006, PowerShell emerged as a powerful alternative.
What is Windows PowerShell?
PowerShell is an interactive Command-Line Interface (CLI) and automation engine designed by Microsoft to help design system configurations and automate administrative tasks.
PowerShell is a cross-platform task automation solution made up of a command-line shell, a scripting language, and a configuration management framework. PowerShell runs on Windows, Linux, and macOS – Microsoft Learn
This tool has its own command-line with a unique programming language similar to Perl. Initially, PowerShell was designed to manage objects on users’ computers.
Today PowerShell offers users an extensive environment where they can execute and automate system management tasks. The user can access resources from Active Directory to Exchange Server through one program. At its core, PowerShell allows the user to access:
- Command Prompt
- PowerShell Commands
- .NET Framework API
- Windows Management Instrumentation
- Windows Component Object Model
As PowerShell has become an open-source application, Linux and Unix-based users can now access this versatile platform. PowerShell’s is mainly used to help users automate administrative jobs. Rather than performing tedious and repetitive tasks, the user can simply create scripts and issue commands, and PowerShell will complete them automatically. The user can customize hundreds of commands, called cmdlets.
Why Use PowerShell?
Windows PowerShell is a powerful command-line shell and scripting language designed for system administration and automation. It is widely used for managing various Windows systems and applications. Here are some key reasons to use PowerShell:
- Powerful Automation: PowerShell allows users to automate repetitive tasks, such as managing files, services, processes, and system configurations.
- Access to .NET Framework: The utility is built on the .NET Framework, meaning you can use .NET classes and libraries directly in your scripts. This gives you access to a vast array of powerful functions and data types that are not available in traditional batch scripting.
- Cmdlets and Extensibility: PowerShell comes with a wide range of built-in cmdlets (pronounced “command-lets”), each designed to perform a specific task. Moreover, you can create custom cmdlets and even integrate external modules to extend its functionality.
- Object-Oriented Pipeline: Unlike traditional shells that deal with plain text, PowerShell processes and passes objects between commands in its pipeline. This means you can work with structured data directly, making it easier to manipulate and format output for subsequent commands or scripts.
- PowerShell Core: PowerShell is now cross-platform and works on Linux and macOS, in addition to Windows. This makes it an attractive option for system administrators and developers working in mixed environments.
- Remote Management: The system enables remote administration of other machines through features like PowerShell Remoting. This enables the management of large numbers of servers or computers from a central location.
- Access to WMI and CIM: PowerShell can query and interact with the Windows Management Instrumentation (WMI) and Common Information Model (CIM) to retrieve system information, monitor hardware, and configure system settings.
- Integration with Windows Management Tools: Many Microsoft services provide PowerShell cmdlets, such as Active Directory, Exchange, and SharePoint.
- Robust Error Handling: PowerShell provides advanced error handling and debugging features, including try/catch blocks and detailed error messages.
- Security Features: PowerShell includes security features like execution policies that control the execution of scripts, and Just Enough Administration (JEA).
- Task Scheduling and Background Jobs: You can schedule scripts to run at specified times or intervals using Task Scheduler, or execute commands in the background with PowerShell jobs.
- Script Debugging and Profiling: PowerShell’s debugging tools allow you to step through your code, set breakpoints, and examine variables in real-time. Additionally, you can profile the performance of scripts to identify bottlenecks or inefficiencies.
- Community Support and Documentation: A large, active community and a wealth of documentation, both official and community-driven, assist new developers to gain tips and tricks to improve PowerShell scripts.
- Standardized Administration Across Microsoft’s Ecosystem: PowerShell provides consistency when managing services on Windows, such as Windows Server, Exchange, or Azure. This standardization simplifies administration across various systems and tools.
- Interactive Command-Line Interface: PowerShell’s interactive command-line interface makes it easy to test individual commands and explore system information quickly.
PowerShell Use Cases
- System Monitoring: Monitoring system health (disk space, CPU usage, services, etc.) using PowerShell scripts.
- User Management: Creating, modifying, and deleting user accounts in Active Directory.
- Server Configuration: Installing and configuring software, managing server settings, and applying patches.
- Cloud Management: Automating tasks with services like Microsoft Azure through PowerShell modules.
PowerShell cheat sheet (PDF)
Get the PDF version of our PowerShell Cheat Sheet.
How to Use Windows PowerShell
PowerShell is ideal for corporate administrators who run complex management operations over large corporate networks. Rather than collating information about hundreds of different servers and services manually (which would take a long time), you can simply run a script on PowerShell to automatically feed information back to you.
Generally speaking, PowerShell is most beneficial to users who have prior experience with command lines. To use PowerShell, you can run a variety of cmdlets, scripts, executables, and .NET classes. For the purposes of this article, we’re mainly going to focus on cmdlets and scripts to help you come to grips with the fundamentals.
Udemy has a number of top-rated courses on PowerShell that you might find useful.
PowerShell vs Command Prompt
For many users, PowerShell is a better alternative to Command Prompt. The reason is that it simply has more horsepower. One of the biggest differences is that PowerShell uses cmdlets rather than commands. Cmdlets place registry management and Windows Management Instrumentation within the administrative reach of users. In contrast, Command Prompt is confined to much more simple commands.
There is some crossover in syntax between the two platforms as PowerShell will accept some command prompt commands like ipconfigtocd. However, these are known as aliases rather than cmdlets. Another key difference is that PowerShell is centered on objects. Every piece of data output from a cmdlet is an object rather than text. This makes it easier for the user to navigate their way around complex data. The inclusion of the .NET framework also enables PowerShell scripts to use .NET interfaces. In short, PowerShell is Command Prompt on steroids.
Loading Up PowerShell
Before we delve into the basics of using PowerShell, you first need to access the main interface.
The latest version is 7.3 (7.4 is available in preview mode). If you are a Windows 10 or 11 user then you will already have access to PowerShell 5. Windows 8-8.1 users have access to PowerShell 4, but if you’re on Windows 7, you’re going to need to install it within a .NET framework. Across all operating systems, PowerShell offers two distinct interfaces. The 7
The more advanced is the Integrated Scripting Environment, which acts as a comprehensive GUI for experienced users. The basic alternative is the PowerShell console, which provides a command-line for the user to input their commands. Beginners are advised to stick with the latter until they learn the fundamentals of PowerShell.
In order to start PowerShell on Windows 10, you need to be an Administrator. Log in as an administrator, click Start, and scroll through your apps until you locate Windows PowerShell. Right-click and select Run as Administrator. On Windows 8.1, simply search for PowerShell in your System folder. Similarly, on Windows 7 the default directory for PowerShell is the Accessories folder after you’ve installed the program.
What are the different ways I can run PowerShell as an Administrator?
- Press WIN + R, type in powershell, press Ctrl+Shift+Enter. Click OK to run as Administrator.
- Type powershell into the Taskbar search field. Select Run as Administrator from the list of options in the right panel of the results list.
- Open the Command Prompt, type powershell, and press Enter. Type start-process PowerShell -verb runas and press Enter.
- *Also in the Command Prompt, type runas /netonly /user:RemoteDomain\Administrator powershell (substitute a URL or hostname for RemoteDomain)
*A note on option 4 in this list:
The /netonly option of runas applies a user account to remote targets. So, in this case, you want to run PowerShell as Administrator on a computer that is identified by RemoteDomain. The Administrator account is active on that remote device and not on the local machine, so, when prompted, give the password for the Administrator account when prompted, not the password for the Administrator account on the local computer.
How to Run cmdlets
In a nutshell, a cmdlet is a single-function command. You input cmdlets into the command line just as you would with a traditional command or utility. Cmdlets are the main way to interact with the CLI.

In PowerShell, most cmdlets are written in C# and comprised of instructions designed to perform a function that returns a .NET object.
Over 200 cmdlets can be used in PowerShell. Windows PowerShell command prompt isn’t case-sensitive, so these commands can be typed in either upper or lower case. The main cmdlets are listed below:
- Get-Location – Get the current directory
- Set-Location – Get the current directory
- Move-item – Move a file to a new location
- Copy-item – Copy a file to a new location
- Rename – item Rename an existing file
- New-item – Create a new file
For a full list of commands available to you, use the Get-Command cmdlet. In the command line you would enter the following:
PS C:\> Get-CommandIt is important to note that Microsoft restricts users from using custom PowerShell cmdlets in its default settings. In order to use PowerShell cmdlets, you need to change the ExecutionPolicy from Restricted to RemoteSigned. Remote Signed will allow you to run your own scripts but will stop unsigned scripts from other users.
To change your Execution policy, type in the following PowerShell command:
PS C:\> Set-ExecutionPolicyTo change to RemoteSigned, type the following command:
PS C:\> Set-ExecutionPolicy -ExecutionPolicy RemoteSignedMake sure you’re on an Administrator account so that you have permission to set a new execution policy.
How to Run PowerShell Scripts

Script-based processes and commands are part of the foundation of PowerShell’s versatility. In PowerShell, a script is essentially a text file with a ps1 extension in its filename. To create a new script you can simply open the Windows notepad, type your commands, and save with ‘.ps1’ at the end of the name.
To run a script, enter its folder and filename into the PowerShell window:
PS c:\powershell\mynewscript.ps1Once you’ve done this, your selected script will run.
Looking to create your own PowerShell scripts? Nearly 5k students have taken this Udemy course on Advanced Scripting with PowerShell.
Overlap with Windows Commands
When you’re new to PowerShell it can feel overwhelming to try and learn a whole new library of commands. However, what most new users don’t realize is that the syntax used on Windows command-line overlaps with PowerShell. This is made easier by the fact that PowerShell isn’t case sensitive.
Much like Command Prompt, on PowerShell the cd command still changes directories, and dir still provides a list of files within the selected folder. As such, it’s important to remember you aren’t necessarily starting from scratch. Taking this on board will help to decrease the learning curve you face when using PowerShell and decrease the number of new commands that you have to learn.
That being said, it is important to note that these aren’t considered complete PowerShell commands so much as they are aliases (PowerShell’s name for Windows command prompt commands). So even though you can try some of Command Prompt’s commands in PowerShell, you should learn as much as you can about the new ones. Nonetheless, Command Prompt experience can definitely help new users to come to grips with PowerShell and hit the ground running.
Here are some commands that are common to PowerShell and Windows:
cd: Change Directory. This command is used to change the current working directory. In PowerShell,Set-Locationcan be used as well.cls: Clear Screen. This command clears the screen of the console. In PowerShell,Clear-Hostor its aliasclscan be used.dir: Directory. This command lists the files and subdirectories in the directory. In PowerShell,Get-ChildItemcan be used as well.echo: This command prints text to the console. In PowerShell,Write-Outputcan be used as well.copy: This command copies files. In PowerShell,Copy-Itemcan be used as well.del: Delete. This command deletes one or more files. In PowerShell,Remove-Itemcan be used as well.move: This command moves files from one location to another. In PowerShell,Move-Itemcan be used as well.type: This command displays the contents of a text file. In PowerShell,Get-Contentcan be used as well.find: This command searches for a text string in a file. In PowerShell,Select-Stringcan be used as well.exit: This command closes the command prompt or terminal window. It works the same in both Command Prompt and PowerShell.
Backing Up an SQL Database with PowerShell

Many people use PowerShell to back up SQL databases. The command-line interface can conduct full database backups, file backups, and transaction log backups. There are many ways to backup a database in PowerShell, but one of the simplest is to use the Backup-SqlDatabase command. For example:
PS C:\> Backup-SqlDatabase -ServerINstance “Computer\Instance” -Database “Databasecentral”This will create a database backup of a database with the name ‘Databasecentral’ (or the name of your chosen database’.
To back up a transaction log, you would input:
PS C:\> Backup-SqlDatabase -ServerInstance “Computer\Instance” -Database “Databasecentral” -BackupAction LogThis will create a transaction log of the selected database.
The Essential PowerShell Commands
Using aliases will only get you so far on PowerShell, so it’s important to commit to learning everything you can about PowerShell’s native commands. We touched on some of these above, but we’re going to break down the main ones in much more detail below.
Get-Help
This command should be at the very top of any new user’s list when it comes to PowerShell. The Get-Help command can be used to literally get help with any other PowerShell command. For example, if you know the name of a command, but you don’t know what it does or how to use it, the Get-Help command provides the full command syntax.
For example, if you wanted to see how Get-Process works, you would type:
PS C:\> Get-Help -Name Get-ProcessPS C:\> Set-ExecutionPolicyAs touched on earlier in this guide, Microsoft has a restricted execution policy that prevents scripting on PowerShell unless you change it. When setting the execution policy, you have four options to choose from:
- Restricted – The default execution policy that stops scripts from running.
- All Signed – Will run scripts if they are signed by a trusted publisher
- Remote Signed – Allows scripts to run which have been created locally
- Unrestricted – A policy with no restrictions on running scripts
PS C:\> Get-ExecutionPolicyIf you’re using PowerShell, you may not always work on a server that you’re familiar with. Running the command Get-Execution Policy will allow you to see which policy is active on the server before running a new script. If you then see the server in question operating under a restricted policy, you can then implement the Set-ExecutionPolicy command to change it.
Get-Service
One of the most important commands is Get-Service, which provides the user with a list of all services installed on the system, both running and stopped. This cmdlet can be directed by using specific service names or objects.
For example, if you were to type PS C:\> Get-Service, you would be shown a list of all services on your computer, their statuses, and display names.
To use this command to retrieve specific services, type: PS C:\ Get-Service “WMI*” to retrieve all services that begin with WMI.
If you wanted to restrict output to active services on your computer, input the following command:
PS C:\ Get-Service | Where-Object {$_.Status -eq “Running”}ConvertTo-HTML
When using PowerShell, you might want to generate a report about the information you’ve seen. One of the best ways to do this is by using the ConvertTo-HTML command. This cmdlet allows you to build reports with tables and color, which can help to visualize complex data. Simply choose an object and add it to the command.
For example, you could type:
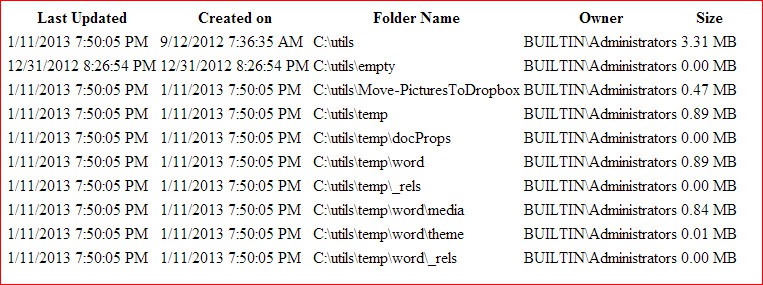
Get-PSDrive | ConvertTo-HtmlThis returns a mass of information, so it’s a good idea to limit it to a file with the Out-File command. A better alternative command is:
Get-PSD Drive | ConvertTo-Html | Out-File -FilePath PSDrives.htmlThis will then generate an HTML file in table form. For example:
You can then add your own colors and borders to refine its presentation.
Export-CSV (and Get-Service)
No less important for increasing visibility is the Export-CSV command. It allows you to export PowerShell data into a CSV file. Essentially, this command creates a CSV file compiling all of the objects you’ve selected in PowerShell. Every object has its own line or row within the CSV file. This command is primarily used to create spreadsheets and share data with external programs.
To use this command, you would type:
PS C:\> Get-Service | Export-CSV c:\service.csvIt’s important to remember not to format objects before running the Export-CSV command. This is because formatting objects results in only the formatted properties being placed into the CSV file rather than the original objects themselves. In the event that you want to send specific properties of an object to a CSV file, you would use the Select-Object cmdlet.
To use the Select-Object cmdlet, type:
PS C:\> Get-Service | Select-Object Name, Status | Export-CSV c:\Service.csvGet-Process
If you want to view all processes currently running on your system, the Get-Process command is very important. To get a list of all active processes on your computer, type:
PS C:\ Get-ProcessNotice that if you don’t specify any parameters, you’ll get a breakdown of every active process on your computer. To pick a specific process, narrow the results down by process name or process ID and combine that with the Format-List cmdlet, which displays all available properties. For example:
PS C:\ Get-Process windowrd, explorer | Format-List *This provides you with comprehensive oversight of all active processes.
Get-EventLog

If you ever want to access your computer’s event logs (or logs on remote computers) while using PowerShell, then you’re going to need the Get-EventLog command. This cmdlet only works on classic event logs, so you’ll need the Get-WinEvent command for logs later than Windows Vista.
To run the event log command, type:
PS C:\> Get-EventLog -ListThis will show all event logs on your computer.
One of the most common reasons users look at event logs is to see errors. If you want to see error events in your log, simply type:
PS C:\> Get-EventLog -LogName System -EntryType ErrorIf you want to get event logs from multiple computers, specify which devices you want to view (listed below as “Server1” and “Server2”). For example:
PS C:\> Get-EventLog - LogName “Windows PowerShell” -ComputerName “local computer”, “Server1”, “Server2”.| Parameters you can use to search event logs include: | |
|---|---|
| After | User specifies a date and time and the cmdlet will locate events that occurred after |
| AsBaseObject | Provides a System.Diagnostics.EventLogEntry for each event |
| AsString | Returns the output as strings |
| Before | User specifies a date and time and the cmdlet will locate events that occurred before |
| ComputerName | Used to refer to a remote computer |
| EntryType | Specifies the entry type of events (Error, Failure Audit, Success Audit, Information, Warning) |
| Index | Specifies index values the cmdlet finds events from |
| List | Provides a list of event logs |
| UserName | Specifies usernames associated with a given event |
Stop-Process

When using PowerShell, it’s not uncommon to experience a process freezing up. Whenever this happens, you can use Get-Process to retrieve the name of the process experiencing difficulties and then stop it with the Stop-Process command.
Generally, you terminate a process by its name. For example:
PS C:\> Stop-Process -Name “notepad”In this example, the user has terminated Notepad by using the Stop-Process command.
PowerShell Commands List
| Command name | Alias | Description |
|---|---|---|
| Set-Location | cd, chdir, sl | Sets the current working location to a specified location. |
| Get-Content | cat, gc, type | Gets the content of the item at the specified location. |
| Add-Content | ac | Adds content to the specified items, such as adding words to a file. |
| Set-Content | sc | Writes or replaces the content in an item with new content. |
| Copy-Item | copy, cp, cpi | Copies an item from one location to another. |
| Remove-Item | del, erase, rd, ri, rm, rmdir | Deletes the specified items. |
| Move-Item | mi, move, mv | Moves an item from one location to another. |
| Set-Item | si | Changes the value of an item to the value specified in the command. |
| New-Item | ni | Creates a new item. |
| Start-Job | sajb | Starts a Windows PowerShell background job. |
| Compare-Object | compare, dif | Compares two sets of objects. |
| Group-Object | group | Groups objects that contain the same value for specified properties. |
| Invoke-WebRequest | curl, iwr, wget | Gets content from a web page on the Internet. |
| Measure-Object | measure | Calculates the numeric properties of objects, and the characters, words, and lines in string objects, such as files … |
| Resolve-Path | rvpa | Resolves the wildcard characters in a path, and displays the path contents. |
| Resume-Job | rujb | Restarts a suspended job |
| Set-Variable | set, sv | Sets the value of a variable. Creates the variable if one with the requested name does not exist. |
| Show-Command | shcm | Creates Windows PowerShell commands in a graphical command window. |
| Sort-Object | sort | Sorts objects by property values. |
| Start-Service | sasv | Starts one or more stopped services. |
| Start-Process | saps, start | Starts one or more processes on the local computer. |
| Suspend-Job | sujb | Temporarily stops workflow jobs. |
| Wait-Job | wjb | Suppresses the command prompt until one or all of the Windows PowerShell background jobs running in the session are … |
| Where-Object | ?, where | Selects objects from a collection based on their property values. |
| Write-Output | echo, write | Sends the specified objects to the next command in the pipeline. If the command is the last command in the pipeline,… |
PowerShell: A powerful command-line interface
Although making the transition to PowerShell can seem quite complex, it’s command-line interface operates much the same as any other. It may have its own unique cmdlets, but a wealth of online resources can help you with any administrative task you can think of. To get the most out of PowerShell, you simply need to get used to the multitude of commands available to you.
As a new user, it is easy to become daunted by PowerShell’s 200-plus cmdlets. Make sure you start out with the command line interface before graduating to the full-blown GUI. Regardless of whether you’re new to PowerShell or command-line interfaces, more than enough information is available online to help you make the most of this powerful tool.
PowerShell Community Resources
PowerShell Commands FAQs
How do I navigate in Windows PowerShell?
The most important navigation actions you need to know for PowerShell is how to get into it and how to get out again. The easiest way to access the PowerShell environment is to type PowerShell in the search field of your taskbar. PowerShell runs in its own window, so you can close it down just by clicking on the X in the top right corner of the window’s frame. The proper way to close the window is to type exit and the command prompt. The standard navigation commands of the Command Prompt work in PowerShell so use cd to change directory. Enter a drive letter followed by a colon (eg. D:) to switch to another drive.
Is Windows PowerShell the same as Command Prompt?
PowerShell is an advancement on Command Prompt because its shell scripting capabilities include better programming constructs than those available for batch jobs in Command Prompt. All of the Command Prompt commands are available in PowerShell but then PowerShell has extra commands and utilities, called cmdlets. Think of PowerShell as Command Prompt +.
How do I learn bash scripting?
Bash scripting is a Unix shell script. As Linux is an adaptation of Unix, a shell script written for Linux is often called a Bash script. There are a lot of online tutorials on how to create a Bash script. In order to avoid confusion, try not to refer to a PowerShell script as a Bash script.
How can I make Command Prompt default instead of PowerShell?
When you press WIN + X, you now get a PowerShell window instead of the old Command Prompt. To stick with Command Prompt, go to the Start menu and click on Settings. In the Settings menu, select Personalization. Select Taskbar in the left-hand menu of the Personalization Settings Window. In the main panel of that window, look for Replace Command Prompt with Windows PowerShell in the menu when I right-click the Start button or press Windows key+X. Set that to Off.
What are the different ways I can run PowerShell as an Administrator?
- Press WIN + R, type in powershell, press Ctrl+Shift+Enter. Click OK to run as Administrator.
- Type powershell into the Taskbar search field. Select Run as Administrator from the list of options in the right panel of the results list.
- Open the Command Prompt, type powershell, and press Enter. Type start-process PowerShell -verb runas and press Enter.
How do I run PowerShell commands?
You can run PowerShell commands from a Command Prompt window by using the format: powershell -command ” <PowerShellCode> “ but put your PowerShell command inside the quotes instead of <PowerShellCode>. If your PowerShell command requires a value in quotes, use single quotes in there instead of double-quotes. The surrounding quotes in the execution example here should remain as double-quotes.

Nicely done. I grew up with the command prompt and when I look at PS I get over-whelmed with the number of commands and how to use it. Your intro to it makes me feel a little more at ease with getting into it.
This is a real good basic tutorial for somebody that is just starting to learn Powershell!