

Paranoid about your emails? Want to send them in one of the safest ways possible? This guide tells you how to use PGP encryption on Windows for free, and includes screenshots and directions for every step of the way. With it, you’ll find it easy to install, set up and use PGP encryption.
If you are looking for a background on PGP, who invented it, and how it works on a deeper level, head to our more extensive guide on PGP encryption and how it works.
If not, let’s dive straight in.
In order to run PGP smoothly, and with the least risk to your privacy and security, we will combine several different pieces of software. The first of these is the PGP encryption package Gpg4win, which is an installation for Windows that comes with the Gnu Privacy Guard (GPG) and some additional components.
On top of Gpg4win, we will also be using an email client from Mozilla called Thunderbird, and Enigmail, which is a Thunderbird addon that brings everything together. The best part is that all three of these downloads are free, so it won’t cost anything to get up and running.
You will be using these three components with your own email address. Ideally, this address should come from a provider that has a reputation for taking security and privacy seriously, but these directions will still work with any old Gmail or Yahoo account. So strap yourselves in and get ready to encrypt.
What’s the problem with your normal email?
Most of us use email every day, but many aren’t aware of just how insecure it is. Unfortunately, email isn’t very safe at all. Between your outbox and the inbox of your recipient, you never know who could be intercepting your messages. Criminals, the authorities, or your crazy ex-boyfriend could be reading everything that goes in and out.
The lack of security is fine in most situations. For the average person, it doesn’t really matter if an interceptor reads the latest chain email to enter their inbox, or if their ISP can access their correspondence with an old friend from college.
Problems arise when you want to send something valuable or sensitive. You wouldn’t want to email your online banking password to your wife, or organize a plot to overthrow the government through email. In both cases, the information could easily be found, leading to your funds being stolen or a very angry official knocking on your door.
What’s the solution?
If you want to keep your emails safe, the best thing you can do is encrypt them. By encrypting your messages with PGP, you are putting them into a complex code which can only be broken by your recipient’s private key. The same goes for when you receive an encrypted message—your private key is the only thing which allows it to be accessed.
This system means that even if someone does intercept your messages, they can’t actually read them. They will be able to see who you are communicating with, when the message was sent, the subject title and the metadata, but the contents of the message itself will be obscured with unreadable ciphertext.
See also: Famous codes and ciphers
Which email provider should you use?
We will be downloading Gpg4win, Thunderbird and Enigmail in just a moment, but you will also need an email address to get started. You can use whichever one you normally do, but free emails like Gmail and Yahoo are probably a bad idea. Many of these services are only free because these companies extract your data and sell it to advertisers.
While Google can’t scan the contents of a PGP encrypted email, it can still collect the metadata. If your whole motivation for using PGP is to enhance your privacy and security, then using the services of companies with such questionable records probably isn’t a good start.
So which email service should you use? If you have a high risk-level, you may want to consider an email provider that specifically focuses on secure and private email, such as Tutanota or Proton Mail.
They both offer free plans with limited functionality, as well as premium accounts with more storage and features. These will cost you a few dollars a month, but the expense can definitely be worth it in a lot of cases.
Setting up PGP encryption on Windows
Now that you understand why this is such a useful system for securing your email, it’s time to get started. This is a multi-step process that includes downloading and installing three separate apps, then configuring them to work together.
Downloading and installing Gpg4win
Gpg4win is an open-source package of programs for Windows. It comes with some certificate managers and plugins, but all we will need for today’s tutorial is the Gnu Privacy Guard encryption software.
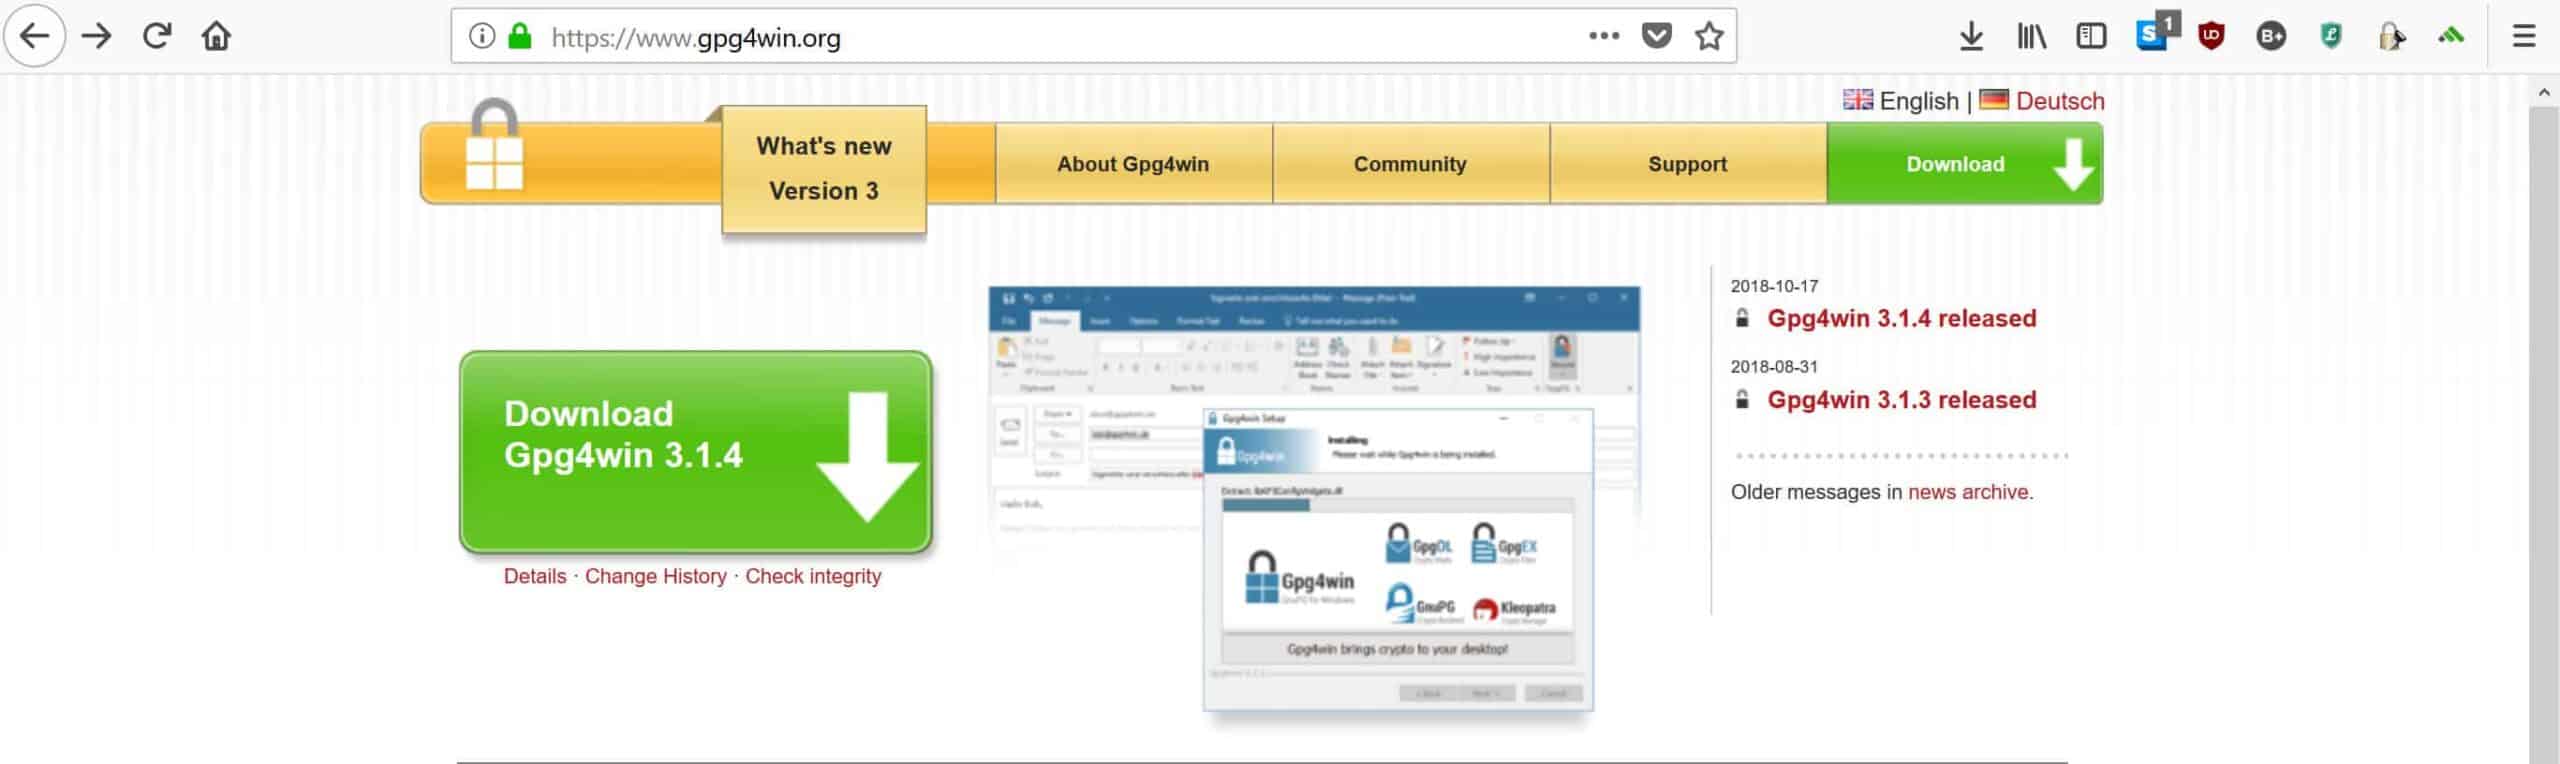
The first thing you need to do is head over to the Gpg4win website and download the encryption package for Windows.
Click on the big green button that says Download Gpg4win, followed by the version number:
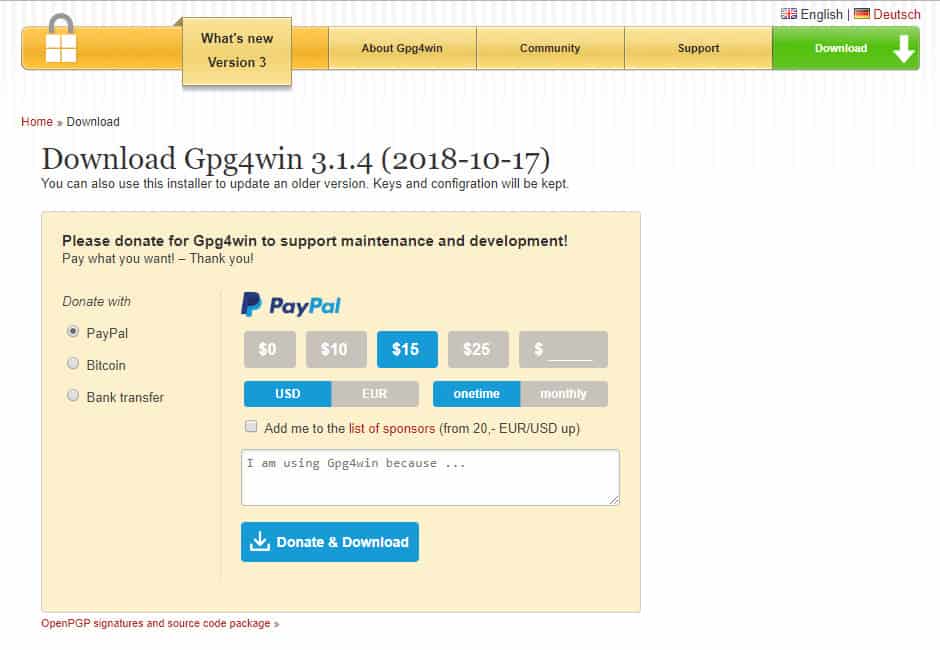
You will be taken to the following screen, where you are asked for a donation:
You don’t have to donate anything, because Gpg4win is ultimately a free software package. Despite this, it’s important to keep in mind that GPG is a project that helps to secure the communications of millions of people around the world. Donations are a critical part of keeping the project alive, so if you have some extra cash, it’s a worthwhile cause to support.
If you don’t want to donate, just click the $0 that is under the PayPal logo, then hit the Download button. You will be taken to the following page while you wait for the GPG package to download:
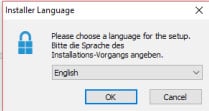
Once the download has finished, double click on it to run the setup wizard. This will bring you to a menu where you can choose your language. Pick whichever language you are most comfortable with, then click OK:
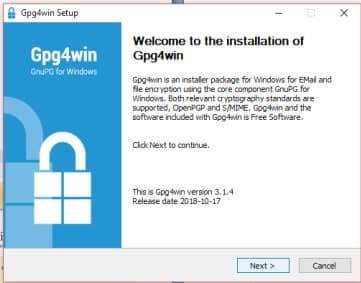
You will be taken to the following page, where you can just click Next:
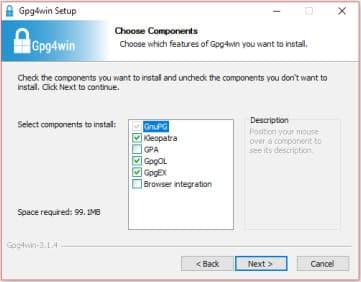
This brings you to a screen where you can choose which aspects of the GPG package you would like to install. All that we really need for our purposes is GnuPG, but downloading the default selections won’t hurt. You can also choose to download the Browser integration or GPA if you feel like you will need them for something else.
Once you have made your selections, click Next:
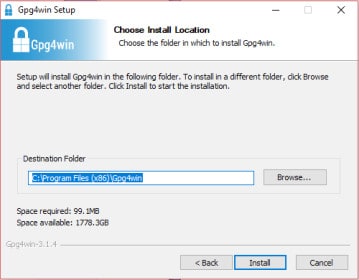
You will be brought to the following page, where you can either choose somewhere to save Gpg4win, or just leave the destination as is. Click Install:
Wait for a few moments while Gpg4win is installed. Then you will be taken to the following page:
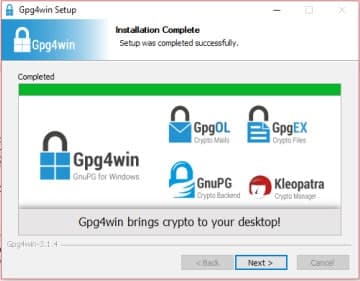
Click Next, then you will end up here:
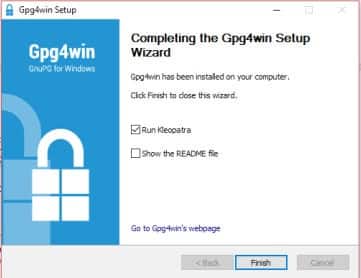
Click Finish to complete the setup of Gpg4win of your computer. You won’t need to run Kleopatra for today’s tutorial, so you can either deselect the box or just close the program when it opens. Kleopatra is a certificate manager which you can use to manage your keys, but today we will be using Enigmail instead.
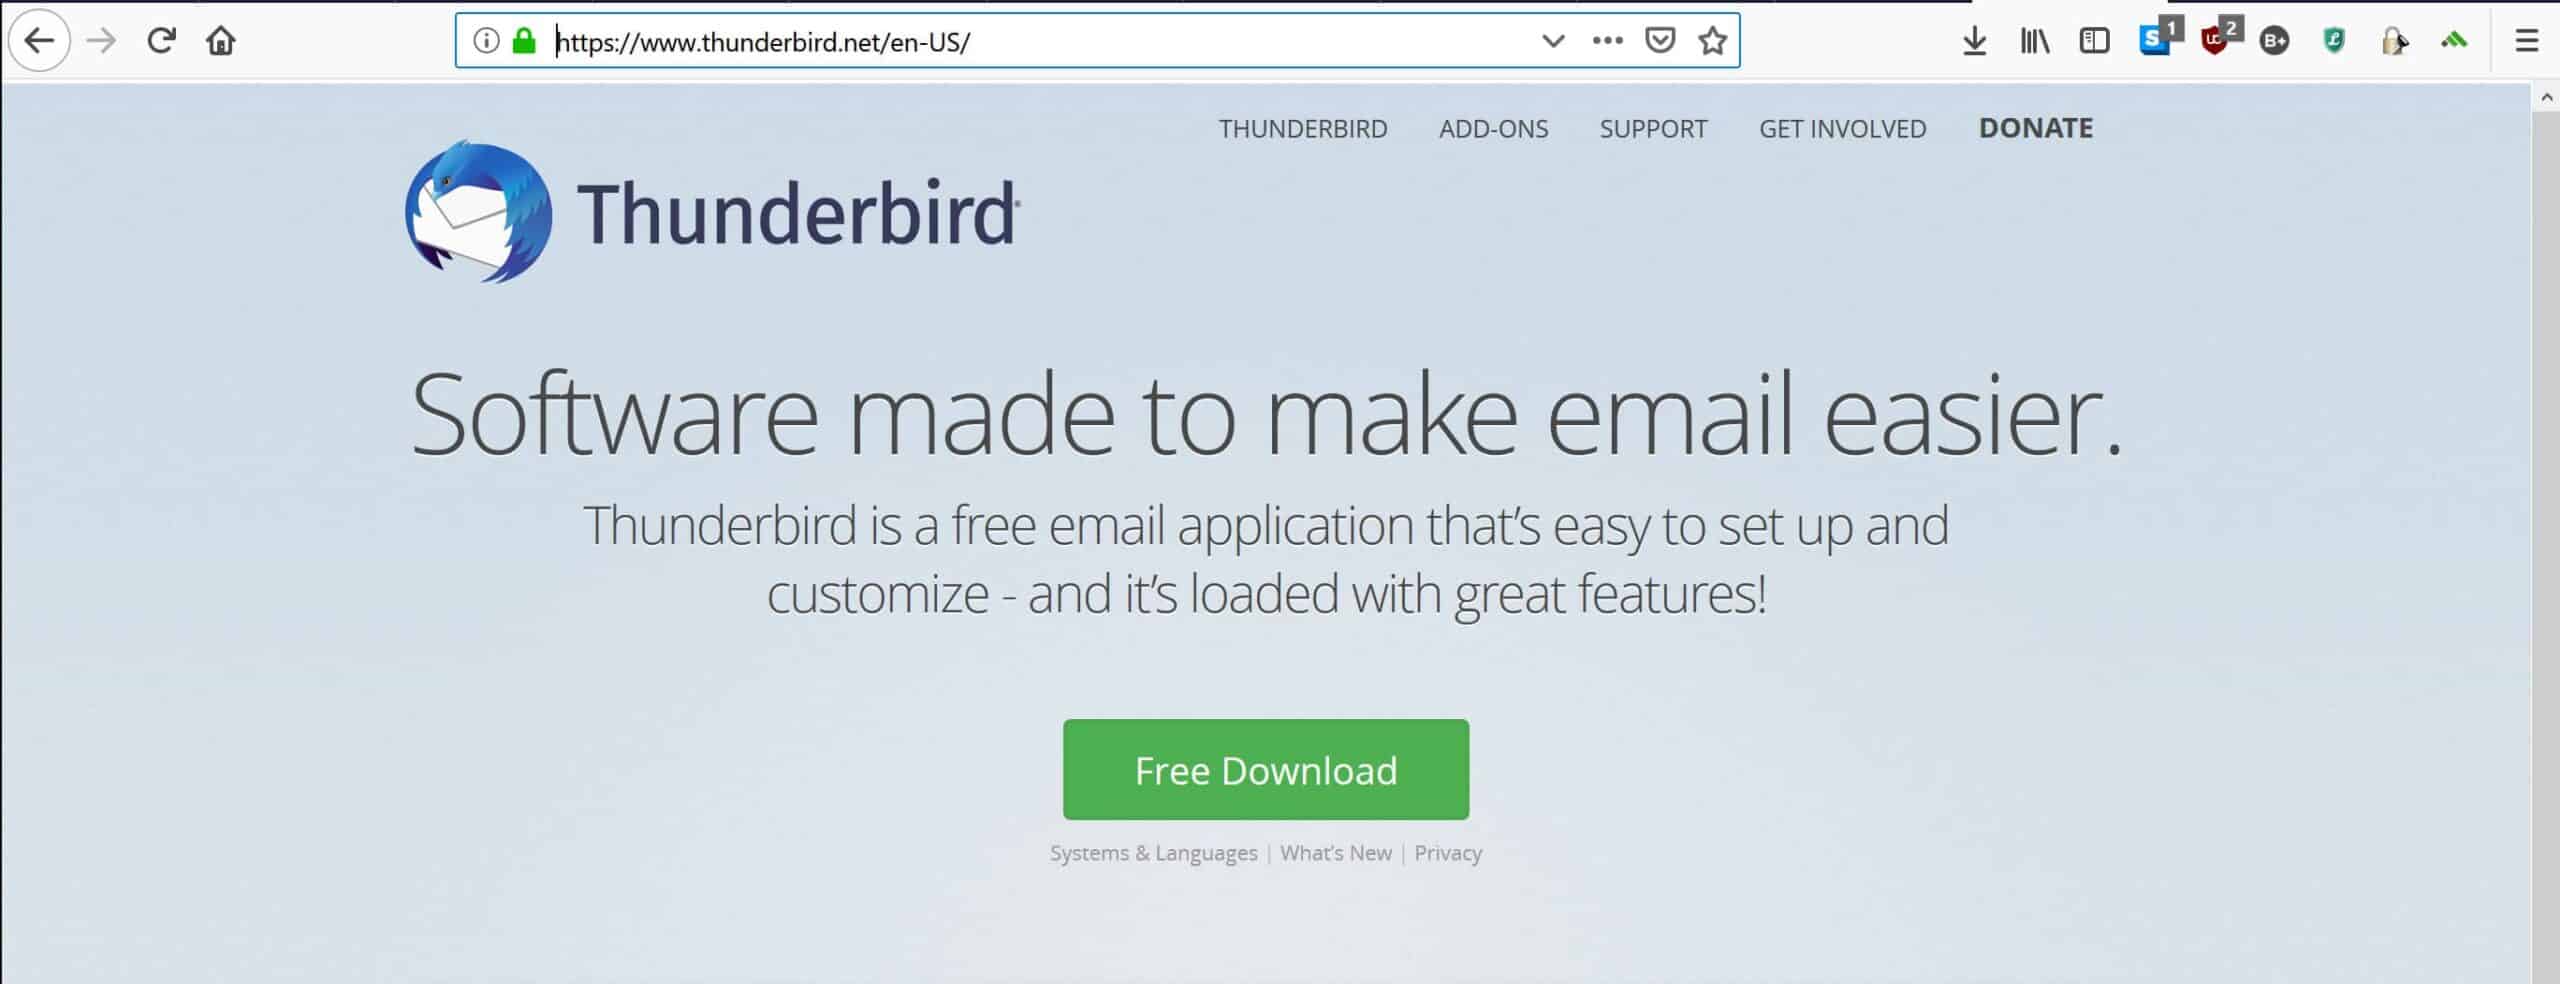
Installing Thunderbird
The first step is to make your way to the Thunderbird website, then hit the big green Download button in the middle:
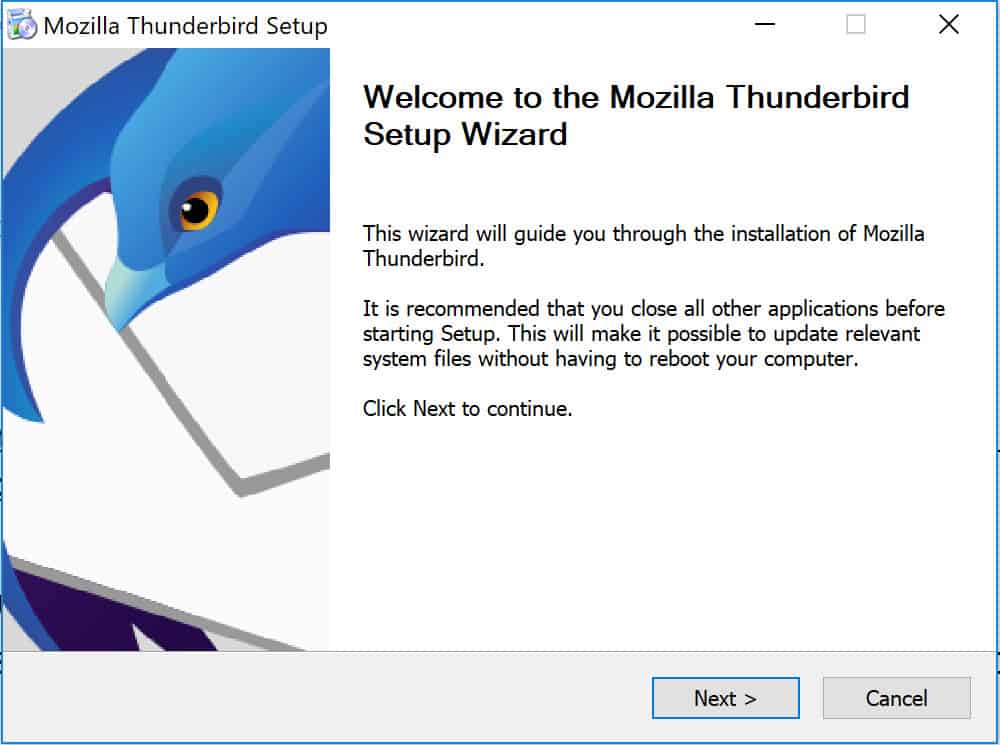
Wait for the file to download, then run it. A window might pop up, asking if you want to allow the program to make changes to your computer. If it does, click Yes. The following setup wizard will launch:
Click Next, which will bring you here:
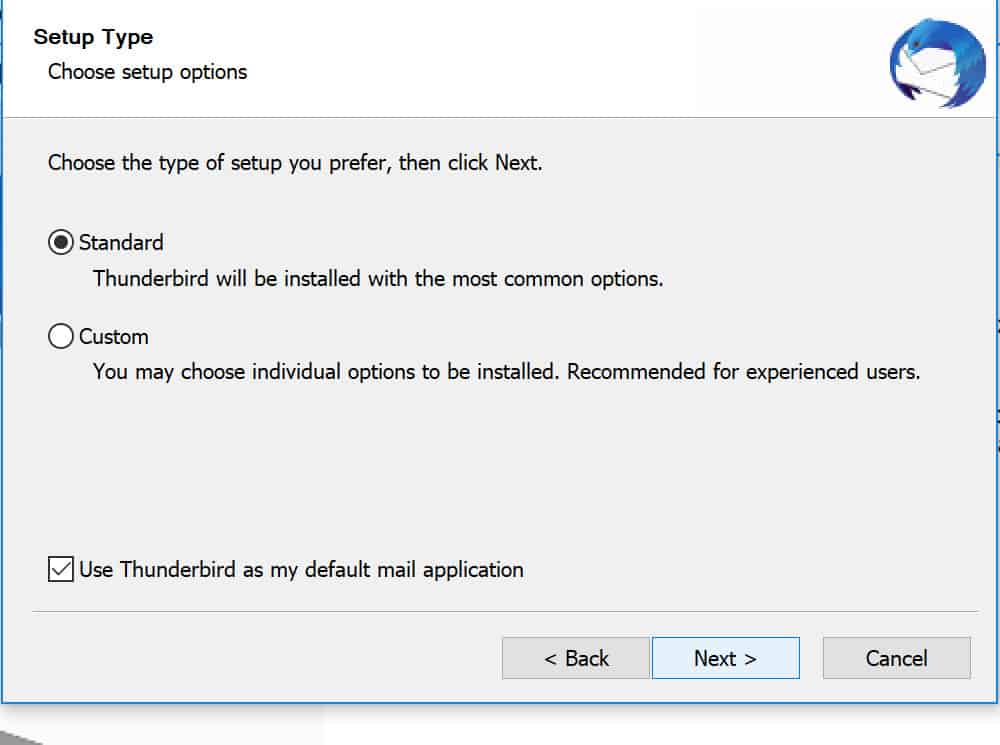
If you are a power user, feel free to go with the Custom setup option. If you aren’t too technically-minded, it’s probably best to choose the Standard installation instead. Click Next, which will take you to this review page:
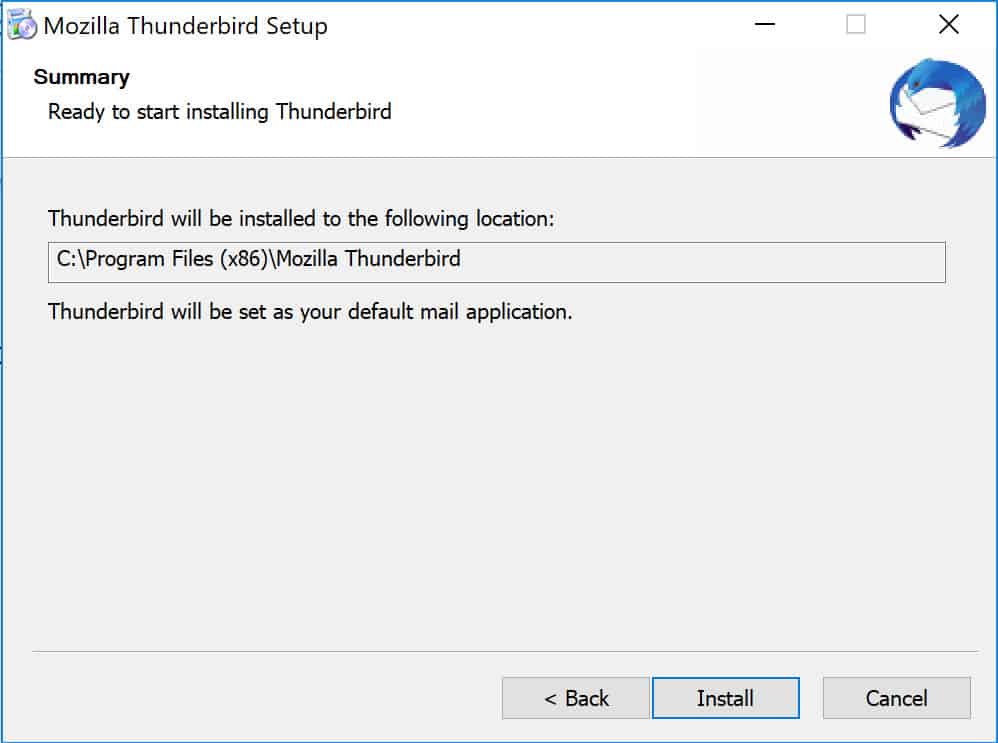
Review your selections, then click Install if you are happy with them. Otherwise go back through the setup wizard and change the file’s location, or whichever other options you want to alter.
If you do make any changes, cycle through each of the above steps again until you click Install. Wait for the installation to finish, then you will be brought to the completion page. Click Finish to complete Thunderbird’s installation.
Setting up Thunderbird
Thunderbird should launch by itself. If it doesn’t, search through your files and open it manually. You will be brought to this setup screen:
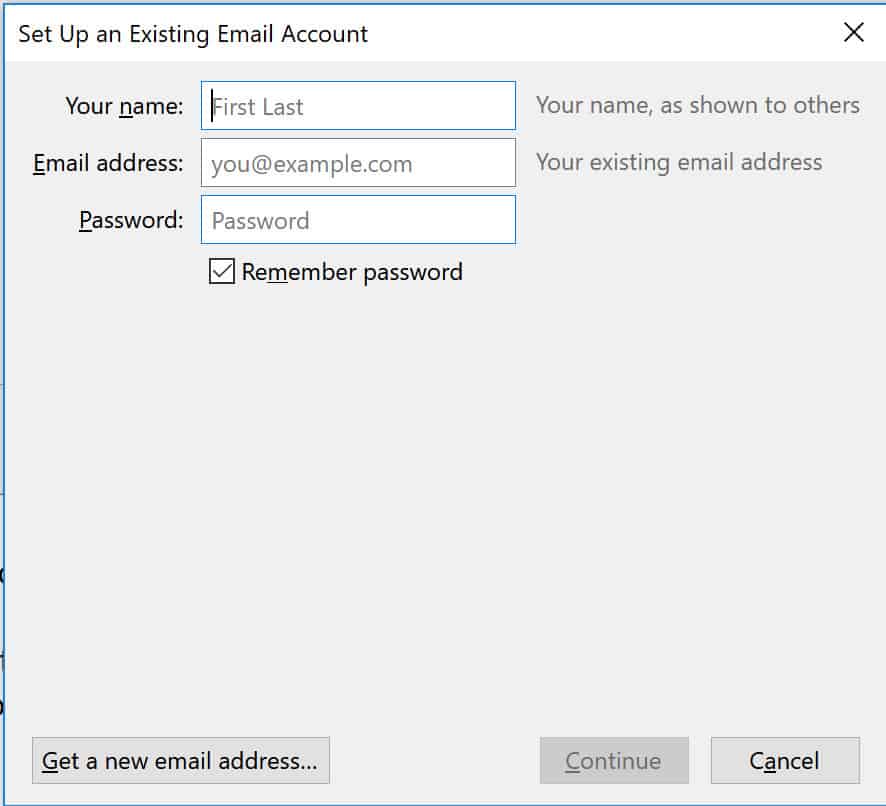
Fill in your name, the email address you would like to use and the password that belongs to that account. Strong passwords are crucial, because weak ones make it trivial for an attacker to break into your PGP encrypted email. For more details on strong passwords, head to our tutorial on how to make strong passwords.
See also: Password Generator tool
Once you have entered your details, click Continue. This takes you to the following screen:

If you aren’t sure what you are doing, it’s probably best to leave the settings as they are. IMAP is a protocol that stores the master copies of your email folders on the server, with additional copies hosted locally. POP3 will store your messages on the first device that accesses them. In general, IMAP is more convenient when it comes to syncing your email across devices.
Once you are happy with your configuration, click Done. The setup wizard will take a moment to check your password, then you will be led to the interface of your new Thunderbird email client.
There are a lot of other configuration options that you can experiment with in Thunderbird, such as setting up the security preferences and disabling HTML in your emails. In fact, many of these are important for your overall safety and privacy. Despite their importance, we have a lot of other things to cover in this post, so we will be saving them for another day.
Setting up Enigmail
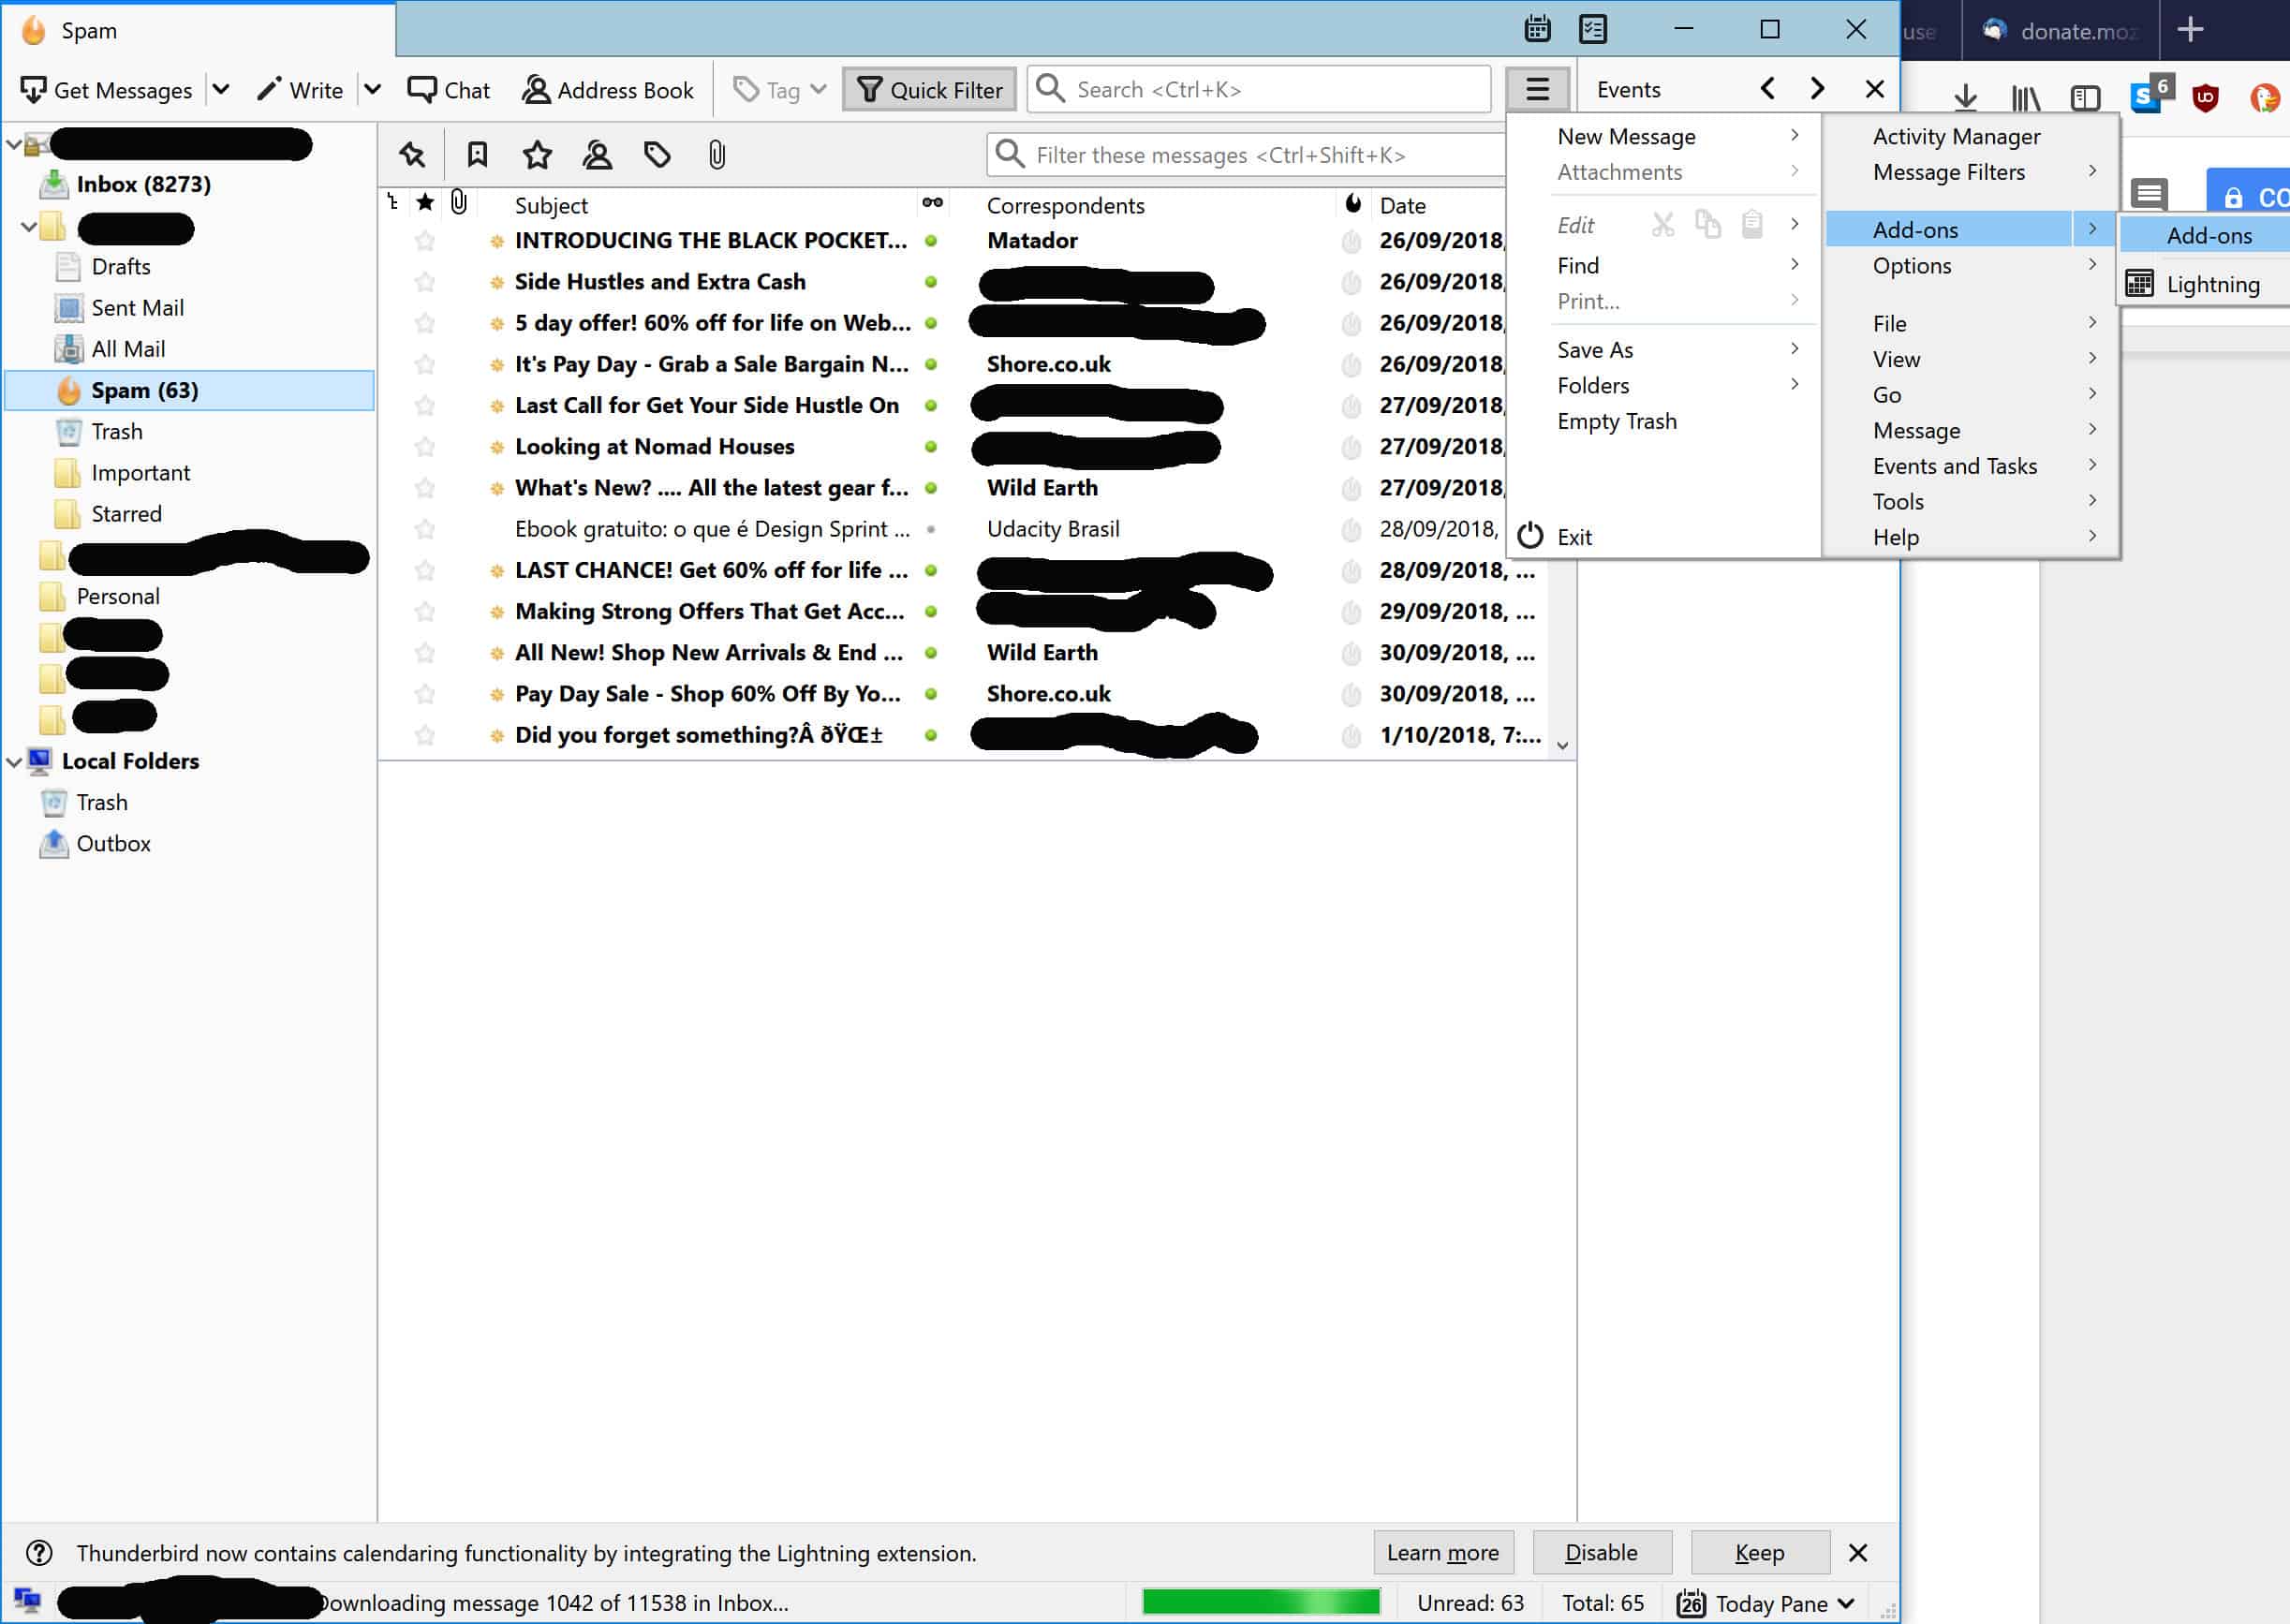
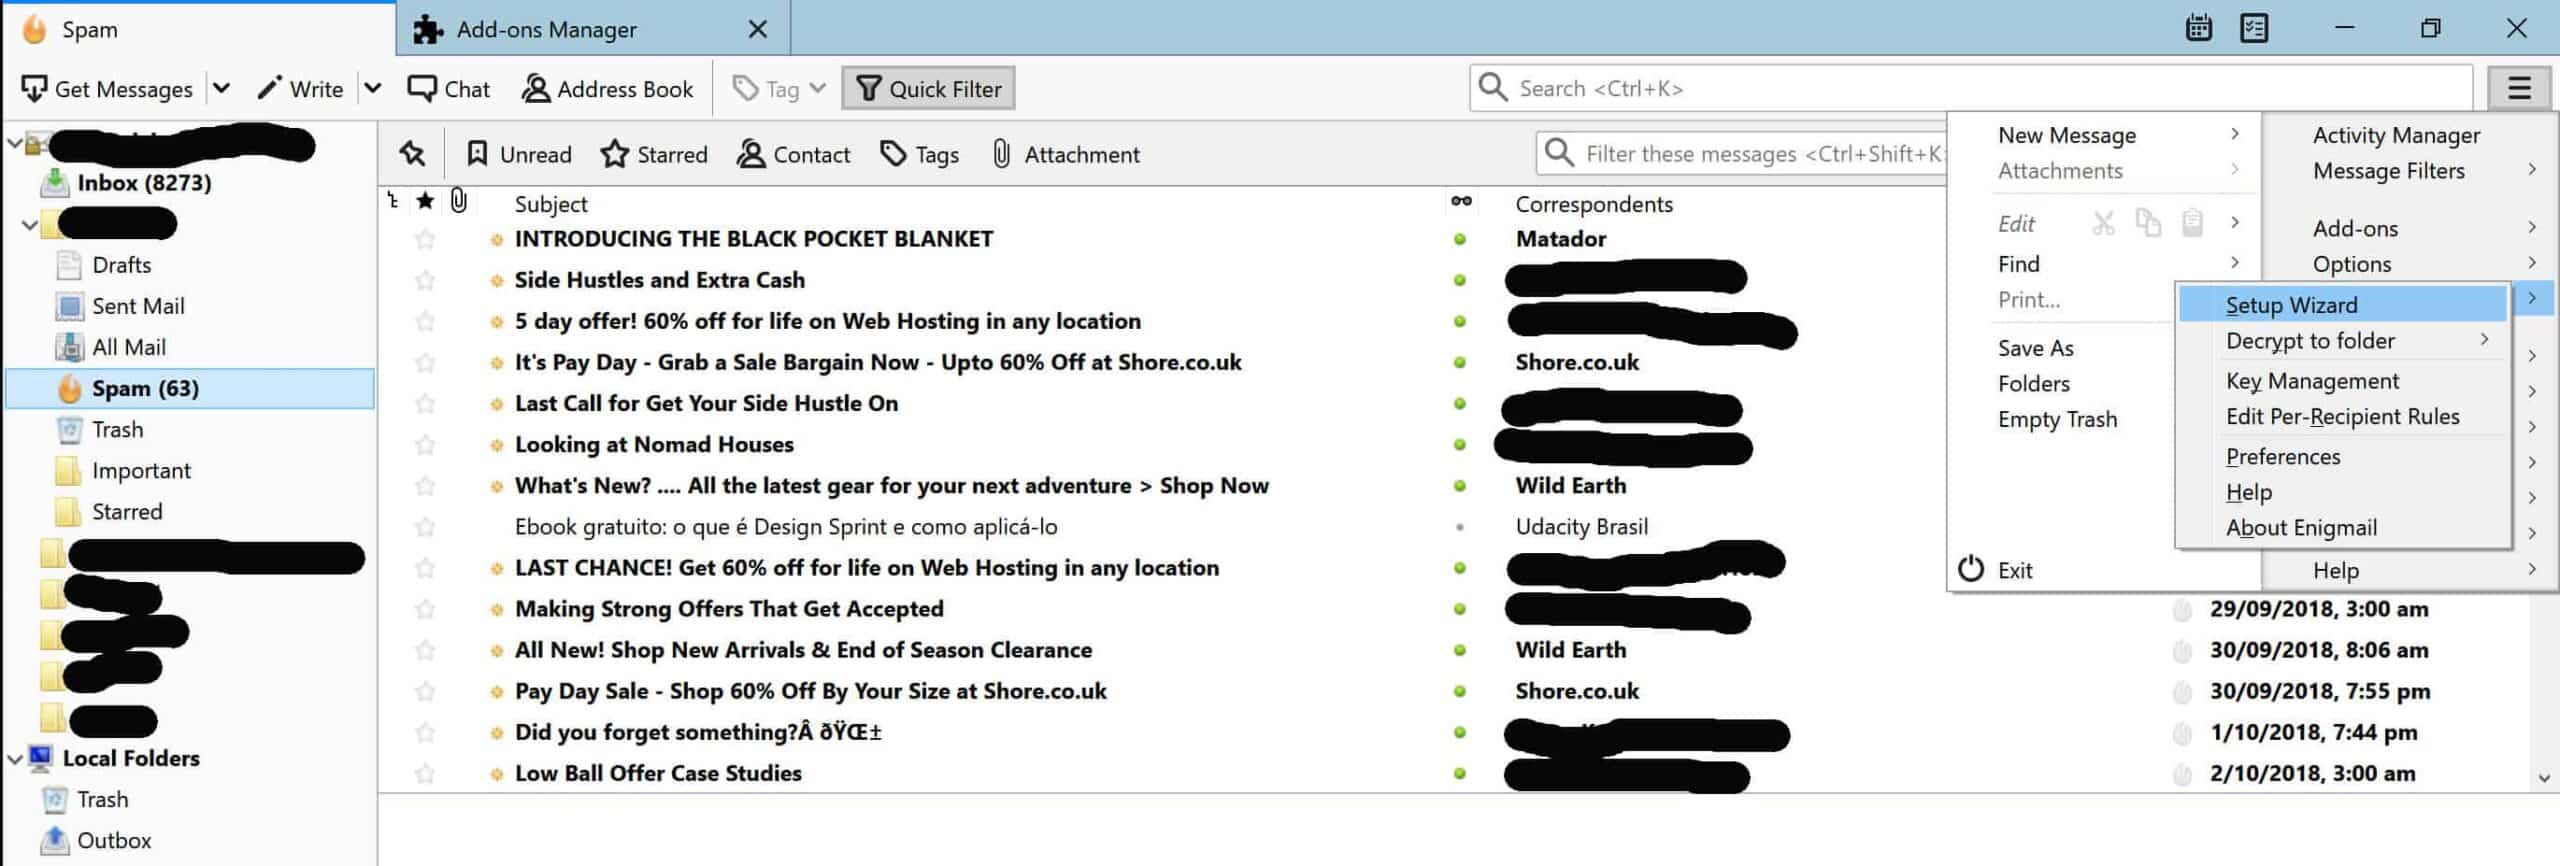
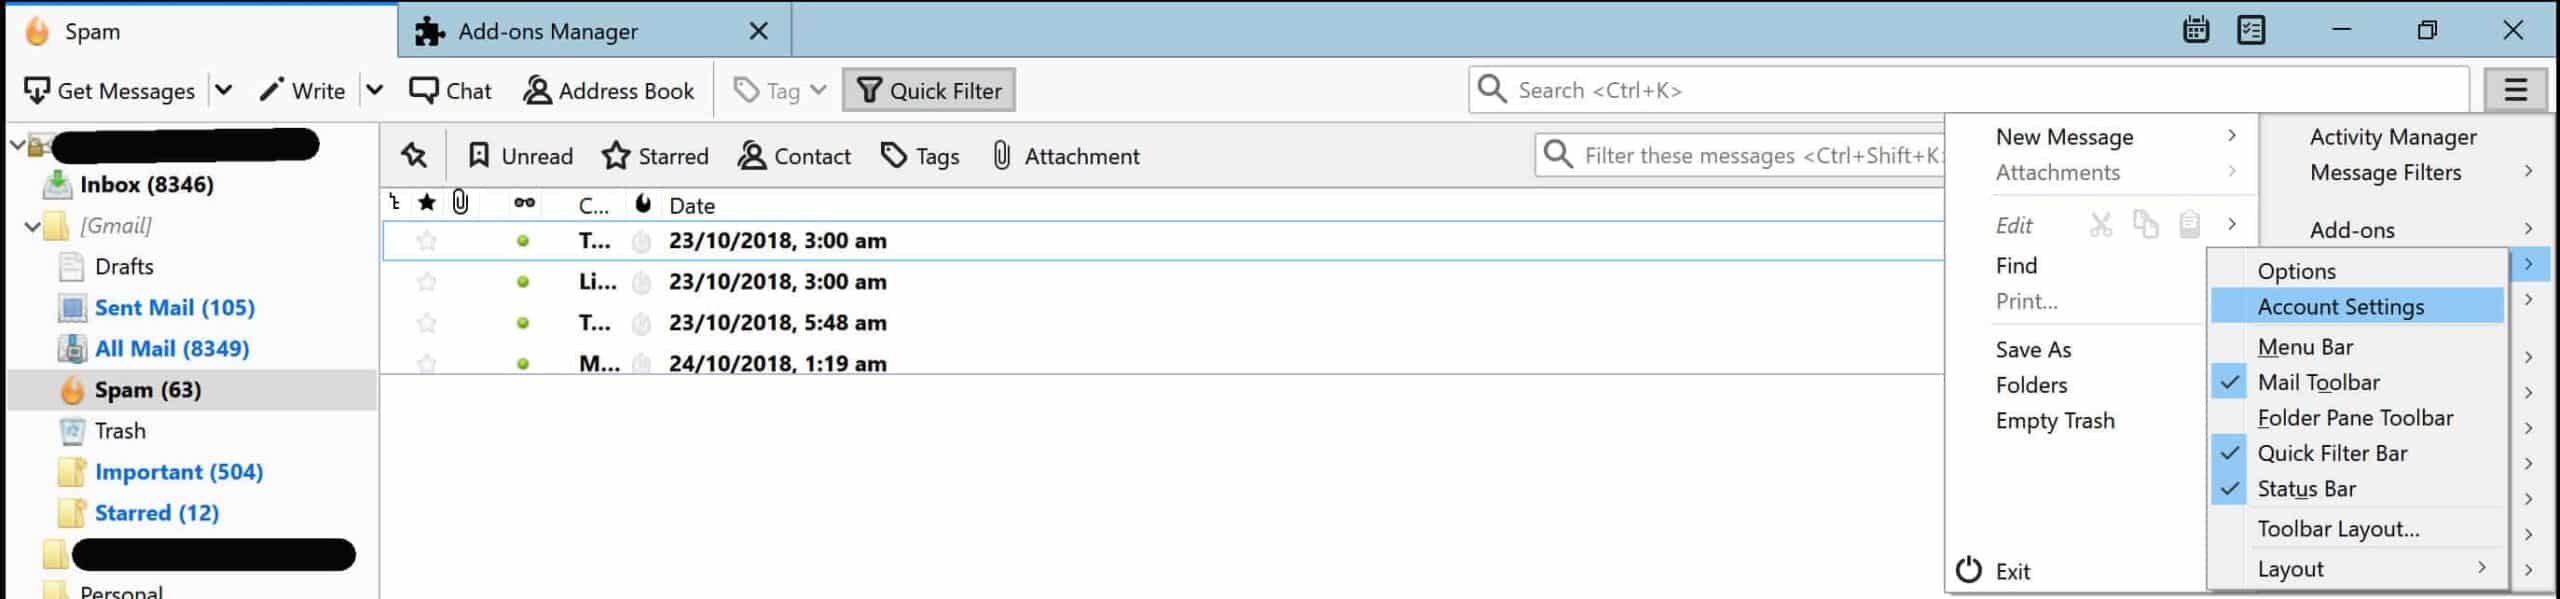
The easiest way to set up Enigmail is to do it from the Thunderbird client that we just downloaded. From the main screen of your Thunderbird inbox, you will see a small icon in the menu with three horizontal lines. It is located in the top right, next to the search box.
Hover over this icon to bring up the settings. In the right column of the menu, you will see Add-ons. Move your mouse across this, then wait for the third menu column to pop up. Click Add-ons when it does:
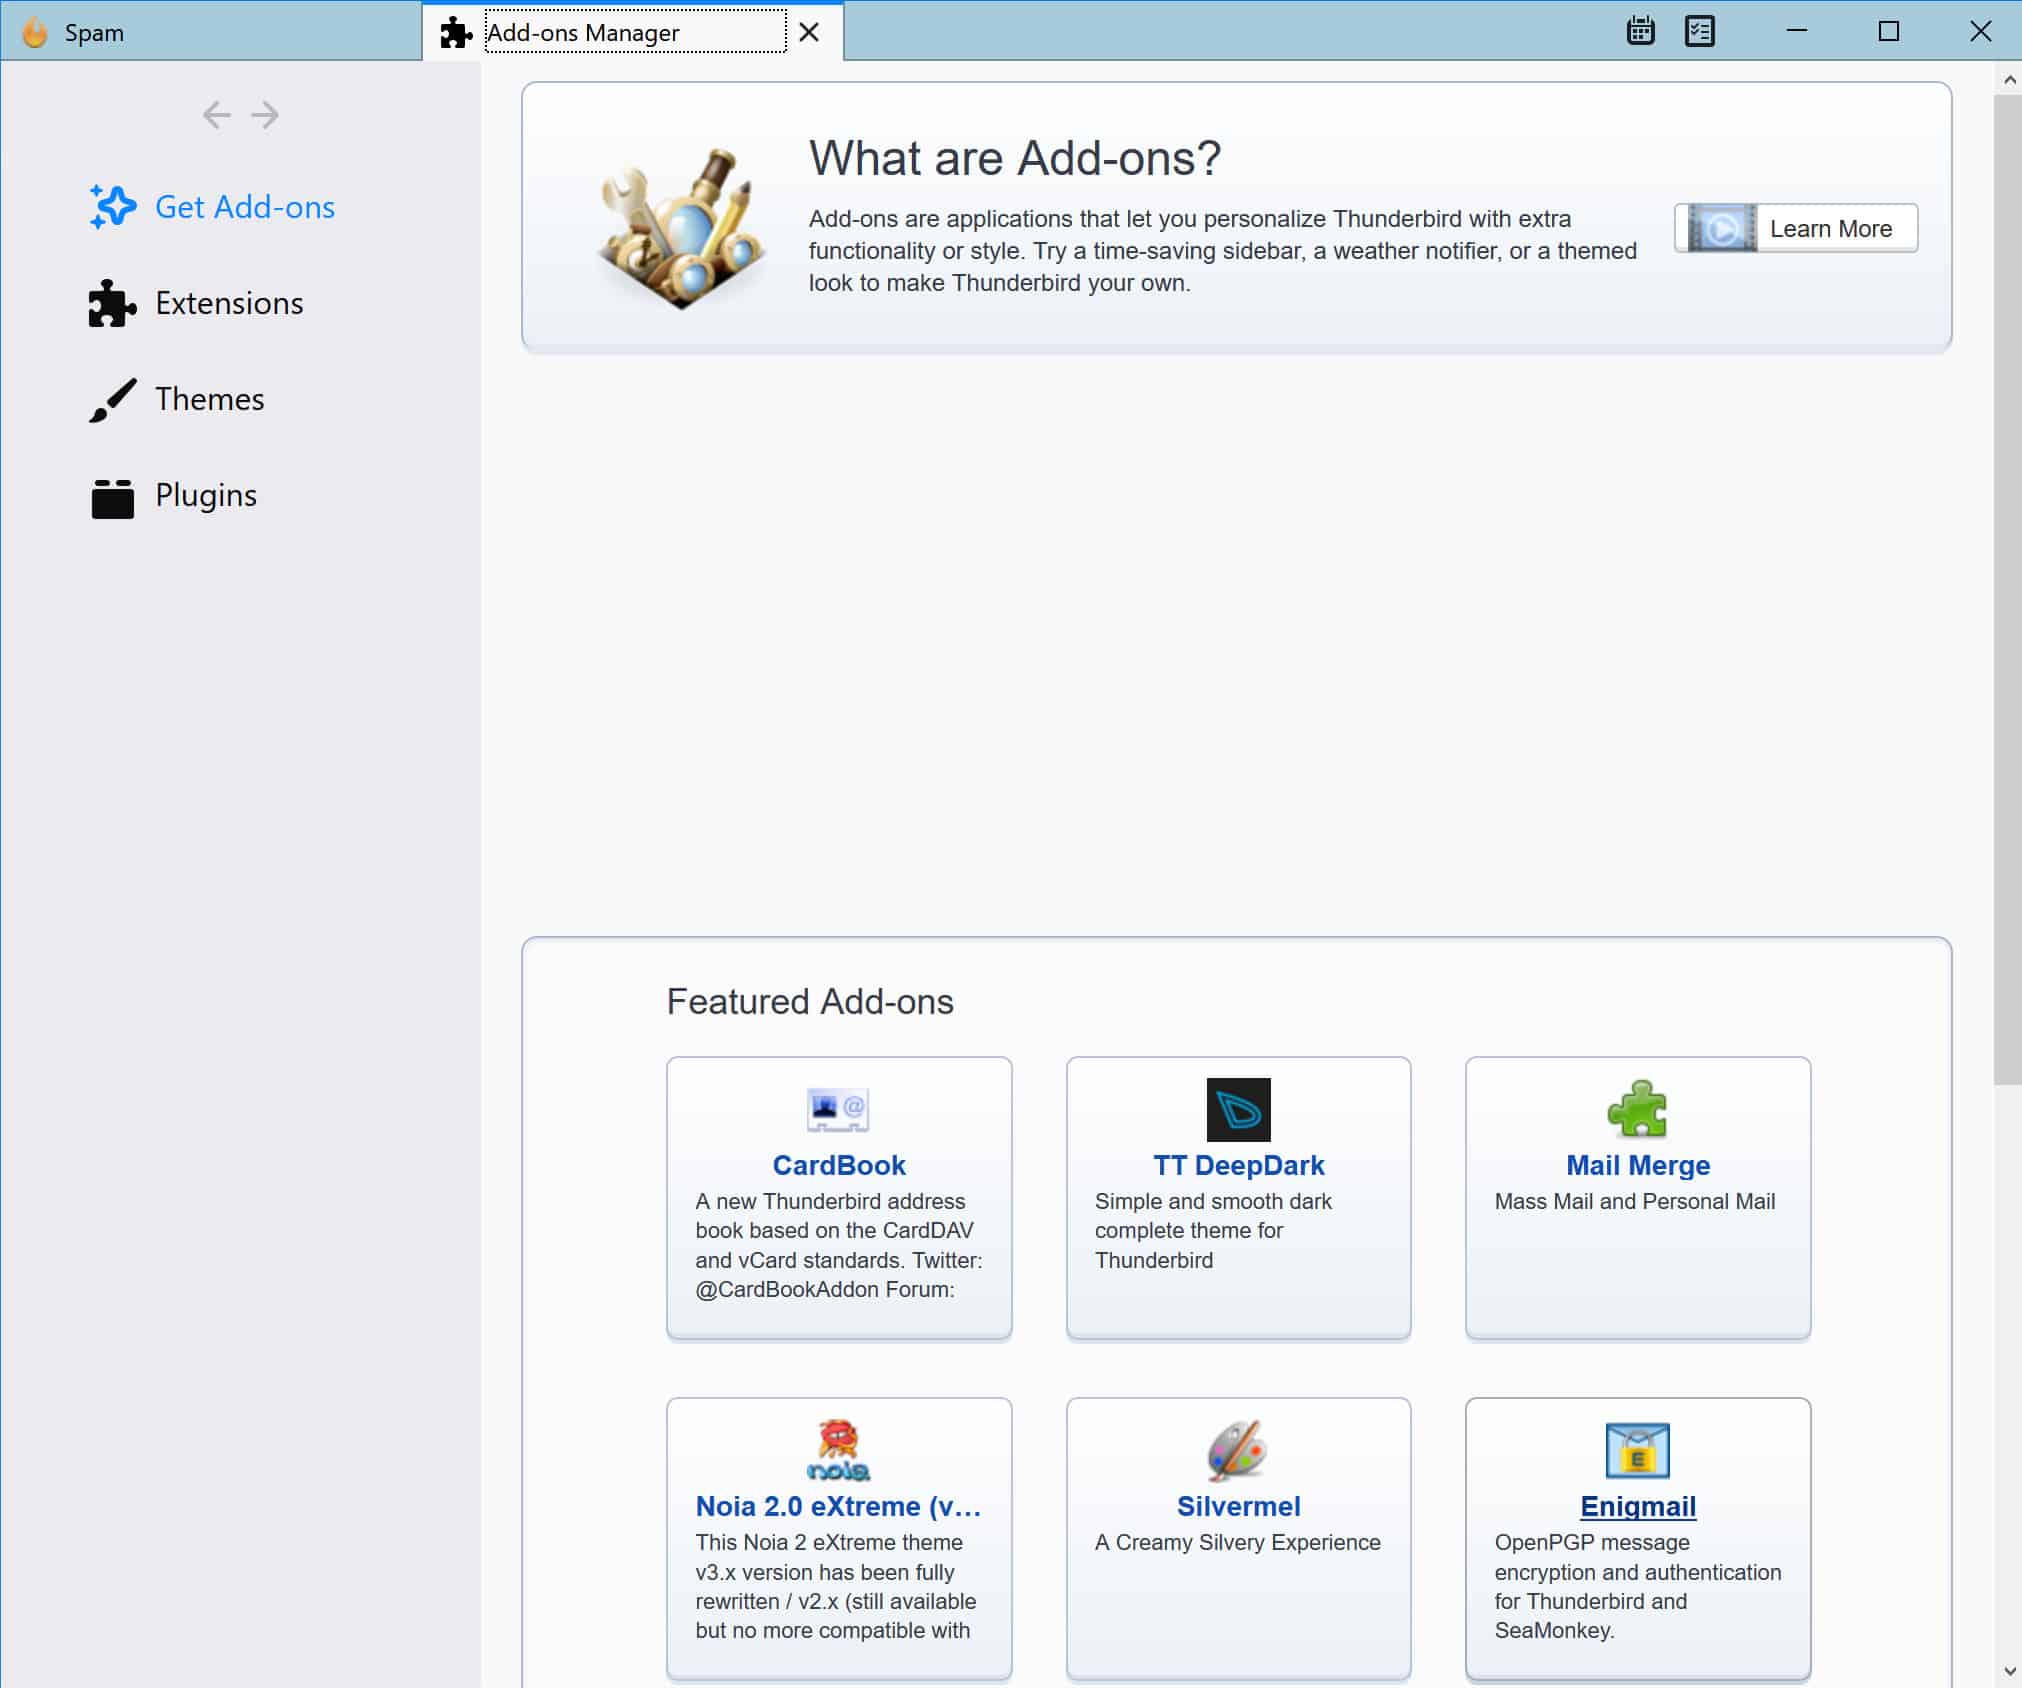
This brings you to the Add-ons page. If you scroll down, Enigmail should be in the Featured Add-ons section. Click on it:
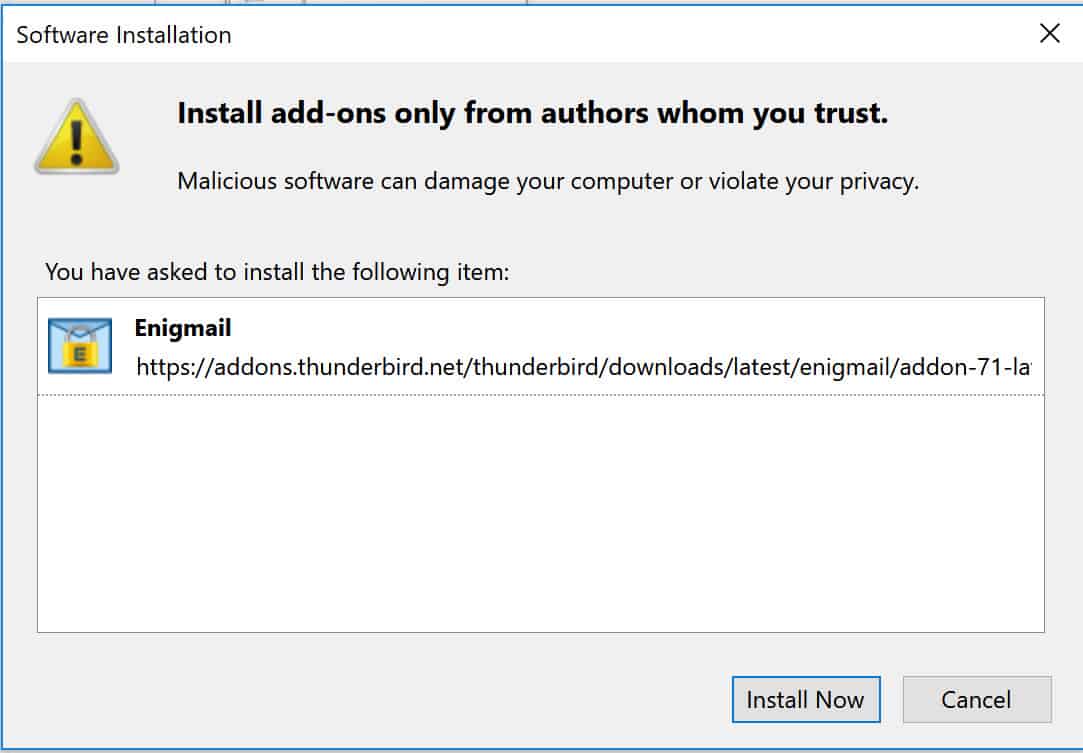
Clicking on the Enigmail icon will take you through to the following page:
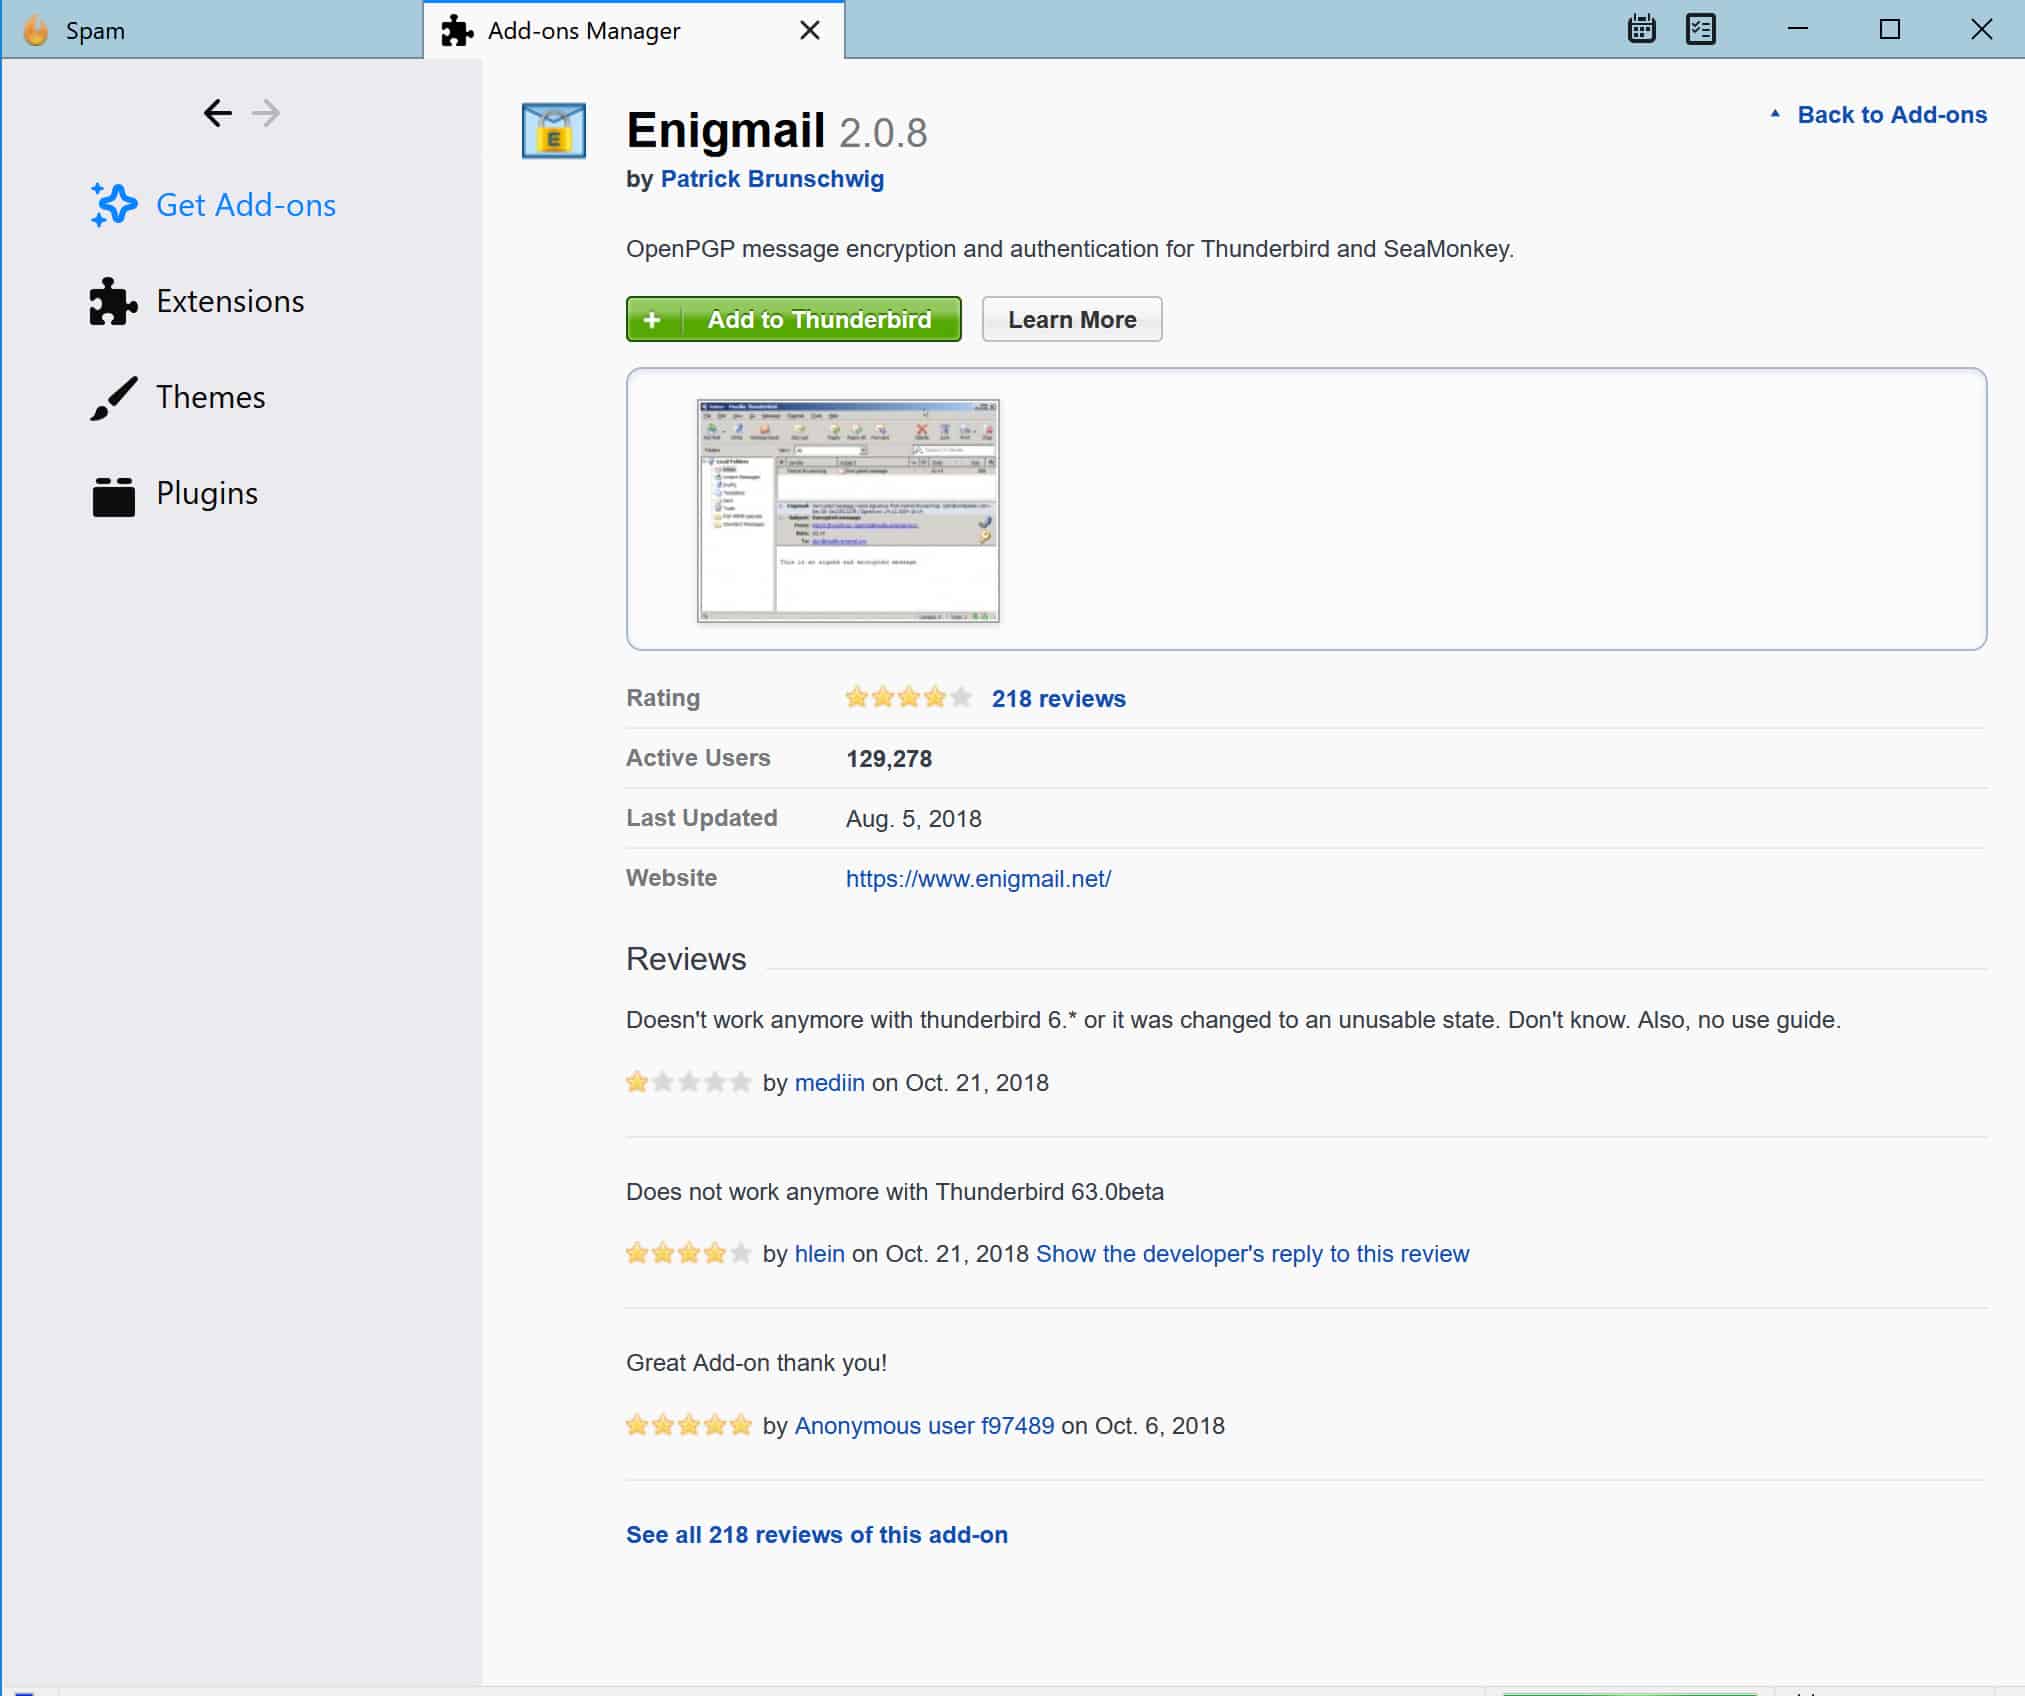
Click on the green Add to Thunderbird button. It will bring up the following popup. Click Install Now:
In the Add-ons screen which you navigated to before, you can now click on the second option in the vertical menu to the left, Extensions:
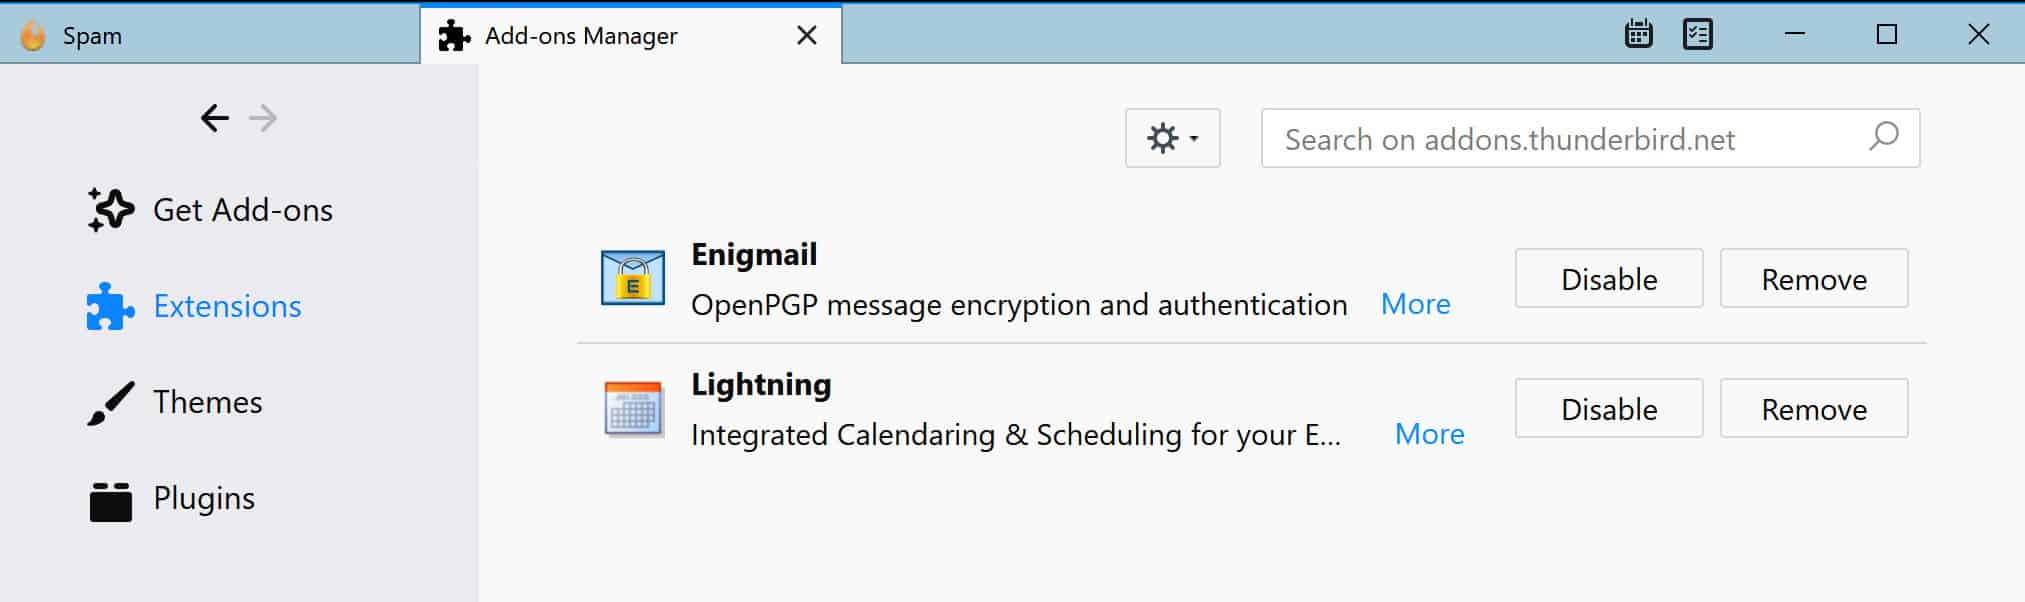
You should now see the Enigmail icon listed among your extensions.
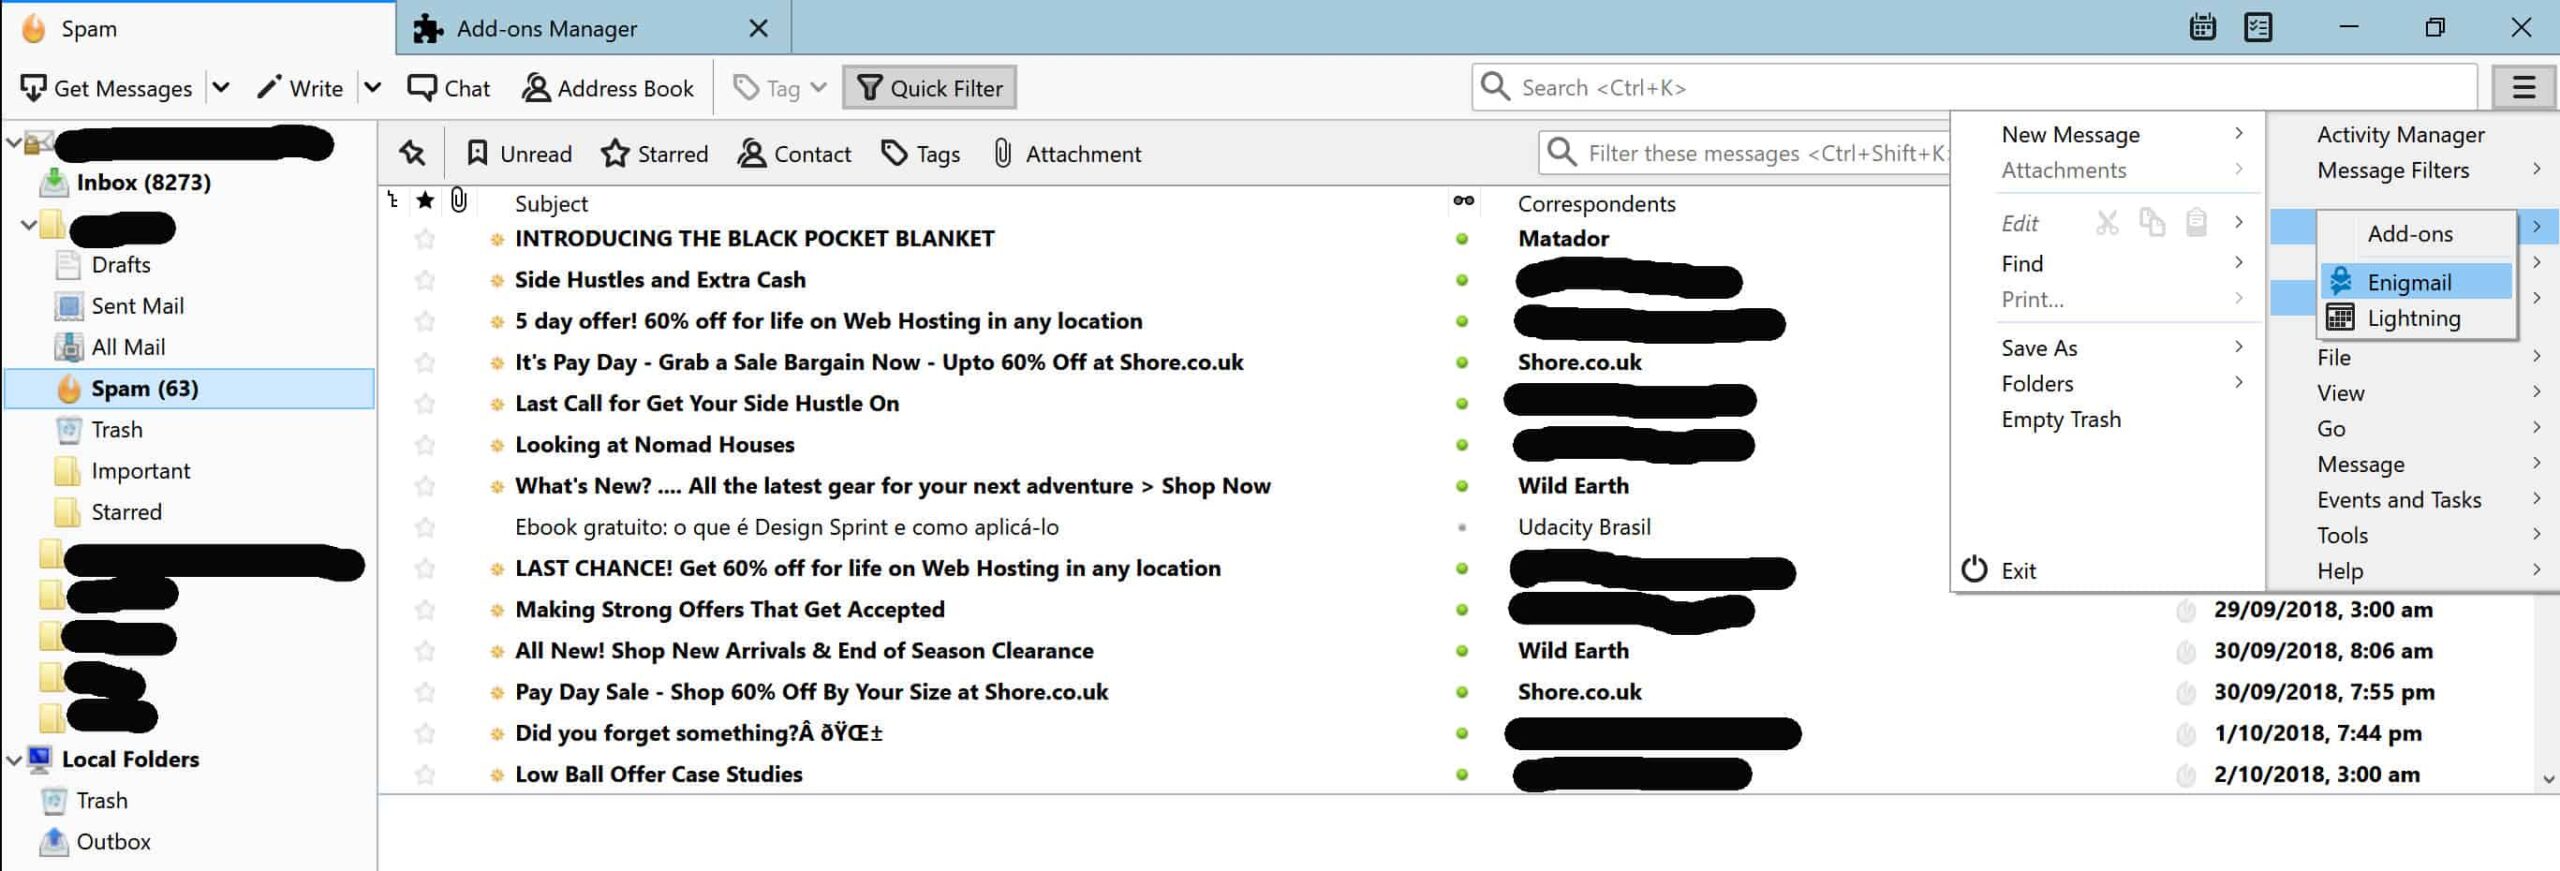
To make sure that Enigmail and Gnu Privacy Guard are set up correctly, go back to the menu bar, hover over Add-ons in the second column until the other Add-ons menu comes up. You will now see Enigmail beneath it. Click on it:
This will take you to the following screen:
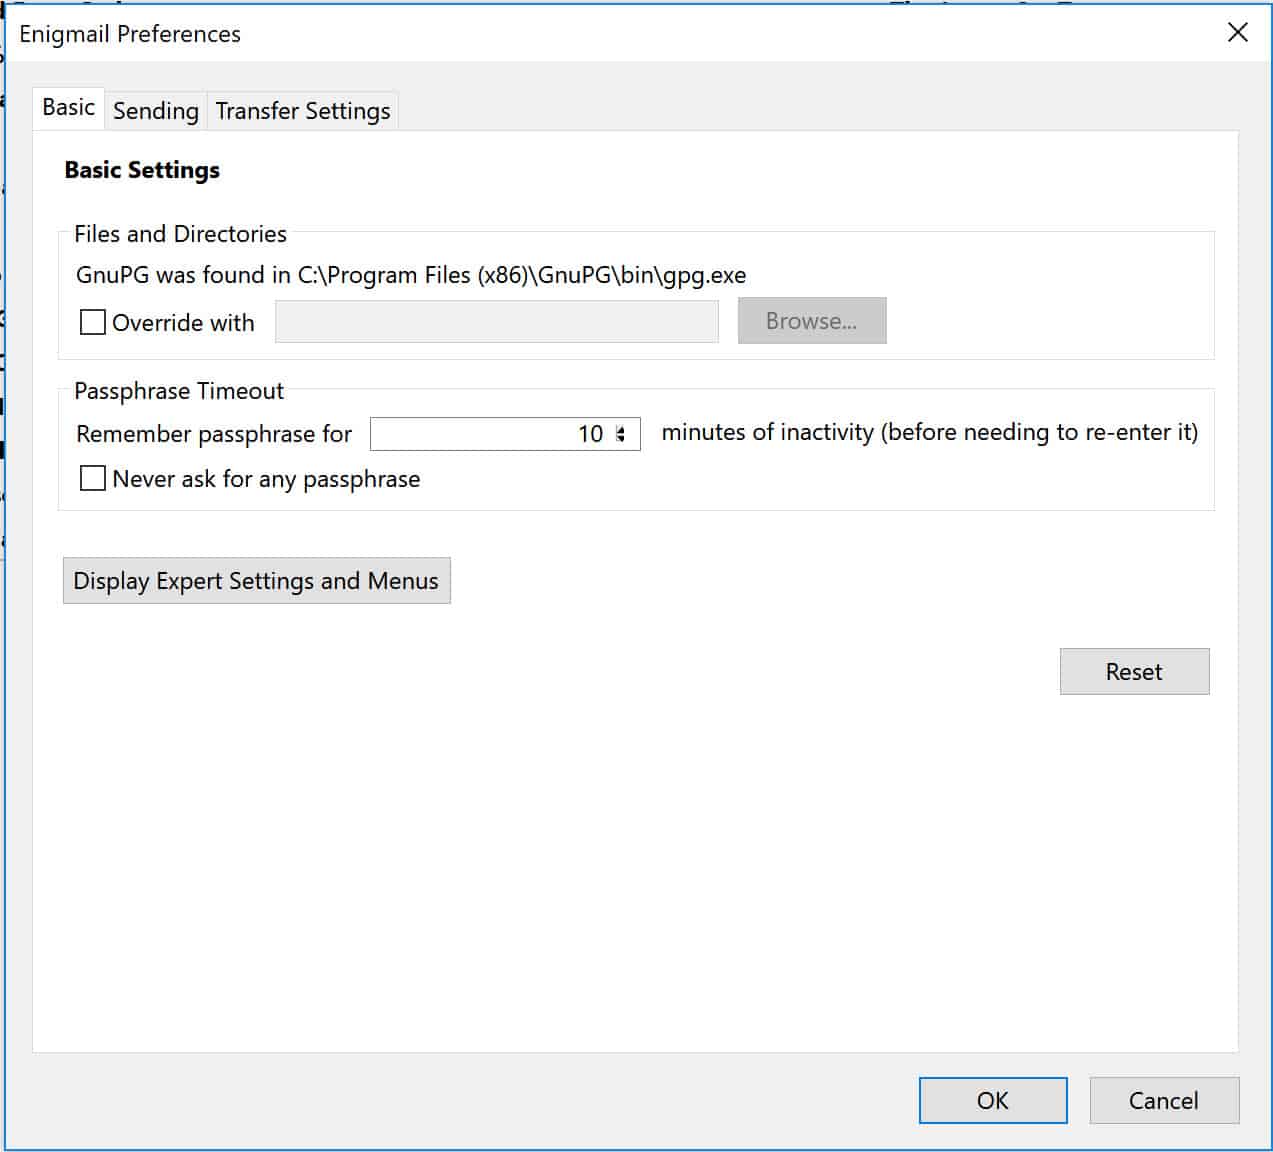
Under Basic Settings, where it says Files and Directories, you want it to say “GnuPG was found in …”. If it says “Could not find GnuPG”, then check the box underneath that says “Override with”, and enter the location where you saved Gpg4win earlier in the tutorial. Click Okay to head back to Thunderbird’s main screen.
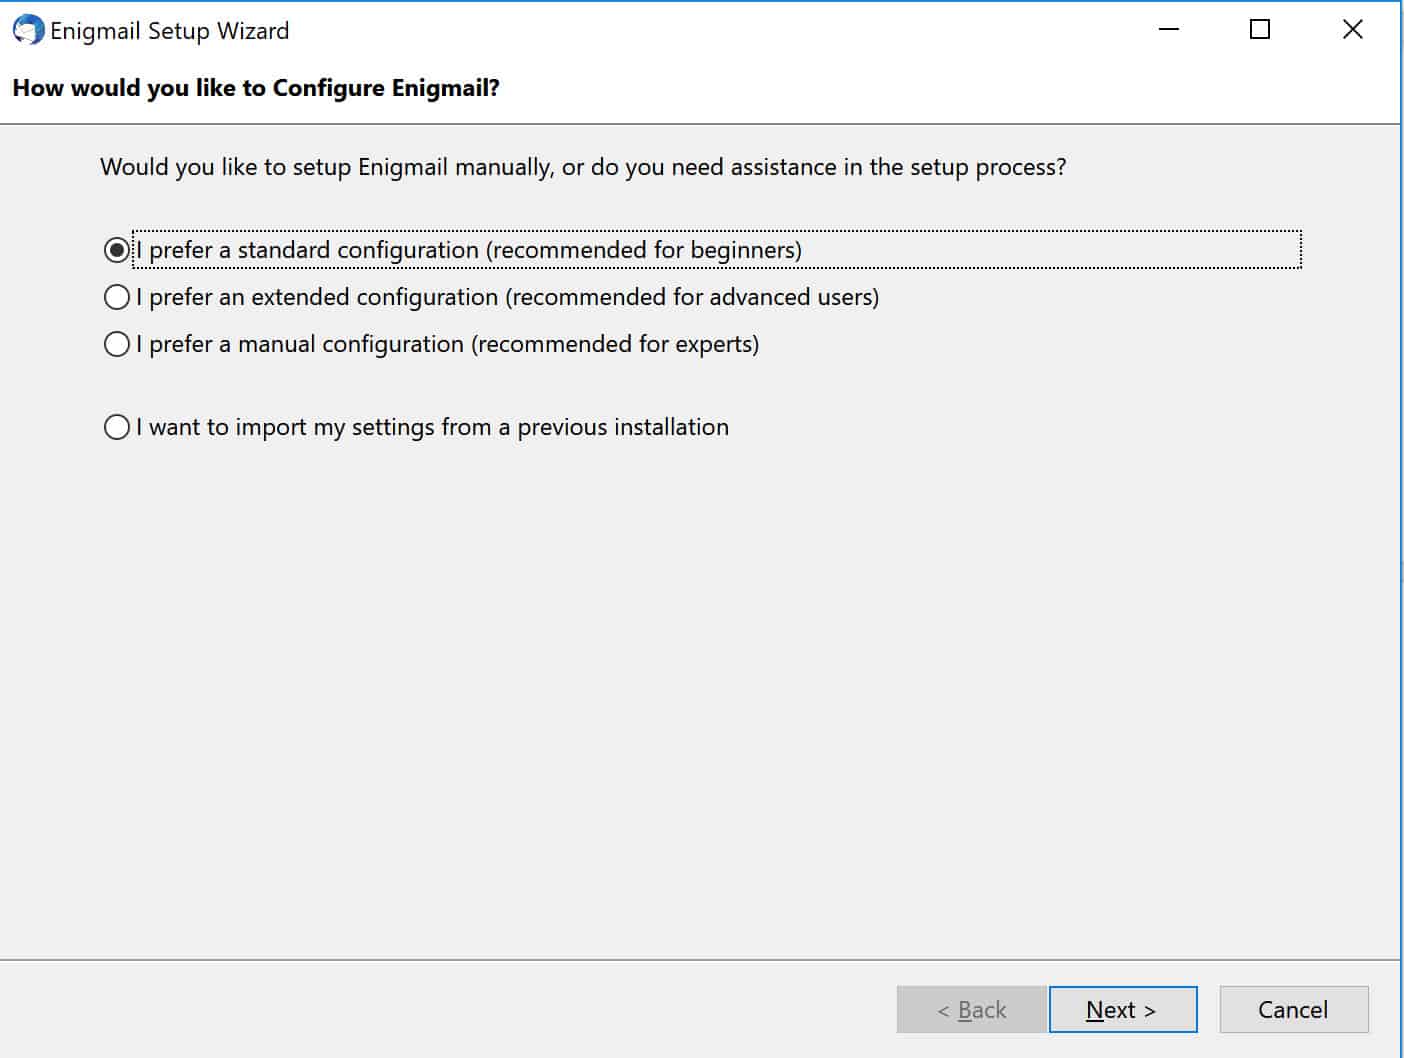
To configure Enigmail, click on the Setup Wizard by going back into the menu, then scroll down to where it says Enigmail in the second column. Setup Wizard should be the first option that pops up when you hover over it:
For this tutorial, we will be sticking with the standard configuration. If you are an advanced user, feel free to choose one of the other settings. Click Next:
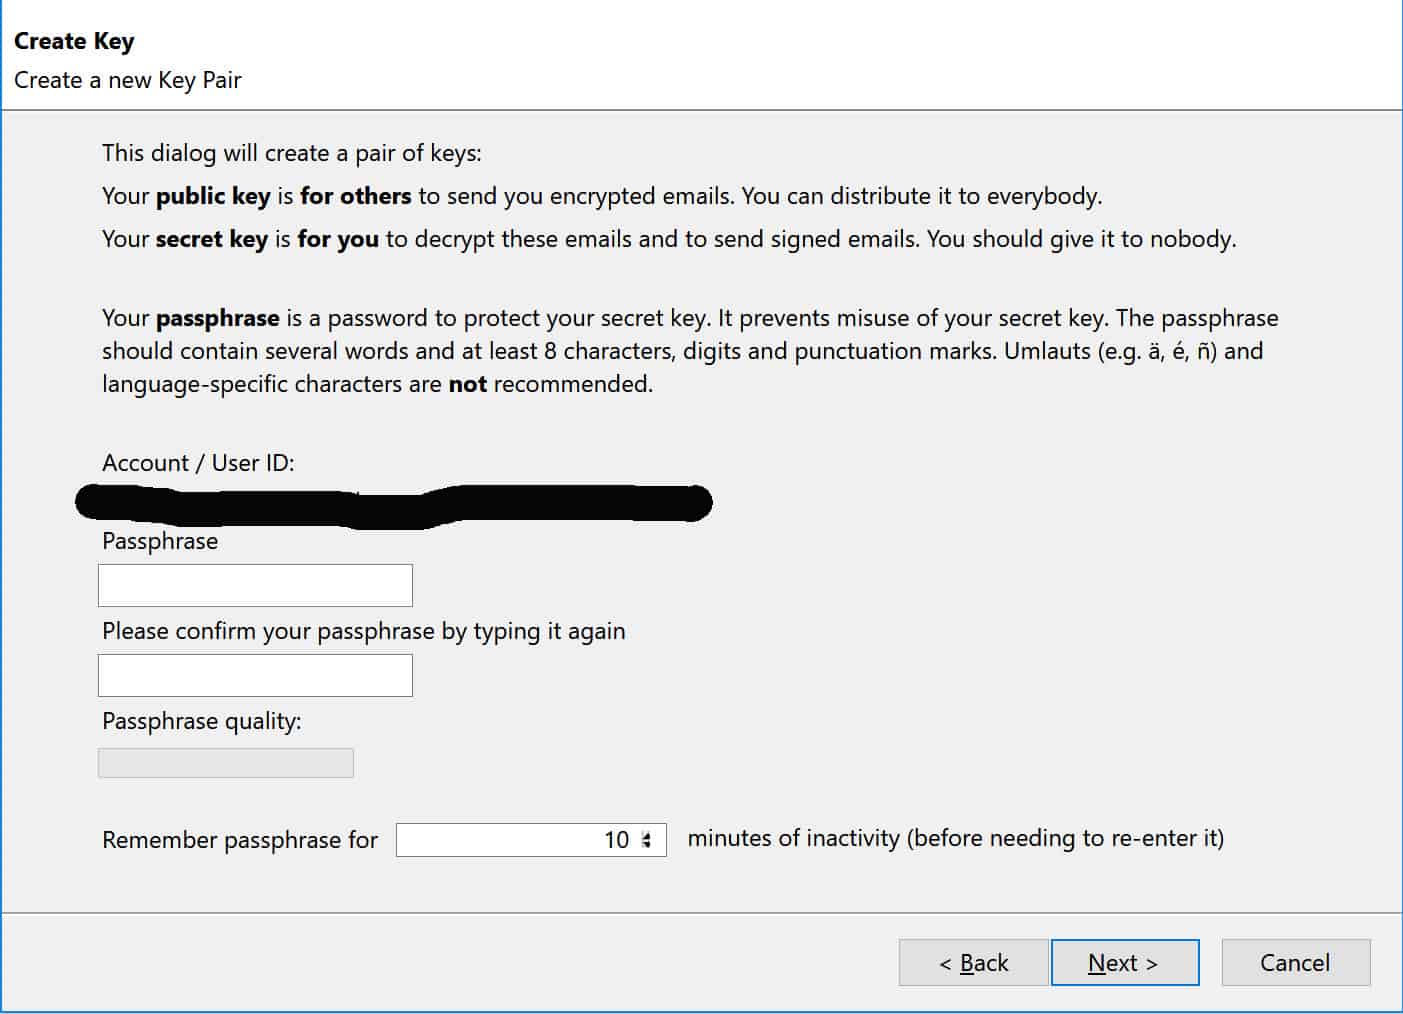
You will be brought to a new page for setting up your key pair. Key pairs are a crucial aspect of PGP, comprised of both the public key that your correspondents use to encrypt your messages, and the private key, which you use to decrypt them.
If anyone ever discovers your private key, it allows them to access your PGP encrypted messages. This is why it is crucial to always keep your private key safe from the eyes of others. A good solution is to keep it on a USB drive that is locked away in a safe.
The first thing you will need to do is enter a strong password to protect your keys:
Once you have entered your password, click Next. It may take a few minutes to generate your key, then you will be brought here:
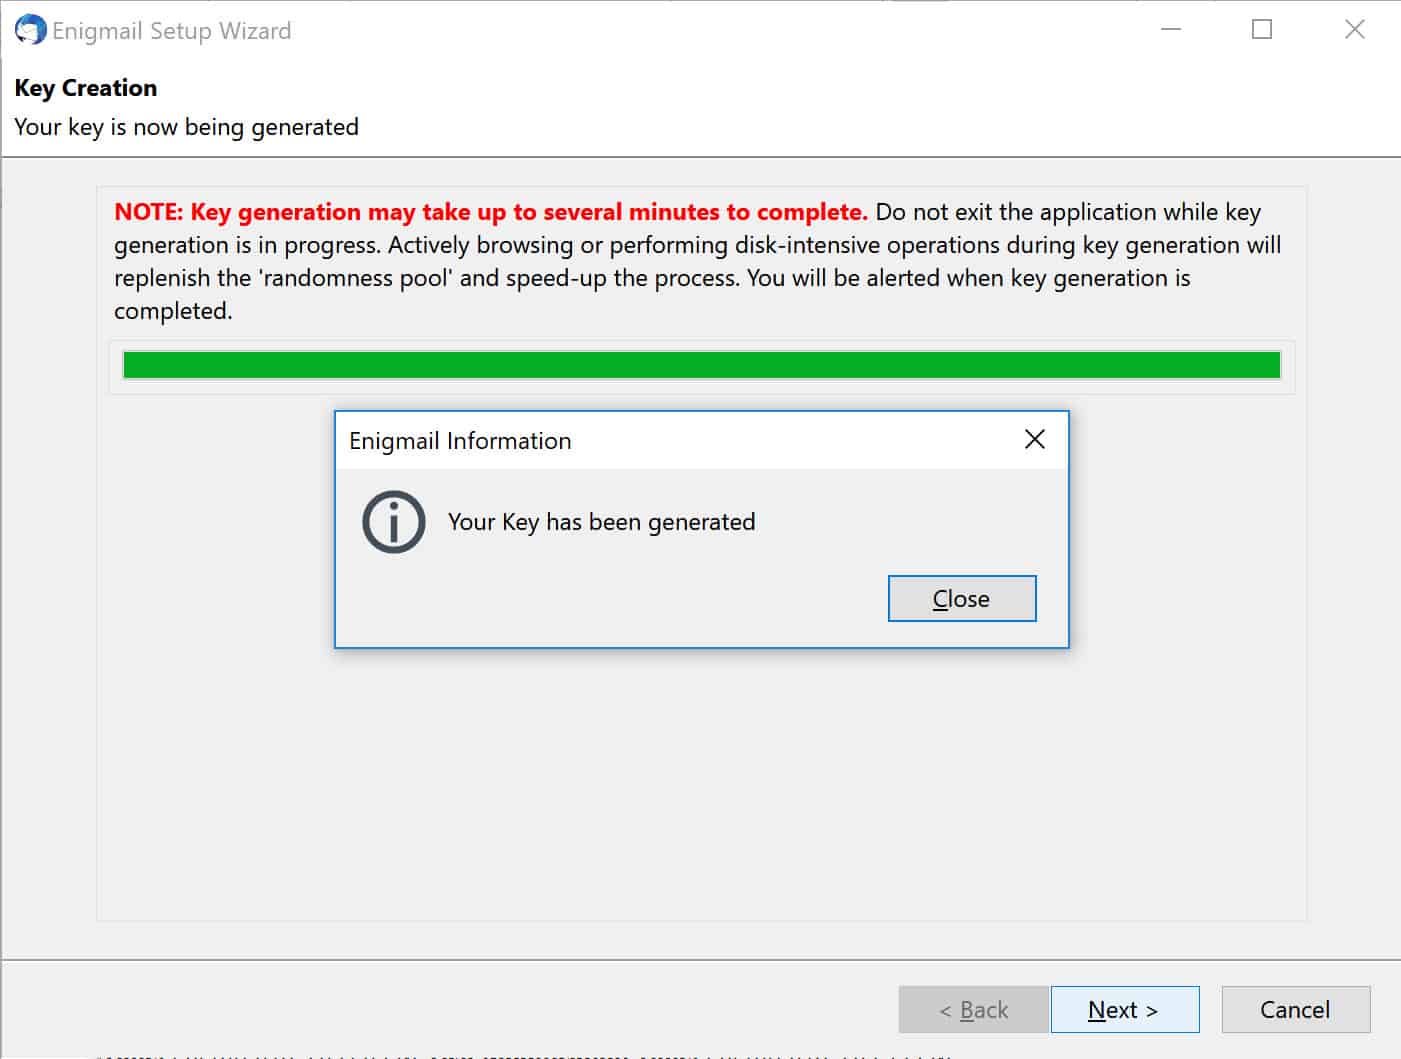
Click Close, then Next, which takes you to the following screen:
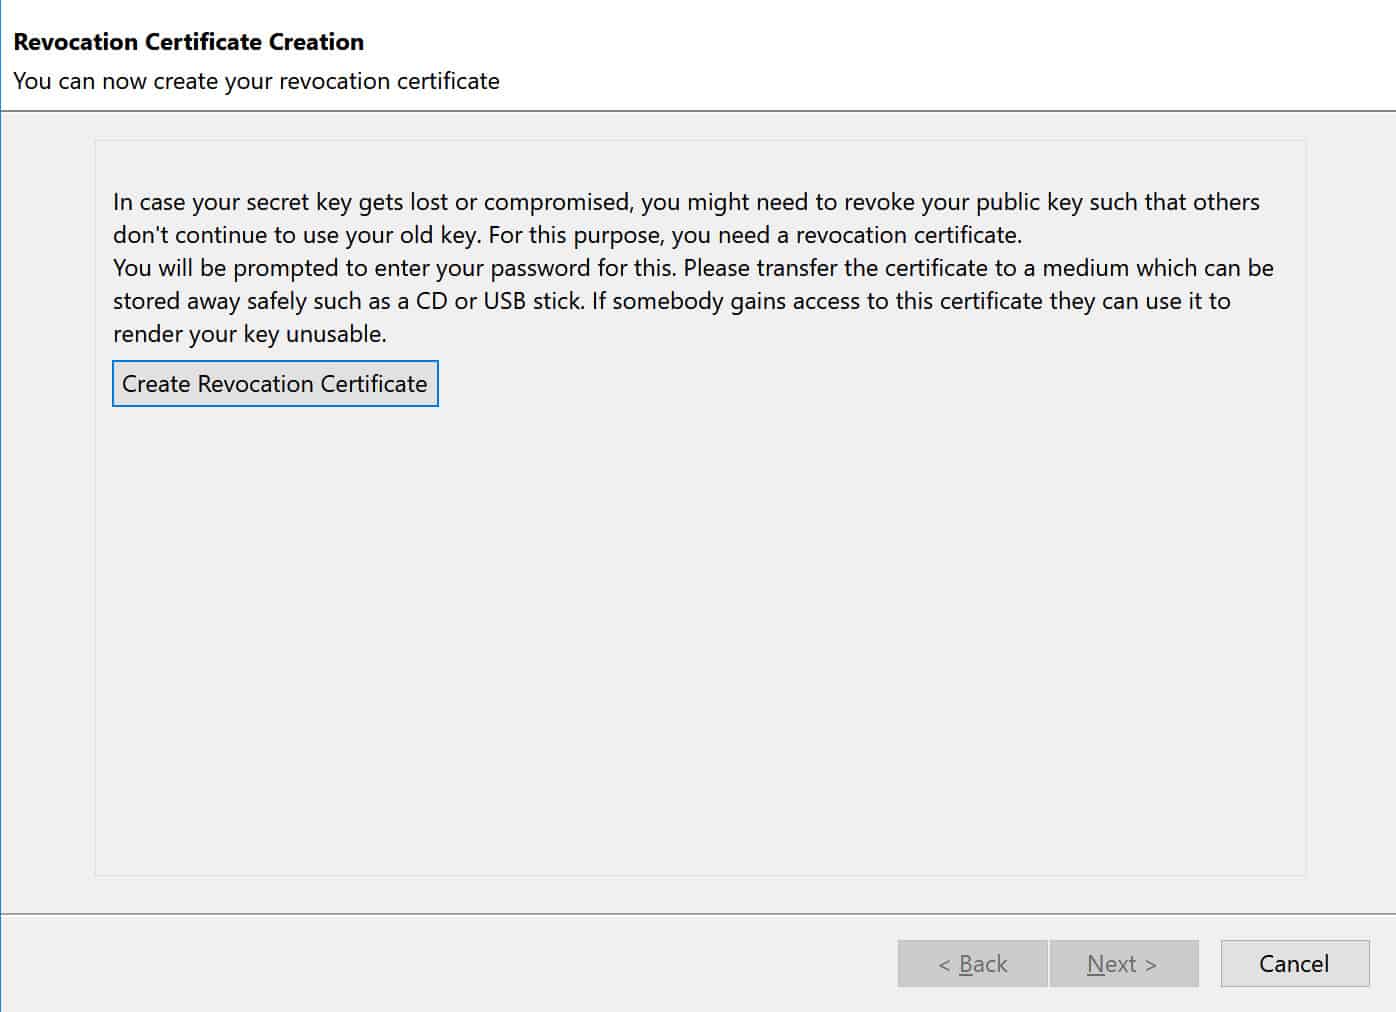
Click Create Revocation Certificate. This certificate will allow you to revoke your public key if you ever need to. There are several situations where you may want to revoke your certificate, such as if you lose your private key, or if you ever think that your PGP details have been compromised by attackers.
To set up the revocation certificate, you will have to enter the password that you just created. You will then be led to the following page, where you can choose where you would like to save the certificate:
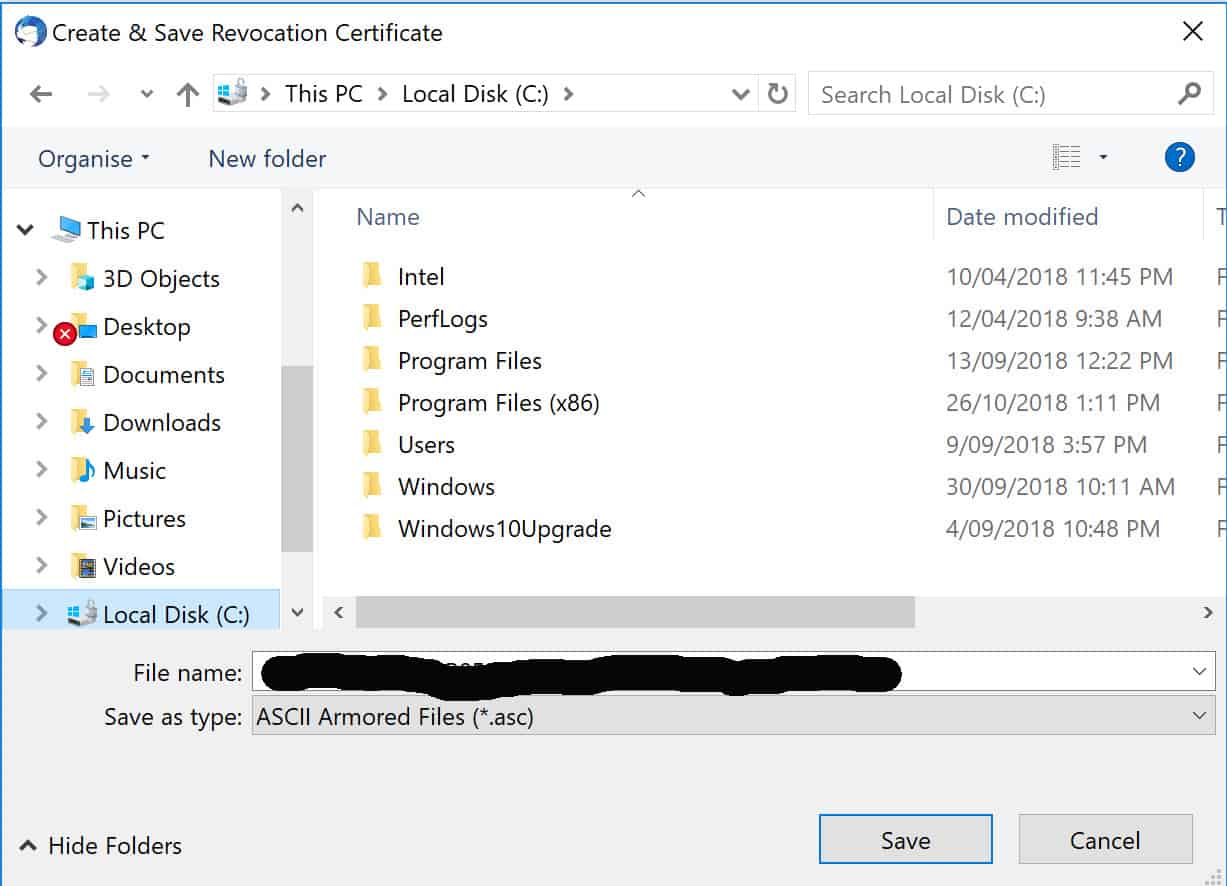
Now you can click Next on the Create Revocation Certificate page. You will be brought to the final screen of the setup wizard, where all you have to do is click Finish.
As the last step in setting up Enigmail, we want to make sure that everything has been configured properly. Head back into the menu with the three horizontal bars, then scroll down to Options and then Account Settings. In the menu on the left side, click on the sixth option, OpenPGP Security:
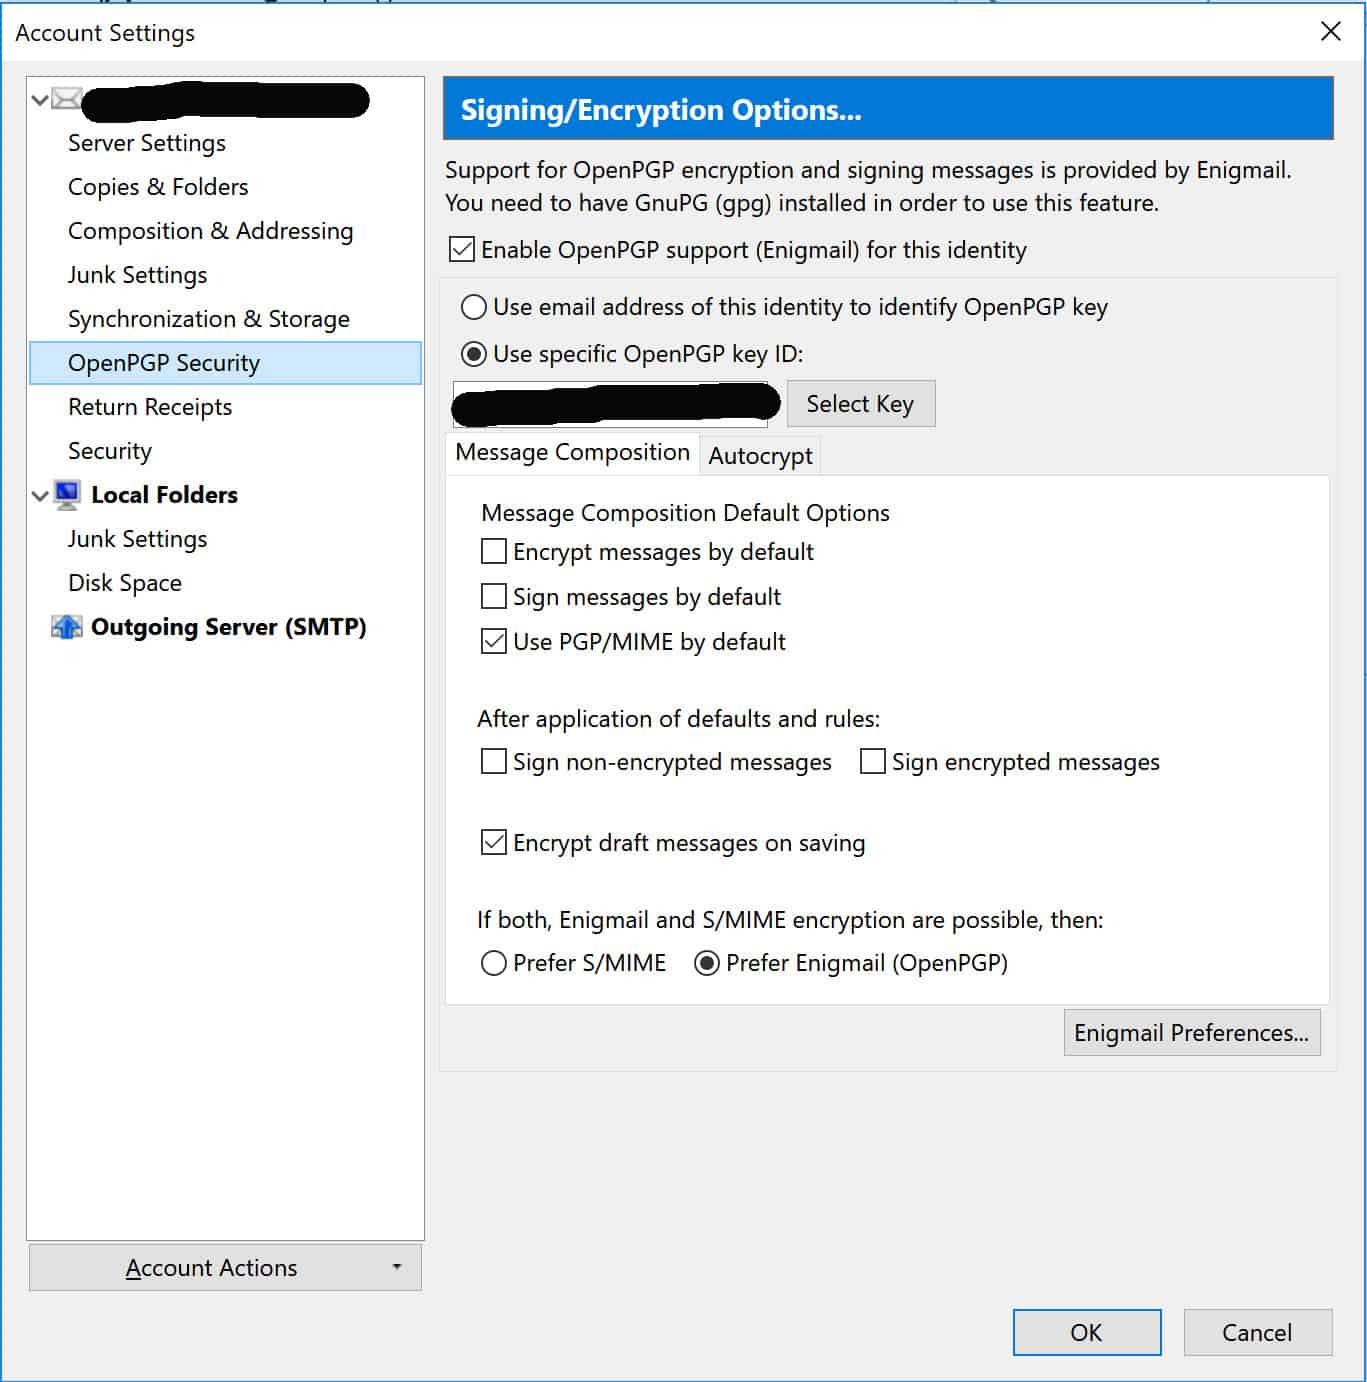
In this section, you want to make sure that the checkbox that says “Enable OpenPGP support (Enigmail) for this identity” has been ticked. This ensures that you are using PGP encryption through Enigmail.
Generating new key pairs
If you want to use PGP with multiple email accounts, it is suggested that you use a different key for each one. If you are happy with the account that you have already integrated, feel free to skip this step.
With the tools that you have just downloaded, there are two ways that you can generate new key pairs for each of your accounts. You can use the certificate manager, Kleopatra, or the Thunderbird addon, Enigmail. In this tutorial, we will focus on generating keys with Enigmail.
To generate another key pair, you will need to add an additional email account first. You can do this by firing up Thunderbird, then clicking on the menu at the top right. Hover over Options, then click on Account Settings:
This will take you to the following window. On the bottom left, click where it says Account Actions:
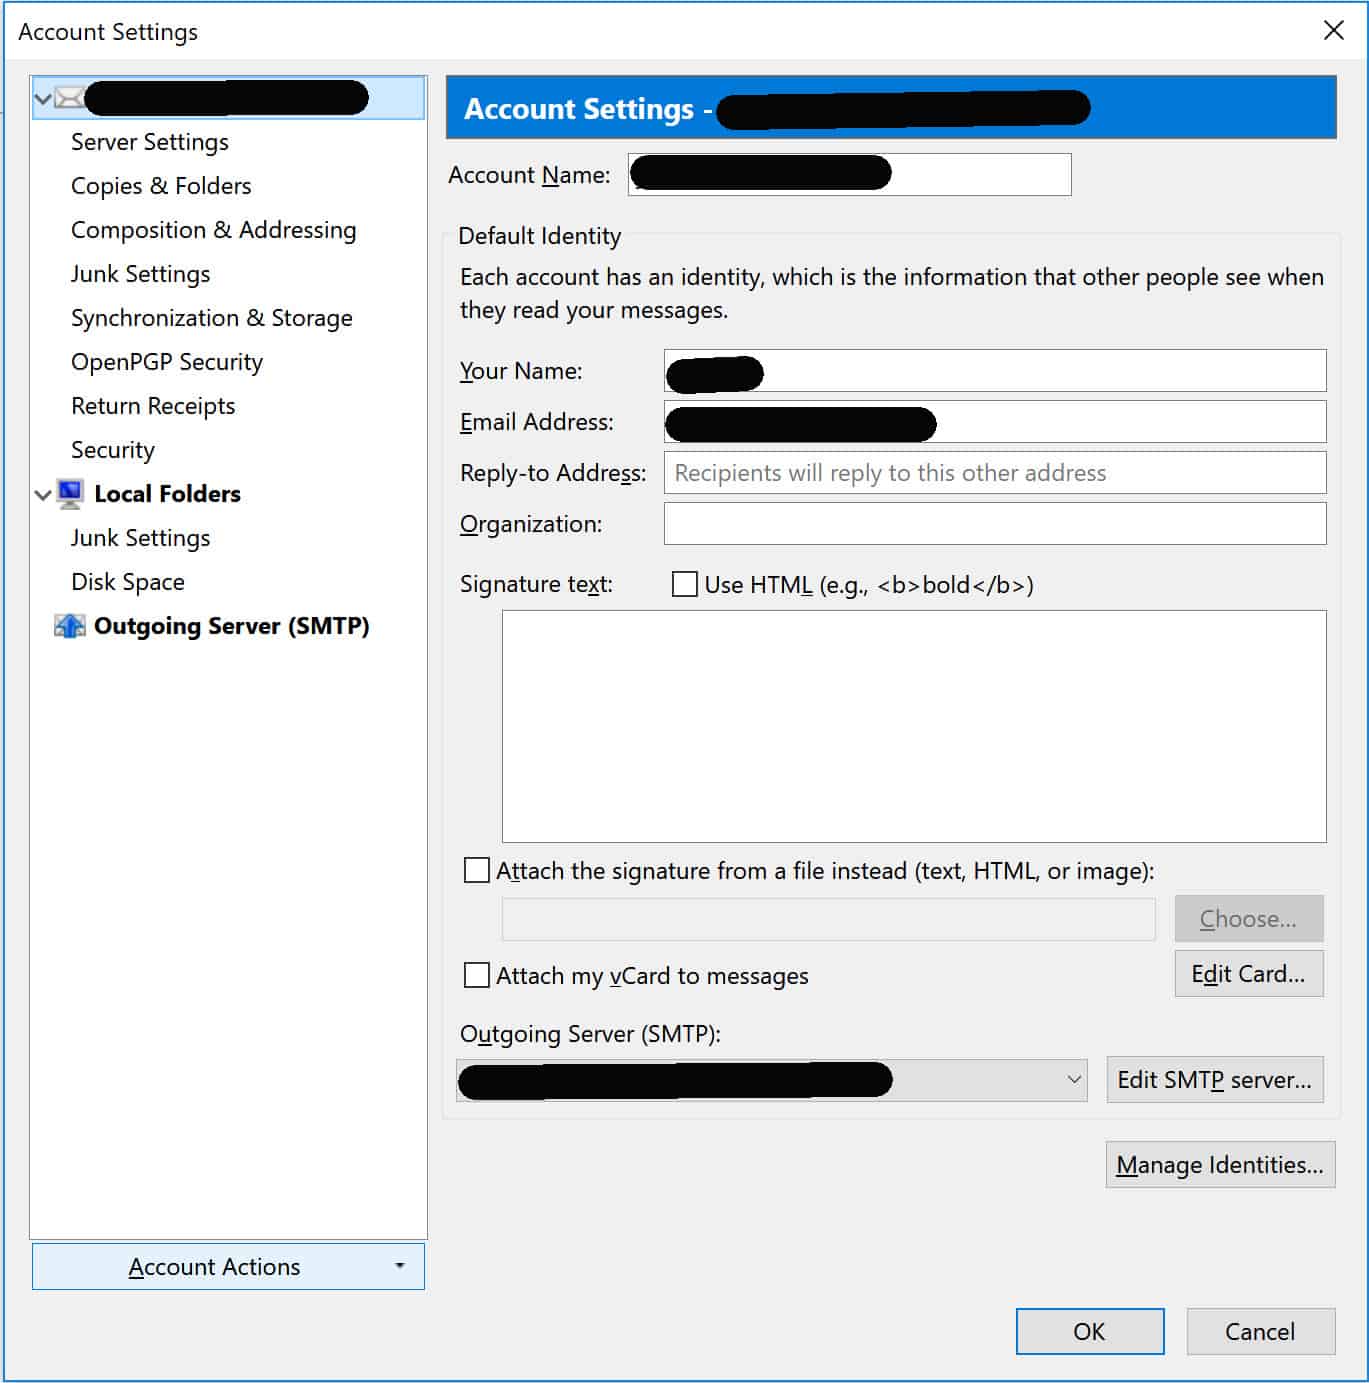
A submenu will pop up. Select Add Mail Account, which will bring up the following screen:
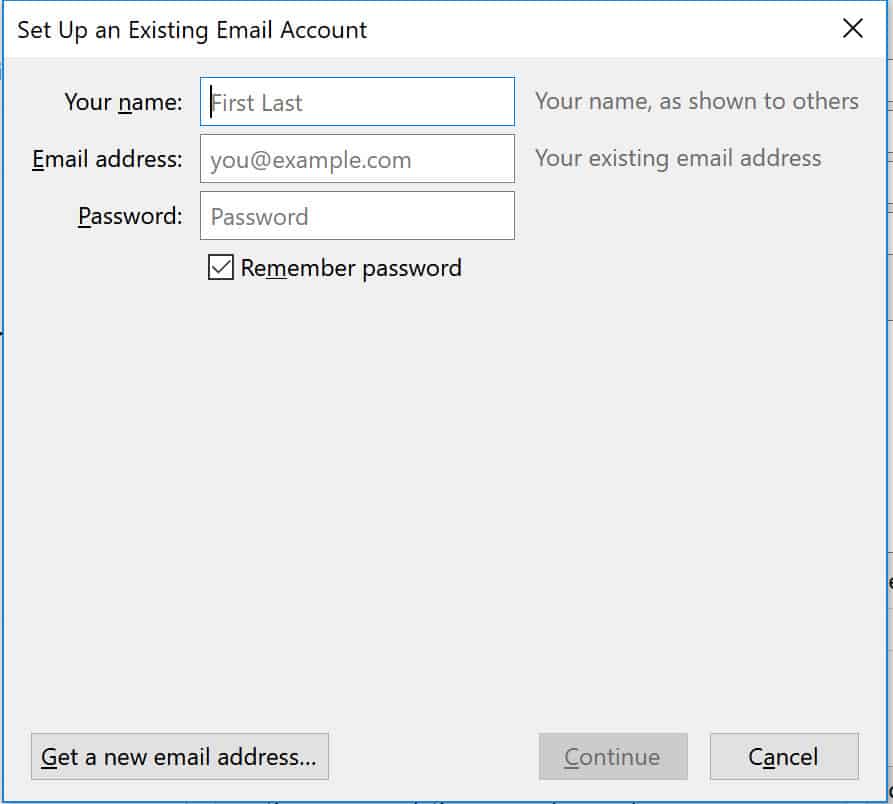
Enter your details, and then click on Continue. Thunderbird should set up the account automatically. If you use a less-common email provider, you may have to enter these settings manually.
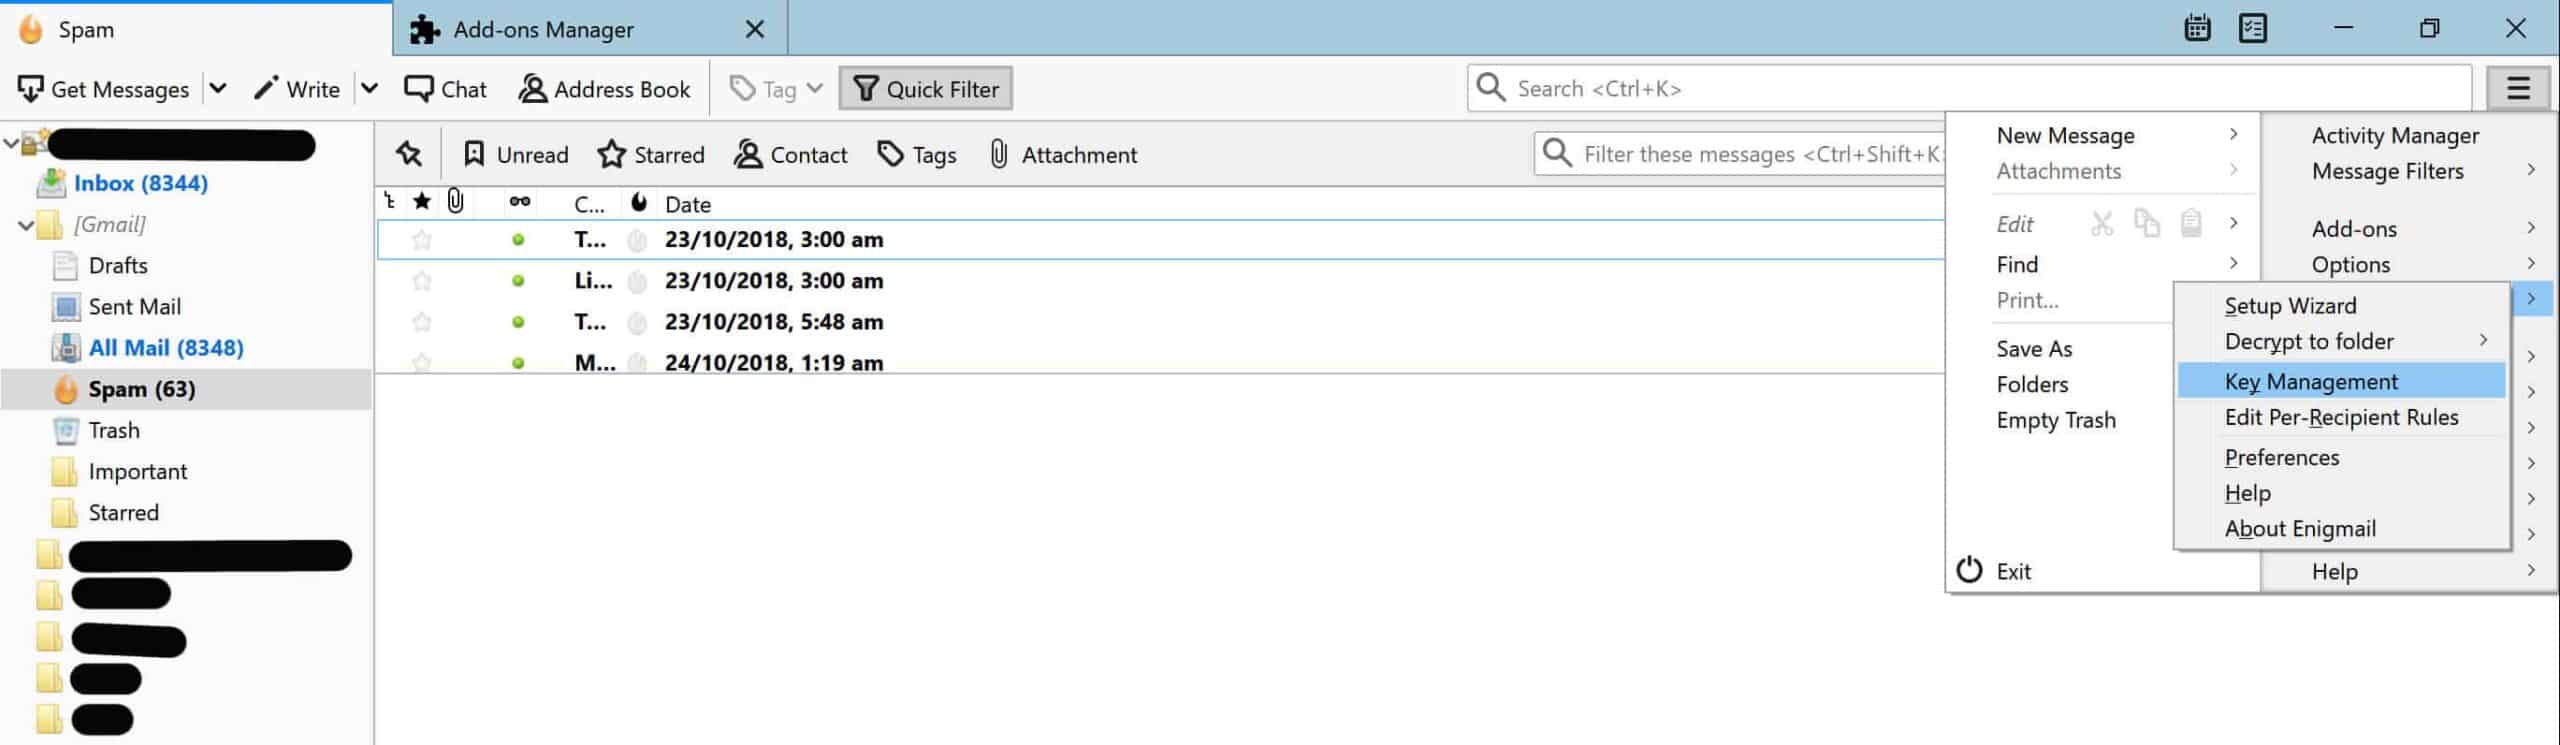
Once you have added the account, it’s time to set up a new key pair for it. Click on Thunderbird’s menu, hover your cursor over the Enigmail option, then click on Key Management, which opens up in the new menu:
This will bring you to the following popup:
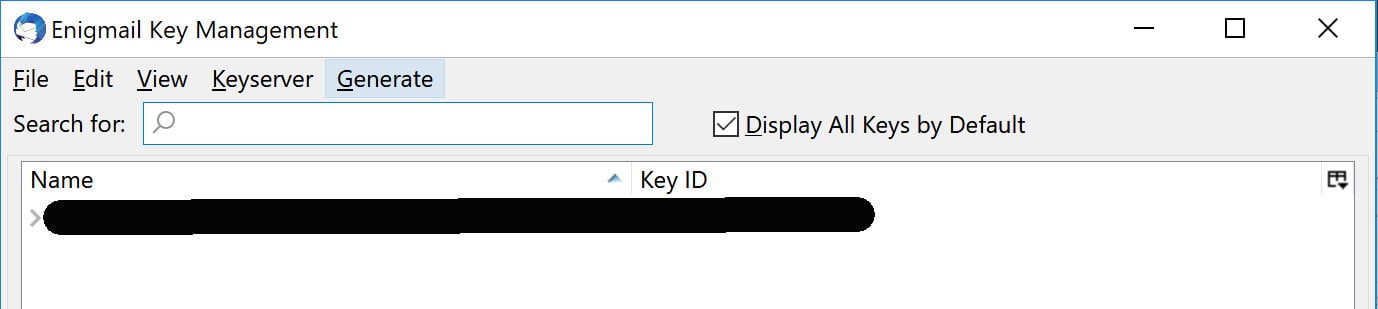
Click on Generate in the top menu. Select the New Key Pair option that comes up in the submenu. This will bring up the following screen:

At the top, select the account which you would like to generate a key pair for. Then enter a strong password to protect your private key. If you want, you can alter the expiry date of your keys, but this is only necessary in certain use cases. Click on Generate key, then wait a few moments for the program to produce your key.
Importing an old key pair
If you already have an existing key pair which you would like to use, go to Thunderbird’s menu, then put your cursor over the Enigmail option which pops up.
Click on Key Management, which opens up in the new menu:
This will bring you to the following popup:
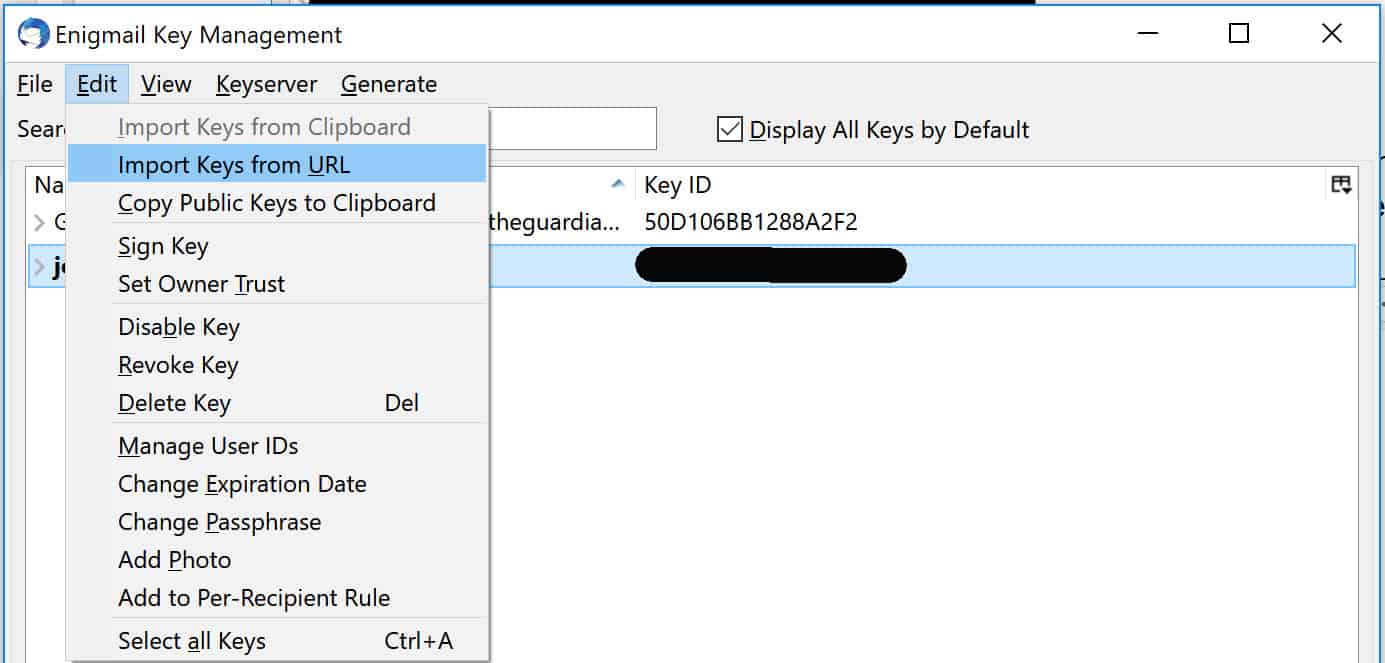
To import your key, simply click on File, then Import Keys from File. You can also click on Edit, then Import Keys from URL instead. It just depends on where you want to import the key from. Enigmail will then import your key from its location.
Sending and receiving PGP encrypted emails on Windows
Now that you have your programs installed and your keys set up, it’s time to learn how to send PGP encrypted emails. There’s just one more problem that we have to solve first. Who do you send them to?
Adding your recipients
PGP encryption is an excellent tool for encrypting emails, but it’s useless if you don’t have anyone to talk to. To secure a message with PGP encryption, you will need your intended recipient’s public key first.
If they are already a PGP user, it makes things easy. They may have their key displayed on their website, you can ask them for it directly, or you can search for it on key servers.
If the person that you need to communicate with doesn’t already use PGP, then you may have to convince them to set it up in order to be able to communicate securely.
One of the most common ways of sharing a PGP key is by sending the .asc file. If your intended recipient has already sent you the .asc file for their key, save it locally, then head back to the Key Management menu that we talked about in the last section:
Click on File, then Import keys from file. Navigate through your computer to where you saved the recipient’s .asc file, then select it to add it to Enigmail.
Another option is to add the key’s URL. If you come across your intended recipient’s URL in the following format, it’s simple to add it in Enigmail:

All you have to do is copy the URL, then go to the Key Management menu in Enigmail. Click Edit, followed by Import Keys from URL:
You will be brought to a new screen where you can paste the URL. Click OK, then OK once again on the confirmation screen. You will be met with a screen that says Success! Keys imported if the key has been imported properly.
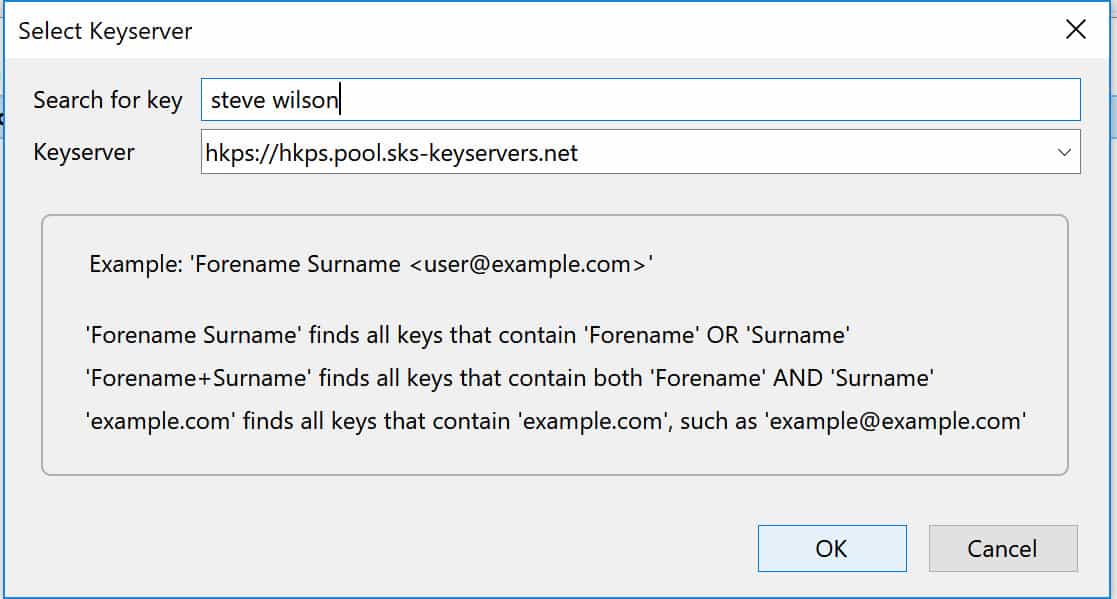
Another option for finding your recipient’s public key is to look them up on one of the key servers. From the Enigmail Key Management menu, hover over Keyserver, then click on Search for Keys:

Enter the name or email of your intended recipient, then select which server you would like to conduct the search through. Click OK to begin your search:
The results of your search will come up in a new screen. If you find the correct recipient, click on their name, then select OK. The recipient’s key will be imported and you will be met with a screen that says Success! Keys imported.
Distributing your public key
It’s just as important for potential contacts to be able to find your PGP key as it is for you to be able to find theirs. If you are already talking to someone through an insecure channel, but want to switch to PGP, you can send them the .asc file for your public key. This will allow you to continue your correspondence in a secure manner.
One of the simplest ways to send the .asc file is through Thunderbird. Begin by composing an email. Add the recipient’s address and any relevant message. When you have finished, go to the Enigmail menu, then click on Attach My Public Key:
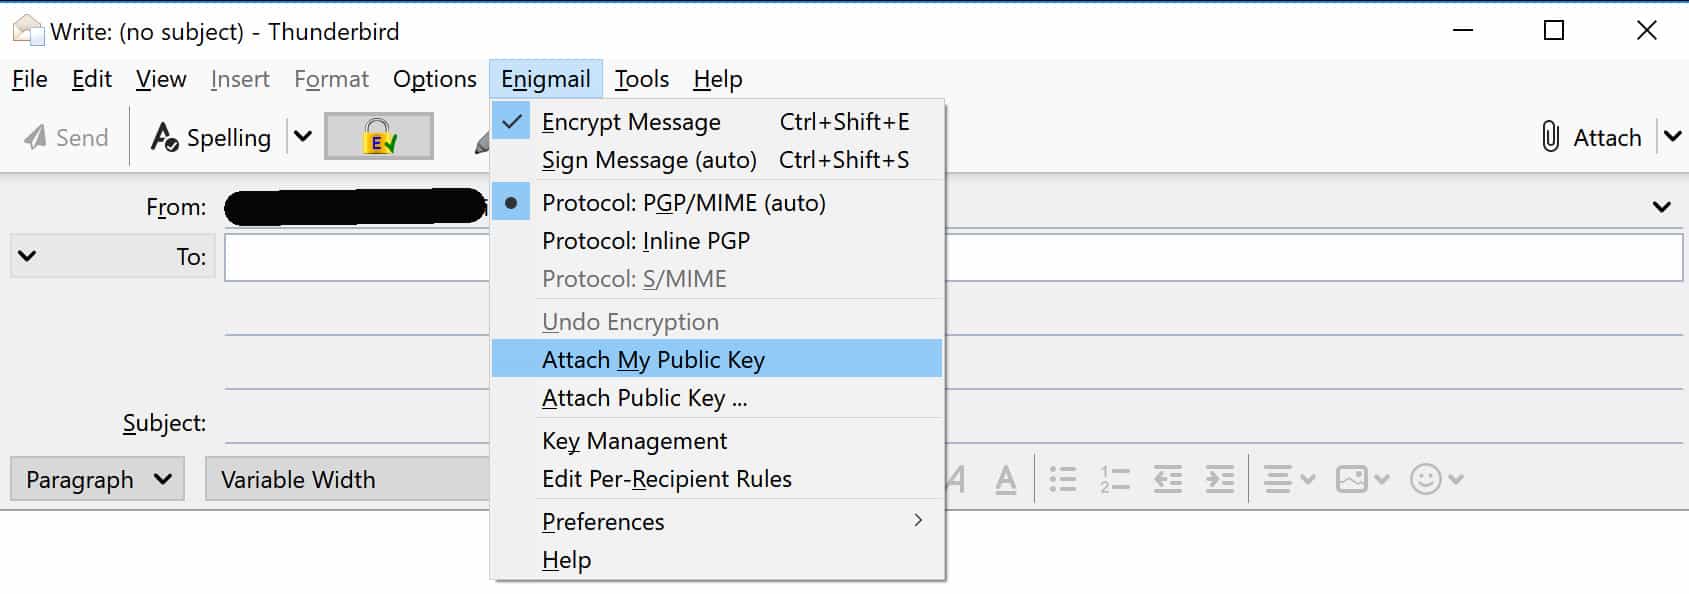
This will add your public key as an attachment. Be aware that this doesn’t encrypt your message, it just gives your recipient your public key so that they can send you encrypted messages in the future.
You can also distribute your public key by listing it on a key server. To do this, head back to the Enigmail Key Management menu. Click on the key which you would like to place on the server, then hover over the Keyserver menu. Click on Upload Public Keys:
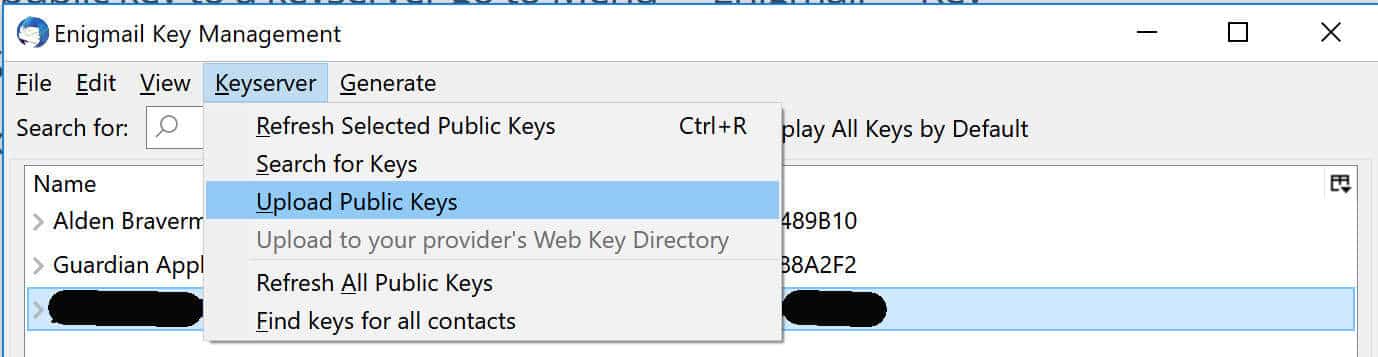
It will only take a few moments for your public key to upload. Once it’s up, people will be able to search for it on the public server.
Encrypting your emails
Now that you have added the keys of some contacts and they also have your key, it’s time to encrypt an email. Start an email as you normally would, by going to the Write tab in the top left of Thunderbird’s main interface.
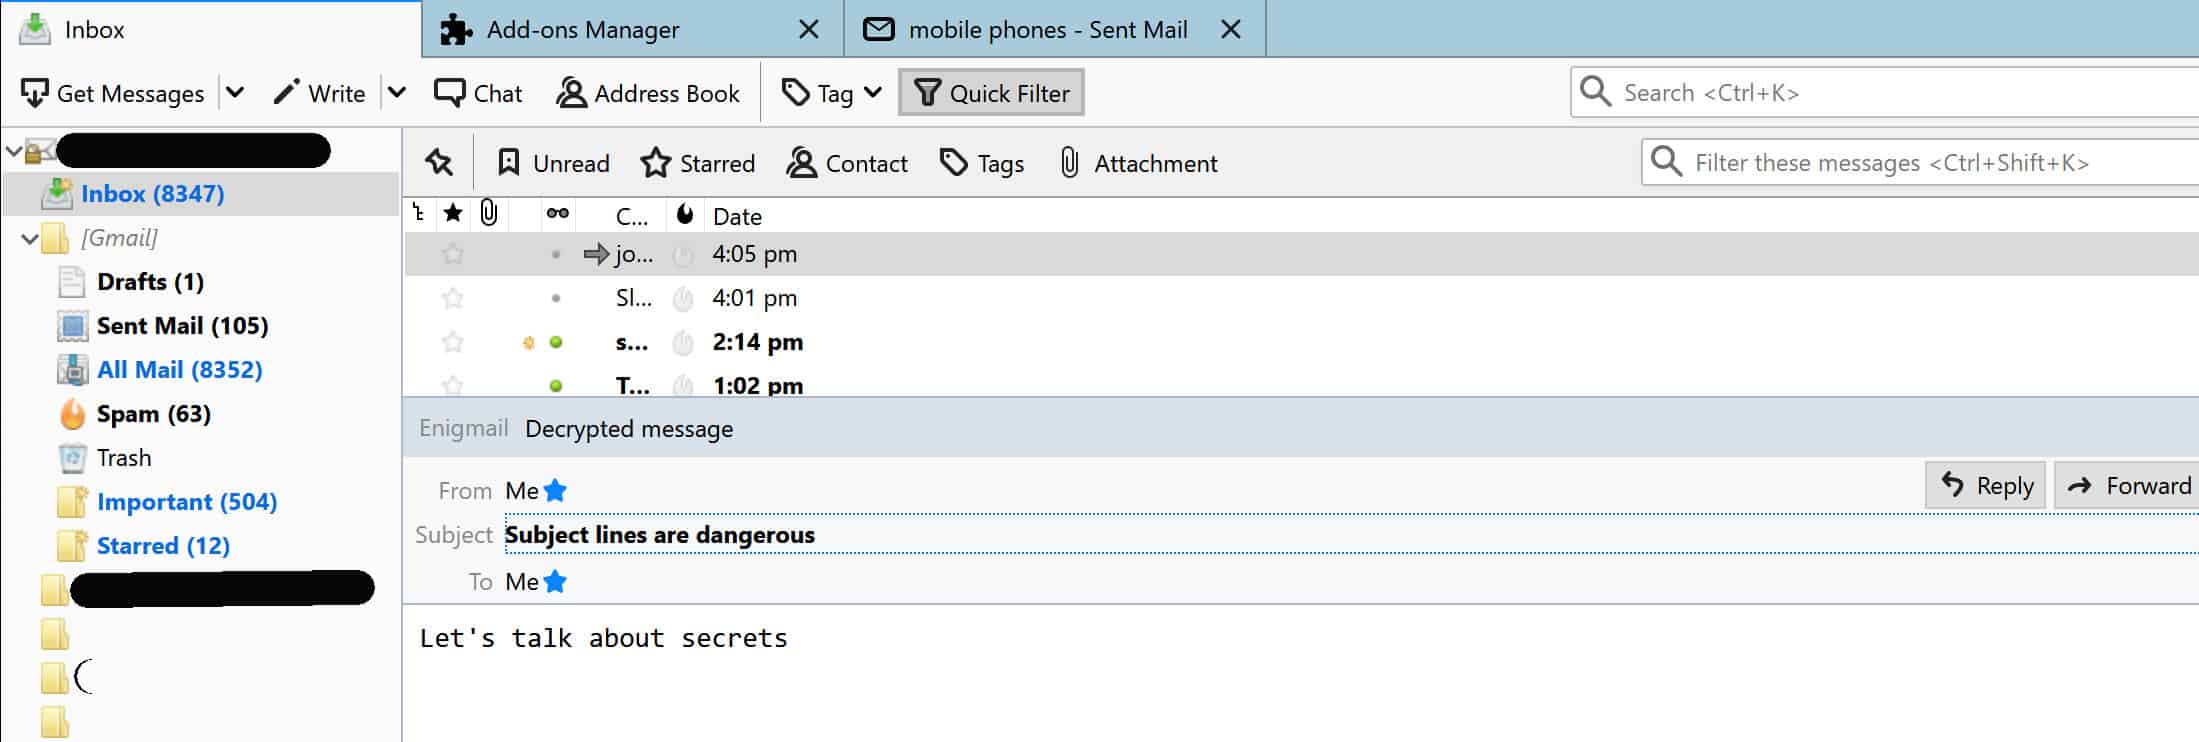
Enter the email address of one of the contacts whose public keys you have already added, then type out your message. If you want, you can include a subject line, but make sure that it doesn’t contain anything too specific or sensitive. This is critical, because subject lines and metadata aren’t encrypted in PGP messages:

If the recipient’s email address appears in red, like it does in the above picture, then it means that the public key hasn’t been associated with the email yet in Thunderbird.
Thunderbird will generally do this automatically, as long as it can find the correct public key. When you send the contact subsequent PGP emails, their email address should appear in black instead.
Notice a lock icon in the menu above the sender address. It will either be a black lock with a red X, or a gold lock with a green tick. To encrypt your message, click this icon to make sure it shows the gold lock with the tick.
Once you have done this, simply click Send and your encrypted message will be delivered to your recipient’s inbox. They will only be able to access it by entering their private key. If an attacker intercepts the message, all they will see is the ciphertext.
If your recipient doesn’t already have your public key, you may want to attach it using the method discussed earlier under Distributing your public key. This makes it easier for your recipient to reply in an encrypted format.
Decrypting PGP encrypted emails
When you receive a PGP encrypted email, double click on it. A new window will then come up, asking you to enter your password. Type it in, then click OK:
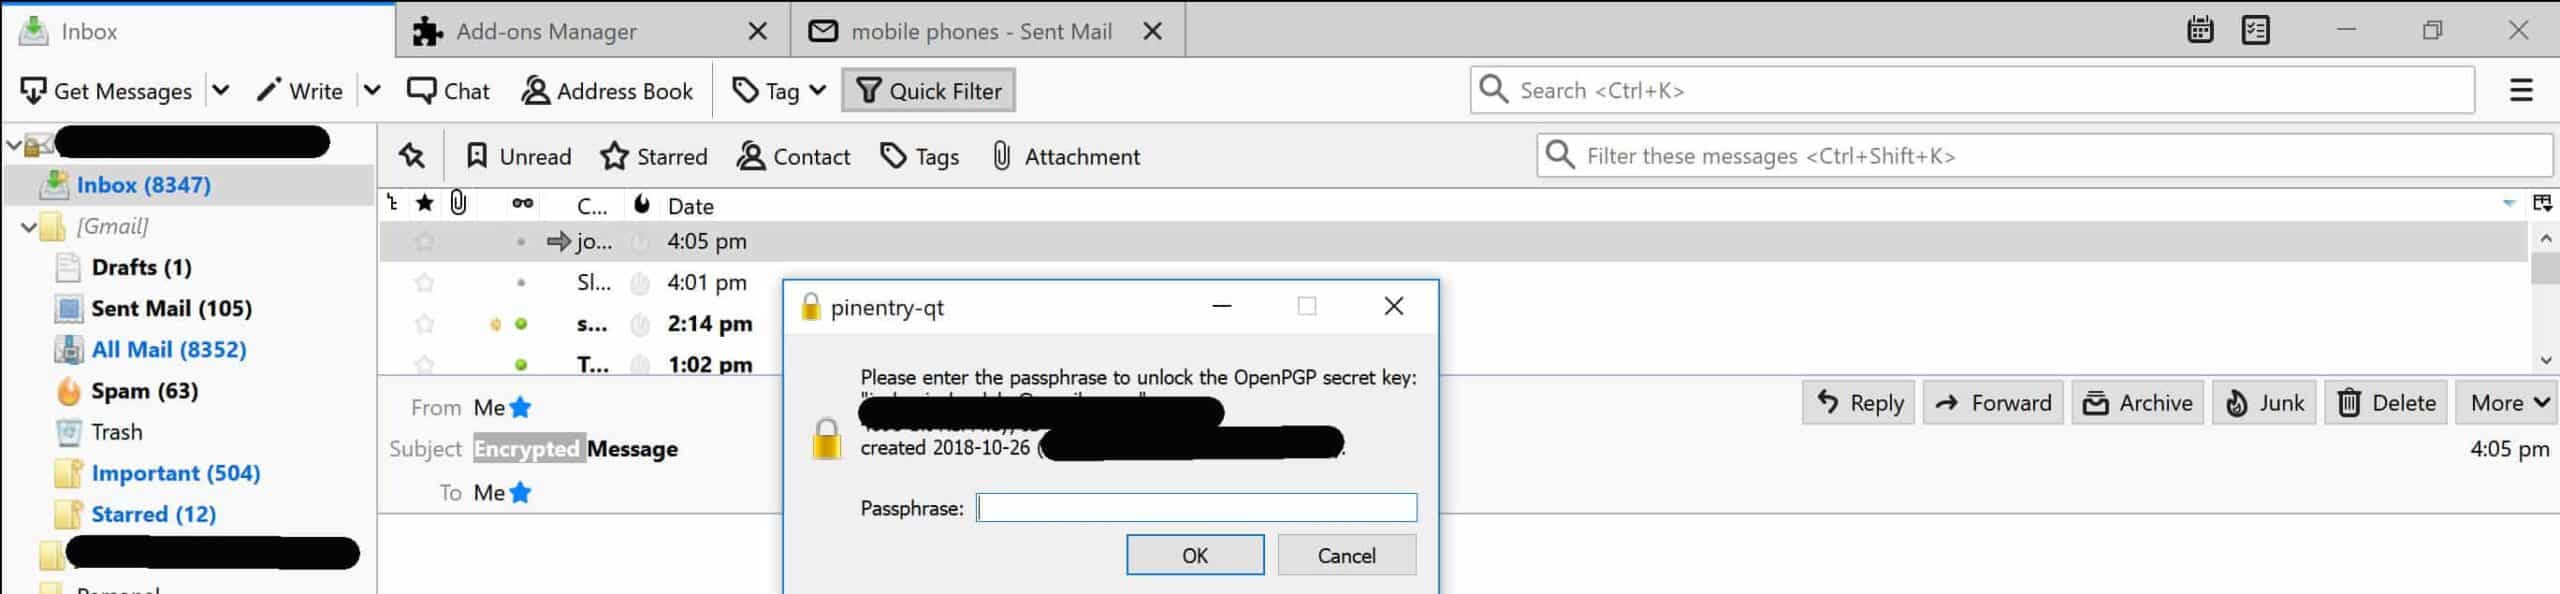
As long as you entered your password correctly, the message should open up as plaintext, allowing you to read it:
Now that you know how to decrypt your messages, you have all of the information you need to send and receive messages in a secure manner. Sure, PGP is a bit more difficult to get used to than normal email, but it is significantly safer.
When to use PGP encryption depends on your threat model. Most people will only send emails with it when they need to discuss sensitive or valuable information. They tend to prefer standard email in other situations for its simplicity and universality.
If you face greater risks or just to prefer to err on the side of paranoia, you may choose to send all of your messages through PGP, despite the extra effort. One of PGP’s greatest advantages is that it gives you the freedom to enhance your security when you need to, as well as offering a range of configuration options to suit each user’s individual needs.
Why should you use Gpg4win, Thunderbird & Enigmail together?
There are a number of different ways that you can send secure emails, including both paid and free options. The combination of Gpg4win, Thunderbird and Enigmail stands out for a few different reasons.
One of the most important is that all of these components are open source, and they have a strong community behind them. This community is incredibly dedicated to providing safe communication options to its users.
Another key factor is that all of these downloads are free, which means that even those without much money can implement the security features that they need. This is especially important for activists and whistleblowers across the world.
When considering the secure messaging alternatives, most of the big tech companies have some decent security features in their software packages, as well as options for secure messaging.
In many situations, these offerings can be fine to use without any negative results. Despite this, companies like Google and Microsoft have pretty poor records when it comes to privacy.
Many people prefer to stay away from these tech giants and their proprietary software, instead choosing to go with open-source options whose code can be inspected by anyone. This is why the combination of Gpg4win, Thunderbird and Enigmail is incredibly popular in the privacy community.
One of the few minor issues with this setup is that it is a little more difficult to configure than some of its alternatives, but it’s nothing that the average internet user shouldn’t be able to handle.
Considering what this software combination offers in terms of security and customization, the extra bit of tinkering isn’t too much of a trade-off. Together, Gpg4win, Thunderbird and Enigmail is an excellent package for keeping your communications safe.
See also: Public key cryptography