
What is SFTP?
SFTP, or Secure File Transfer Protocol, is a secure method for transferring files over a network. Built on the SSH (Secure Shell) protocol, SFTP ensures the encryption of data during transit, protecting sensitive information from interception or unauthorized access. It is widely used for secure file sharing, system backups, and data transfers across various platforms.
Unlike traditional FTP (File Transfer Protocol), which transfers data in plaintext, SFTP provides robust security by encrypting both commands and data. This encryption prevents potential attackers from intercepting login credentials or accessing files during transmission. The reliance on SSH also enables additional features such as authentication using keys, ensuring that only authorized users can access the system.
SFTP operates as a subsystem of SSH and uses a single, encrypted connection on port 22 by default. This design contrasts with FTP, which often requires multiple ports and is harder to secure. SFTP’s simplicity in configuration and its ability to integrate seamlessly with firewalls make it an attractive option for administrators.
SFTP supports various functions, including uploading and downloading files, resuming interrupted transfers, changing file permissions, and managing directories. These features make it versatile for applications such as website management, remote server administration, and cloud storage synchronization.
One significant advantage of SFTP is its platform independence, allowing it to work across UNIX, Linux, Windows, and macOS systems. This flexibility, combined with its strong security features, makes SFTP an essential tool for businesses that need to transfer confidential or mission-critical data.
In summary, SFTP is a secure, reliable, and versatile protocol that has become the standard for secure file transfers in environments where data integrity and confidentiality are paramount.
What is Cygwin?
Cygwin is free and open-source software that provides a Linux-like environment for Microsoft Windows. It consists of a DLL, which acts as an emulation layer providing substantial Portable Operating System Interface (POSIX) system call functionality, and a collection of tools, which provide a Linux look and feel. Under Cygwin, source code designed for Unix-like operating systems may be compiled and executed in Windows with minimal modification.
Thus, it is possible to launch Windows applications from the Cygwin environment, as well as to use Cygwin tools and applications within the Windows operating context. Users can interact with Cygwin through a Unix shell, such as bash, tcsh, or zsh. From there, they can issue Unix commands much like they would on a Unix or Linux computer.
How to Install Cygwin on Windows?
Cygwin programs are installed by downloading and running Cygwin’s setup program, which downloads the necessary program and feature package files from repositories on the Internet. According to information from their website, “When installing packages for the first time, the setup program does not install every package. Only the minimal base packages from the Cygwin distribution are installed by default, which takes up about 100 MB”.
Individual packages such as bash, gcc, less, and others are released independently of the Cygwin DLL. The setup program keeps track of the versions of all installed components and provides the mechanism for installing or updating everything available from the Cygwin website. Once you’ve installed your desired individual packages of the Cygwin distribution, re-running it next time will merely update your system to the latest releases. Now, follow the steps below to install Cygwin on Microsoft Windows:
Step 1: Go to the official Cygwin download page and download the latest version of Cygwin on your computer.
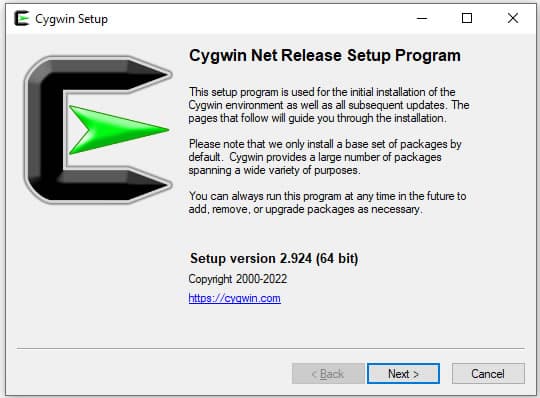
Step 2: Once you have downloaded the Cygwin setup file, double-click on the downloaded file to start the installation. You should see the following screen:
Step 3: Click Next to proceed to the next screen. You will be required to choose whether to install it from the internet or your local machine.
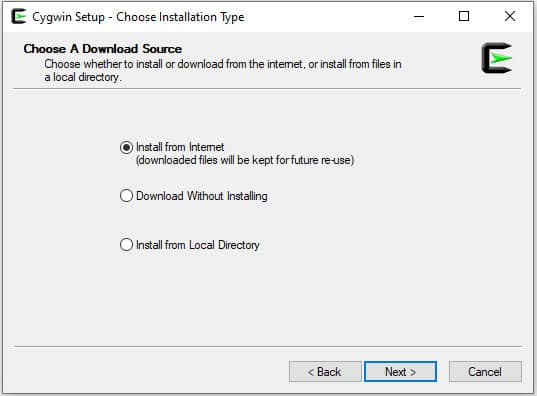
Step 4: Choose “Install from the internet” and click on Next to continue. You will be asked to select the directory where you want to install Cygwin as shown below:
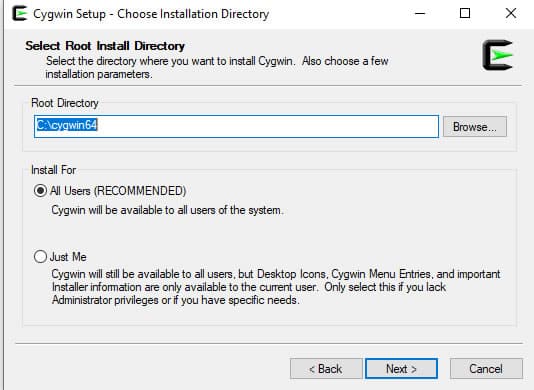
Step 5: Define your installation directory path and click on Next to continue. You will be asked to select the local directory where you want the setup to store the installation:
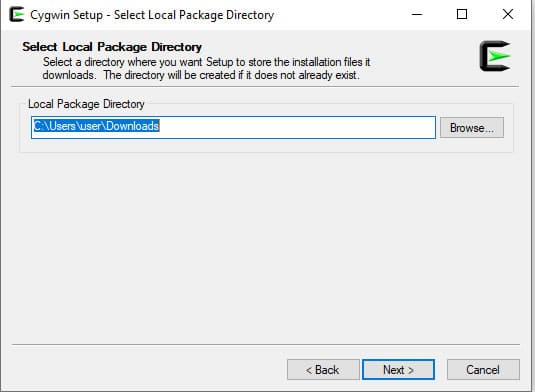
Step 6: Select a preferred directory and click on the Next button. You will be asked to select the Internet connection:

Step 7: Select Direct Connection and click on the Next button. You will be asked to select the download mirror:
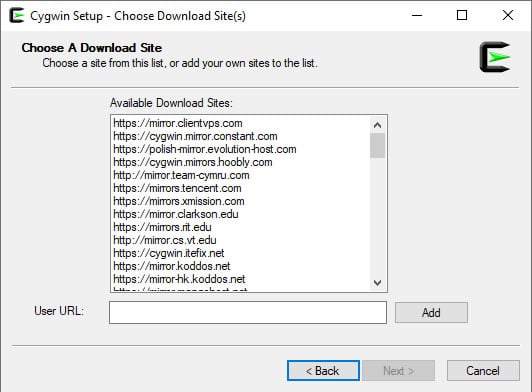
Step 8: Select your desired mirror and click on the Next button. You will be asked to select a package that you want to install:

Step 9: Select OpenSSH and click on the Next button. You will be asked to review and confirm the installation.
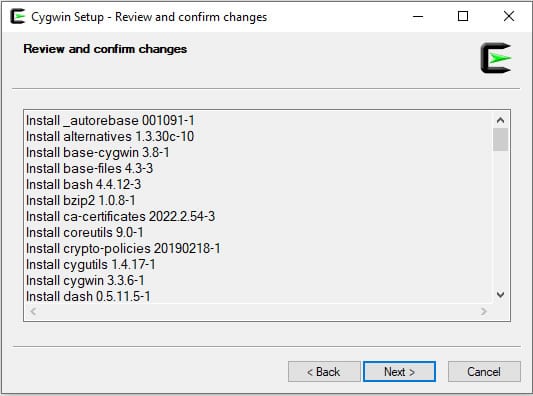
Step 10: Click on Next to continue. You will be asked to create a shortcut icon:
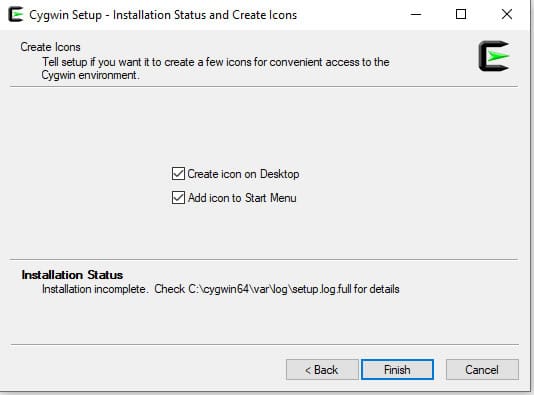
Step 11: Select your preferred options as shown above and click on the Finish button to complete the installation.
Configure an SFTP Server
After installing Cygwin, the next step is to set up an SFTP server using Cygwin. Follow the steps below to complete the process:
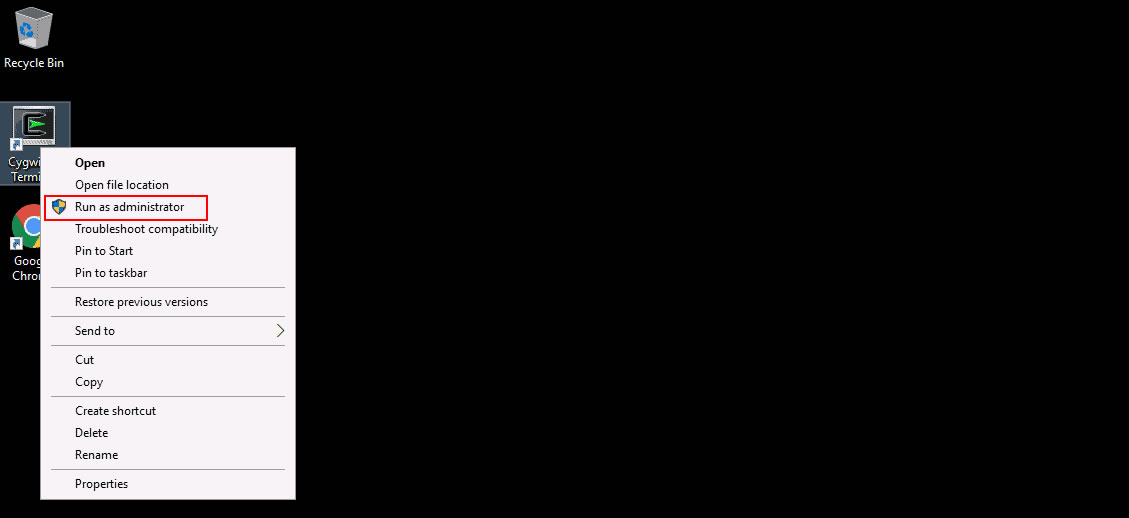
Step 1: Right-click on the Cygwin shortcut icon on your Windows desktop and click on Run as an Administrator.
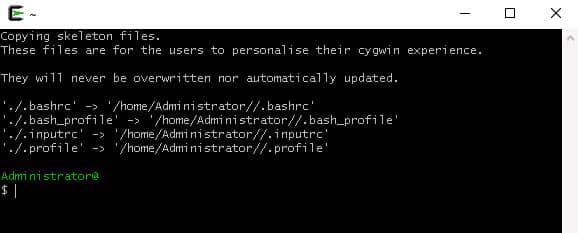
When you launch Cygwin the first time, it will create a home directory structure similar to the screenshot below:
Step 2: Next, you will need to create a password and group file inside /etc directory to store the user and group information. Both files are critical because they store user account and group information. Run the following command in the Cygwin terminal to create a passwd and group file:
mkgroup > /etc/group

mkpasswd -cl > /etc/passwd
Step 3: Next, you will need to provide read/write permissions to passwd and group files. You can do it by using the following command:
export CYGWIN=’ntsec tty’

chmod +rw /etc/group

chmod +rw /etc/passwd

chmod 0755 /var
Step 4: Next, you will need to configure the Cygwin SSH daemon to access the Windows system through SSH protocol. You can run the following command in the Cygwin terminal to configure the SSH daemon: ssh-host-config
The following output will be generated, in which you will be required to respond to several Yes/No questions:
*** Info: Generating missing SSH host keys

ssh-keygen: generating new host keys: RSA DSA ECDSA ED25519

*** Info: Creating default /etc/ssh_config file

*** Info: Creating default /etc/sshd_config file

*** Info: StrictModes is set to 'yes' by default.

*** Info: This is the recommended setting, but it requires that the POSIX

*** Info: permissions of the user's home directory, the user's .ssh

*** Info: directory and the user's ssh key files are tight so that

*** Info: only the user has write permissions.

*** Info: On the other hand, StrictModes don't work well with the default

*** Info: Windows permissions of a home directory mounted with the

*** Info: 'noacl' option and they don't work at all if the home

*** Info: directory is on a FAT or FAT32 partition.

*** Query: Should StrictModes be used? (yes/no) yes

*** Info: Updating /etc/sshd_config file

*** Query: Do you want to install sshd as a service?

*** Query: (Say "no" if it is already installed as a service) (yes/no) yes

*** Query: Enter the value of CYGWIN for the daemon: []

*** Info: The sshd service has been installed under the LocalSystem

*** Info: account (also known as SYSTEM). To start the service now, call

*** Info: `net start cygsshd' or `cygrunsrv -S cygsshd'. Otherwise, it

*** Info: will start automatically after the next reboot.

*** Info: Host configuration finished. Have fun!
Step 5: After configuring the Cygwin SSH daemon, start the SSH service with the following command:
net start cygsshd
You should get the following output:
The CYGWIN cygsshd service is starting.

The CYGWIN cygsshd service was started successfully.
Create SFTP Users and Directories
The following are the steps required to create SFTP users and directories:
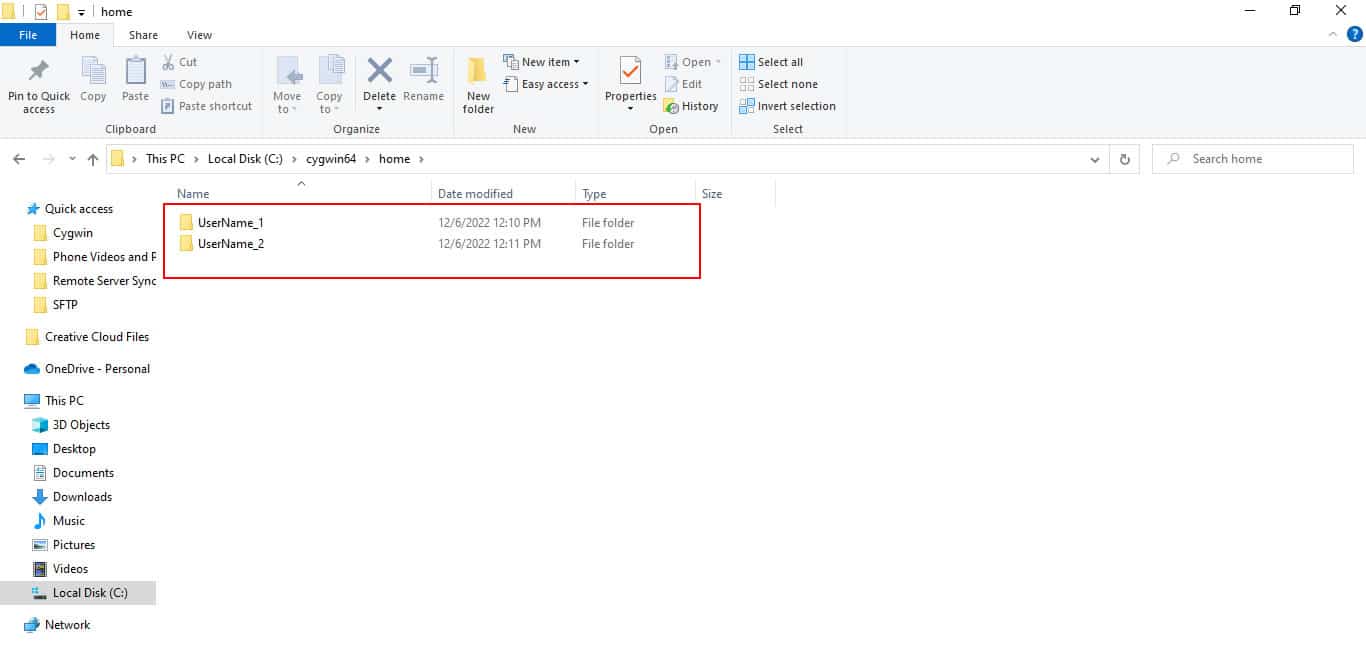
Step 1: Navigate to C: Drive >> cygwin64 >> home and create a directory called username_1 and username_2 as shown in the following screen:
Step 2: Go to the Control Panel >> Administrative Tools >> Computer management >> Local User and groups and create two users called username_1 and username_2.
Step 3: Add both users’ details to Cygwin’s passwd file. To do this, open the Cygwin terminal and run the mkpasswd command to add newly created users’ details to the /etc/passwd file: mkpasswd -cl > /etc/passwd
Step 4: Set proper ownership to the /home/username_1 and /home/username_2 directories:
chown -R username_1 /home/username_1

chown -R username_2 /home/username_2
Verify SFTP Connection from Localhost
Now that the Cygwin SFTP has been installed and configured. It’s time to test it from the local system. To do this, Launch the Windows CMD and run the following command to test the SFTP connection: sftp username_1@localhost.
You will be asked to provide a username_1 password as shown below:
The authenticity of host 'localhost (::1)' can't be established.

ECDSA key fingerprint is SHA256:b6Tr4vIS2pga9QsYHYPHjCYIP2d0TzA1/+DFsi0e1AM.

Are you sure you want to continue connecting (yes/no)?

Warning: Permanently added 'localhost' (ECDSA) to the list of known hosts.

username_1@localhost's password:
Provide username_1 password and press Enter. Once you are connected to SFTP, you should see the following output:
Connected to username_1@localhost.

sftp>
Configure Windows Firewall
SFTP uses port 22 by default to establish a connection. That means you need to ensure that the Cygwin SFTP server allows inbound connections to port 22 (SSH). To do this, you’ll need to configure the Windows Firewall to allow incoming TCP connections to port 22 using the steps below:
- In Windows, go to Windows Firewall >> Advanced Settings.
- Inbound Rules >> New Rule
- Rule Type >> Port >> Click Next
- TCP >> Specify local ports (22)
- Allow the connection, apply the rule to any profile (Domain, Private, or Public), and give it a name.
Access SFTP Server from Linux System
This section will show you how to connect to the SFTP server from the Linux machine using the Command Line and GUI methods.
Step 1: You will be asked to enter username_1 password as shown below:
The authenticity of host '215.87.10.171 (215.87.10.171)' can't be established.

ECDSA key fingerprint is 48:50:63:c5:a0:74:84:df:99:4b:2b:81:cd:db:ad:9f.

Are you sure you want to continue connecting (yes/no)? yes

Warning: Permanently added '215.87.10.171' (ECDSA) to the list of known hosts.

username_1@215.87.10.171's password:
Step 2: Provide your password and press Enter. Once you are connected to the SFTP server, you should see the SFTP shell in the following output:
Connected to 215.87.10.171.

sftp>
Step 3: Next, create some directories on the SFTP server using the following commands:
sftp> mkdir dir1

sftp> mkdir dir2
Step 4: You can verify both directories using the following command: sftp> ls -l
You should see both directories in the following output:
drwxr-xr-x 1 username_1 None 0 Dec 05 12:03 dir1

drwxr-xr-x 1 username_1 None 0 Dec 05 12:04 dir2
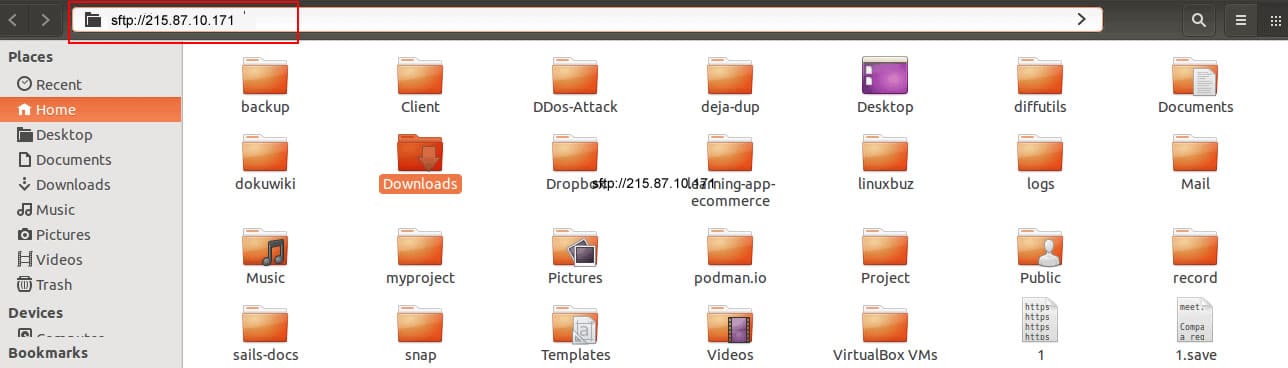
Linux GUI Method: This section will show you how to connect to the SFTP server from the Linux file manager. On the Linux machine, open the file manager and type the SFTP URL as shown below:
You will be asked to enter the SFTP username and password. Provide the required login details and click on the Connect button. Once you are connected to the SFTP server, you will see the Cygwin directory structure just like the one shown in the screenshot below:

Access SFTP Server from Windows System
You can also access the SFTP server from the Windows system using the WinSCP utility.
Step 1: On the Windows system, launch the WinSCP utility. You should see the following screen:
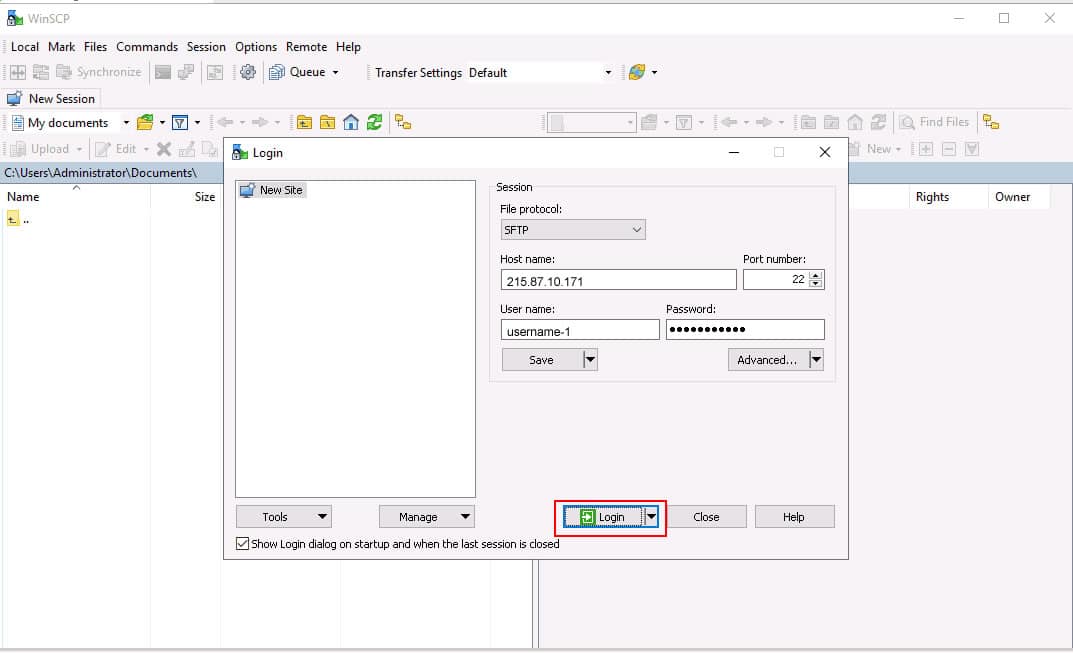
Step 2: Provide protocol details, IP address, Port, Username, and Password, and click on the Login button, and you will be connected to the SFTP server. From there, you can download and upload any file and directory to and from the SFTP server.
Alternatives SFTP Tools for Windows
There are lots of alternative tools out there for setting up and using SFTP servers on Windows. However, here are some of the best tools we recommend:
- Files.com SFTP Server (FREE TRIAL) A cloud-native Managed File Transfer (MFT), automation, and integration platform that enables organizations to securely store, transfer, and share files between users, teams, and organizations. Files.com is one of the largest providers of cloud-based SFTP in the world, and offers SFTP primarily as an integration tool to enable connectivity to some other application that supports SFTP but has no direct integration with Files.com. For instance, Files.com supports integration with Microsoft Azure Blob Storage. This allows you to mount Microsoft Azure Files file share directly into Files.com as a folder. Start with a 7-day free trial.
- ExaVault SFTP A cloud service that operates as a mediator for file transfers. ExaVault SFTP server offers SFTP, FTPS, FTP-SSL, and optionally plain-old FTP. Webhooks, SSH keys, and a robust API let you programmatically control your SFTP site. Once you have set up SFTP file transfer with ExaVault, you can utilize additional features such as creating SSH keys, automations, and even integrating ExaVault services directly into your website or applications.
- SolarWinds SFTP SCP Server A free SFTP server for secure network file transfers. It was designed with network administrators in mind, which they can use to securely push OS images and firmware and configuration updates, backup configuration files, and transfer files up to 4 GB. FTP SCP Server is a great tool for managing the configuration backups and system updates of cloud services and resources. The SFTP/SCP server runs as a service, but some basic configuration may be necessary to ensure the SFTP/SCP server performs in a way that works best within your environment.
