
The SSH File Transfer Protocol (SFTP) is a secure FTP system that provides an efficient method for transferring files with its efficiency rising for the transfer of multiple files. This is actually the combination of two pre-existing protocols. SSH is the Secure Shell. It establishes an encrypted connection between two points and the original purpose of this was to allow command line access to the remote computer. Activate FTP from the local computer to send a file within that secure SSH session, and you’ve got SFTP.
SFTP is widely used by web hosting providers and cloud service platforms, enabling their customers to transfer files securely over the internet. However, for a long time, Microsoft Azure, one of the leading cloud service providers, lacked a fully managed SFTP service. Users were often forced to use workarounds, such as leveraging Azure Container Instances (ACI) with Azure File Shares or configuring an SFTP server manually on Azure Blob Storage. These solutions, while functional, required significant administrative overhead and complex setup processes.
To address these problems, Microsoft has now introduced SFTP support for Azure Blob Storage, a fully managed, scalable solution that simplifies file transfer. This new service allows users to securely connect to Azure Blob Storage and perform file transfers via SFTP without the need for complex configurations. With this addition, Azure users can now manage and transfer files more efficiently, leveraging the security and ease of use that SFTP provides, all within a fully managed cloud environment.
Deploy SFTP on Azure Using Microsoft Managed SFTP Service
To deploy SFTP on an Azure storage account, you need to enable SFTP, and then connect to Blob Storage by using an SFTP client. To do this, the following prerequisites must be met:
- An Azure subscription and you must also register the SFTP feature with your Azure subscription.
- An Azure storage account—a standard general-purpose v2 or premium block blob storage account. You can also enable SFTP as you create the account.
- Azure CLI, you can either install the Azure CLI locally or use the Azure Cloud Shell.
- The hierarchical namespace feature of the Azure storage account must be enabled. To enable the hierarchical namespace feature, check out Upgrade Azure Blob Storage with Azure Data Lake Storage Gen2 capabilities.
- If you’re connecting from an on-premises network, make sure that your client allows outgoing communication through port 22 used by SFTP.
Once you’ve met all the prerequisites, follow the steps below to deploy SFTP on Azure:
- Enable SFTP Support: If you have an existing storage account, you can enable SFTP support in the following ways:
- Log in to your Azure portal and navigate to your Storage account.
- Under Settings, select SFTP.
- Click on Enable SFTP as shown on the screenshot below.
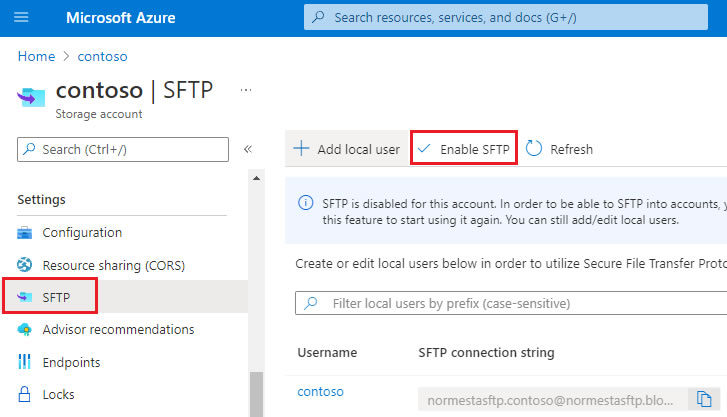
Note that this option appears only if the hierarchical namespace feature of the account has been enabled. Otherwise, check out Upgrade Azure Blob Storage with Azure Data Lake Storage Gen2 capabilities to enable the hierarchical namespace feature. If you are comfortable with PowerShell and command line tools, you can also enable SFTP support using the PowerShell method and the Azure CLI method.
- Configure SFTP Permissions: SFTP permission model is based on a new form of identity management called local users. To grant access to a connecting client, the storage account must make use of a local user identity, which must use either a password or a Secure Shell (SSH) private key credential for authentication.
You can use the Azure portal to configure local users for an existing storage account, choose an authentication method, and assign permissions for that local user by following the steps below as stipulated by Microsoft:
-
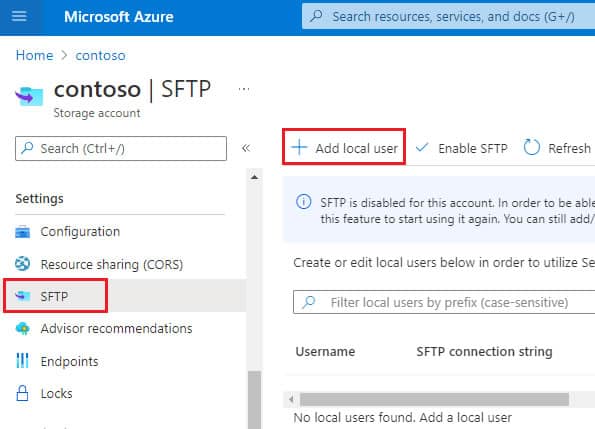
- In the Azure portal, navigate to your Storage account.
- Under Settings, select SFTP and then select Add local user as shown on the screenshot below.
-
- In the Add local user configuration pane, add the name of a user and then select which methods of authentication you’d like to associate with this local user. You can associate an SFTP connection string password and or an SSH key.
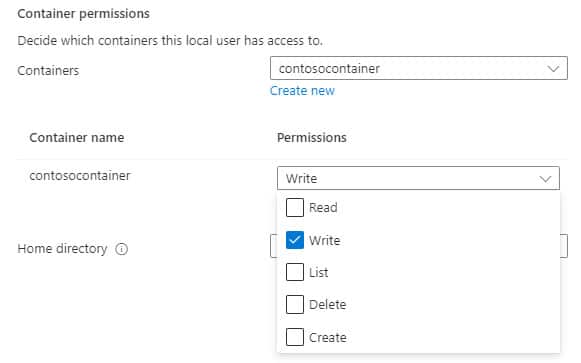
- Click Next to open the Container permissions tab of the configuration pane.
- In the Container permissions tab, select the containers you want to make available to this local user. Then, select which types of operations you want to enable this local user to perform, as shown on the screenshot below.
-
- In the Home directory edit box, type the name of the container or the directory path (including the container name) that will be the default location associated with this local user.
- Click on the Add button to add the local user.
If you enabled password authentication, then the Azure-generated password appears in a dialog box after the local user has been added. Note that you can also configure SFTP permissions by using PowerShell or Azure CLI methods.
- Connect an SFTP Client: Once you deploy the SFTP service, you can use any SFTP client such as Putty, WinSCP, or OpenSSH to securely connect and then transfer files. The following screenshot shows a Windows PowerShell session that uses OpenSSH and password authentication to establish connections and make transfers.

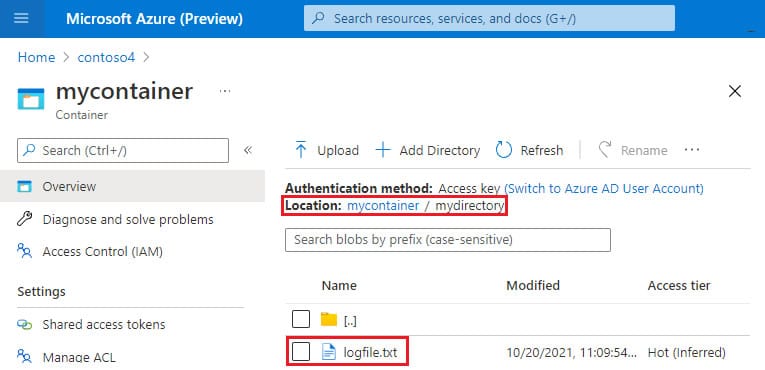
After the transfer is complete, you can view and manage the file in the Azure portal as shown on the screenshot below.
You can also connect using a custom domain or a private endpoint. When using custom domains the connection string is myaccount.myuser@customdomain.com. But if the home directory hasn’t been specified for the user, the connection string is myaccount.mycontainer.myuser@customdomain.com.
If you want to configure the storage account to be accessible over a private endpoint so that you can transfer files to SFTP over a private IP instead of a public IP address, the connection string is myaccount.myuser@myaccount.privatelink.blob.core.windows.net.
This is especially useful in situations where you need an SFTP service within your Azure environment or between your on-premises network and Azure network using site-to-site VPN. If the home directory hasn’t been specified for the user, the connection string becomes myaccount.mycontainer.myuser@myaccount.privatelink.blob.core.windows.net.
Challenges with the Microsoft SFTP Service
No doubt, the Microsoft SFTP Service will make it easier for organizations to run SFTP workloads with minimal management effort and low infrastructure costs. However, it is not without limitations. Whilst this is the beginning phase in the Microsoft SFTP journey, the current release comes with some limitations and known issues. Some of these include
- The SFTP server does not have some of the standard security features found in most commercial and open-source applications.
- Lacks support for Azure AD and POSIX-like access control lists.
- SFTP support requires hierarchical namespaces to be enabled on the object storage account.
- The service, for now, is only available on Azure Data Lake storage Gen2.
- The only authentication option is a local user and there is no control over password generation
- Azure Blob Storage is not generally available in all regions, but we expect more regions to be included shortly.
- Enabling the SFTP endpoint on Azure Blob Storage costs $0.30 per hour, in addition to the transaction, storage, and networking costs for the underlying object storage. Some experts consider this to be expensive.
If these limitations raise concerns, you may consider a commercial easy to integrate third-party service from Files.com as described below.
Deploy SFTP on Azure Using Files.com Managed Cloud Service
Files.com is a cloud-native Managed File Transfer (MFT), automation, and integration platform that enables organizations to store, securely transfer, and share files between users, teams, and organizations. Files.com is primarily designed for business-critical MFT workloads while emphasizing security, compliance, and data residency for business-critical file transfers and exchanges. Files.com acts as both a client and a server for SFTP, FTP, and WebDAV protocols. This allows you to easily connect to any cloud service, partner, or customer, without compromising security.
Files.com supports integration with Microsoft Azure Blob Storage. This allows you to mount Microsoft Azure Files file share directly into Files.com as a folder. On the other hand, Files.com comes with a feature called Remote Server Sync that allows you the ability to push or pull files to or from the Microsoft Azure Files file share. It also lets you perform a two-way “sync” where files that are new or changed in either location are pushed and pulled to maintain a synchronized state between the folder on your Files.com site and that on the remote server. To perform and complete integration with Azure, the Files.com Enterprise Connectivity Addon will be required. But if you are on Files.com Power or Premier subscription plan, the add-on is available for free.
The following are the steps required to deploy SFTP on Azure using Files.com Cloud Service:
Step 1. Integrate Files.com with Azure
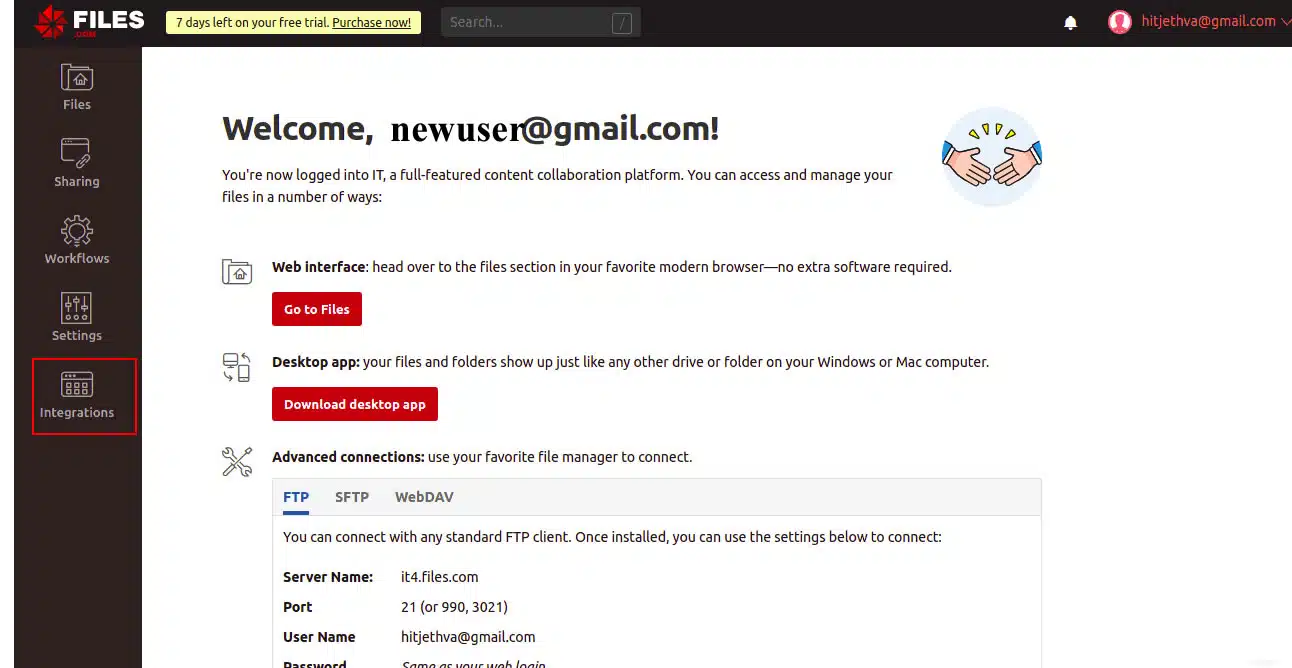
- Log in to your Files.com account. If you don’t have one, you can sign up for a free seven-day trial to get started. Once logged in, you’ll see the screen below.
- Open your Files.com dashboard >> Click on Integration in the left pane.
- Then go to “Search for Integrations” type “Azure,” and select it.
- Click on “Add Microsoft Azure as a remote server”, you will see the screen below.

- Enter details of your Azure storage account such as Internal name (use any name you want), Azure Account, Container Name (from blob storage account), Access Key (located in Security + Networking >> Access Keys), and click on the Save button. Once you are connected to Microsoft Azure you should see the following screen.
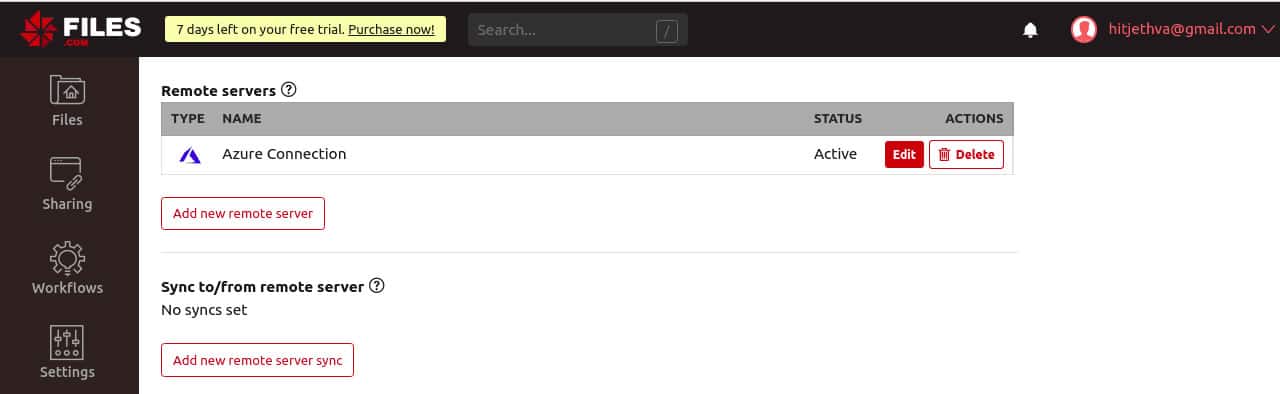
If everything goes well, you should be able to see the remote Azure server successfully integrated into Files.com as shown on the screenshot below.
Step 2. Mount a Folder
Now you need to create a folder on Files.com and mount Azure blob storage on that folder. Once you configure a Mount, any operation you perform on or inside that folder will act directly on the remote in real-time. Whether you are transferring, creating, deleting, or performing any other file/folder operations you have permission for, those operations will “pass-through” to the Azure server in real-time. Now follow the steps below to mount a folder:
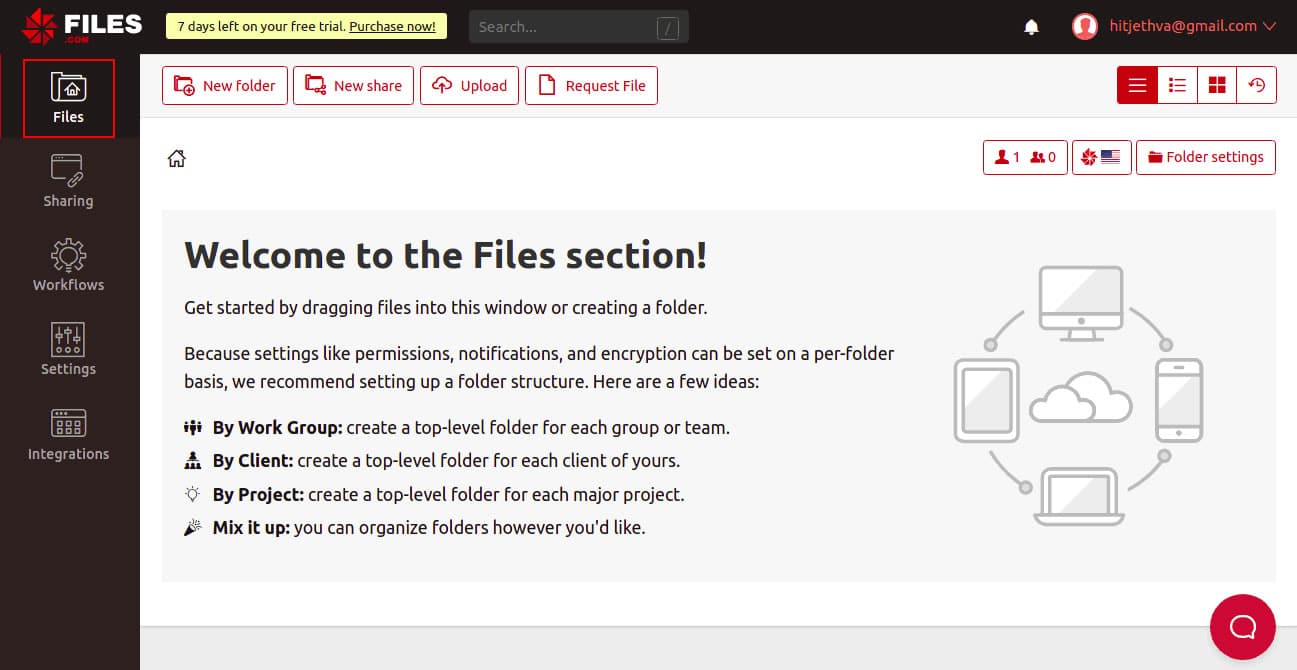
- Firstly, log in to your Files.com account, and you will be presented with your home screen like the one below:
- Click on the New folder button in the top left corner. You will see the following screen:
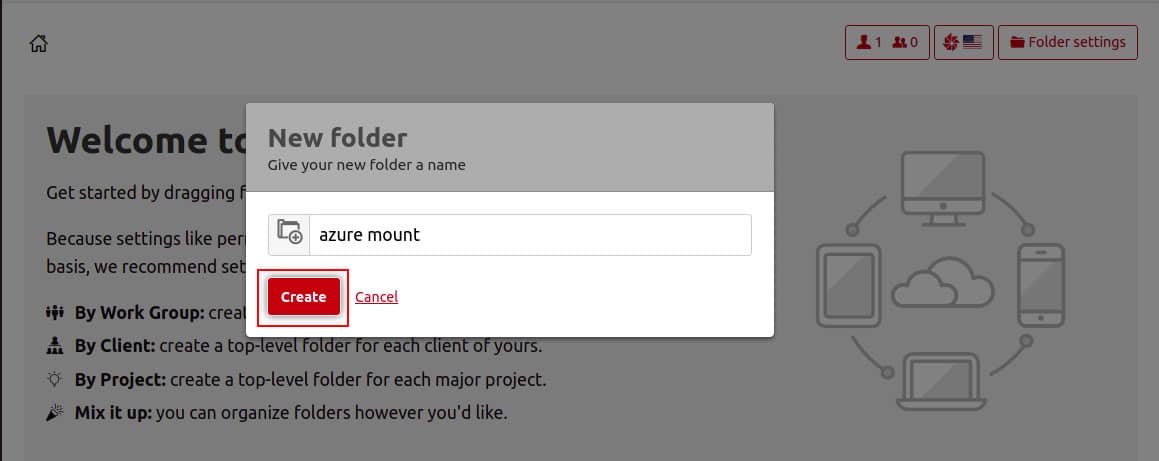
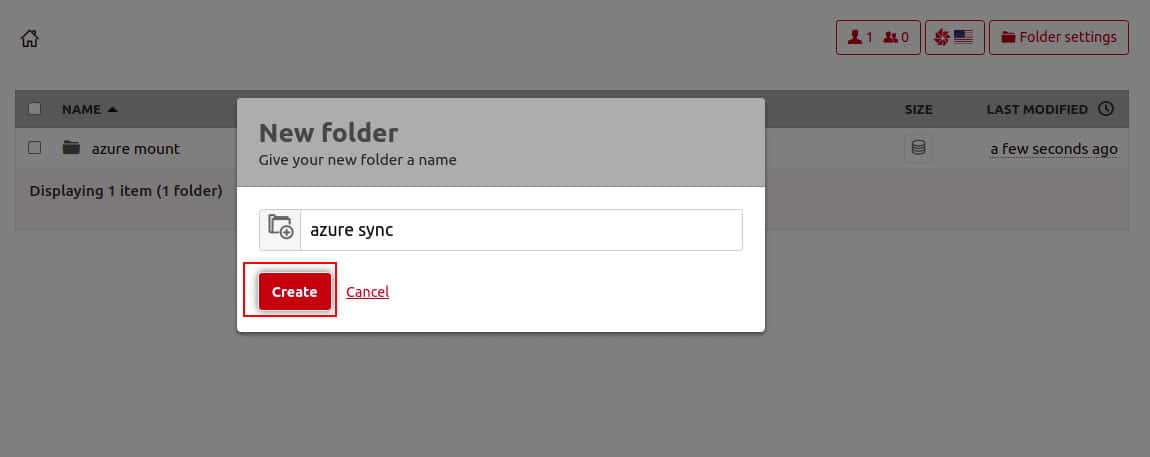
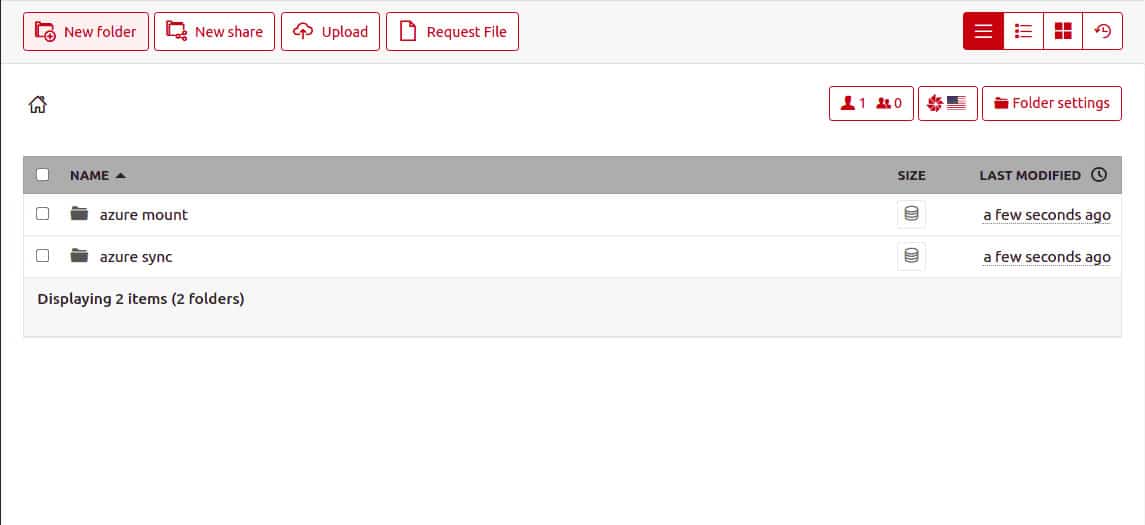
- Provide your folder name (one for mount and one for sync) and click on the Create button. You will see the following screen:
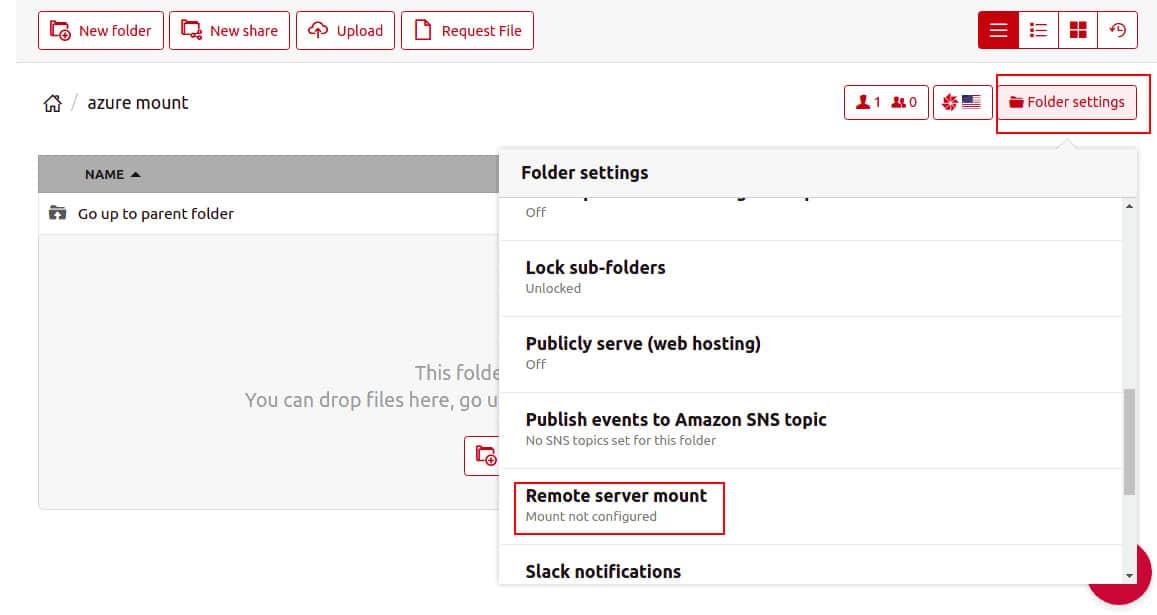
- Navigate the Azure mount folder and click on the Folder settings in the top right corner. You will see the following screen:

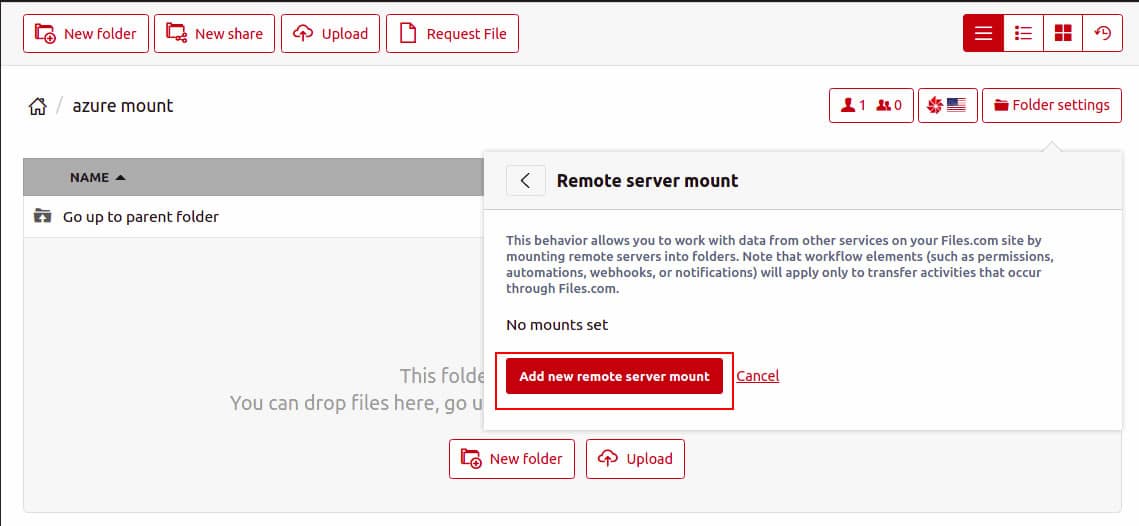
- Click on Remote server mount. You will see the following screen:
- Click on Add new remote server mount. You will see the following screen:
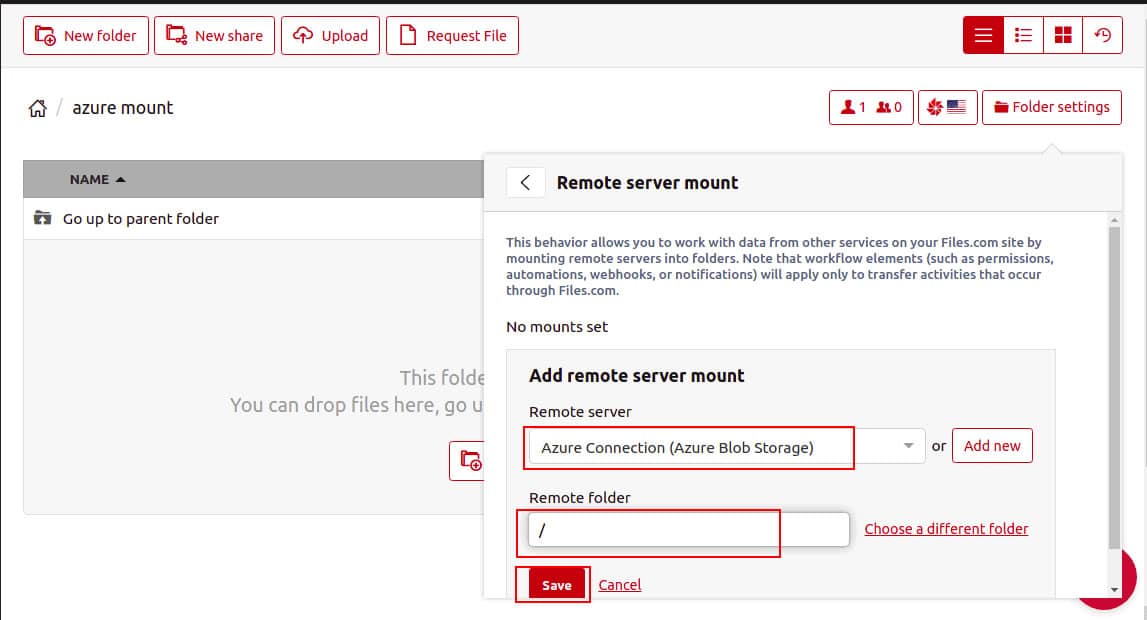
- Select your Azure blob storage account and provide your root directory path (/) then click on the Save button. You will see that all files from the Azure blob storage are now mounted on Files.com.

Step 3: Setup a Remote Server Sync with Azure on Files.com
Remote server sync allows you to sync files in three different modes: push, pull, and two-way sync. Push moves all files from Files.com to the Azure blob storage, pull does the reverse, and two-way sync just as the name implies synchronizes all files on both ends.
Note that the remote server sync option is not real-time, rather it happens at pulling intervals based on your plan. Now, follow the steps below to set up remote server sync with Azure:
- On your File.com dashboard, navigate to the Azure sync folder, and you will see the Folder settings as shown on the screenshot below.
- Click on the Folder settings. You will see the following screen:
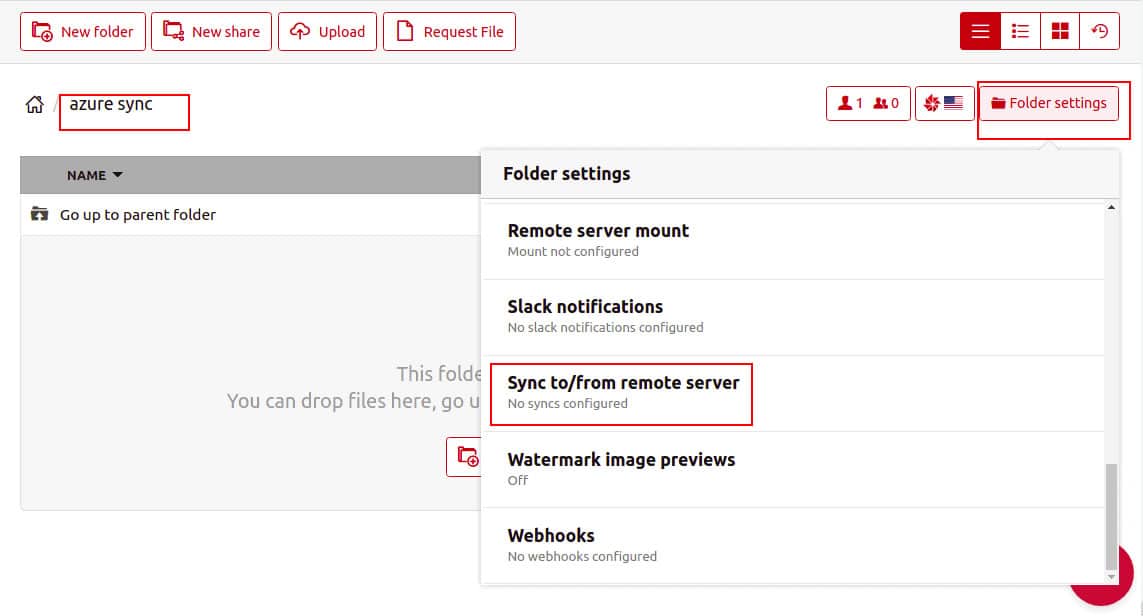
- Click on Sync to/from a remote server. You will see the following screen:
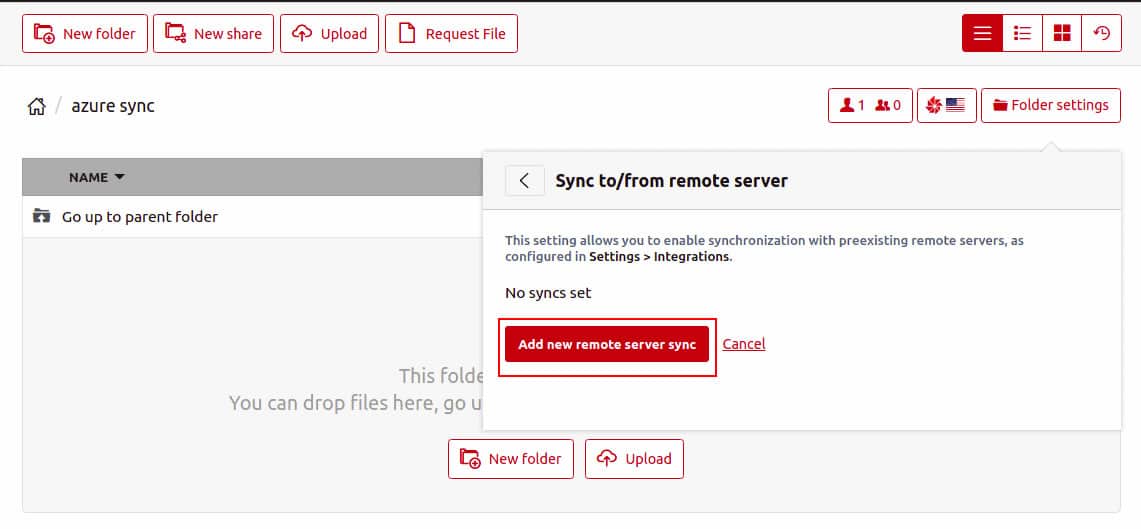
- Click on Add new remote server sync. You will see the following screen:
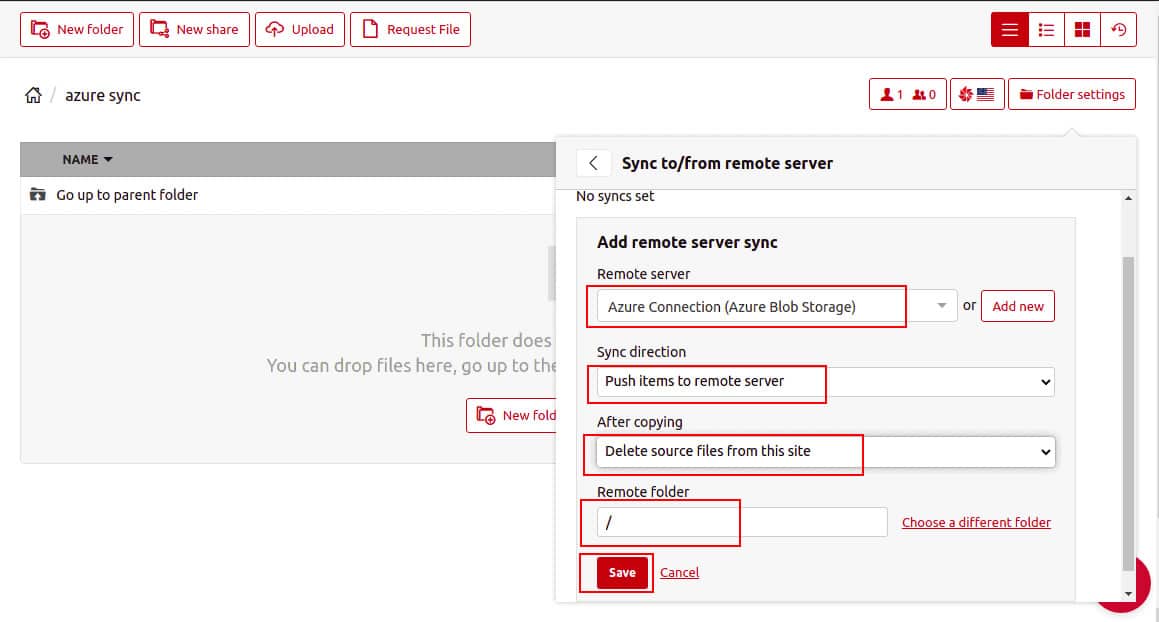
- Select your Azure blob storage, define sync direction “Push items to a remote server”, select the After copying option “Delete source files from this site”, and provide your remote folder root directory path, then click on the Save button.
- Now, click Upload to upload some files on Files.com inside the Azure sync folder as shown below:
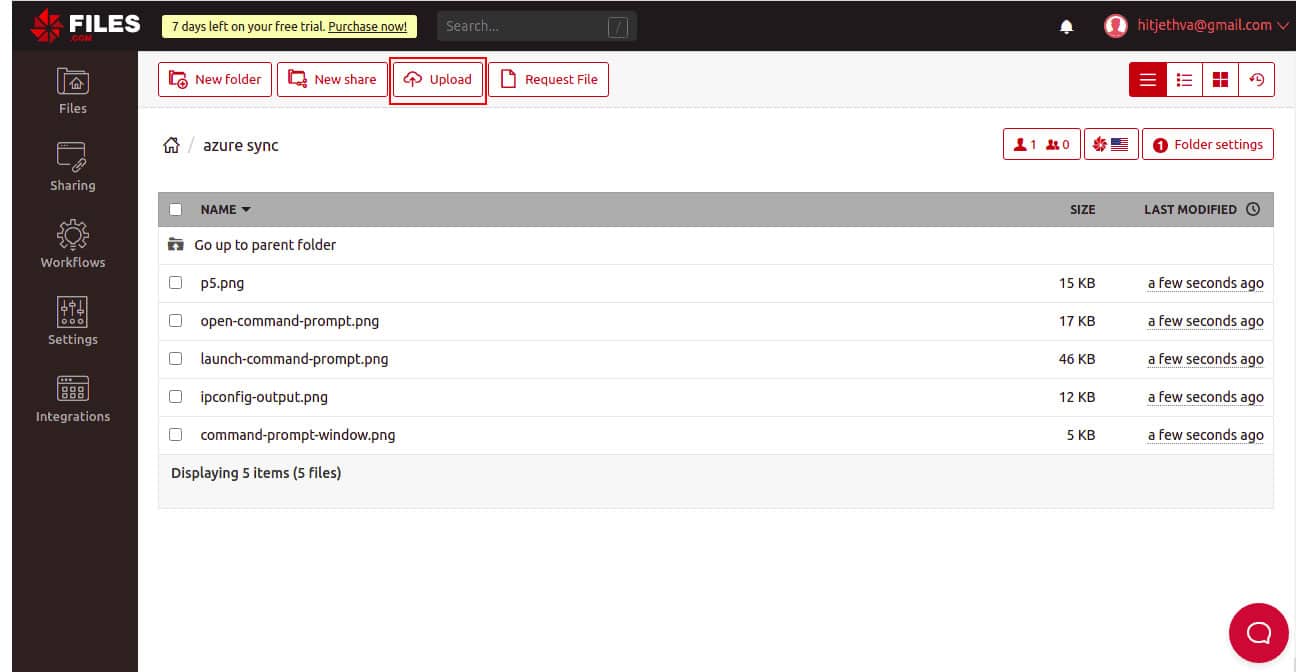
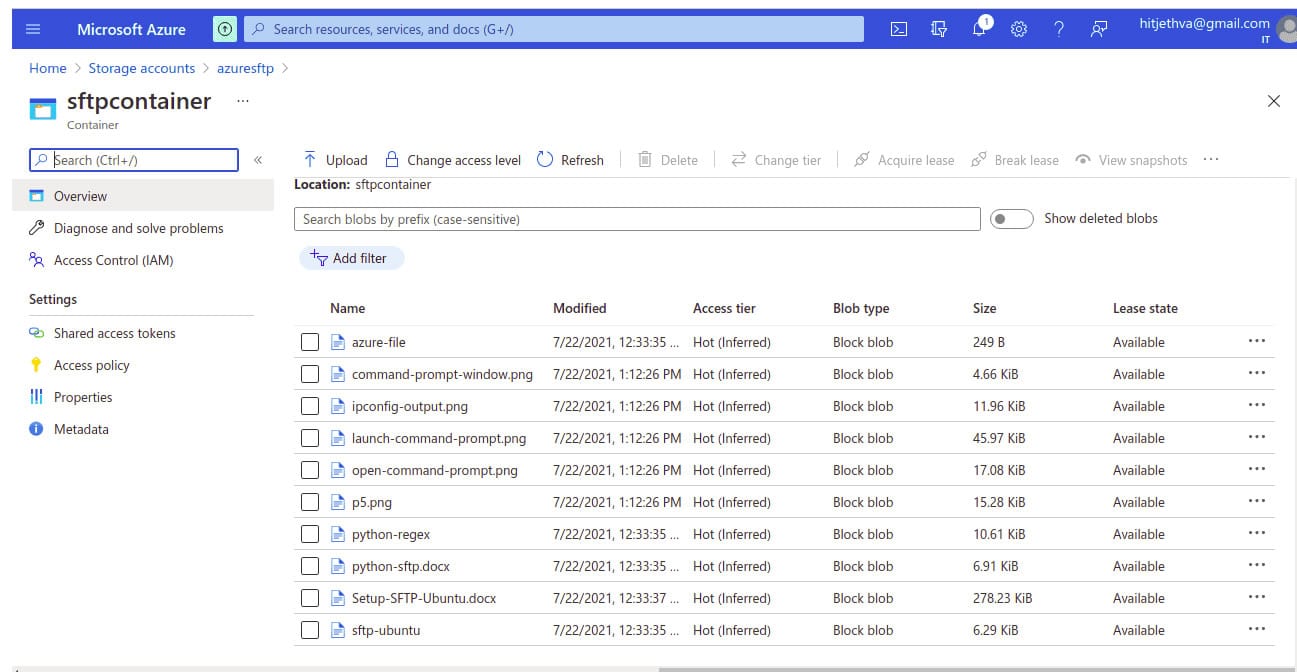
- After a few minutes, go to the Azure blob storage account. You will see that all files from Files.com are synchronized to the Azure blob storage account. You will also observe that all files are deleted from Files.com because we set up sync to push files in one direction to the remote Azure server, as shown on the screen below.
Concluding Remarks
In this guide, we showed you how to deploy SFTP Service on Microsoft Azure using two methods. The first involved the use of Microsoft-managed SFTP service—a newly released fully managed SFTP support for Azure Blob Storage. We also discussed some of its current limitations and issues. The second method involved the use of Files.com managed cloud service—a commercial, easy-to-use third-party SFTP provider. This allows us to integrate the Azure server into Files.com and mount Azure as a folder on File.com. The Remote Server Mount feature in Files.com gives you the ability to connect a specific folder on Files.com to the Azure storage server in real-time. That folder then becomes a client, or window, accessing the files stored in your Azure server or cloud.
Related post: How to set up a virtual machine for safe browsing
