Want to send encrypted email? Don’t want to ditch Outlook? Then hop aboard, because this tutorial will show you how you can bring the two into perfect harmony and use PGP encryption with Outlook.
Why should you use PGP encryption with Outlook?
Whether you’re a huge fan of Outlook or just a long term user who can’t be bothered to change, you may be concerned about the security and privacy of your emails. In times of data breaches and ever-increasing cybercrime, it’s important to think about the security of your online communications.
Which brings us to the point: Is Outlook keeping your emails safe?
The answer is a resounding “no”, but it’s not exactly something unique to Outlook. Sure, it’s owned by Microsoft, a huge company that collects customer data and has had a questionable stance on privacy over the years. Although these aren’t points in Microsoft’s favor, the real issue is with email itself.
Standard email just isn’t secure. Once a message leaves your inbox, there are numerous points in which it can be exposed to attackers. It’s a communication system that is good enough for much of our more mundane daily messages, but it falls tremendously short for those times when secrecy is necessary.
From communication between spies to planning between activists, for those trying to send valuable information to those who are at a high risk of online stalking, email simply isn’t good enough.
How do you make your email secure?
The answer is encryption. In essence, it means to jumble up all of your messages into a complex code that attackers cannot decipher. There is a range of different types of encryption offered by Microsoft as part of Office 365, such as S/MIME, OME and IRM, but this tutorial will focus on using PGP encryption with Outlook.
The advantages & disadvantages of using PGP encryption in Outlook
To start off, the main disadvantage of Pretty Good Privacy (PGP) is that it isn’t built-in to Outlook. So why use it then? Because the other options all have their faults as well.
Secure/Multipurpose Internet Mail Extensions (S/MIME) can be a pain to set up, requiring separate SSL certificate configurations for each client. Certificates also tend to cost money, which is another downside.
Office 365 Message Encryption (OME) is much easier to use but doesn’t encrypt the messages in the traditional way. Instead, it takes messages that have certain specifications, then swaps them out for a link to a Microsoft server. The recipient gets sent the link, which sends them to the server where they can view the message.
Information Rights Management (IRM) isn’t really encryption either; it just uses encryption to prevent certain actions from being taken once an email or file has been sent. It can be used to stop messages from being screenshotted, forwarded or printed, but it’s not an ideal solution for encrypted email.
Another issue with each of these types of encryption is that they occur in the Microsoft environment. While it’s debatable as to how problematic this is, those who distrust tech giants may feel more comfortable encrypting their email elsewhere, ensuring that there is no possible way for Microsoft to access it.
This brings us back to PGP encryption. Although it does take some effort to configure in Outlook, PGP comes with many advantages. It’s open source and free, using a standard that works with a wide range of programs. It also operates on a decentralized model that gives its users a range of choices when it comes to how their information will be encrypted and how they want to trust other users.
Should you use PGP encryption with Outlook?
This all depends on your threat level. If you’re just an average person without too many valuable secrets or a target on your back, then this setup is probably fine. If you have more extreme privacy concerns, or deal with extremely sensitive and valuable information, it may be best to use Gnu Privacy Guard (GPG) with an email client like Thunderbird running through Enigmail instead.
How to set up & use PGP encryption with Outlook
Now that you understand why PGP encryption is important, it’s time to get to work. The first step for installing it is to download Gpg4win. This is an open-source package of encryption tools for Windows. It includes the Gnu Privacy Guard, which is the main encryption program, as well as some certificate managers, plugins and a user manual.
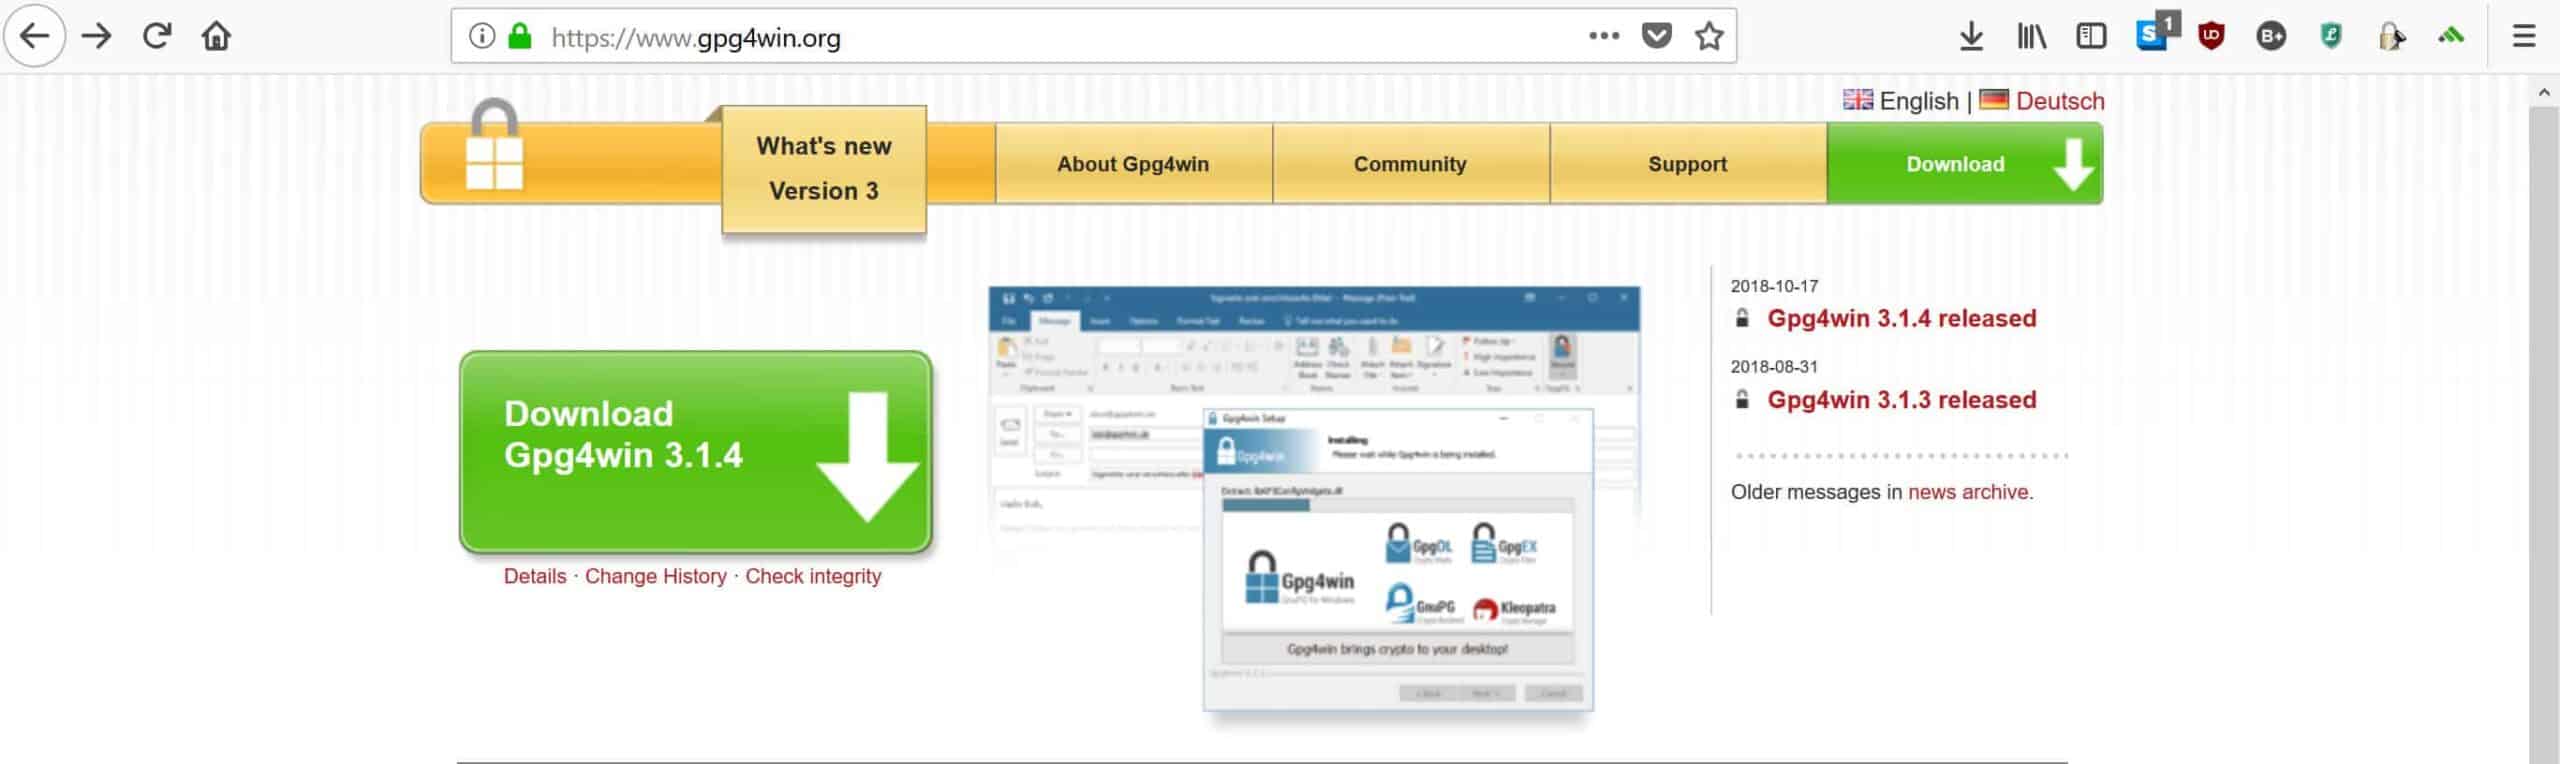
In this tutorial, we will be using the Gnu Privacy Guard, a certificate manager called Kleopatra, and the GpgOL plugin, which is the extension for Microsoft Outlook. All of these come for free in the download package. To get started, head to Gpg4win and click the big green button to the left, which says Download Gpg4win, followed by the version number:
Once you click on the download, you will be brought to the following screen where it prompts you to donate:
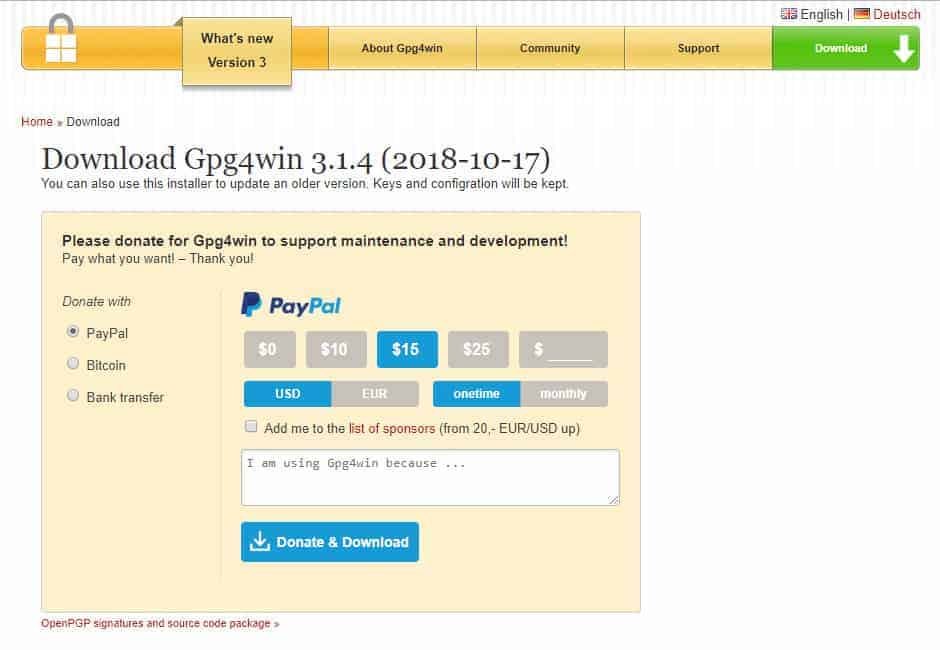
GPG is an important open-source project that helps to keep lots of people safe, and donations are one of the few sources of income that keep the project alive. If you have some spare cash sitting around and feel like doing something good for the internet, then feel free to donate. Otherwise, just click the $0 option right under the PayPal button, then hit Download.
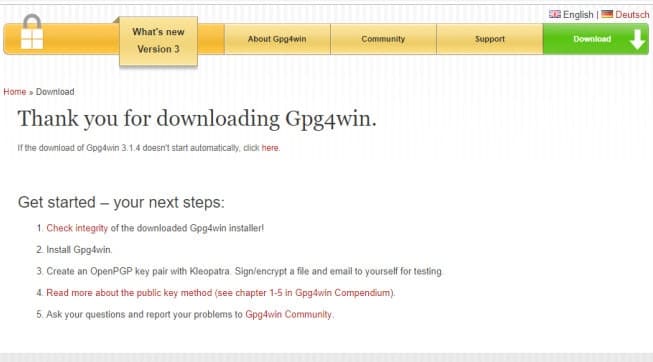
You’ll be brought to the following page while you wait for it to download:
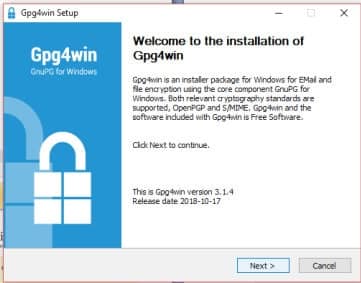
Once the download has finished, double click on it. If you see a popup that asks if you want to allow the program to make changes, click Yes. You will be brought to another popup that asks you to select your language. Go with your usual choice, or pick Norwegian if you want to make the setup a lot more challenging:

Select Okay, then hit Next on the following screen:
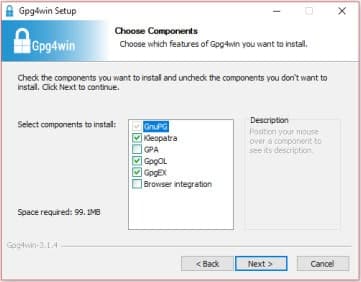
The elements that have already been checked will be all that you need for setting up PGP encryption with Outlook, but you can click the other boxes if you want to download GPA and the Browser integration as well. Select Next:
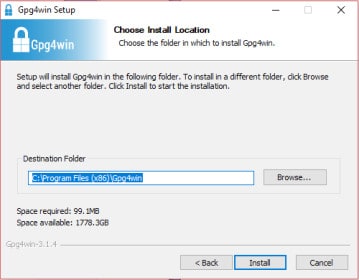
Then select the location where you would like Gpg4win to be installed, or continue with the default option:
The program will take a little while to install. When it is done, you will be brought to this page:

Click Next, which takes you here:
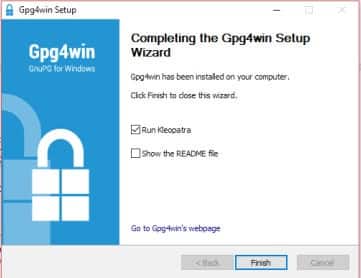
Click Finish to automatically run Kleopatra, which you will need to set up your public and private keys.
Setting up your key pair
Kleopatra gives you two main options, New Key Pair or Import. This article will assume that you are new to PGP and focus on generating keys for you. If that’s the case, then select New Key Pair. If you are an existing user who wants to import your own keys, then feel free to click Import and follow the prompts instead:

Enter your name and email, then click Next. If you are a more technical user, feel free to go into the Advanced Settings, but they are out of the scope of this tutorial:

Make sure that you enter a strong and unique password. If you use a weak password or the same one that you have for every account, it can completely undermine the security of using PGP in the first place. If you aren’t sure how to come up with a good password, check out our guide on how to make strong passwords.
See also: Password Generator tool
Once you have entered your strong password, click Okay. This takes you to the following page:

It’s best to keep some kind of record of your key pair, so select whichever of the three options is more suitable for you. Click Finish once you have made the backup. Now you will be brought back to the main Kleopatra window, where you will see the certificate that you have just created.
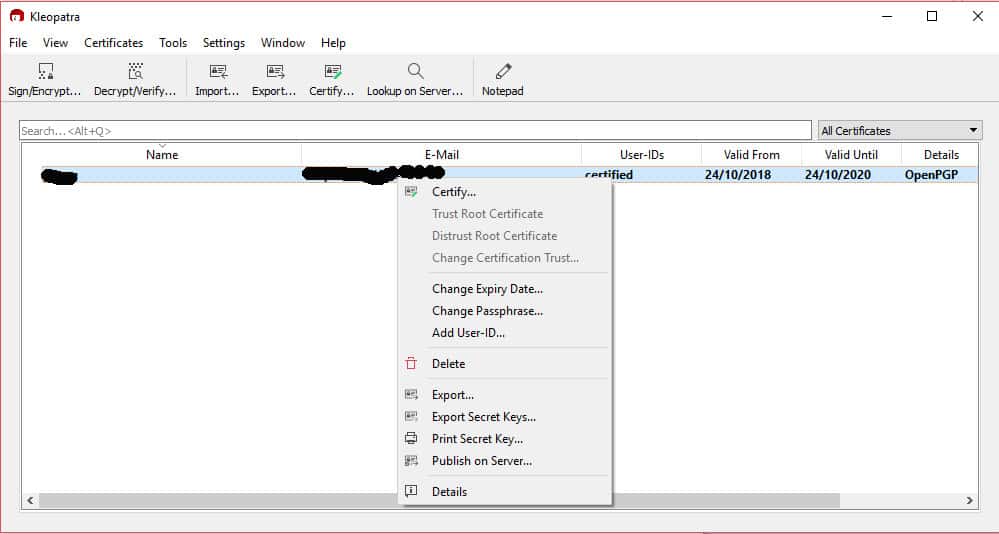
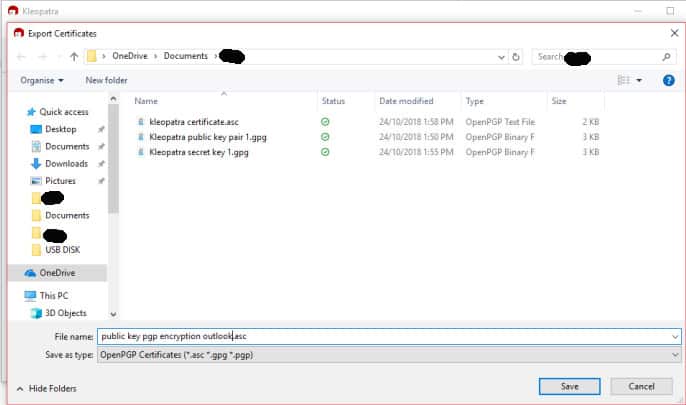
To access your public key, right click anywhere on the bar where it lists your name and email address. Select the option in the drop-down menu that says Export:
Save the file somewhere convenient on your computer:
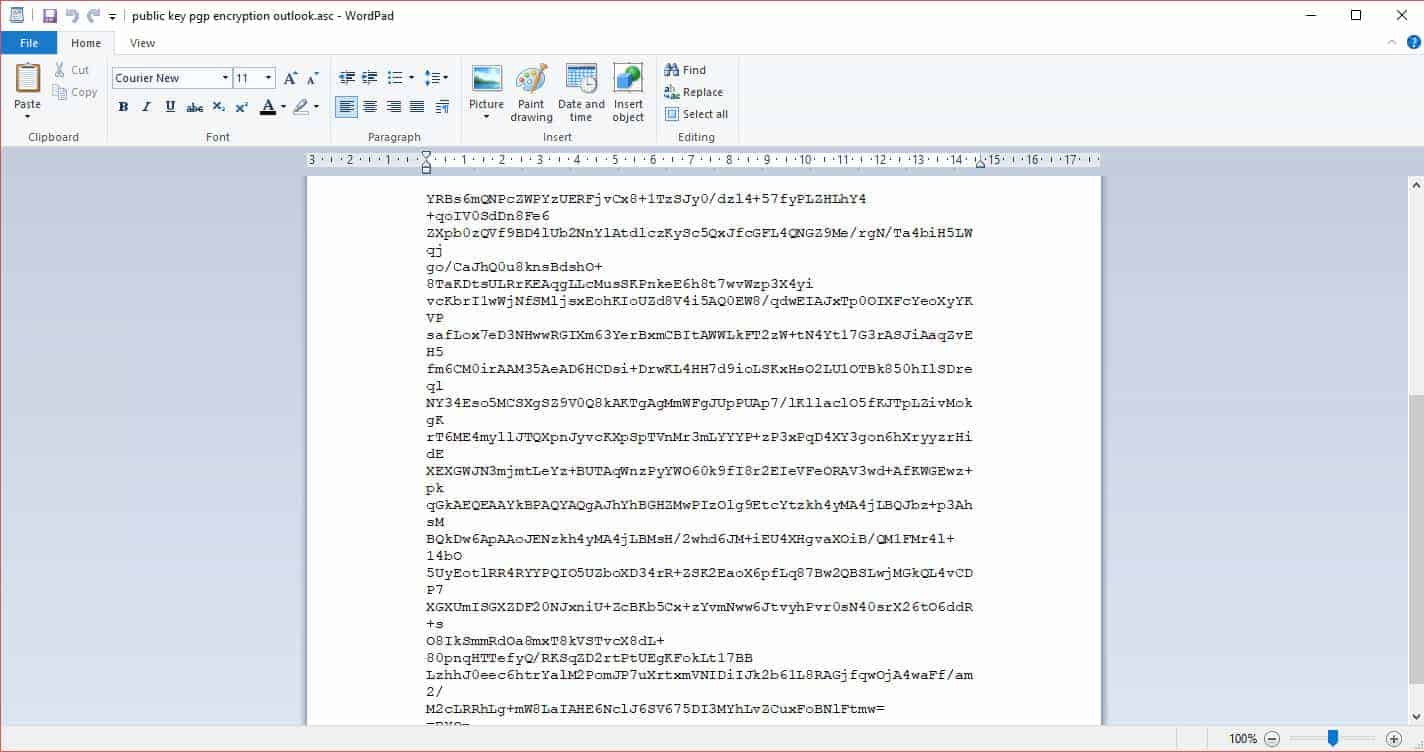
Once you have done this, open a text editor like WordPad. Select File, then Open to look for the file that you have just saved. You may need to go to the menu that appears above the Open button in the bottom right corner. Select All Documents from the drop-down menu, then scroll to the file. Double click on it.
This opens up your public key:
Give your public key to anyone that you would like to be able to communicate securely with. You can also post it to public key servers like this one for others to find it.
Now it’s time to find your private key. You will need it to decrypt any of the PGP messages that you receive. Right click on the bar in Kleopatra where your certificate is displayed again, then select Backup Secret Keys… in the menu:

Choose a location to save it. You may have to enter the password you created earlier to export your secret key, then click Okay:

To view your private key, open it in a text editor, just like you did earlier for your public key. Make sure that you never let anyone find out what your private key is, because they will be able to access all of your PGP encrypted emails. A good solution for keeping it private is to store it on a USB that is locked in a safe.
Adding your recipient
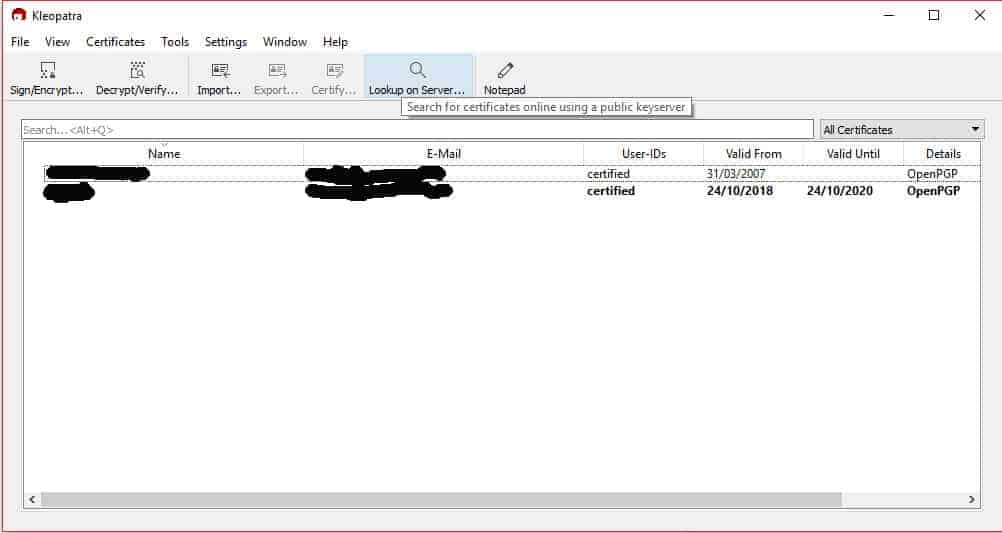
Before you can send a PGP encrypted email with Outlook, you need someone to send it to. First, you have to add some contacts in Kleopatra, either by importing your intended recipient’s key, or by looking it up on the key server.
If you already have the public key, click on the Import button in the top left. Locate the recipient’s public key in your files and then click Open.
To search for someone’s public key, click on the Lookup on Server button instead:
Type in their name or email address, then press Enter:
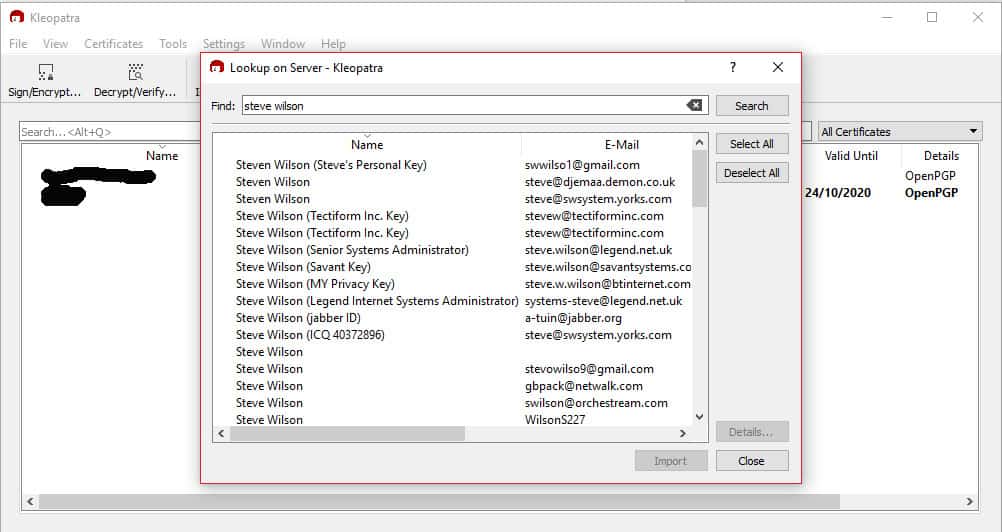
If you find who you are looking for, click on their name and then select the Import button at the bottom. A popup will appear, asking you to certify the contact:

This is to make sure that the PGP key actually belongs to the person who says it does. Click Certify.
In the next window, click the checkbox of the person you want to certify, then click Certify:

You will need to enter your password if you’ve set one. The recipient will then be added to Kleopatra (in the above example, Paul certified himself).
Sending a PGP encrypted email with Outlook
Now that you have someone to talk to, it’s time to send your first encrypted message. One of the most convenient things about the Gpg4win package is that it automatically adds the GpgOL plugin to Outlook, saving you from having to configure it yourself.
The first step after installing Gpg4win will be to restart your computer so that the plugin is available in Outlook. When your computer is back online, fire up Outlook, then click on New Email to compose a message. In the composition screen, you will see a new tab on the top right that says GpgOL. Click on it to open up the encryption options:

Enter the email address of your intended recipient, then type out your message. Once you have finished, click the button that says Encrypt in the top menu. Then you will see the following popup:
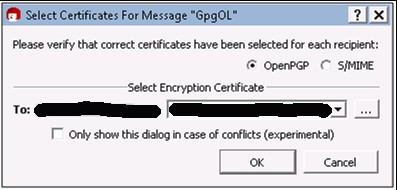
In the drop down menu, select the certificate for your intended recipient, which you added to Kleopatra in an earlier step. Make sure that the email address and the certificate are for the same person, otherwise, the recipient won’t be able to decrypt the message. Click Okay to encrypt your message:
Hit Send and your first PGP encrypted email will be on its way to the recipient.
How to decrypt your PGP emails in Outlook
Now that you know how to send an encrypted email, there is just one more step to being able to effectively communicate with PGP. Luckily, decrypting any encrypted messages you receive is relatively simple. If a PGP encrypted email arrives in your Outlook inbox, click on it to open it.
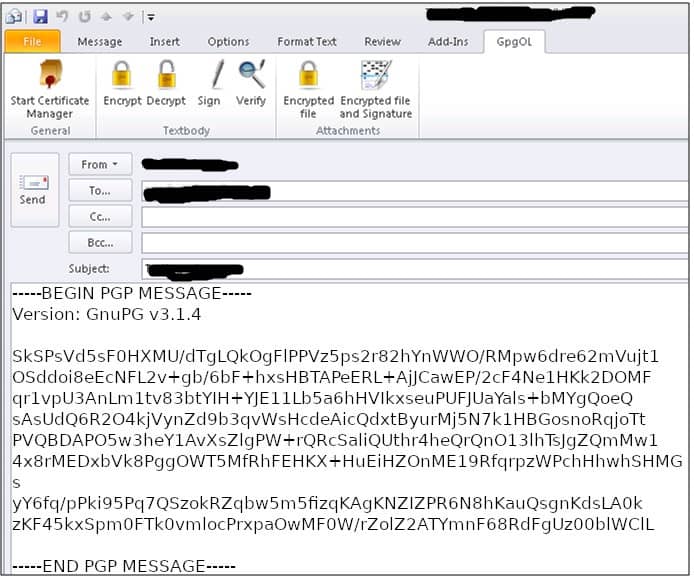
You will see the jumble of encrypted text. Click on the GpgOL tab that we used earlier when we were encrypting our message:

Hit the Decrypt button, then enter the password that you set up earlier. Press Okay and the message will decrypt back to its original form. Read through the message, then reply using the steps that we mentioned above in Sending a PGP encrypted message with Outlook.
Combining Outlook and PGP can take a while to configure, but once you have it set up, it’s easy to keep your communication secure whenever you need to.
Can I use PGP encryption with Outlook Web Access?
The cloud-based version of Outlook, Outlook Web Access, does not support the PGP Messaging Proxy. But you can use PGP Tray to manually encrypt your message:
- Open Outlook Web Access and compose your email as you normally would.
- Cick the PGP Tray icon.
- Select Current Window, then click Encrypt, Sign, or Encrypt & Sign.
- On the PGP Desktop -Key Selection Dialog screen, drag user keys to the Recipients list.
- Click OK and enter the passphrase for your key. The encrypted text will appear in the email message window.
- Send your message.
Assuming you have the public keys for each recipient, the appropriate keys are used automatically.
How can I send PGP-encrypted emails to multiple recipients in Outlook?
After you’ve composed your message, click the PGP Tray icon > Current Window > Encrypt, Sign or Encrypt & Sign. You can drag multiple users and their encryption keys into the Recipients list.
Alternatively, you can encrypt a file or message or multiple recipients in Kleopatra. Click Sign/Encrypt, then add recipients to the box next to Encrypt for others.
In both situations, PGP will encrypt the message so it can be decrypted by multiple recipients.
See also: Public key cryptography
Great write-up. I’ve been using PGP with Thunderbird for years. But many of my clients still insist on using Outlook and have no clue just how cumbersome, slow and inefficient it is when compared to Thunderbird. I find it a pain to have to manually deal with importing new public keys to the keyring manually with Outlook – and I can’t do it from within the Outlook program itself either! What a real PITA. I’ll continue using Thunderbird as well as recommending it to my clients over Outlook.
But now at least I have something to refer my clients to if they continue to insist on using Outlook and going around their elbow to get to their thumb every time they have to deal with e-mail security.
Good to hear Carl. Unfortunately, people are very resistant to change, even if it will save us a lot of effort in the long run.
Can I avoid to write the password every time to decrypt an email?
I don’t think so. While it can be a hassle, keeping the emails encrypted until you enter your password is important for keeping them highly secure.
How can I download this manual
I assume you’re referring to the GPG manual? It’s part of the Gpg4win bundle, so you should get it when you download the program.