OPNsense is a powerful open-source firewall/router based on FreeBSD. It’s built for security and is orders of magnitude more secure than any off-the-shelf router. Plus, it’s extremely flexible and feature-rich. OPNsense is a fork of pfSense, so the two firewalls are very similar and share much of their functionality.
Out of the box, OPNsense includes a wide array of functionality, such as a caching/filtering proxy server, DNS-based URL filtering, and a captive portal. The latter is the focus of this post.
We’re going to go over all of the steps required to configure a captive portal in OPNsense.
What is a captive portal?
A captive portal is similar to a proxy server but for authentication and accounting. It intercepts users’ connections to a given network and prompts them to authenticate themselves for access. This typically means displaying a login page after the user has connected to WiFi/Ethernet, where users can enter credentials (username and password or vouchers) for internet access. Once authenticated, captive portal users can access the internet normally.
The captive portal login page is also often used to display terms and conditions that users must accept for network access.
As mentioned above, a captive portal can also perform accounting, meaning it is aware of all the connections it has allowed or blocked and can manage those connections. It can do things like disconnect users after a set amount of time or after a bandwidth threshold has been reached, etc.
Captive portals provide an extra layer of security, visibility and, control over network usage. They are mainly used in hotels, coffee shops, and airports, but nothing is stopping you from setting it up on your guest network for extra security and control.
Let’s start configuring our own captive portal in OPNsense.
Creating the captive portal interface (optional)
You can configure the captive portal to listen on any interface. However, the most common use case for captive portals is for internet access in hotels and similar settings. So, it makes sense to create a dedicated interface for guests while reserving the LAN for staff. This step is optional, and the captive portal will work just fine on your LAN, but it’s nonetheless recommended. If you only have a WAN and a LAN on your system, you can simply set the captive portal to listen on your LAN.
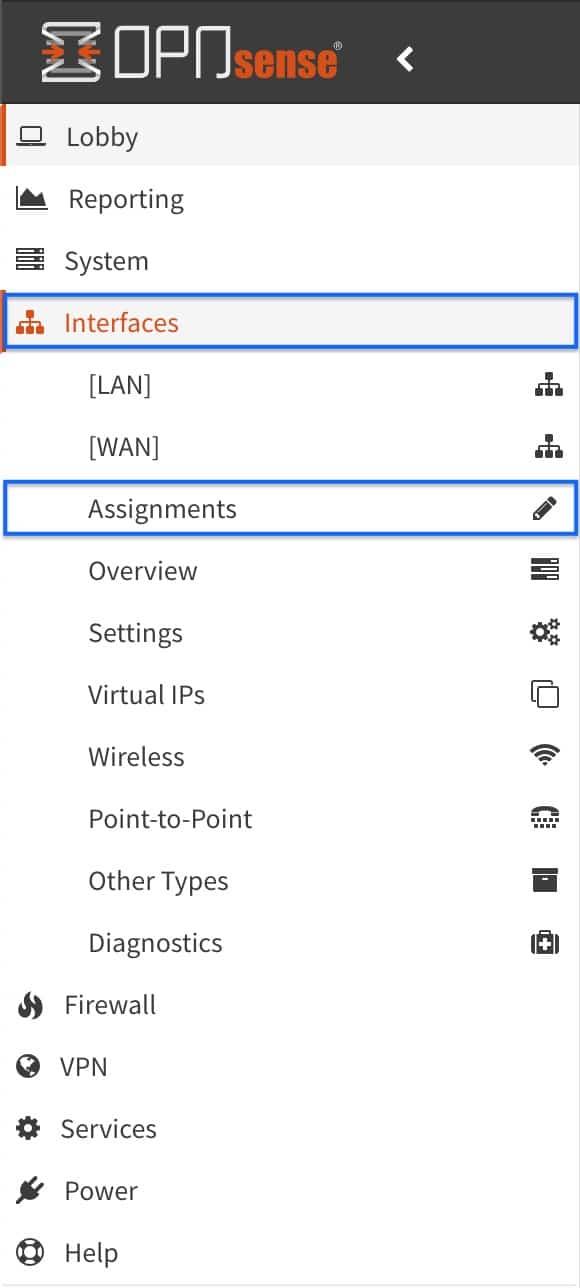
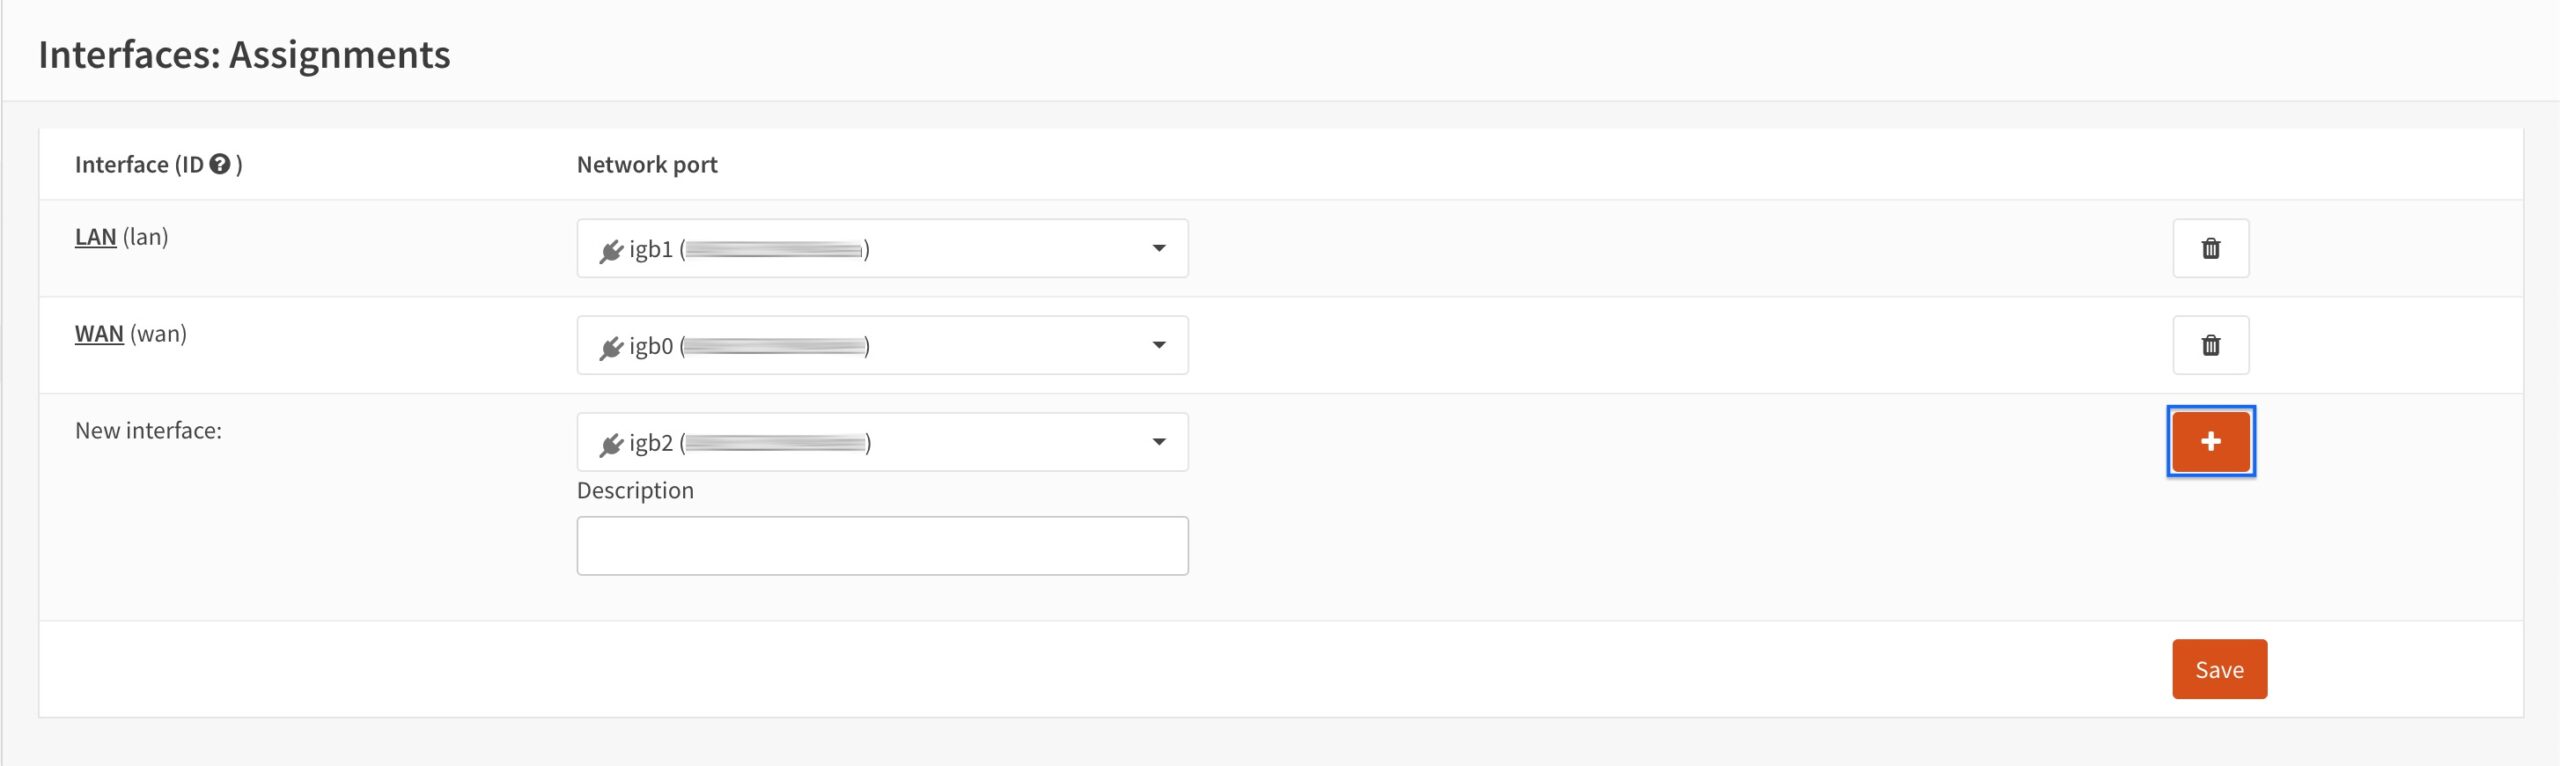
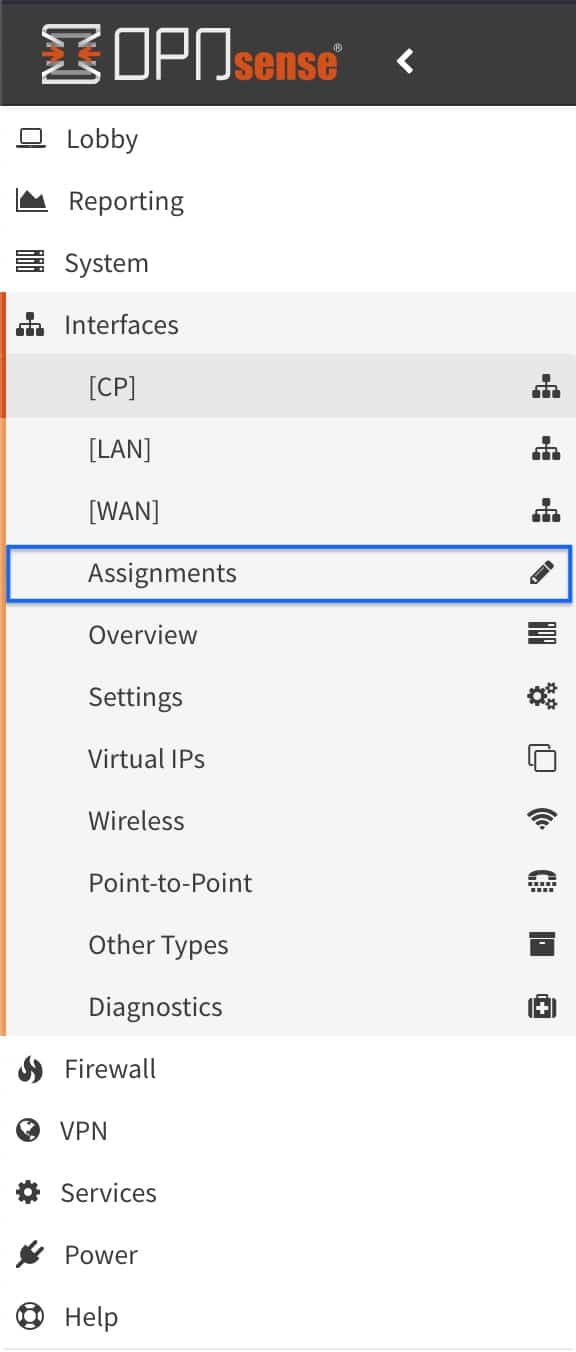
- From the side menus, select Interfaces > Assignments. The Interface Assignments page is displayed.
- Click the + sign to the right of New Interface. OPT1 is added to the list of interfaces.
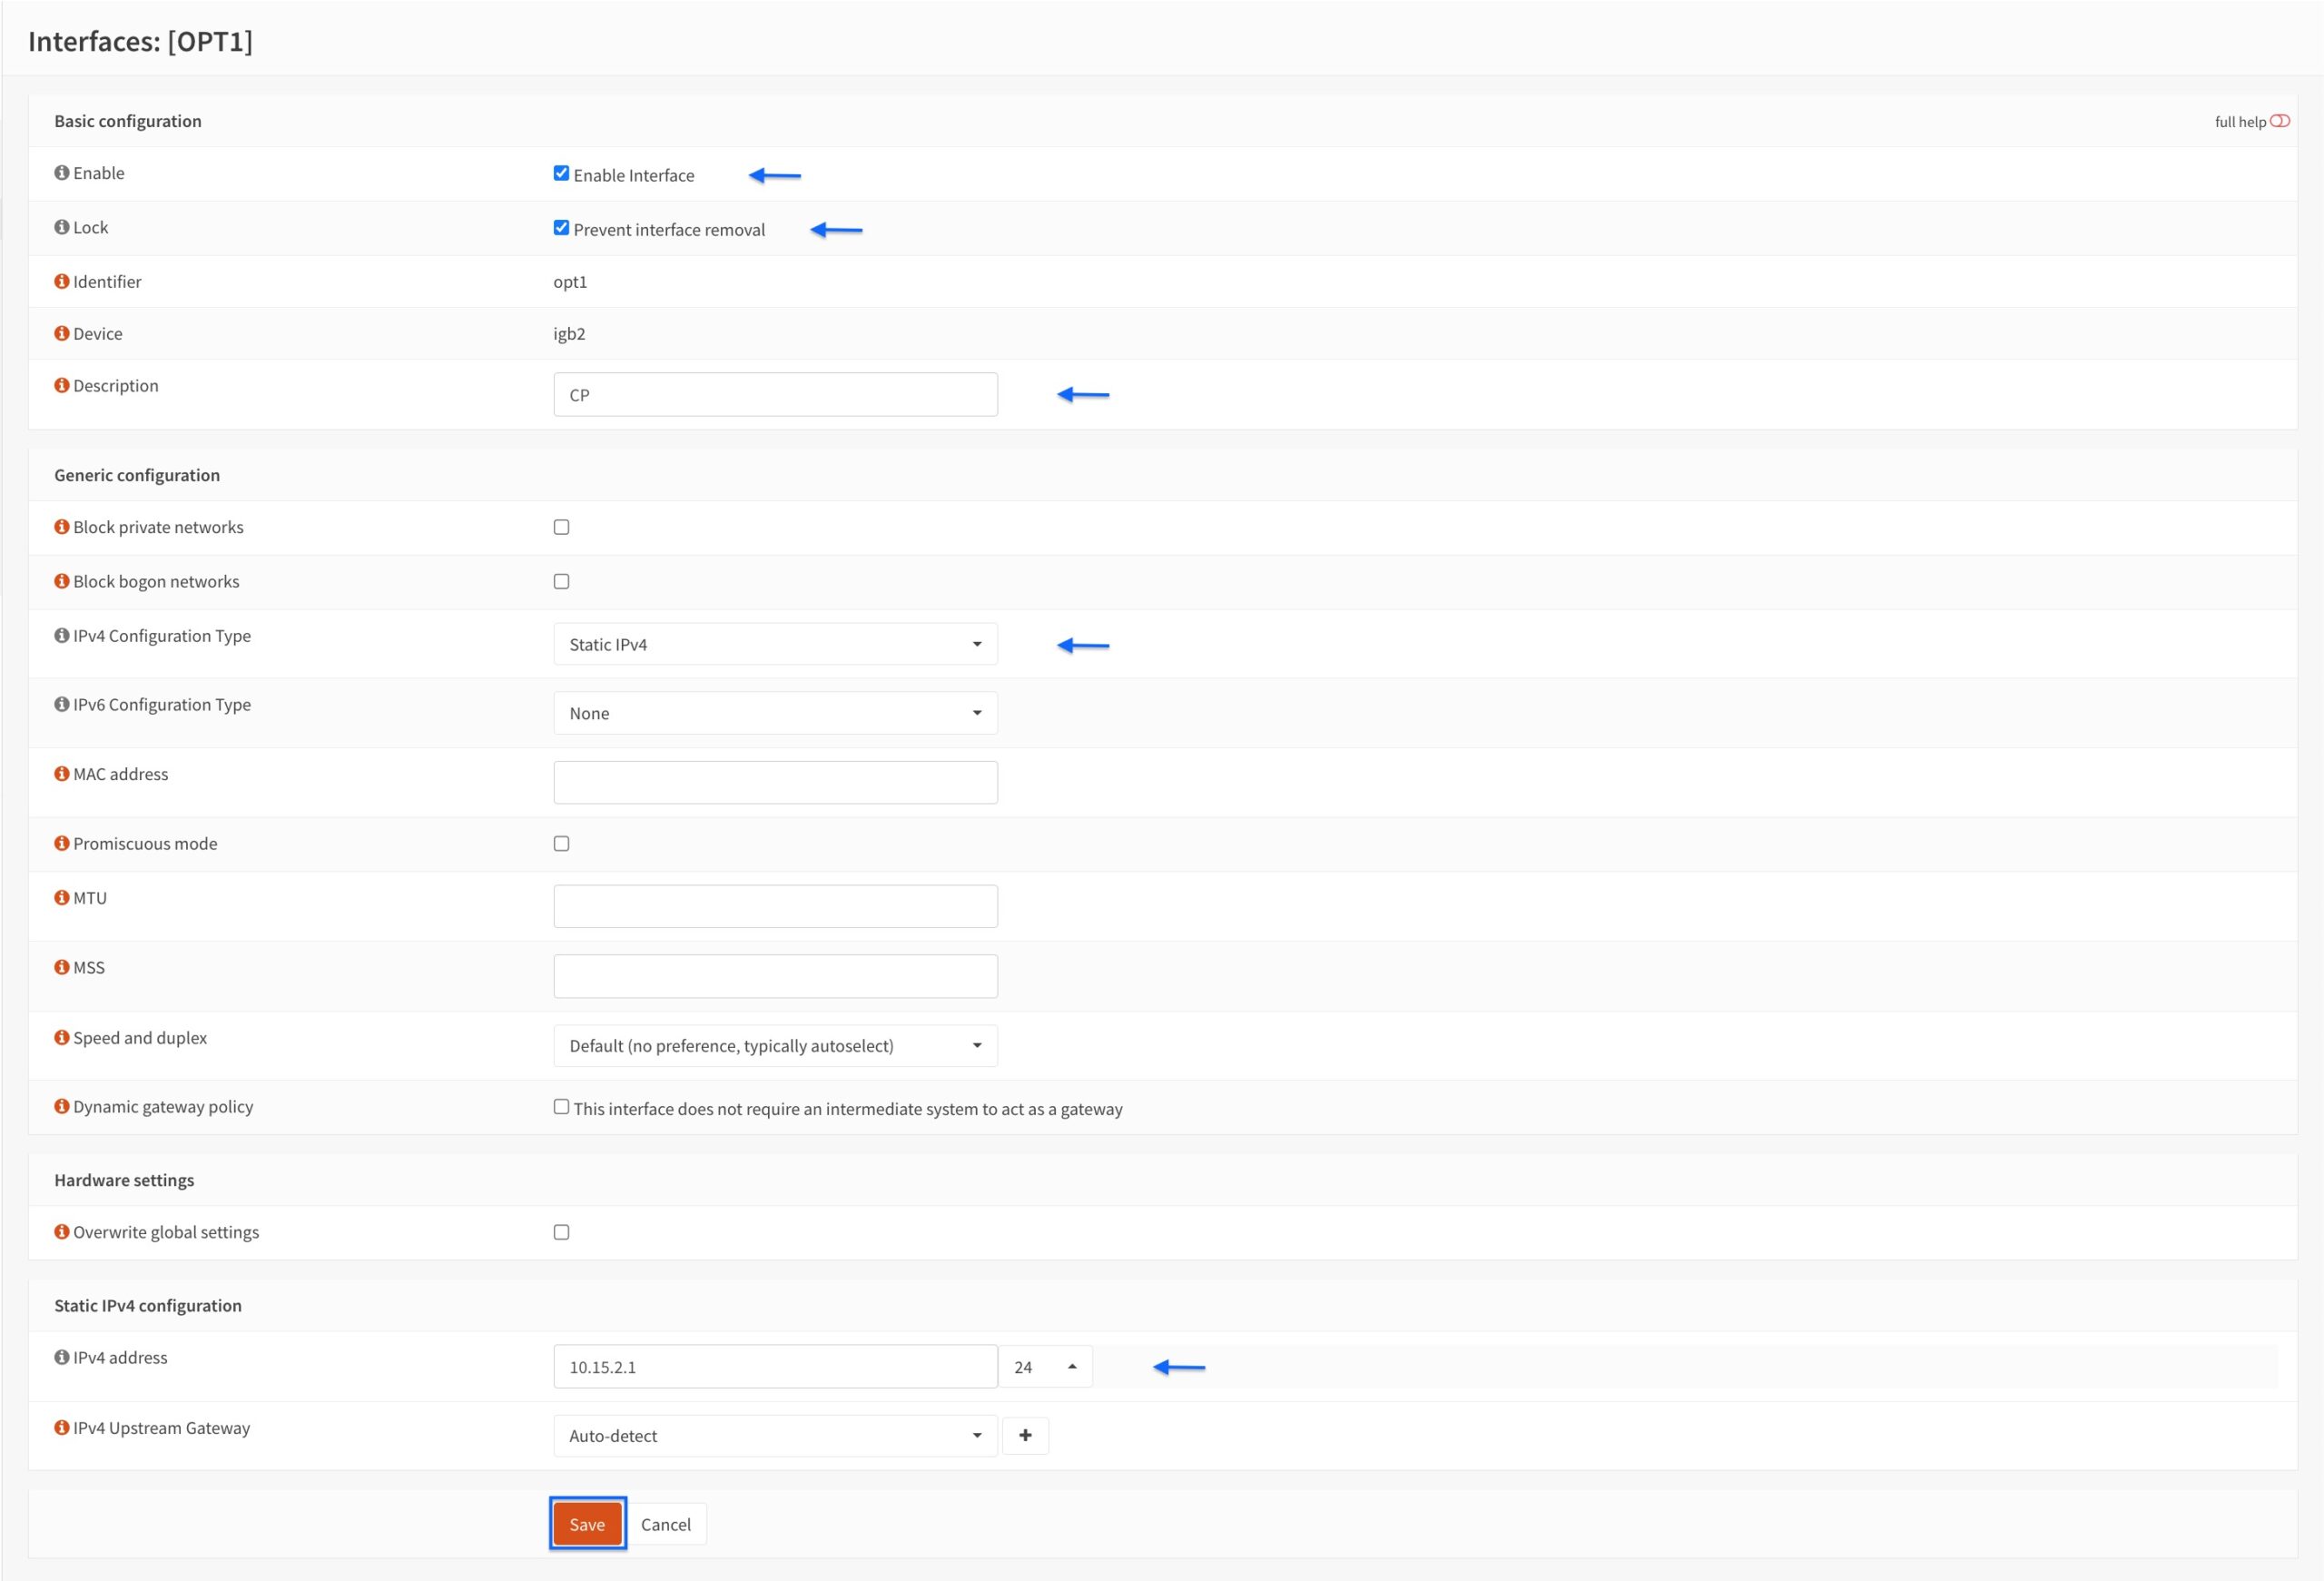
- Click OPT1 to configure the interface. The Interface Configuration page is displayed.

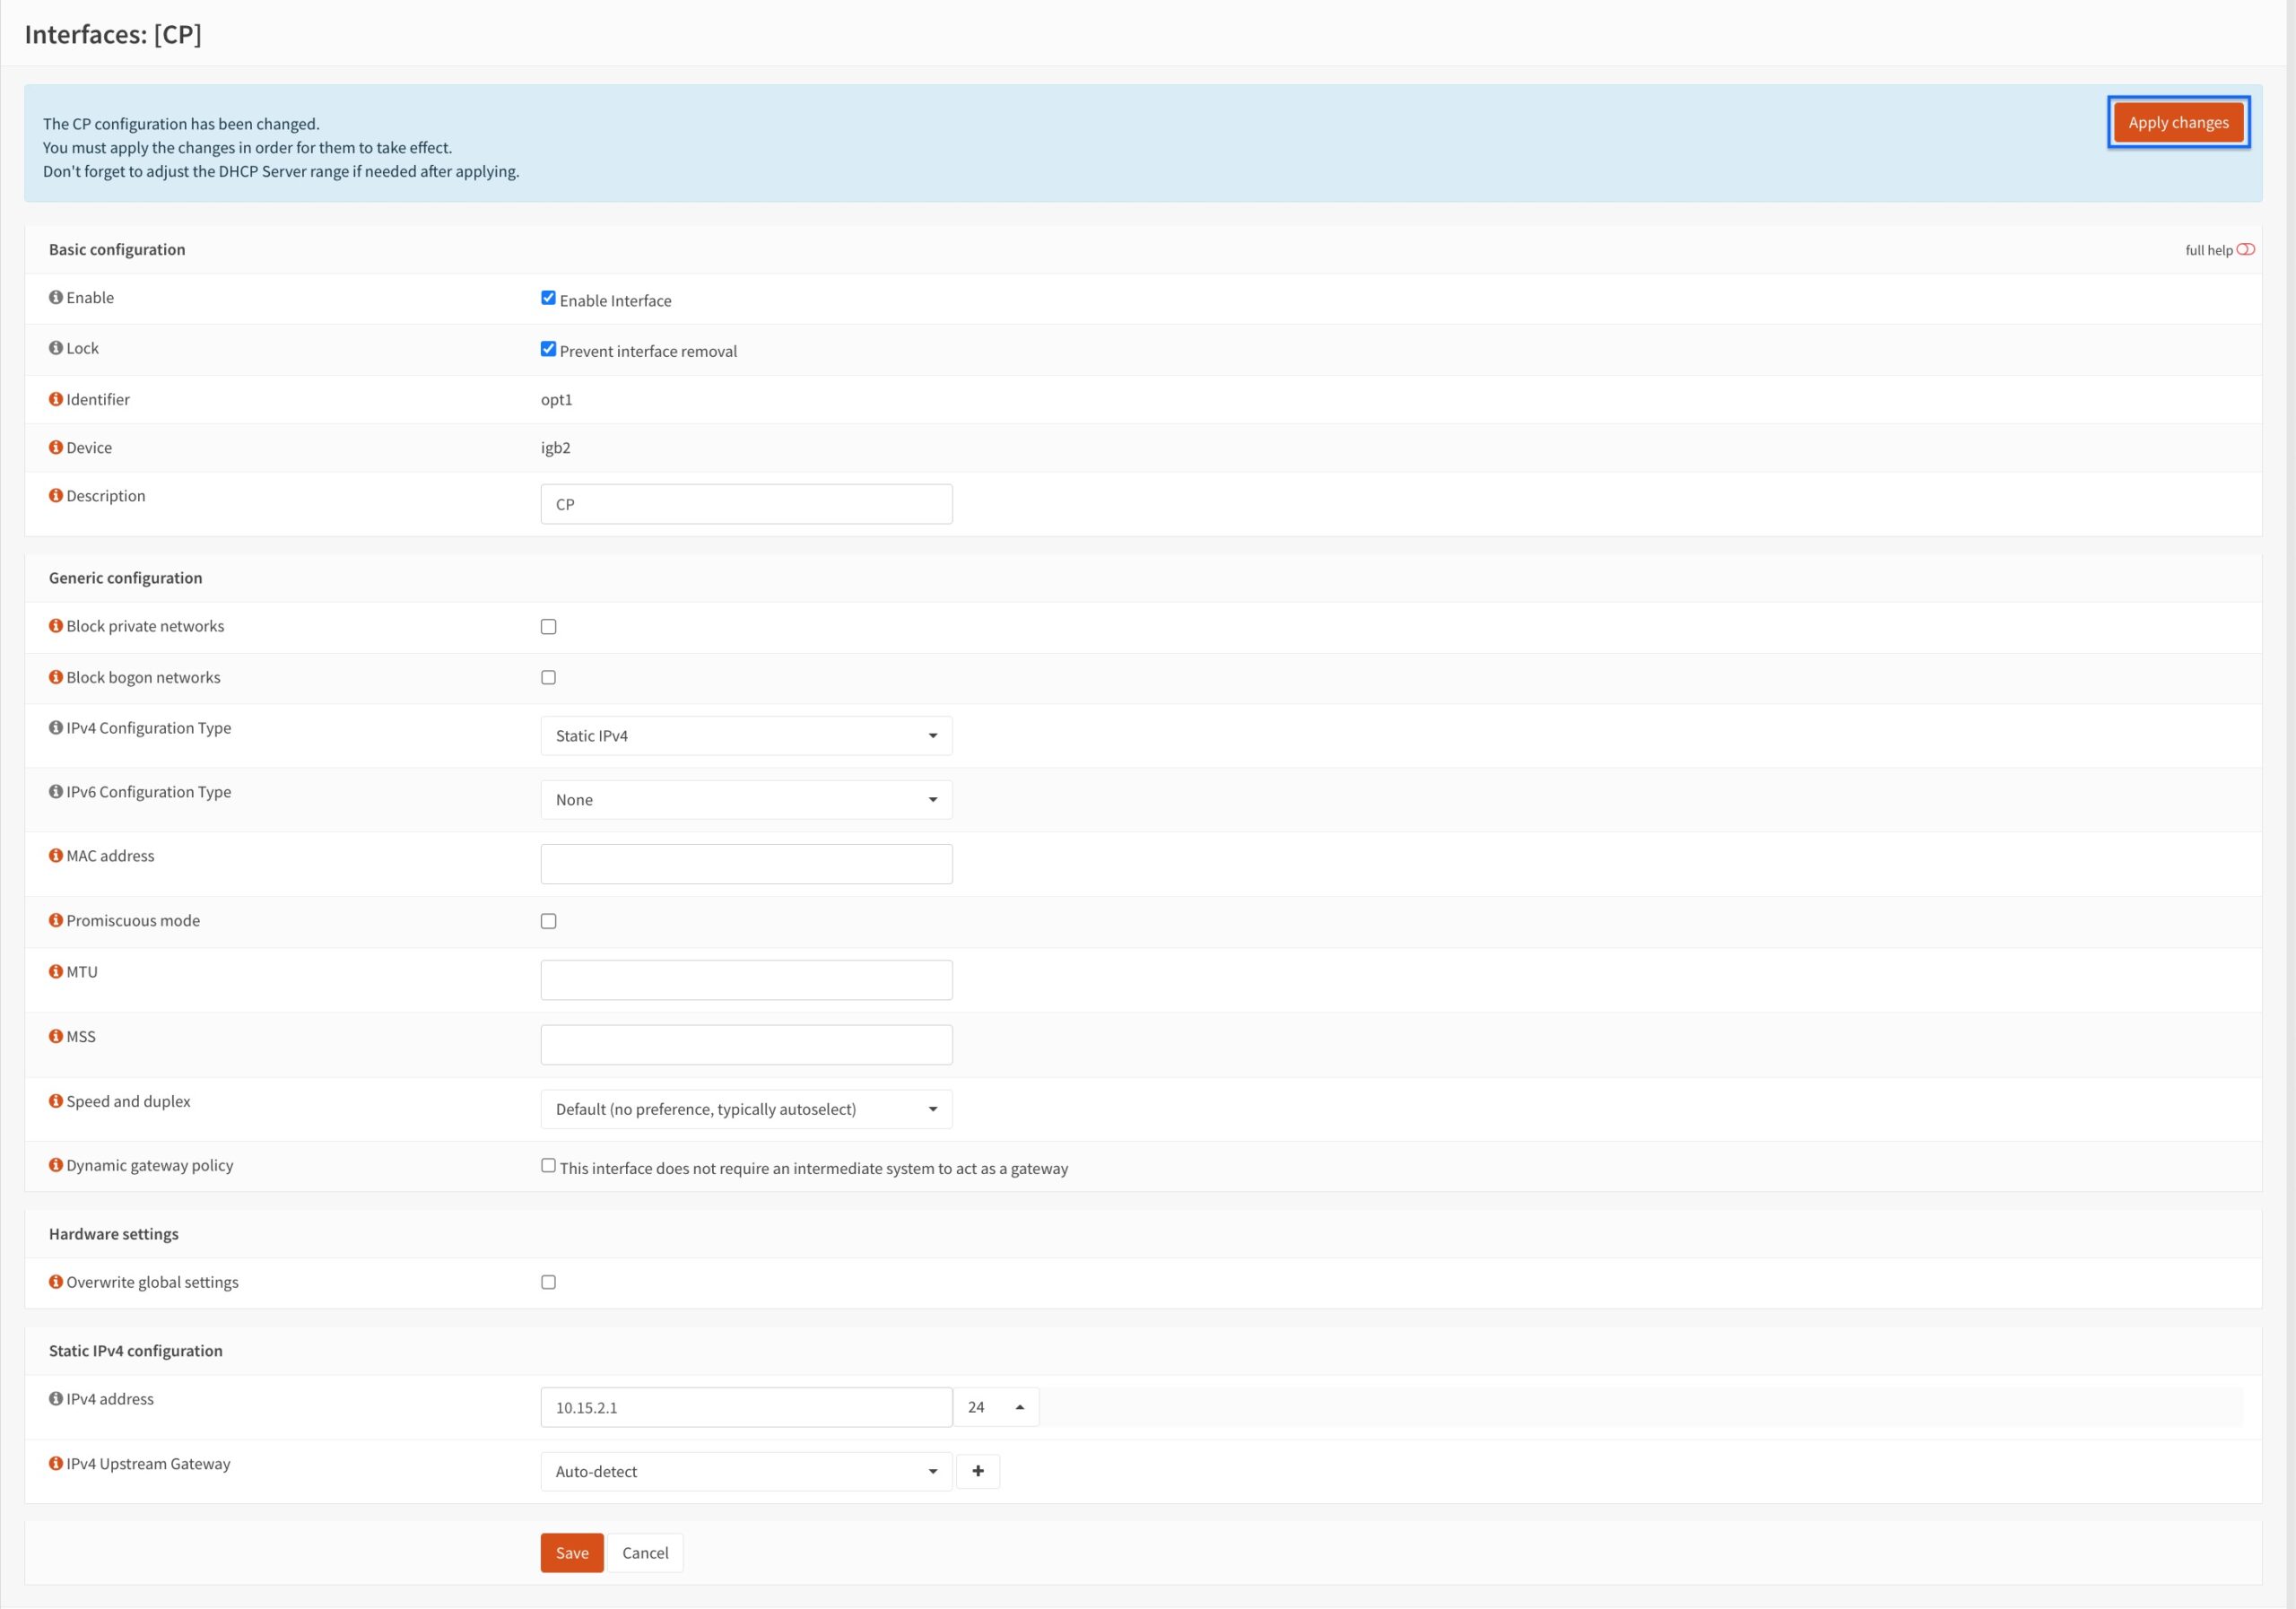
- Tick Enable interface.
- Tick Prevent interface removal (optional).
- Select Static IPv4 from the IPv4 Configuration Type drop-down menu.
- Enter an IP address from an unused subnet and give it a /24 network mask in the IPv4 address field. In my example, I’m using 10.15.2.1.
- Click Save.
- Our CP interface has been created. Click Apply Changes.
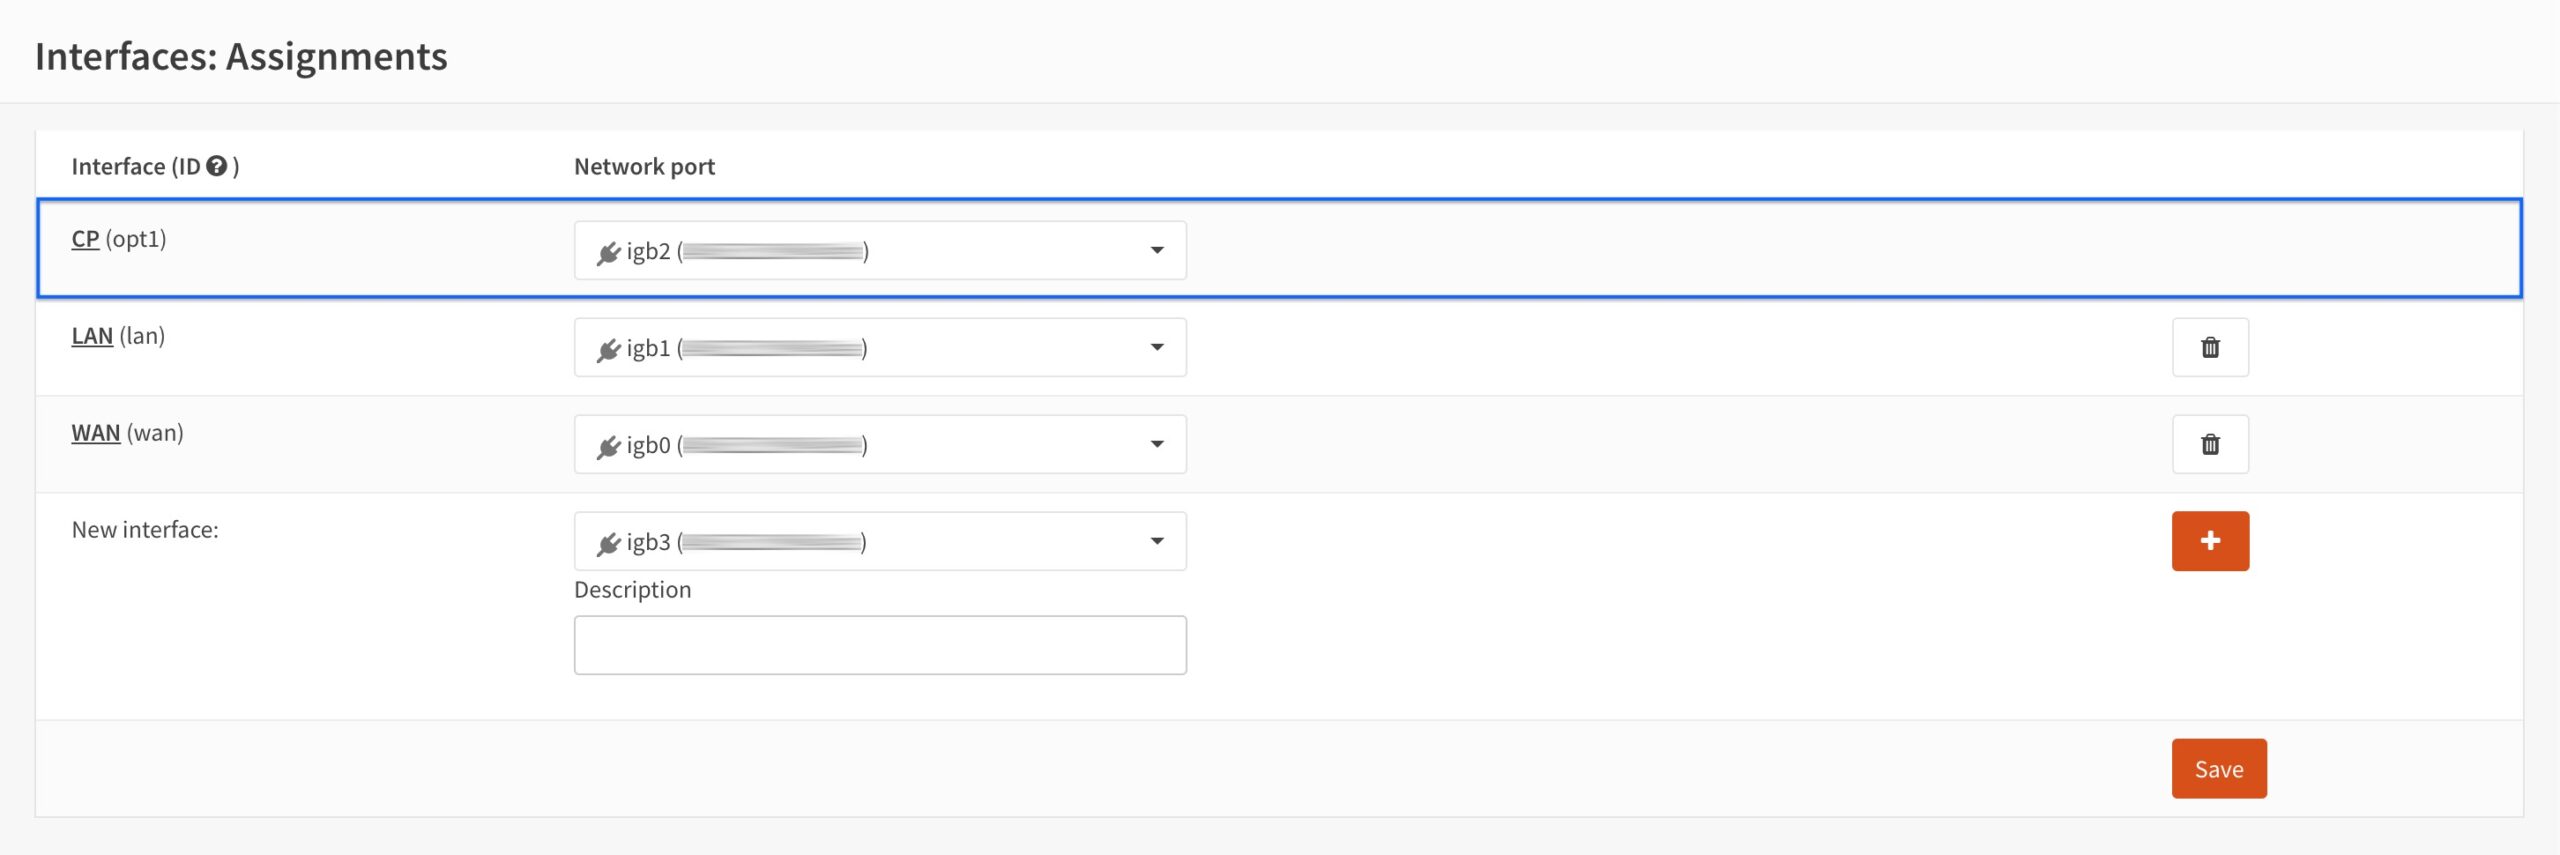
- Go back to the Assignments page.
- We can see that our interface is set up and active on our system.
Creating a captive portal user (optional)
For this tutorial, we will be creating a dedicated captive portal user. This is not required, per se. Contrary to pfSense, where you need to create dedicated captive portal users, in OPNsense, the captive portal applies to any user on the interface it listens on.
However, it can still make sense to create dedicated captive portal users. Having dedicated credentials that you hand out for captive portal access can make things easier to manage from a network administrator’s perspective and provides better control over captive portal access.
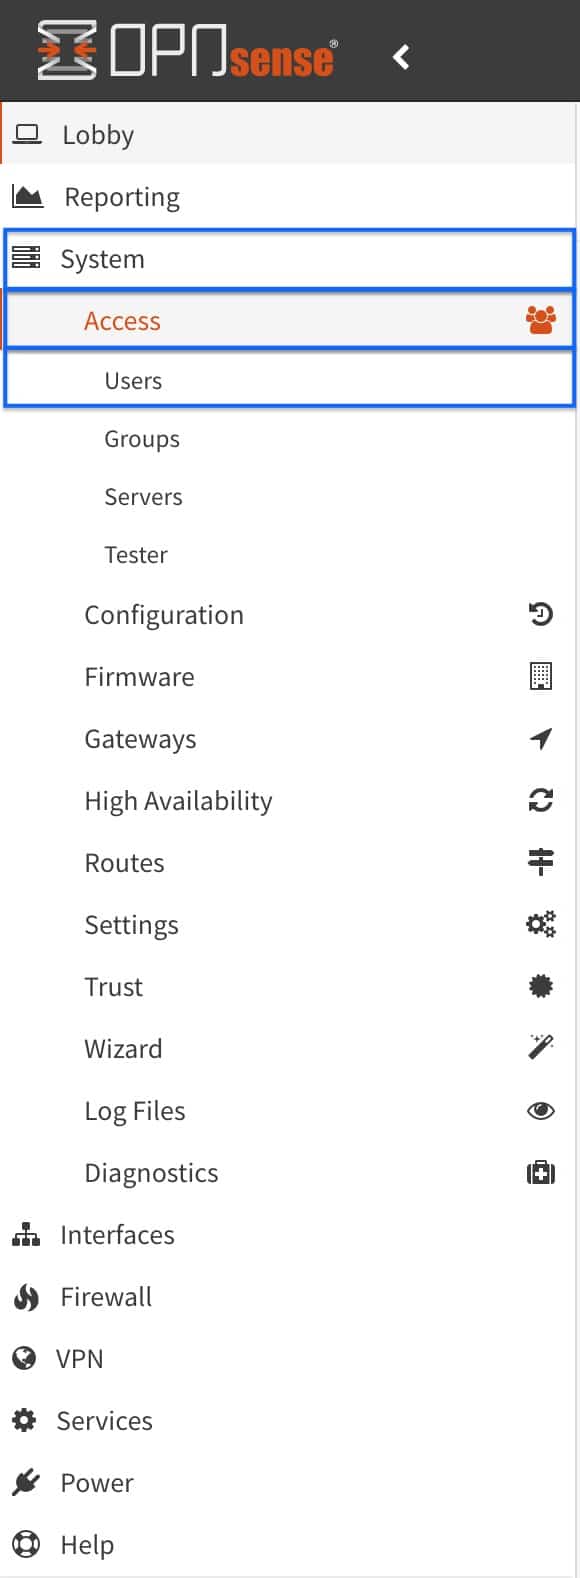
- From the side menus, select System > Access > Users. The Users page is displayed.
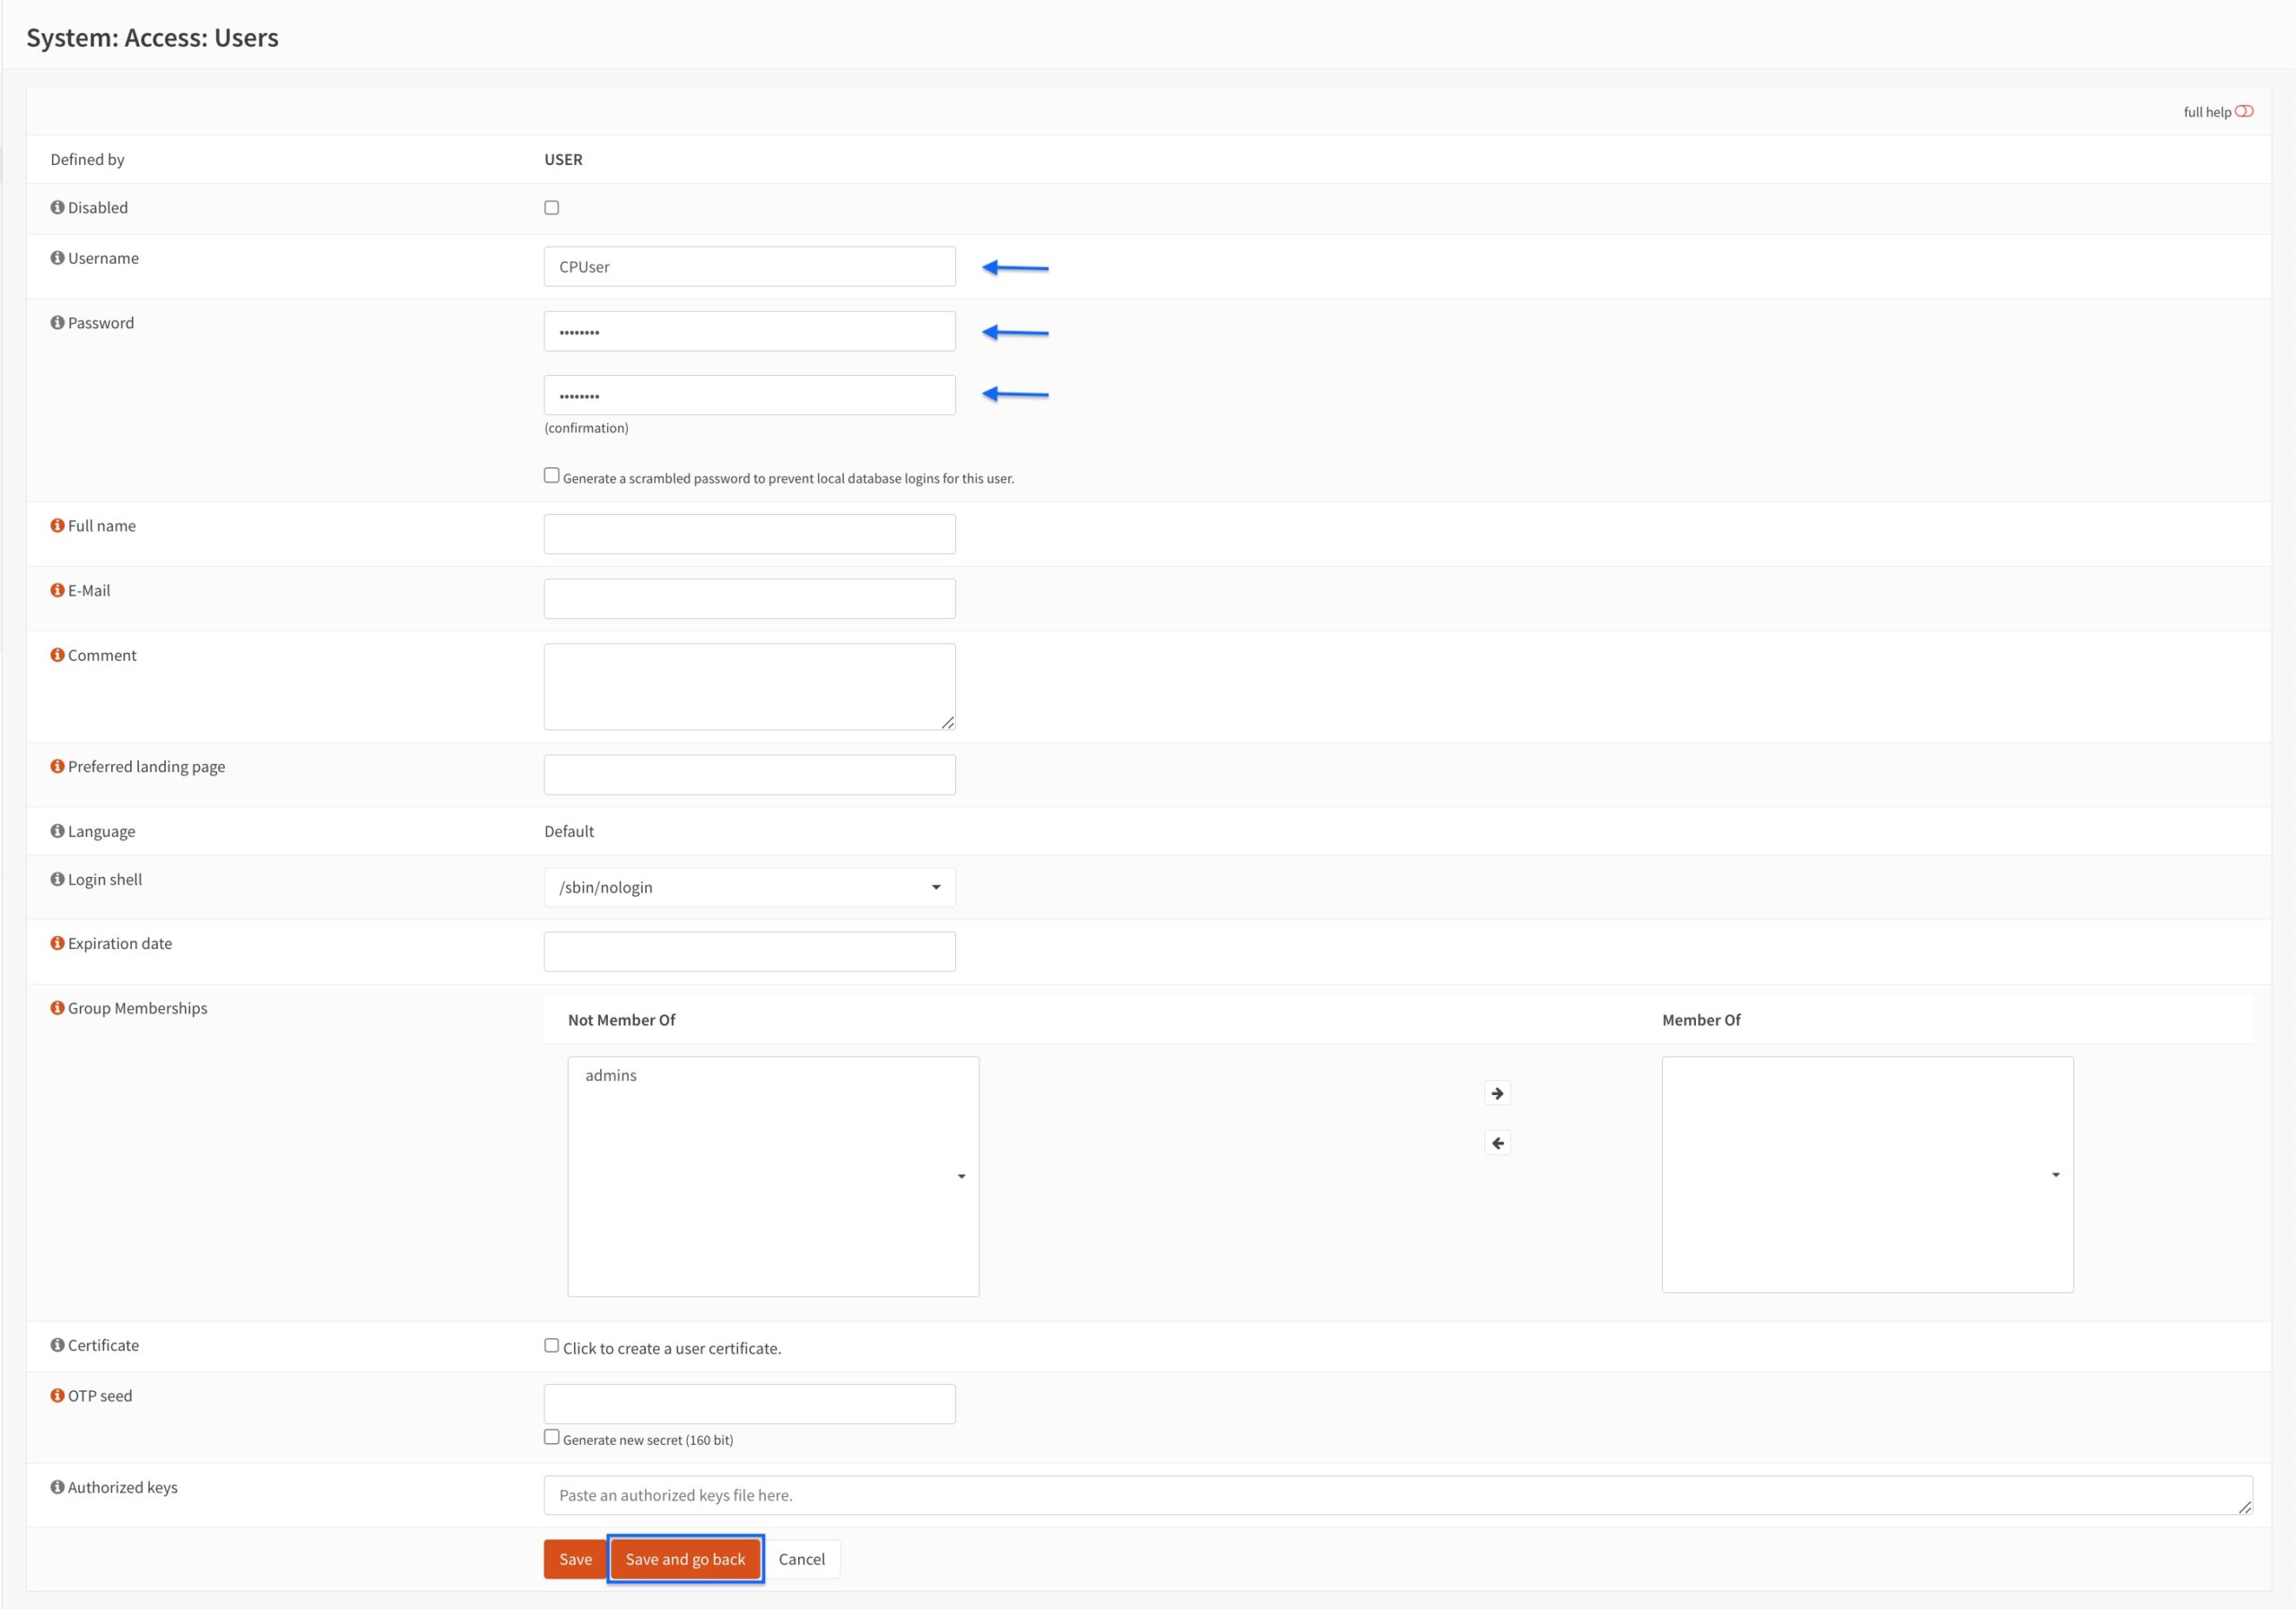
- Click the + sign to create a new user. The User Configuration page is displayed.

- Enter a username in the Username field.
- Enter and confirm a password in the Password fields.
- Click Save and go back.
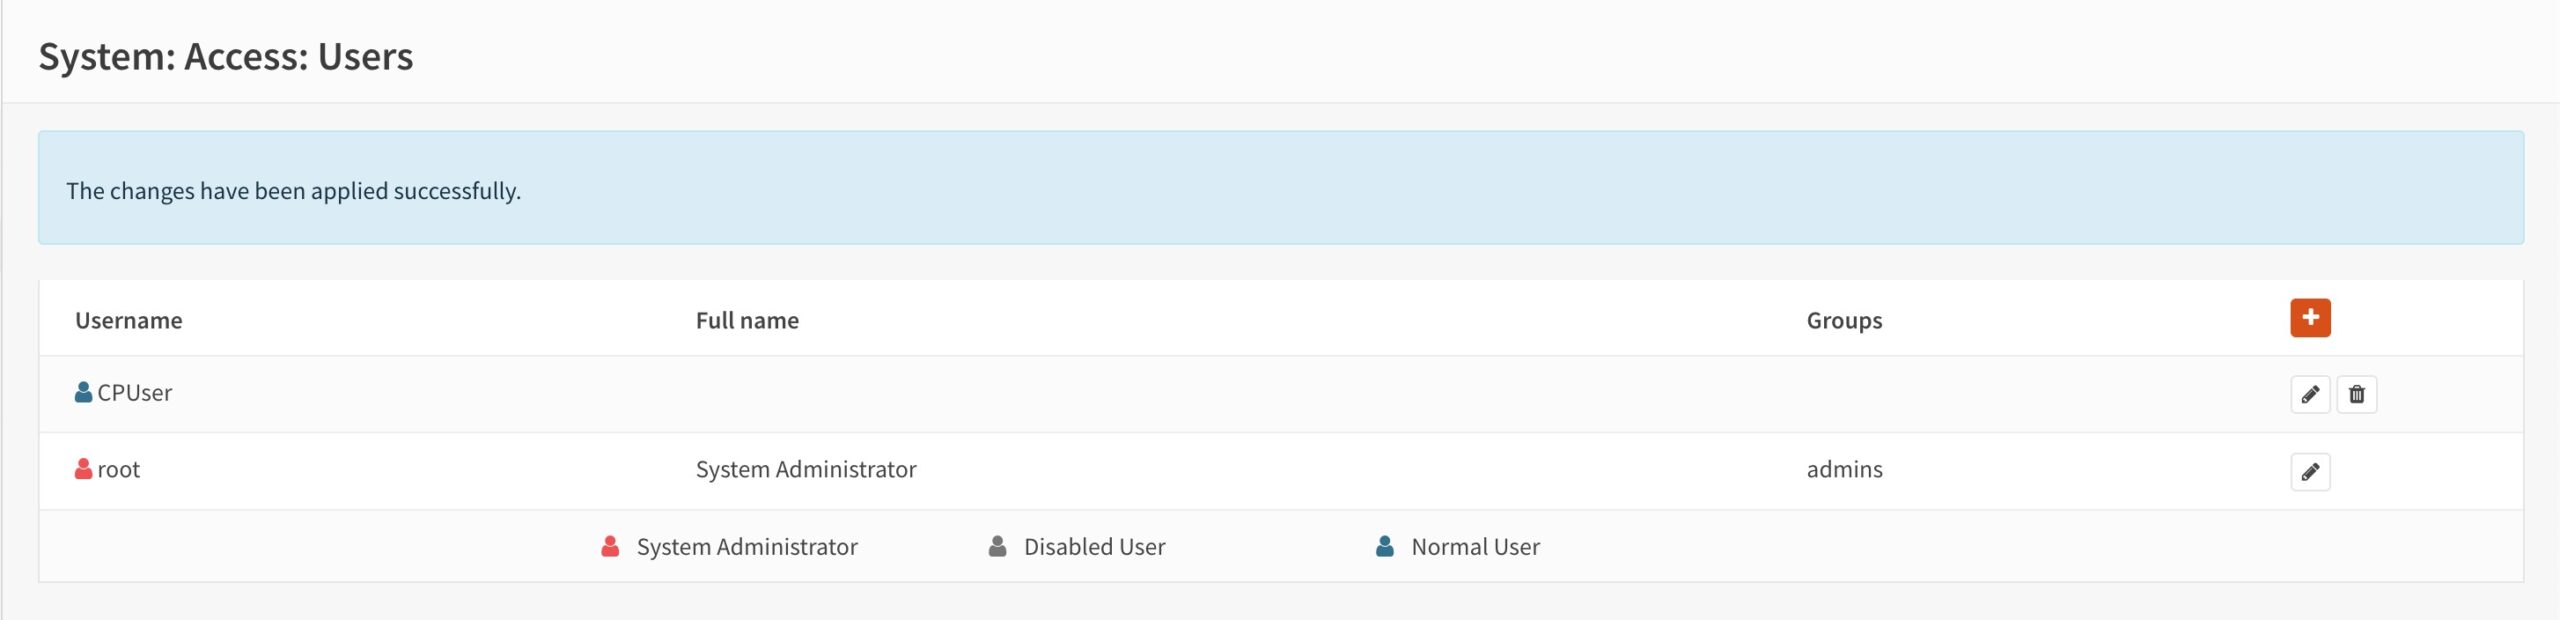
- You’re taken back to the Users page and we can see our CP user is displayed.
Setting up the captive portal
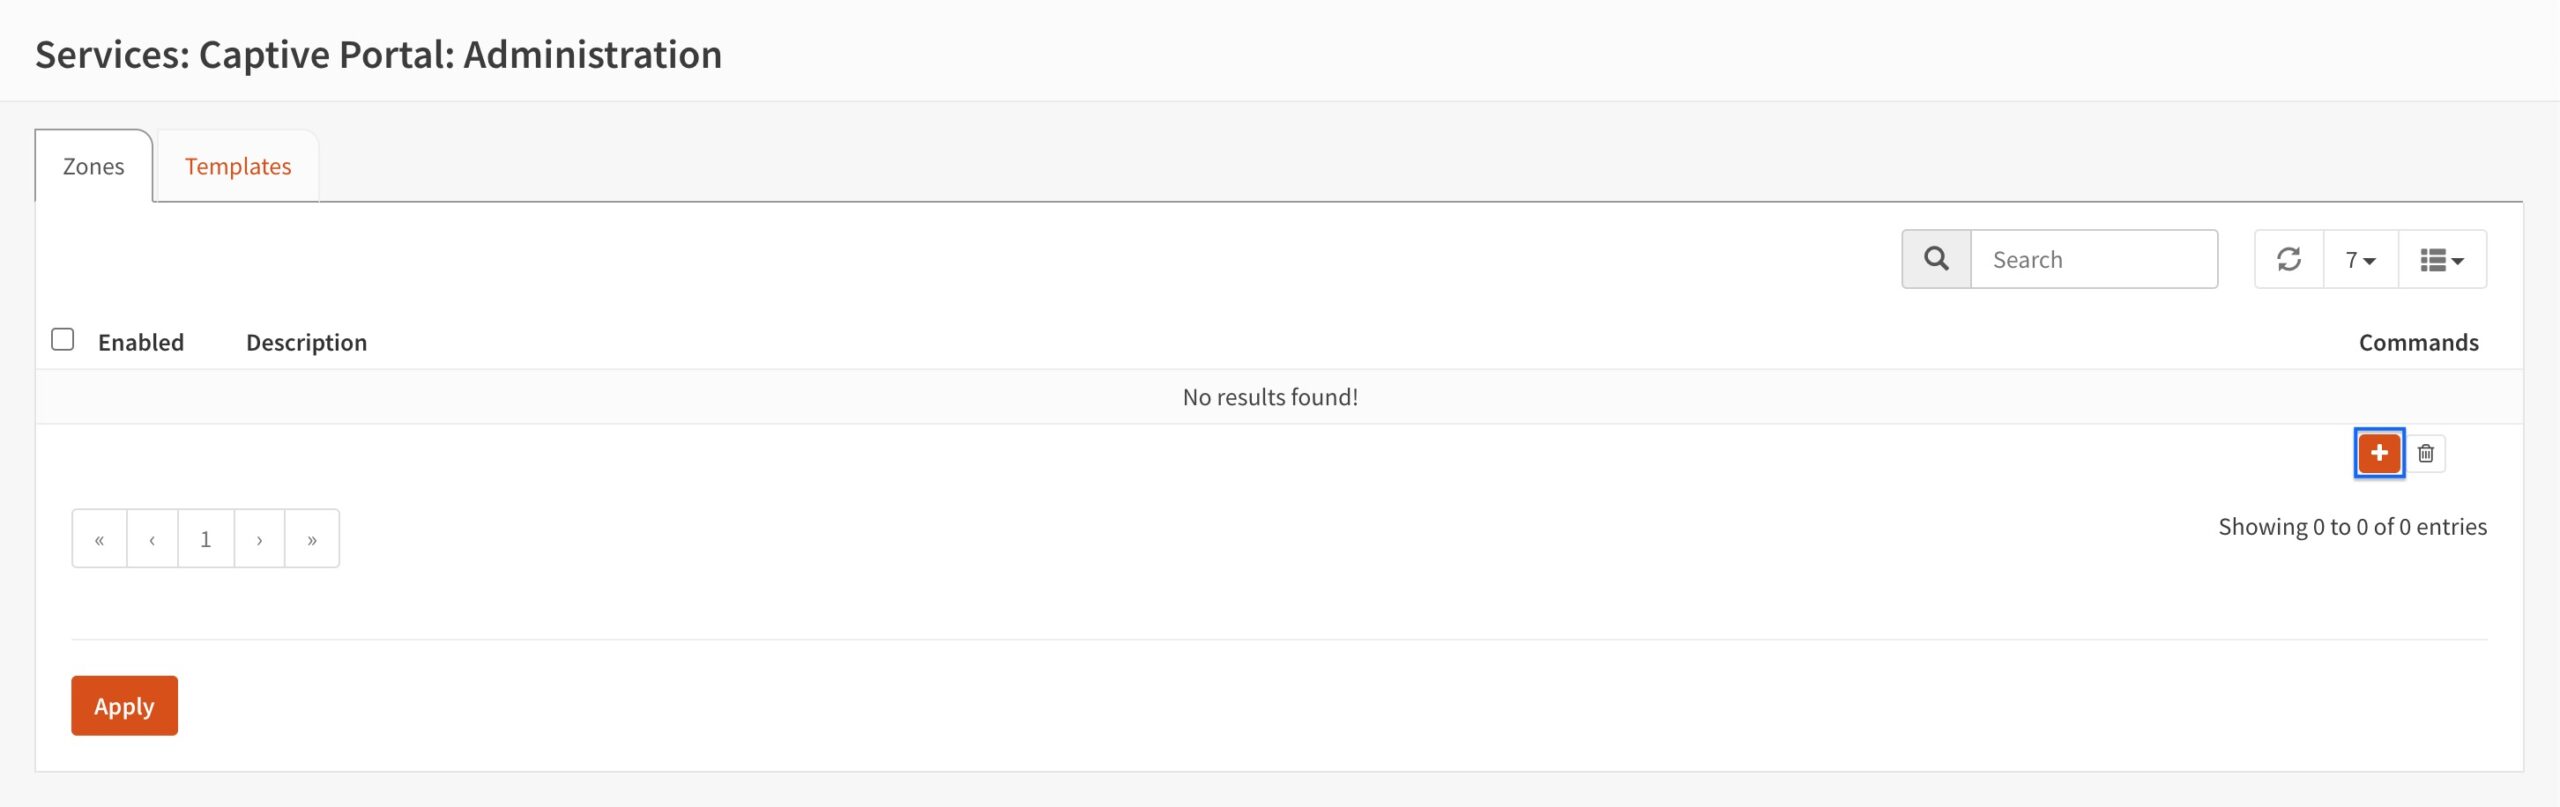
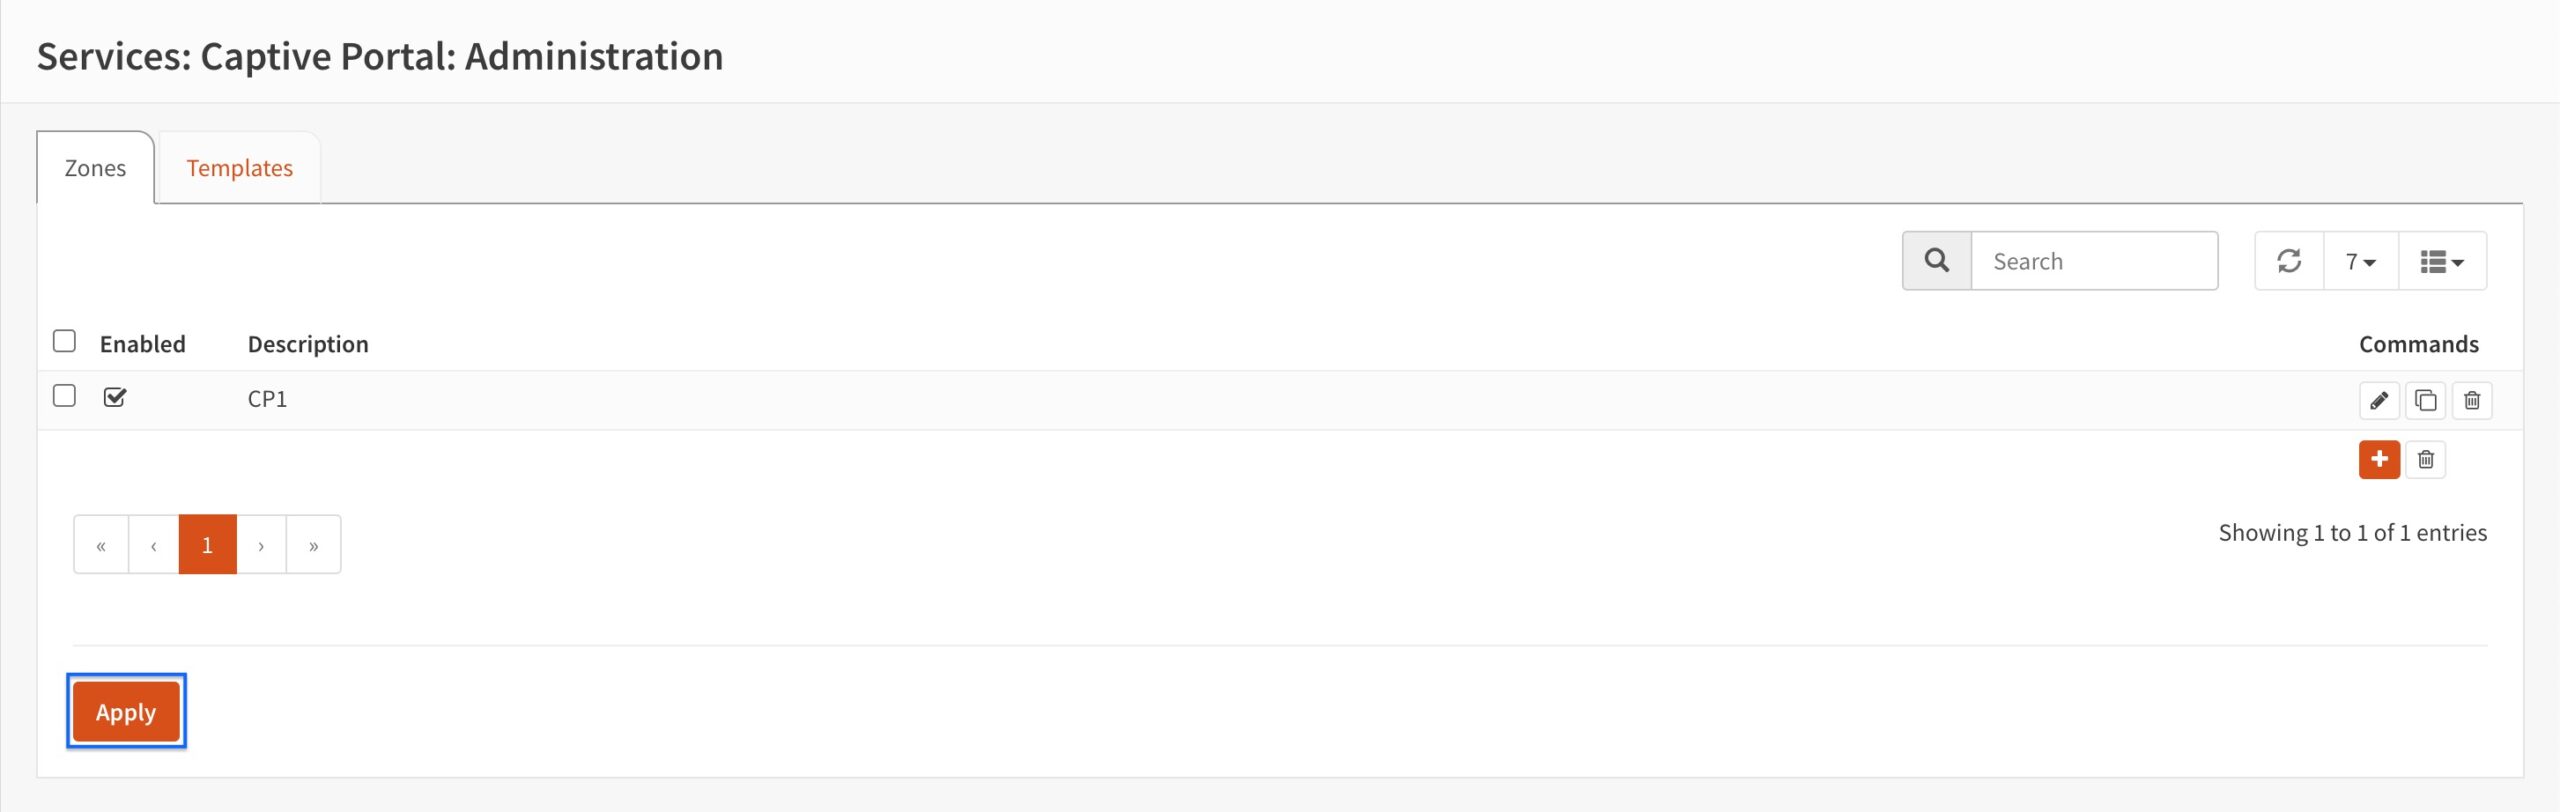
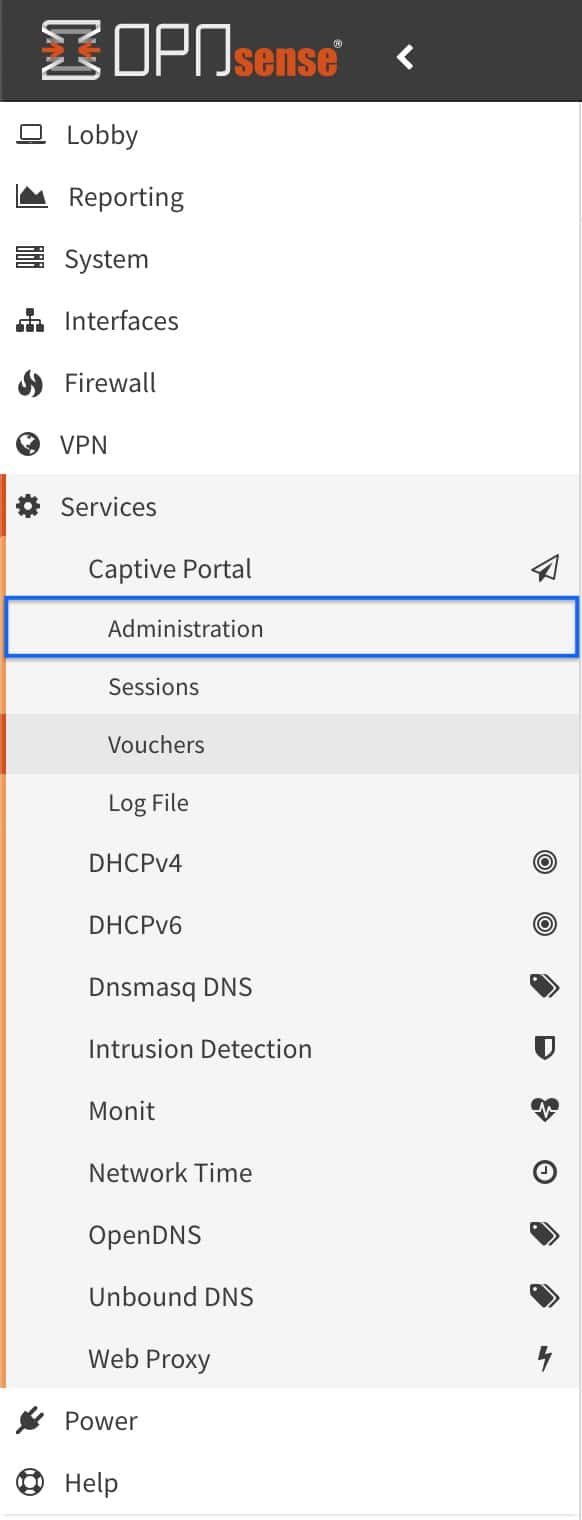
- From the side menus, select Services > Captive Portal > Administration. The Captive Portal page is displayed.

- Click the + sign to add a new Captive Portal zone. The Captive Portal configuration page is displayed.
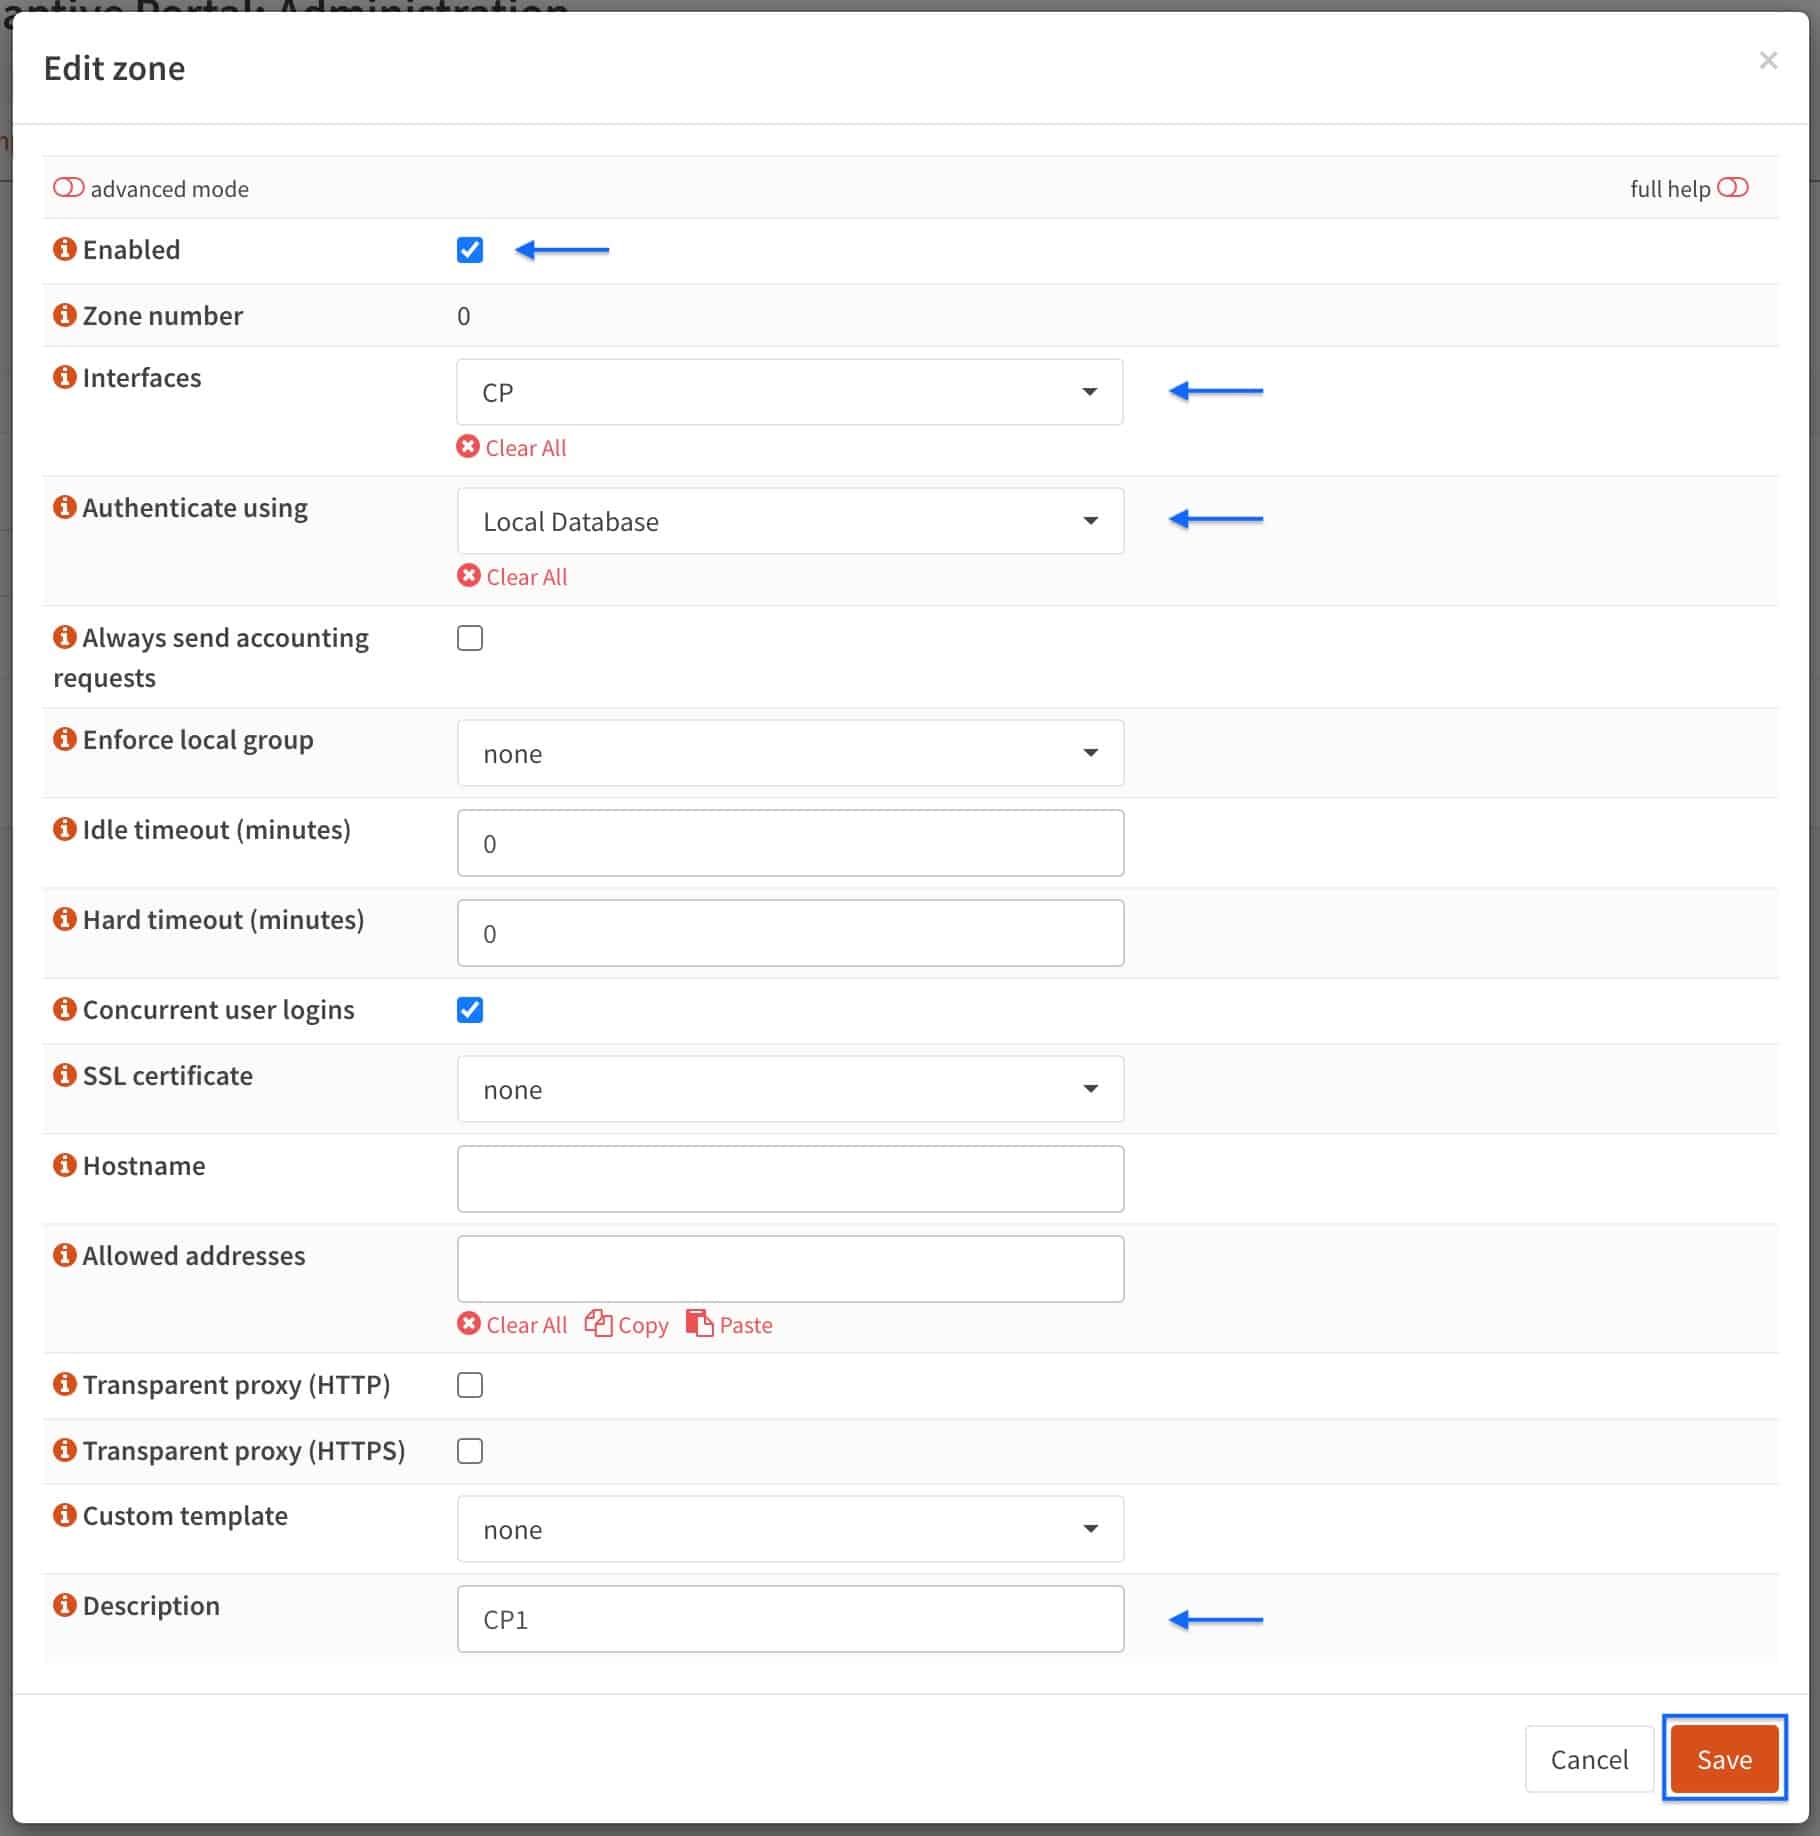
- Tick the Enabled box.
- Select the CP interface from the Interfaces drop-down menu. If your system only has a WAN and a LAN, select LAN here.
- Select Local Database from the Authenticate using drop-down menu.
- Enter a name for your Captive Portal zone in the Description field.
- Click Save.
- You’re taken back to the main Captive Portal page. Click Apply.
Testing the captive portal
Our captive portal is now configured and ready to test.
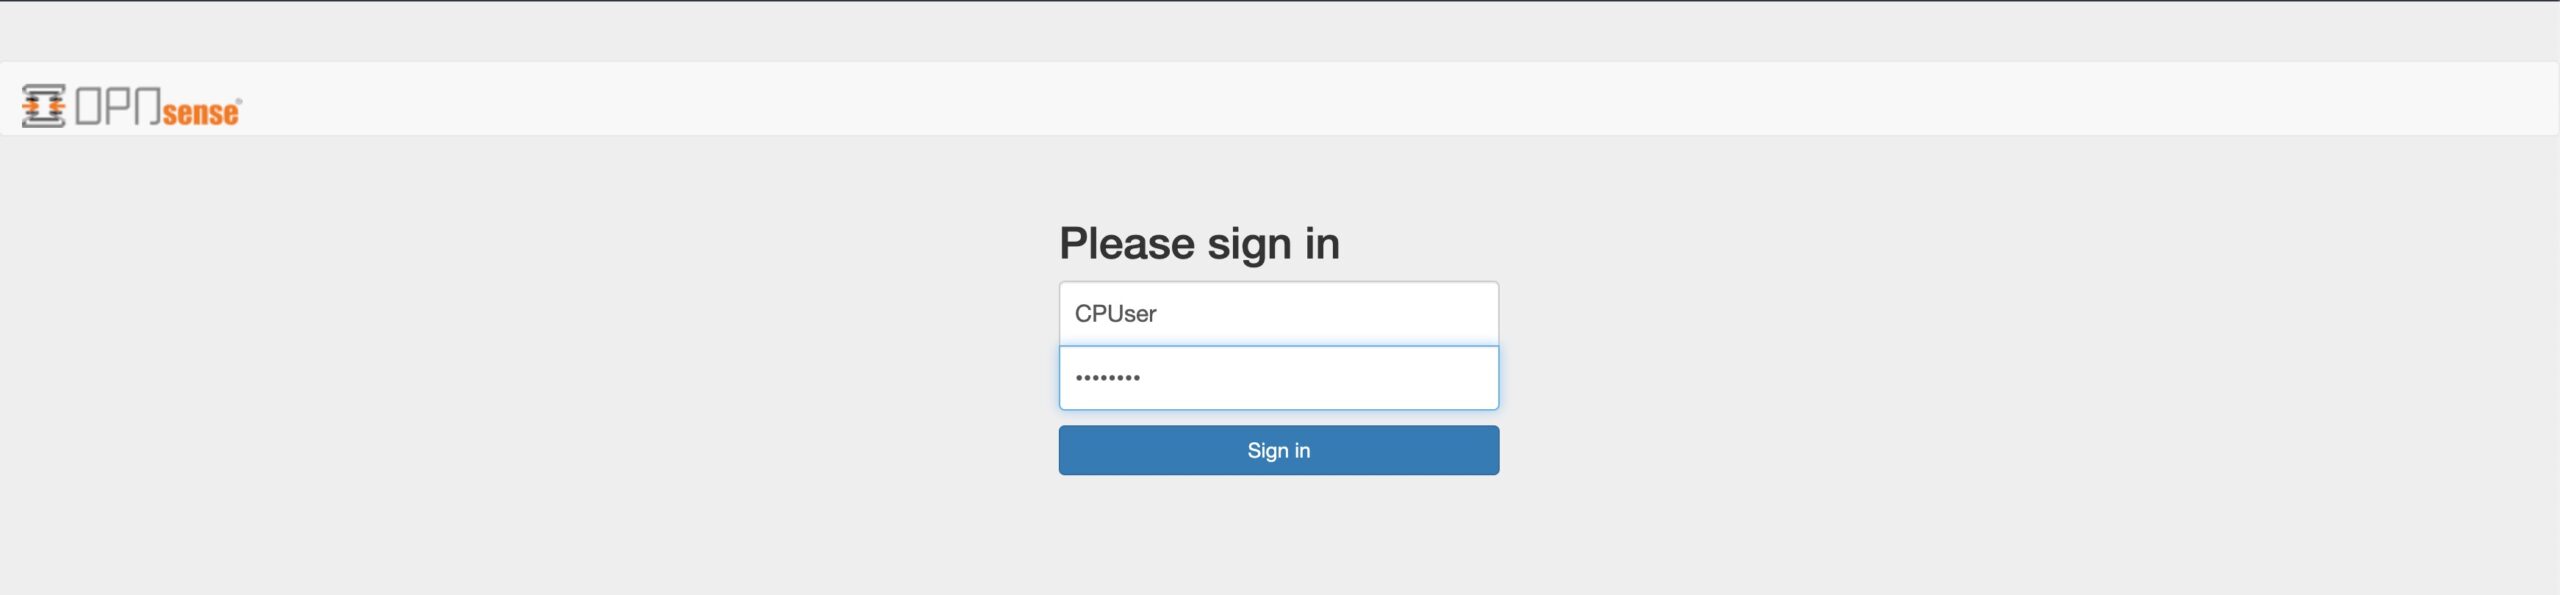
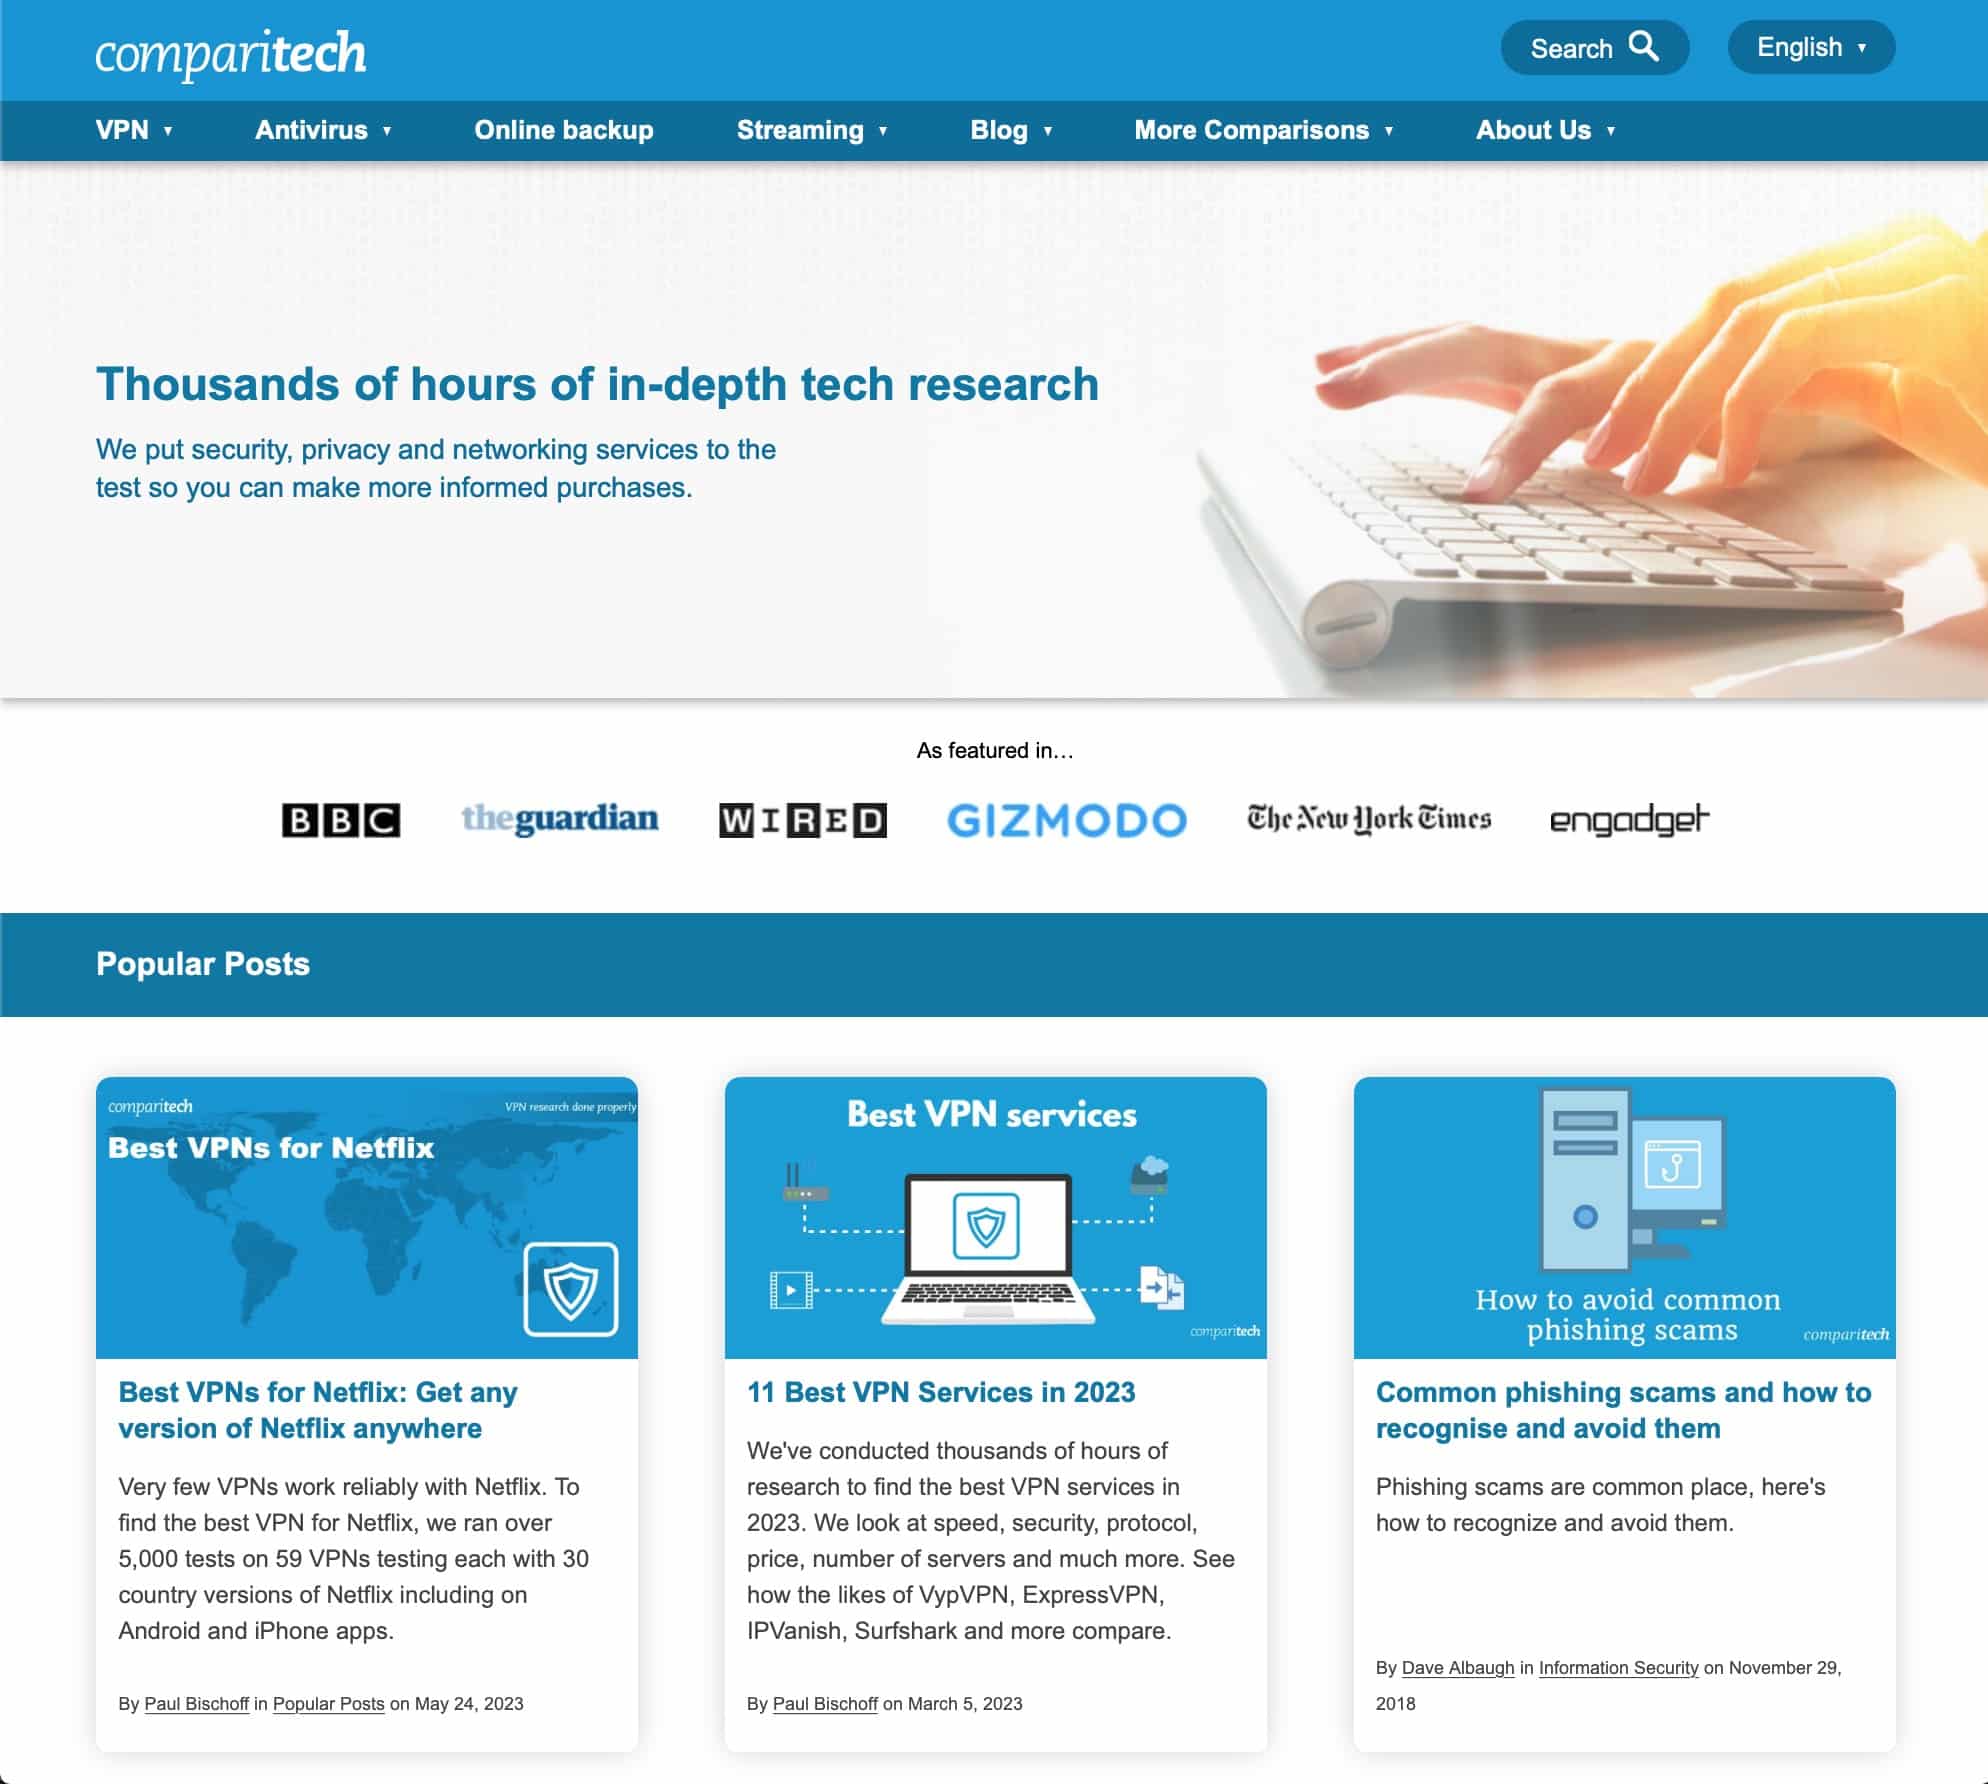
- From a device connected to the CP interface (or your LAN is you set the captive portal to listen on LAN), launch a web browser and try to access a website. In this example, I’m trying to access comparitech.com.
- The internet is blocked and the captive portal login page is displayed. The captive portal is working. Enter the username and password of the CPUser we created earlier.
- After authentication, access is granted and you’re redirected to the site you attempted to access prior to authentication.
Configuring the captive portal to use vouchers
Instead of relying on user accounts, you can enable captive portal access using vouchers. This is recommended in settings where a large number of users access the internet through the captive portal. Vouchers are easier to manage than user accounts.
Creating a voucher authentication server
We first need to create an authentication server for voucher support.
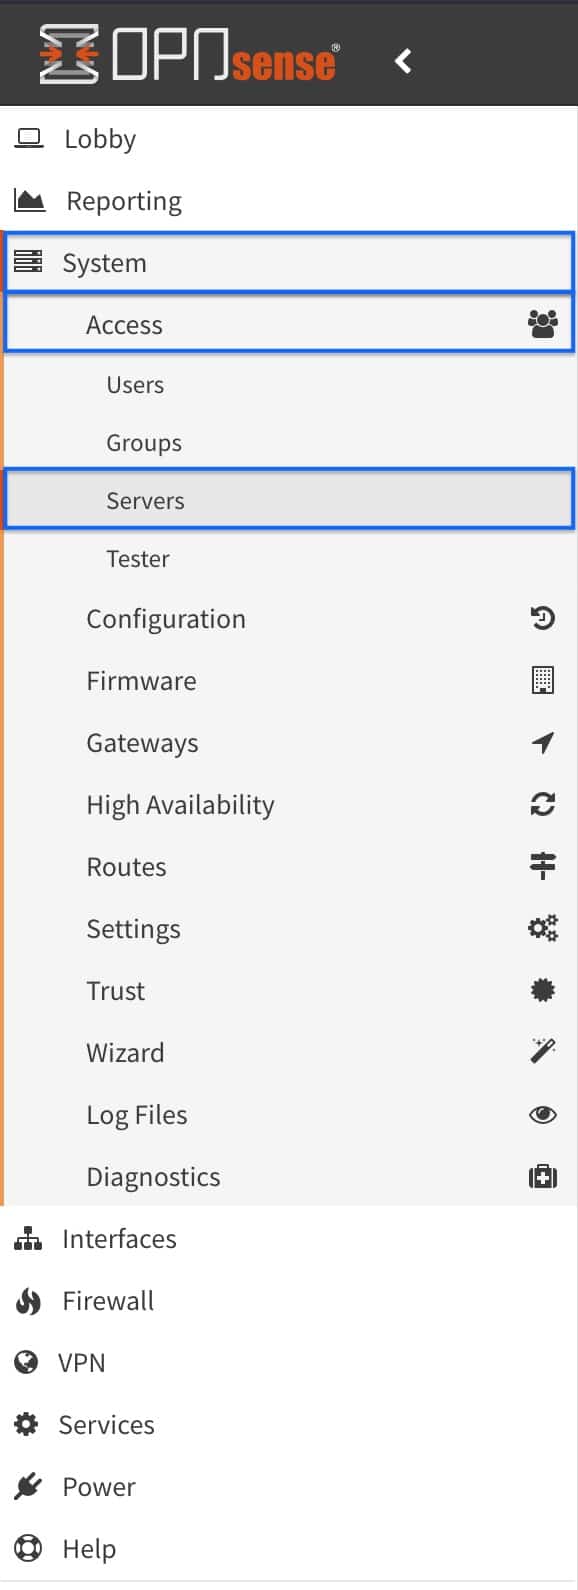
- From the side menus, select System > Access > Servers. The Authentication Servers page is displayed.
- Click the + sign to add a new authentication server. The Authentication Server Configuration page is displayed.

- Enter a name for your server in the Descriptive name field.
- Select Voucher from the Type drop-down menu.
- Set your desired username length and password length in the Username length and Password length fields.
- Click Save. You’re taken back to the Authentication Servers page.
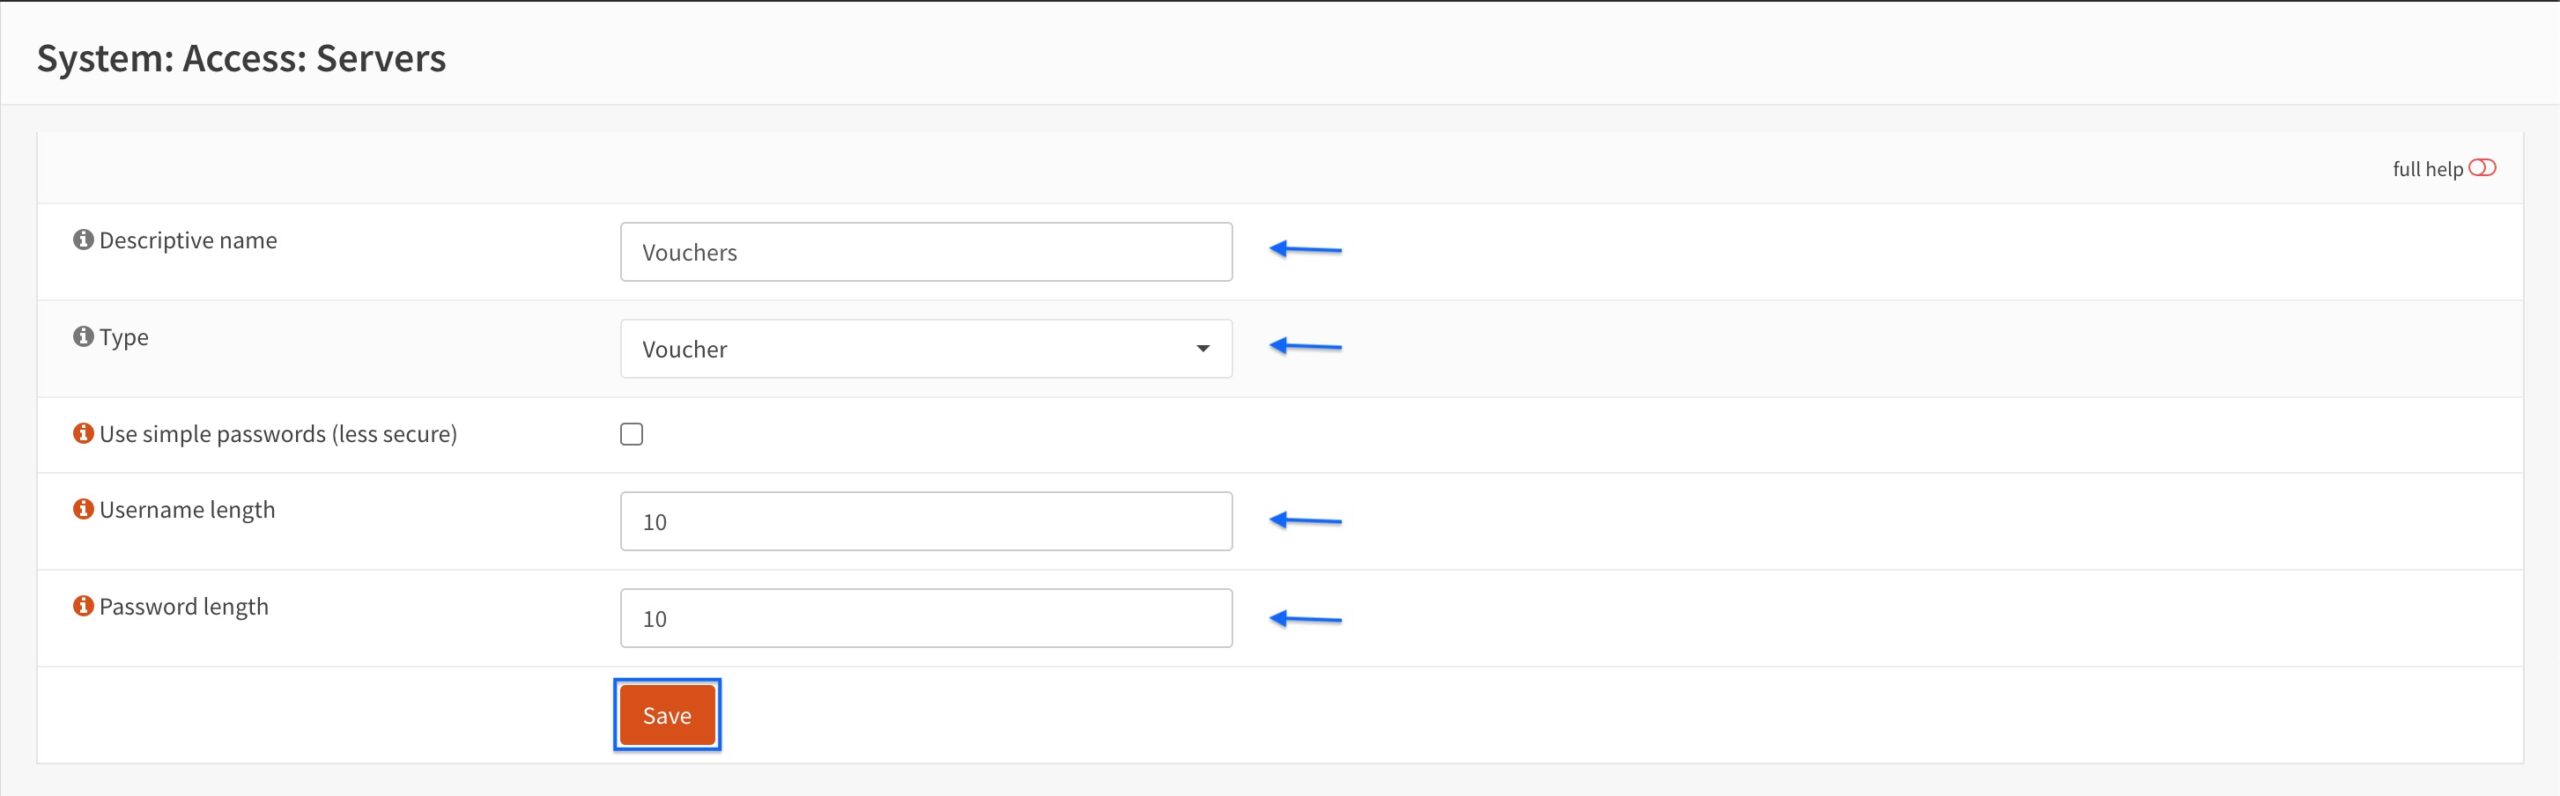
- We can see that our voucher authentication server has been created.

Generating vouchers
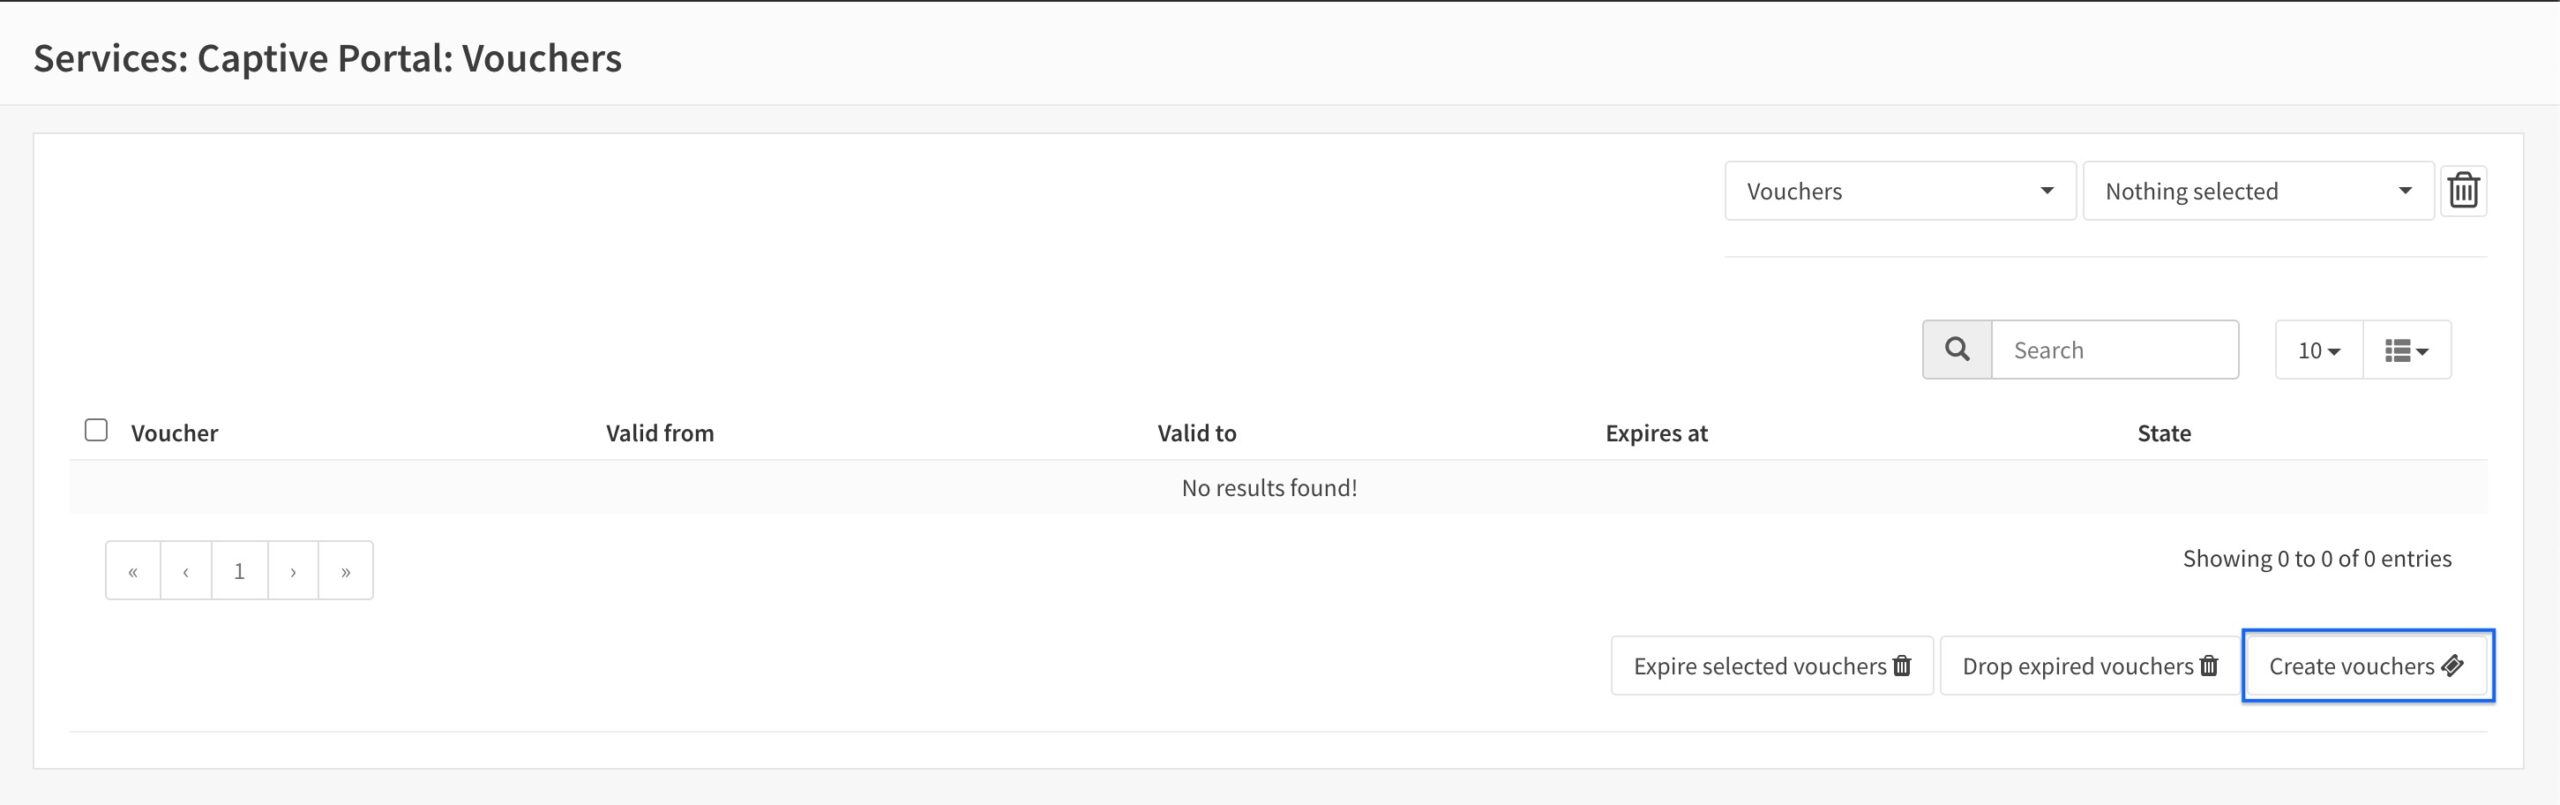
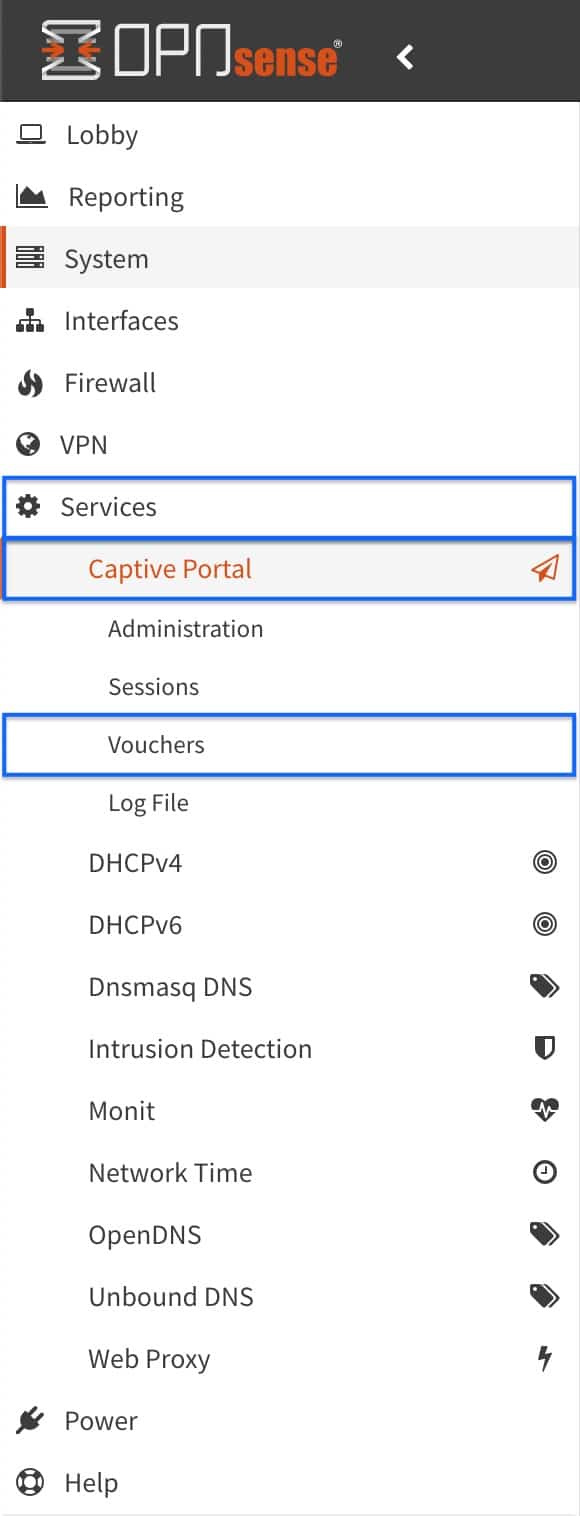
- From the side menus, select Services > Captive Portal > Vouchers. The Captive Portal Vouchers page is displayed.

- Click Create Vouchers to create a new series of vouchers. The Vouchers page is displayed.
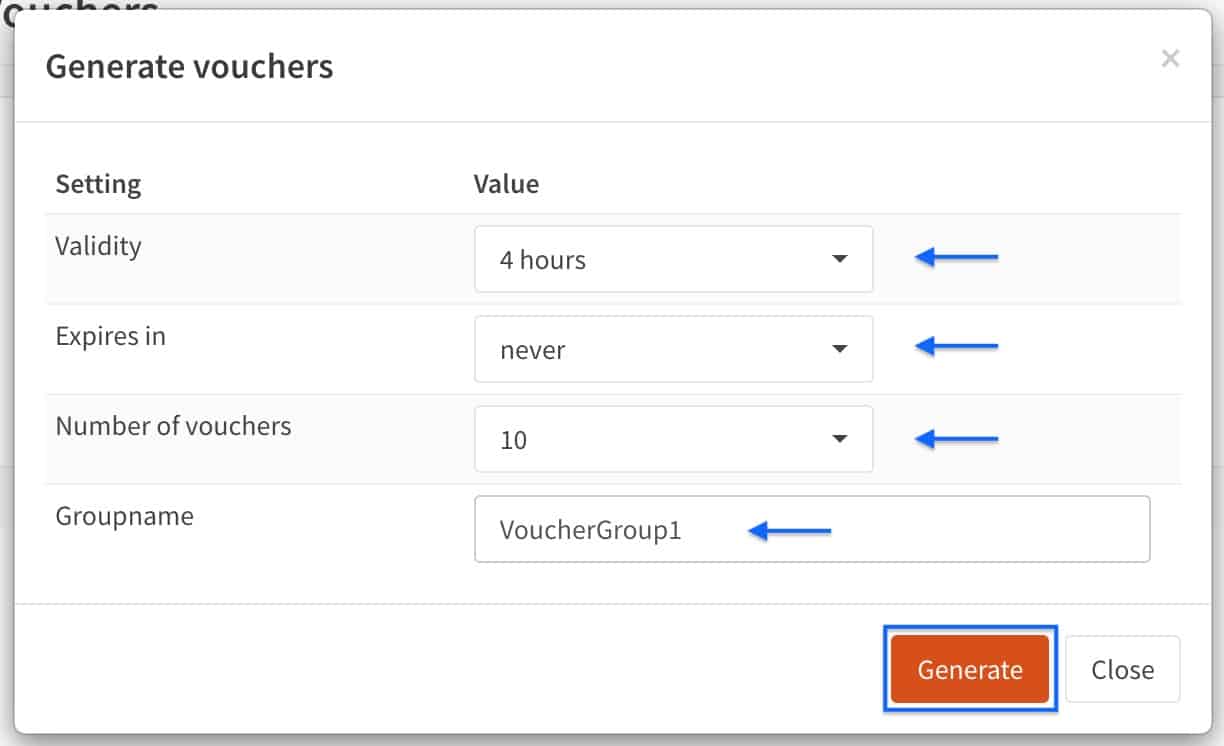
- Select 4 Hours (or your chosen duration) from the Validity drop-down menu.
- Select never (or your chosen duration) from the Expires drop-down menu.
- Select 10 (or your chosen number) from the Number of vouchers drop-down menu.
- Enter a name for your voucher series in the Groupname field.
- Click Generate.
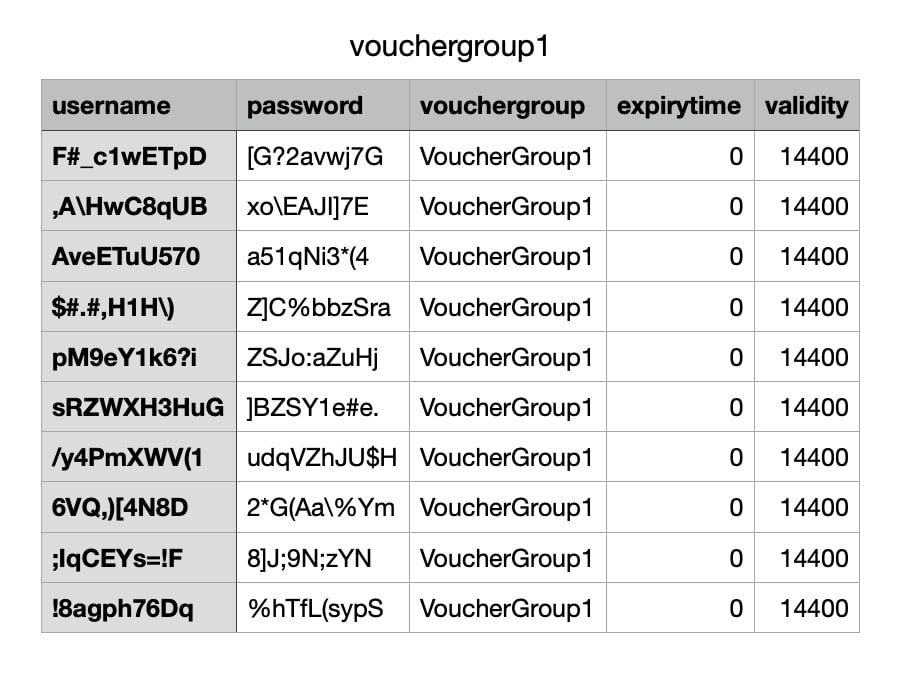
- When you click Generate, you’re prompted to download your vouchers as a .csv file. Save the .csv file on your local drive. It looks like this:
- You’re taken back to the Vouchers page and our voucher series is displayed (the password is omitted for security reasons).

Configuring the captive portal for voucher support
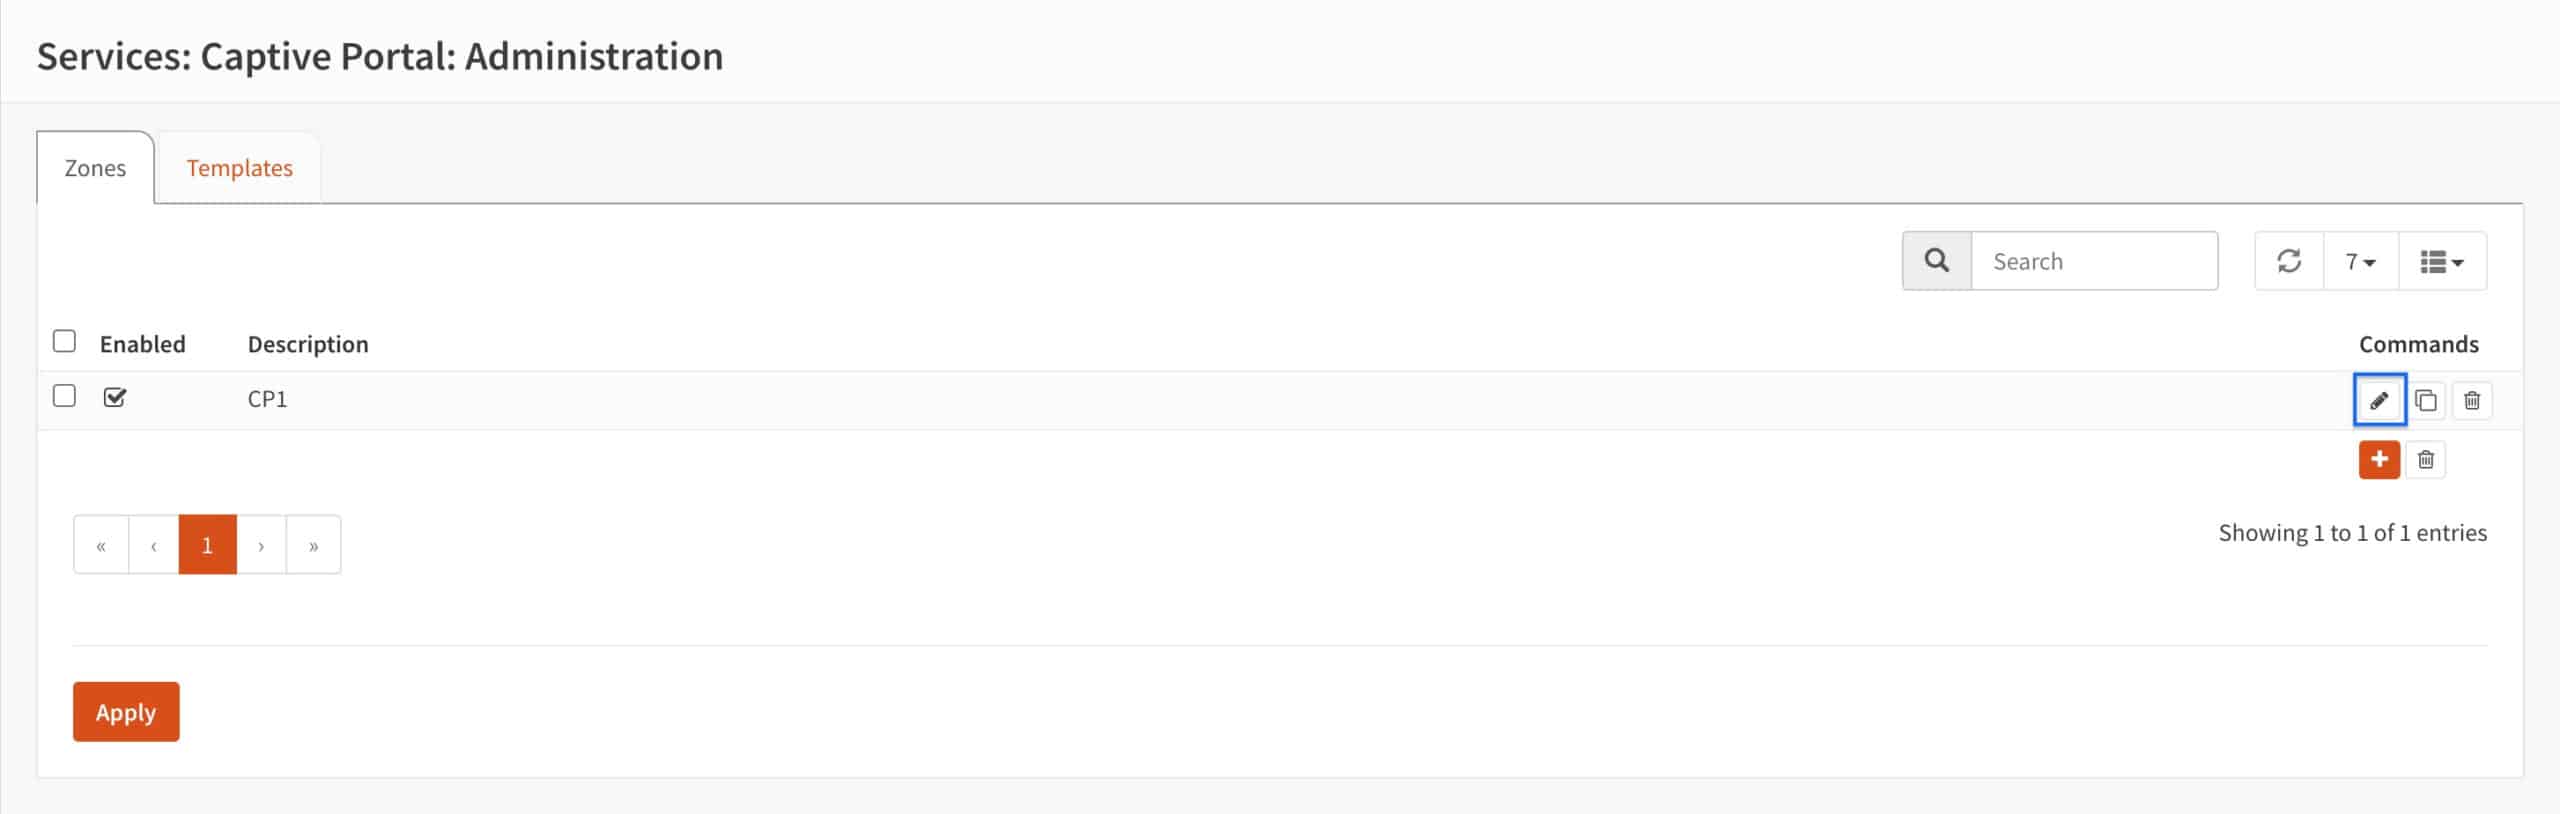
- From the side-menus, select Administration (we’re already in Services > Captive Portal).
- The Captive Portal page is displayed. Click the pencil icon to edit our captive portal zone. The Captive Portal Configuration page is displayed.
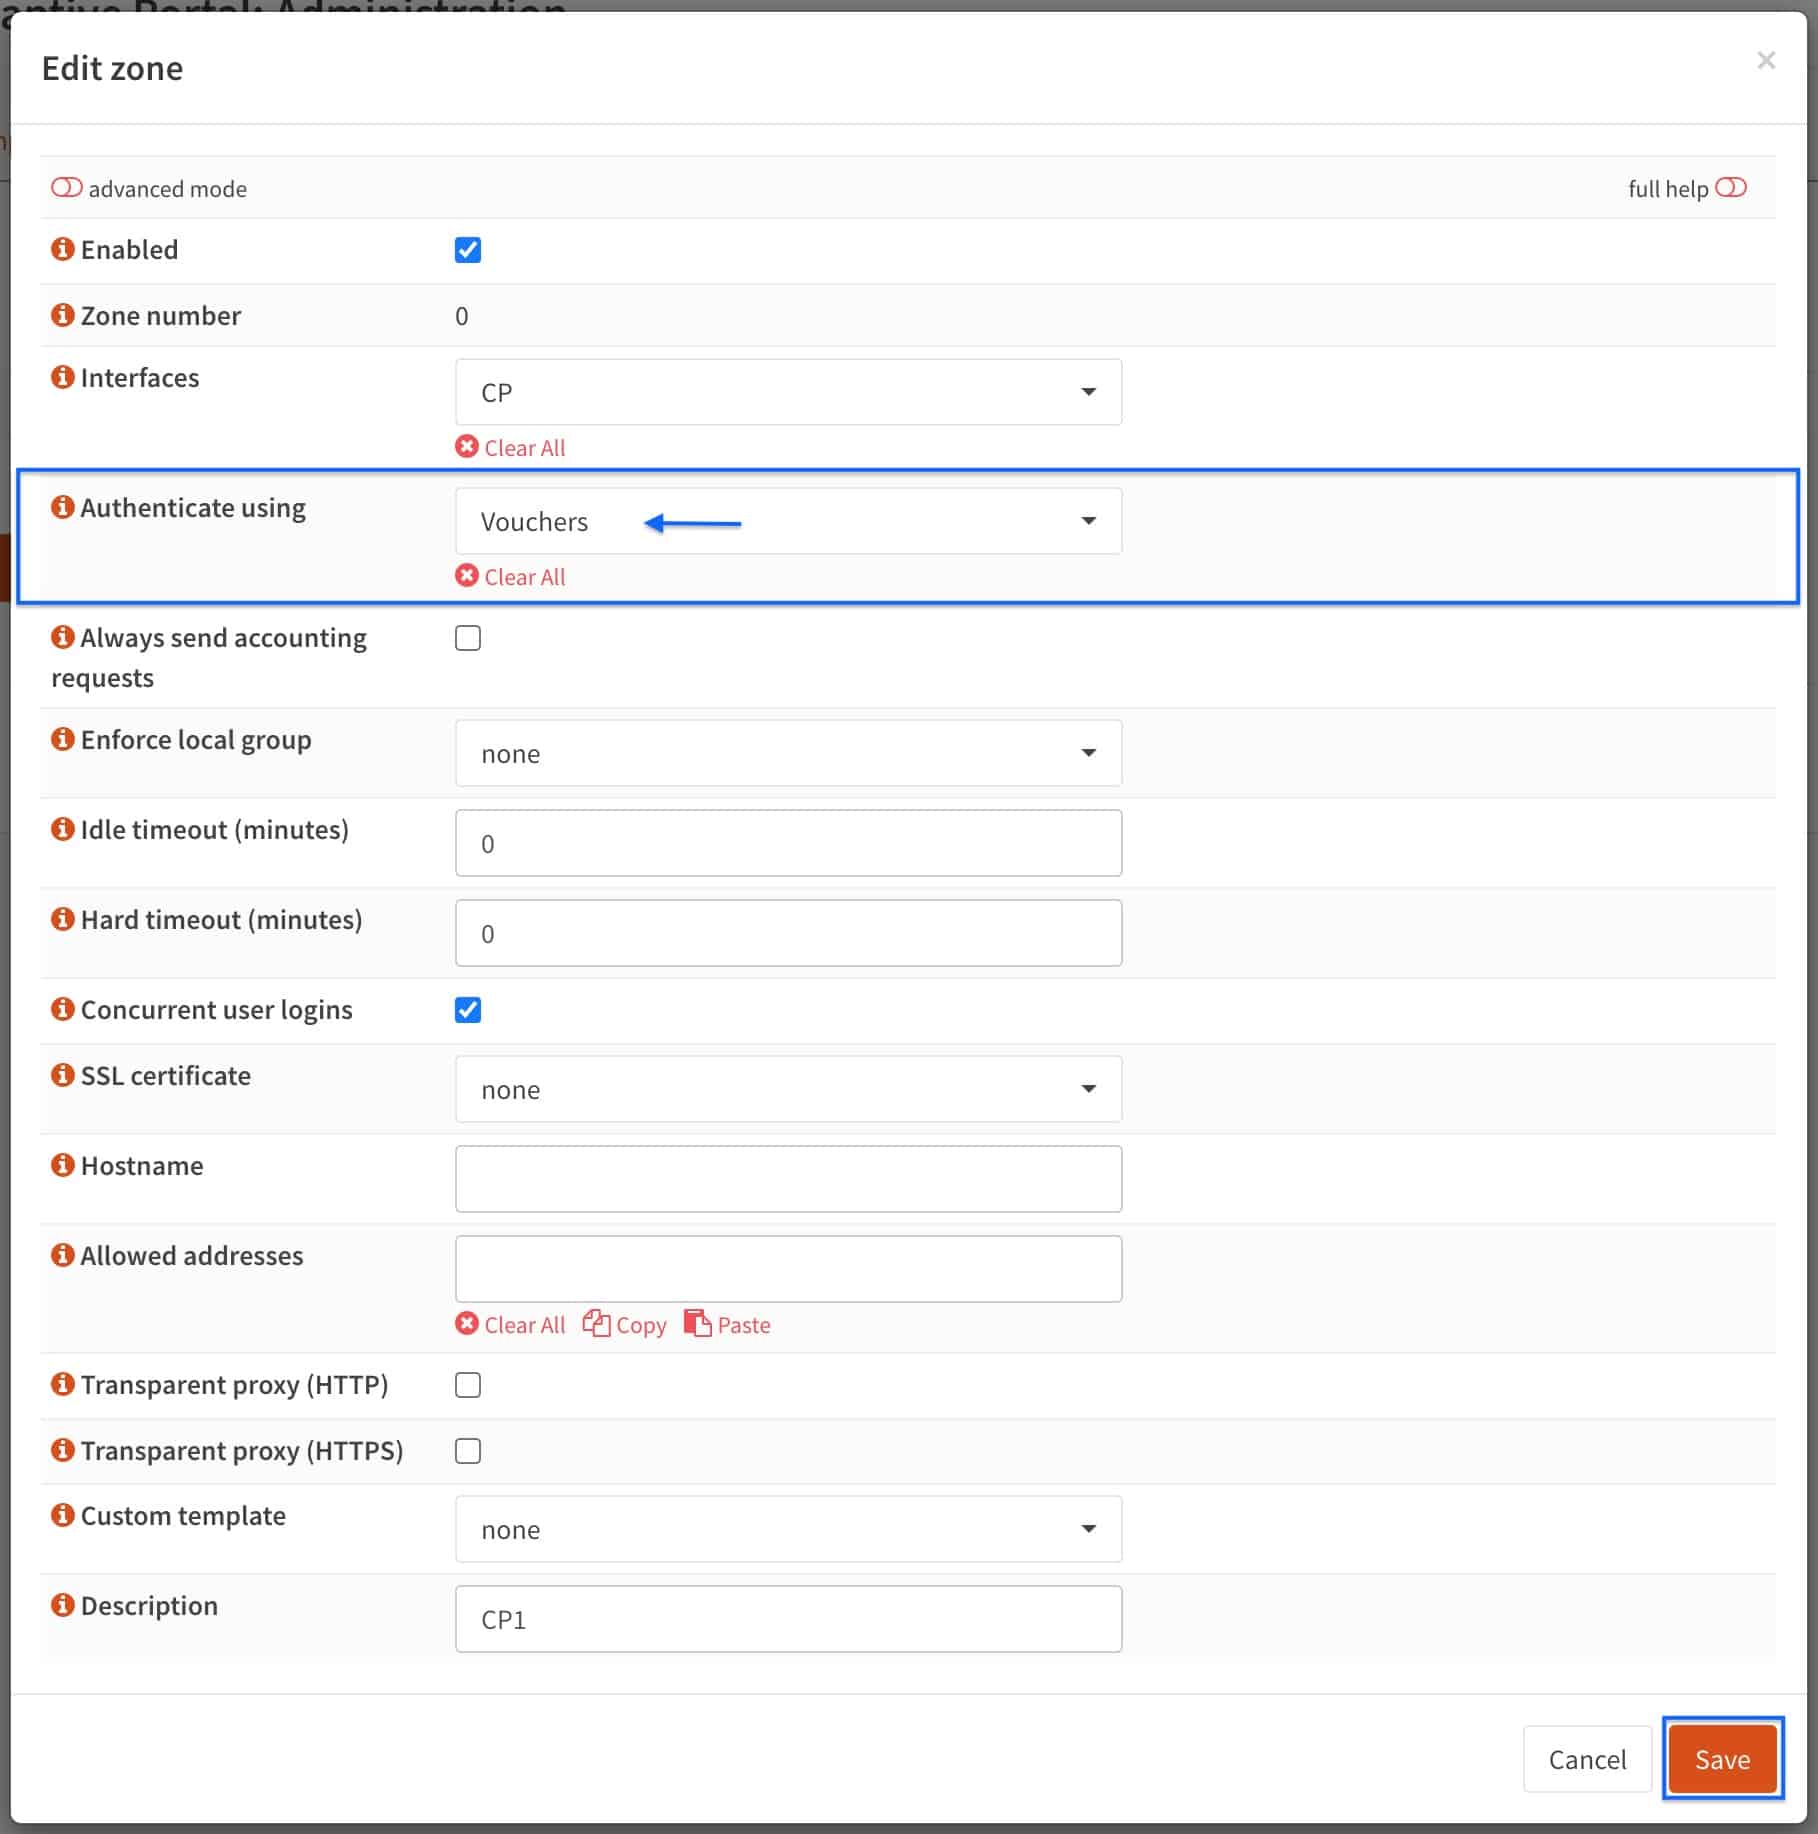
- From the Authenticate using drop-down menu, select Vouchers and click Save.
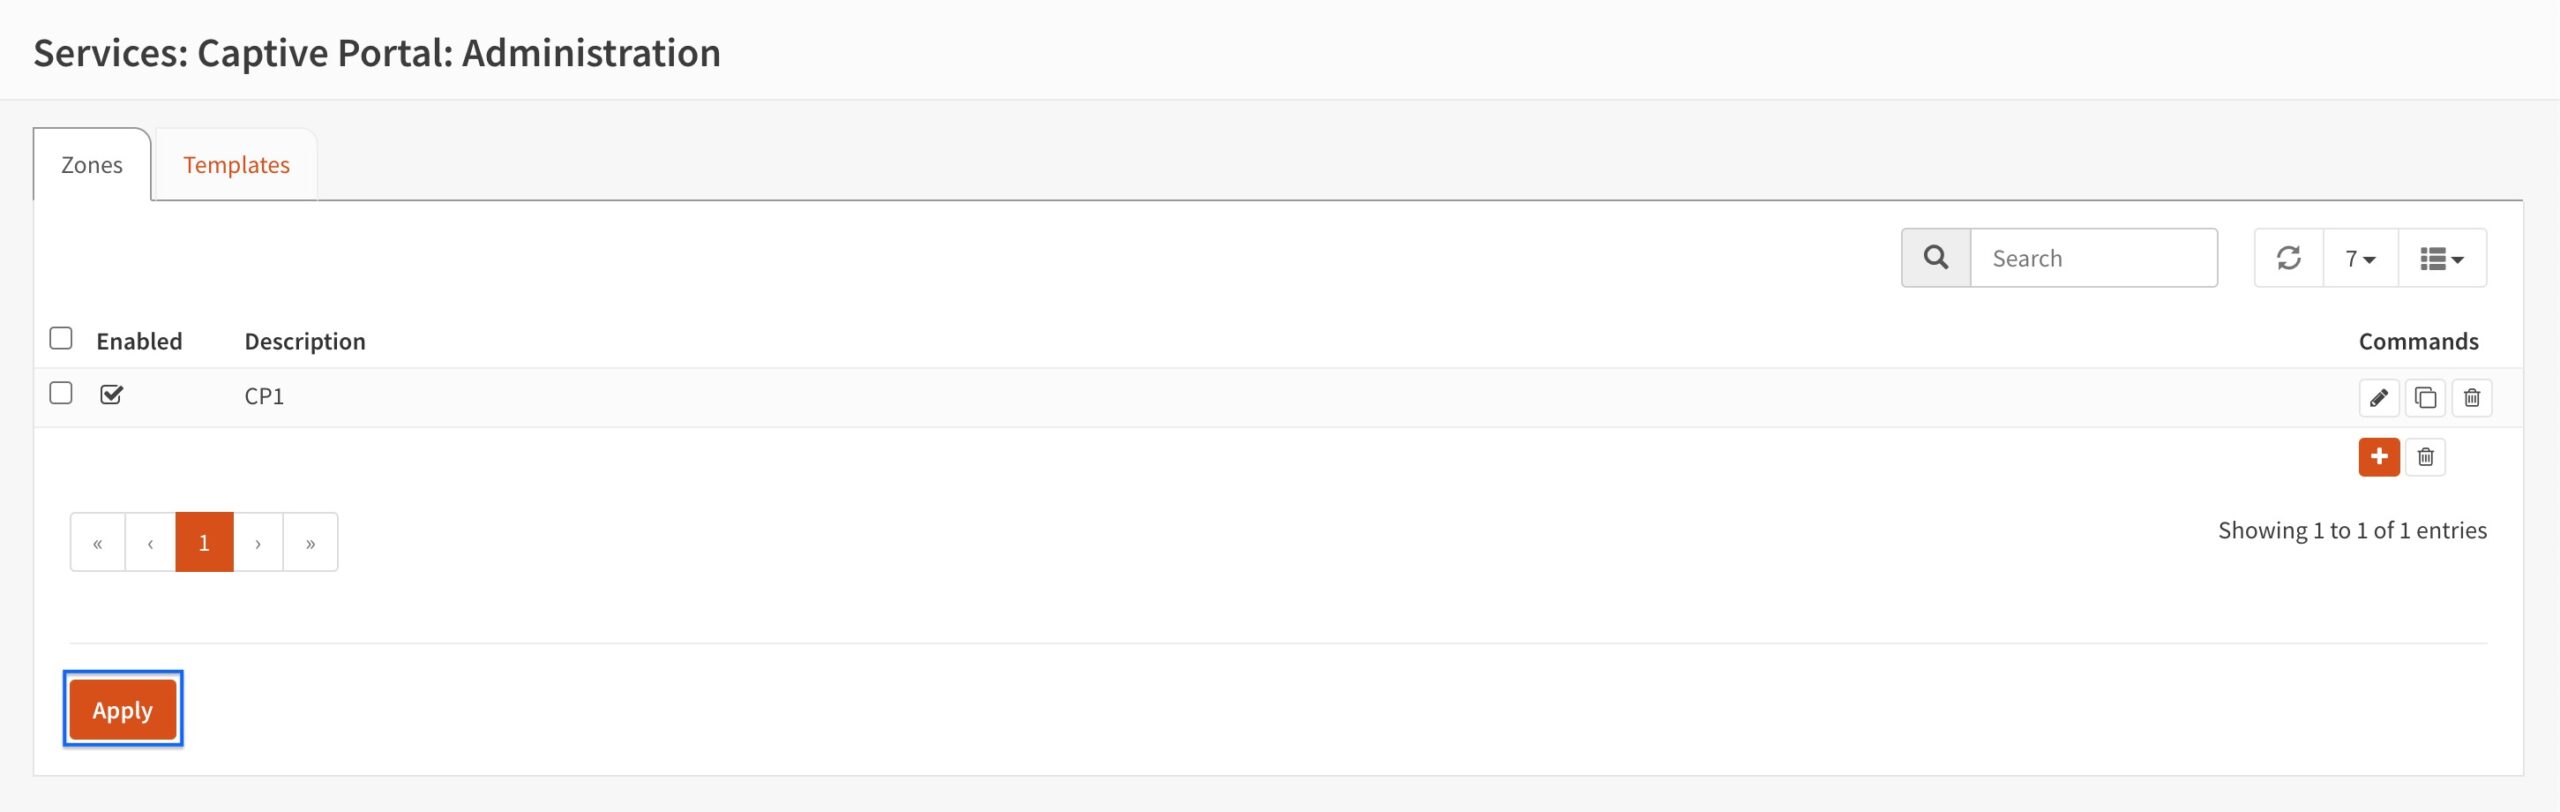
- You’re taken back to the Captive Portal page. Click Apply.
Testing the captive portal’s voucher support
- As before, from a device connected to the CP interface (or your LAN is you set the captive portal to listen on LAN), launch a web browser and try to access a website. As in the previous example, I’m trying to access comparitech.com.
- Again, the internet is blocked and the captive portal login page is displayed. The captive portal is working. Enter the username and password of one of the vouchers in the .csv file.

- After authentication, access is granted and you’re redirected to the site you attempted to access prior to authentication. Vouchers are working.
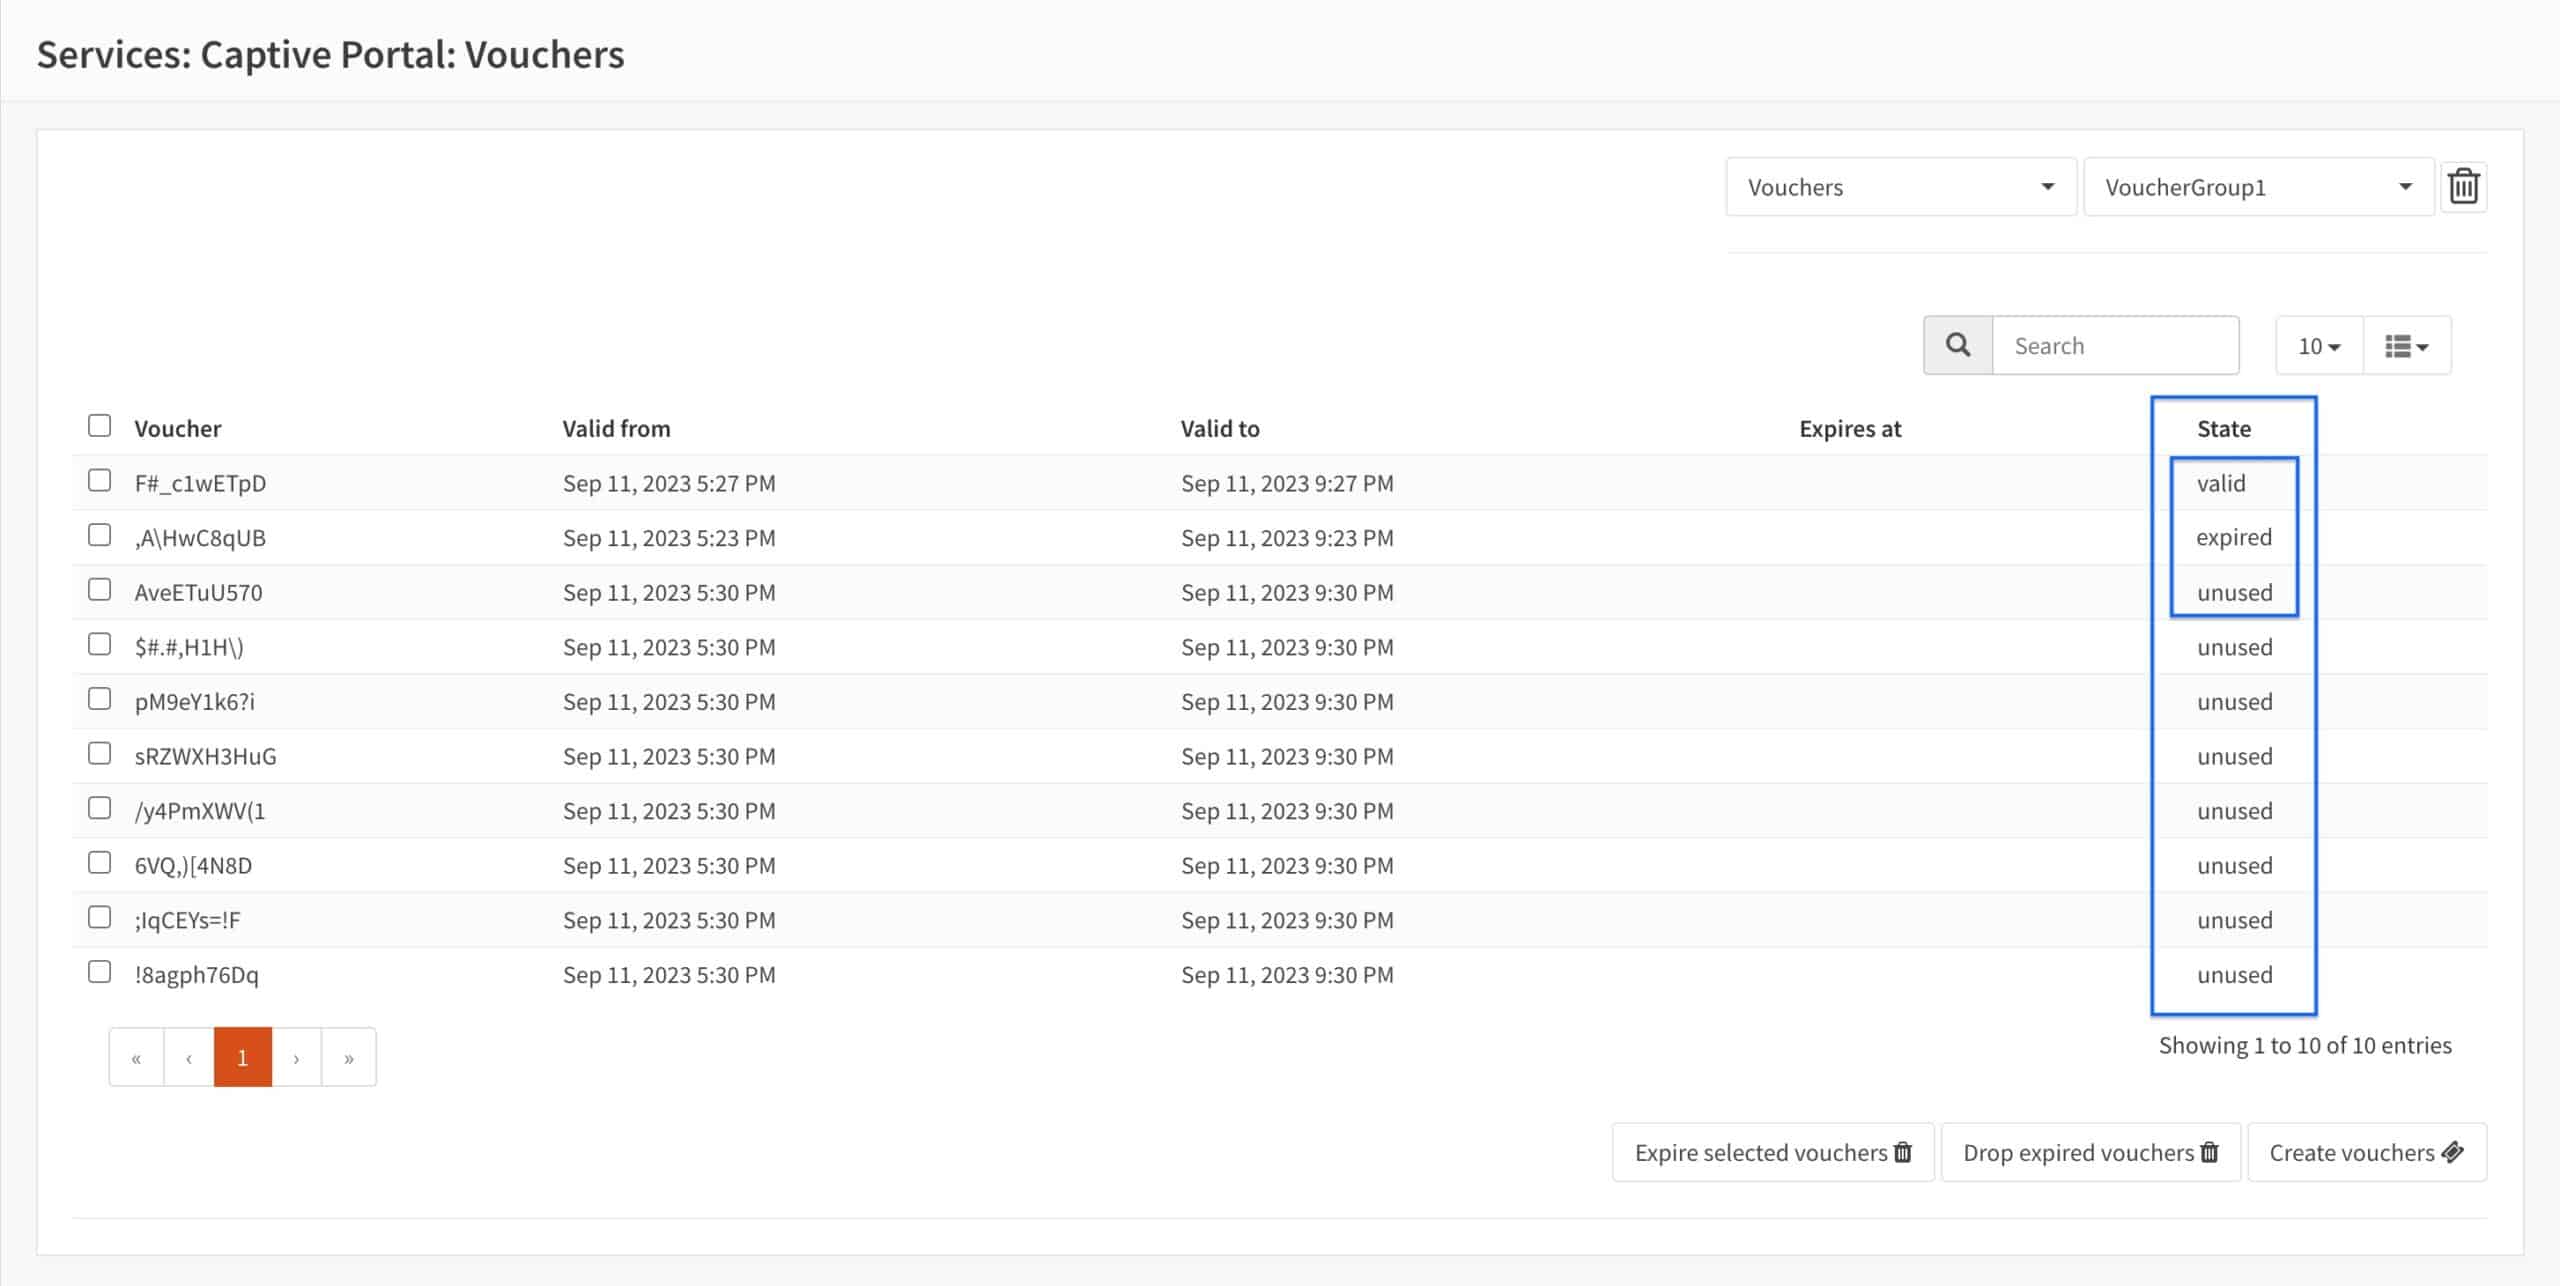
Obtaining the status of our vouchers
You can check the status of your vouchers. Statuses on the Vouchers page include valid (in use and not expired), expired (used and expired), and unused.
- From the side-menus, select Services > Captive Portal > Vouchers. The Vouchers page is displayed.
- We can see our voucher status in the State column.
Wrap Up
We’ve now configured a Captive Portal on OPNsense that supports both username and password authentication and voucher authentication. Captive Portals enhance the security of your guest networks while giving you more visibility and control over what your users can and can’t do on your networks. Captive portals can be helpful to secure a home guest network, but those who will benefit the most from a Captive Portal are businesses that provide internet access to their customers, such as hotels, cafes, and airports.
See also: