
OPNsense, like pfSense, is based on FreeBSD. In fact, OPNsense is a popular fork of pfSense. However, Netgate recently decided to create a premium version of pfSense (pfSense Plus) that includes proprietary code while continuing to support the fully open-source version (pfSense Community Edition). That decision has left many pfSense CE users to believe that the Community Edition will slowly but surely be abandoned.
What the future of pfSense CE holds is anyone’s guess at this point, but that uncertainty has prompted many pfSense users to jump ship (or to consider switching) to OPNsense. While both pfSense and OPNsense are extremely similar, their configurations have significantly strayed from one another by now.
With that in mind, this post explains how to set up your own OpenVPN server in OPNsense.
This guide assumes you have a working OPNsense configuration with working WAN and LAN interfaces and are using the Unbound DNS Resolver for DNS resolution.
Also, settings that are ignored in the instructions should be left at their default values (i.e., untouched).
Let’s start.
Authentication
To configure our OpenVPN server, we first need to select an authentication method. OpenVPN in OPNsense supports password-based authentication, certificate-based authentication, or both. In this post, we will configure our server to use both to cover all the bases.
Feel free to only select one or the other. If you choose only password-based authentication, you can skip generating user certificates. But you’ll still need to generate a Certificate Authority and a server certificate.
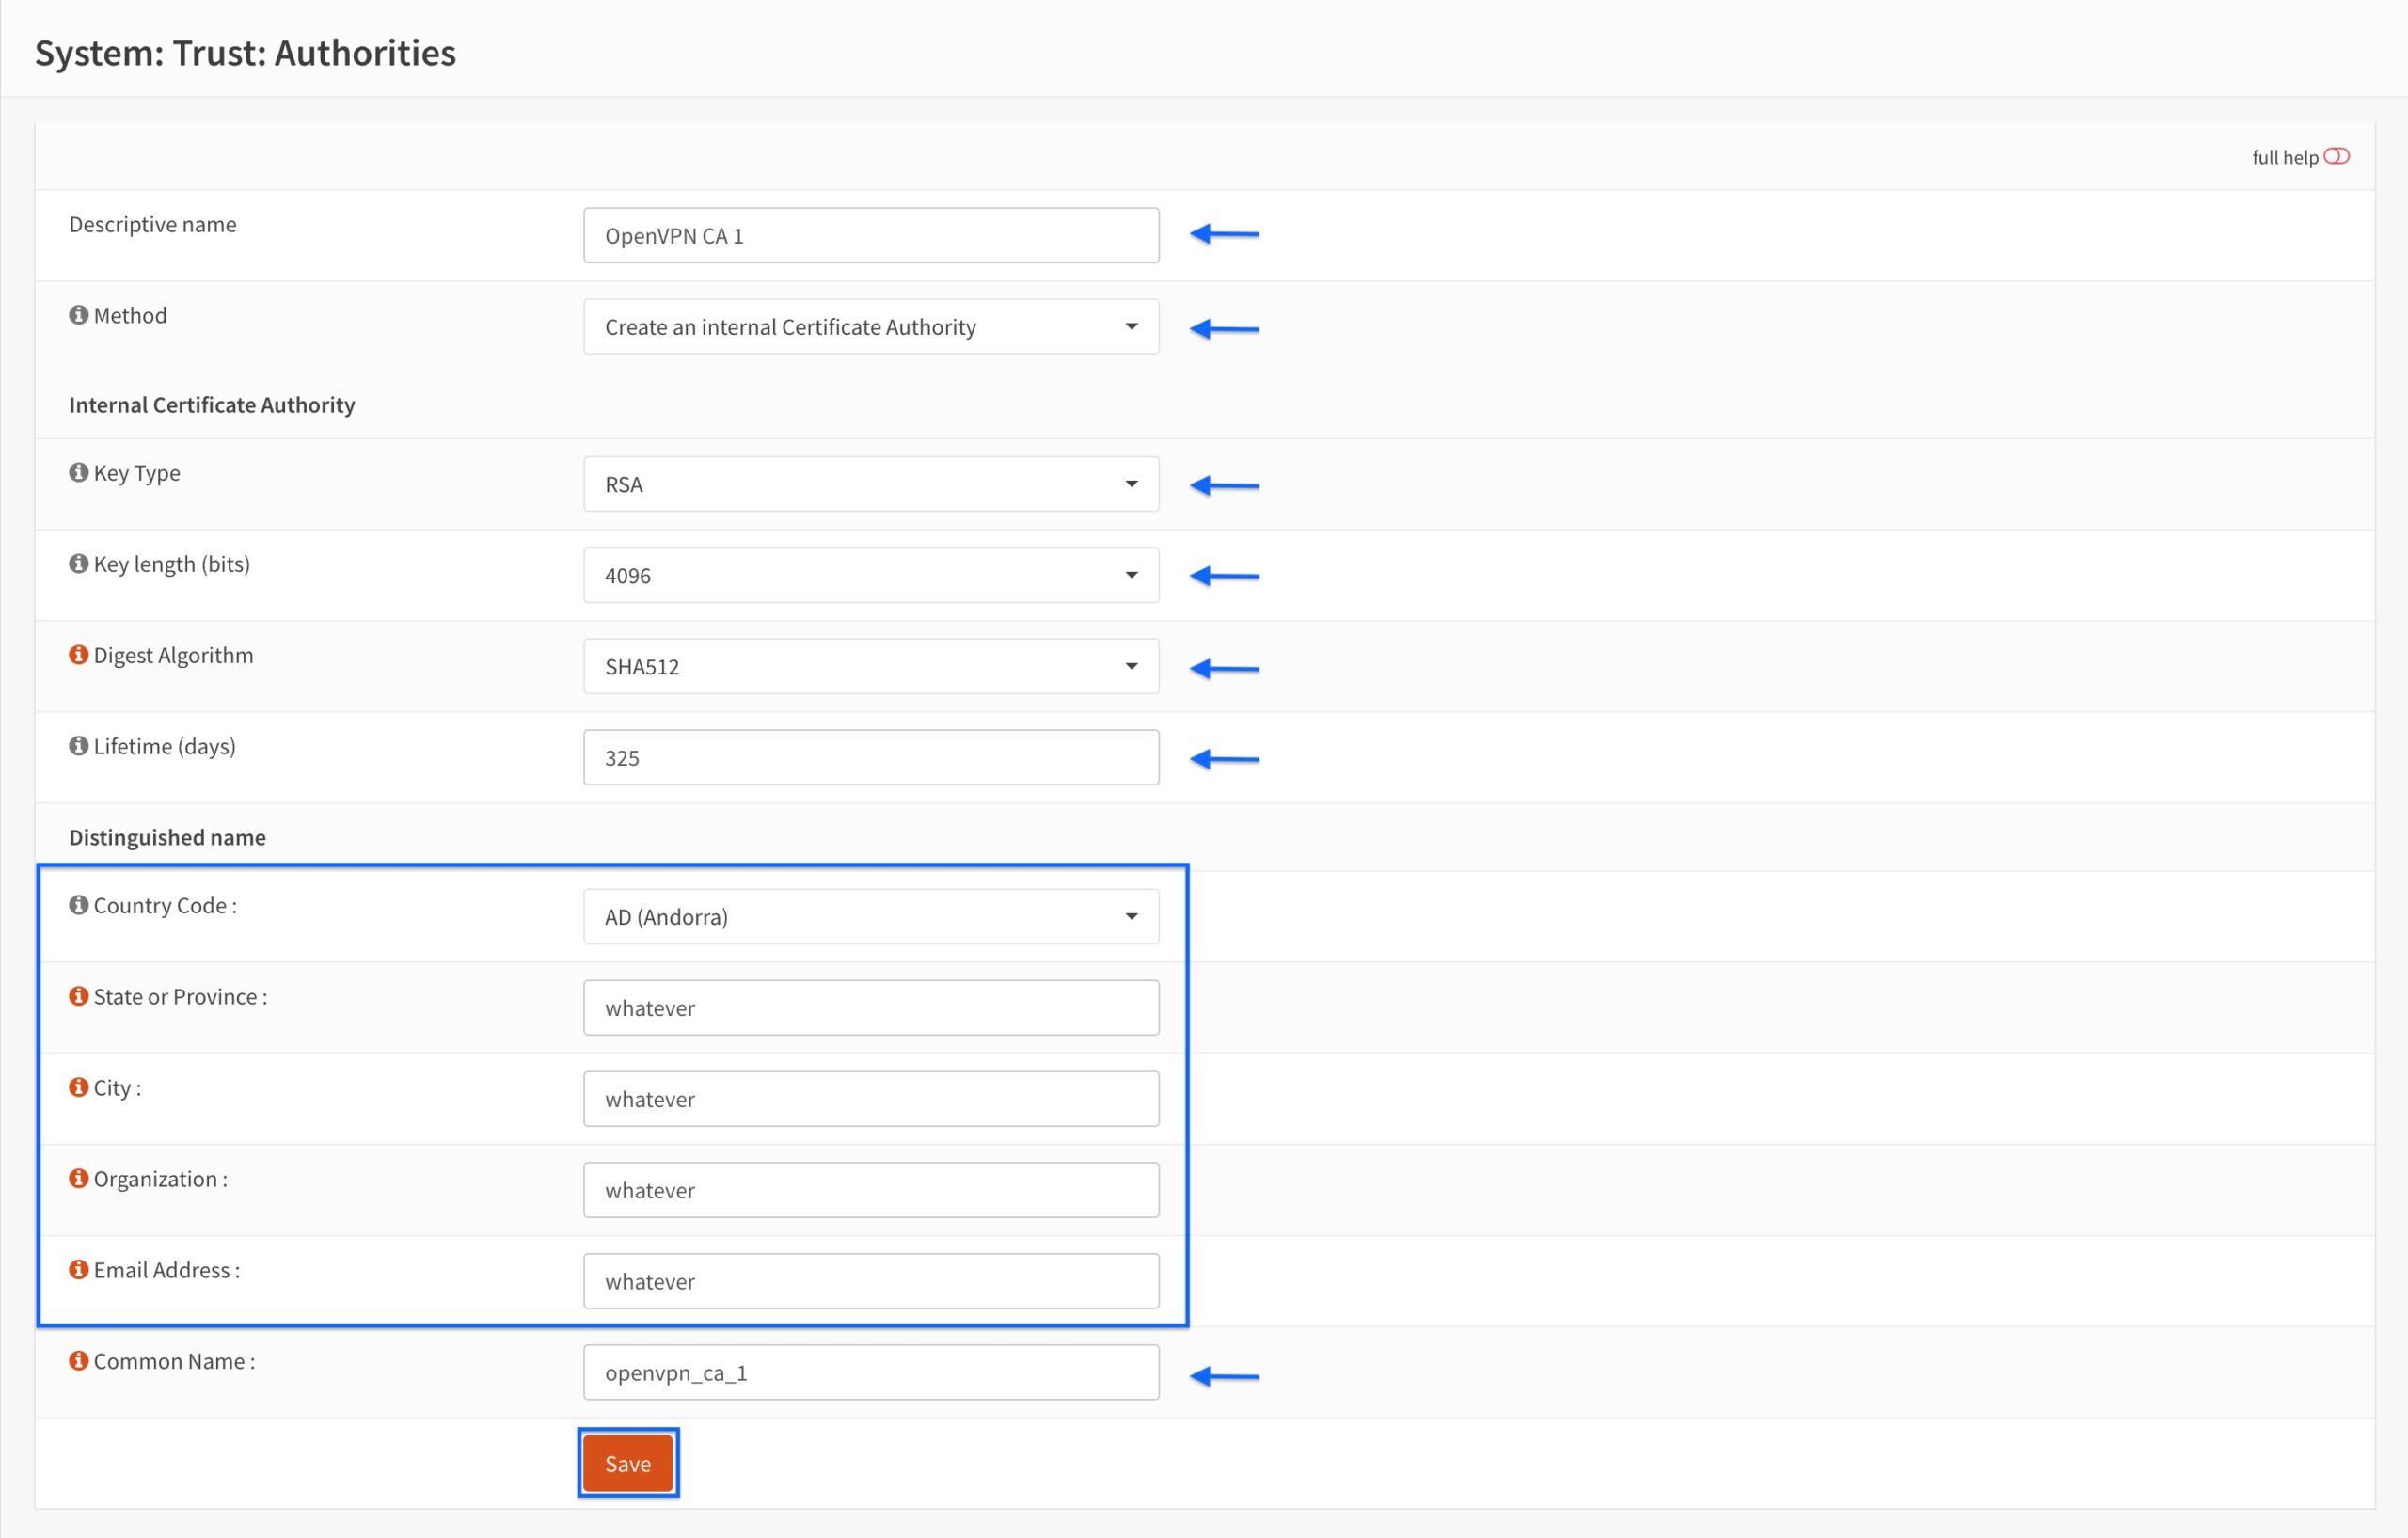
To start, we will generate our Certificate Authority (CA) to validate the OpenVPN server’s identity and authenticate the user certificates (if enabled).
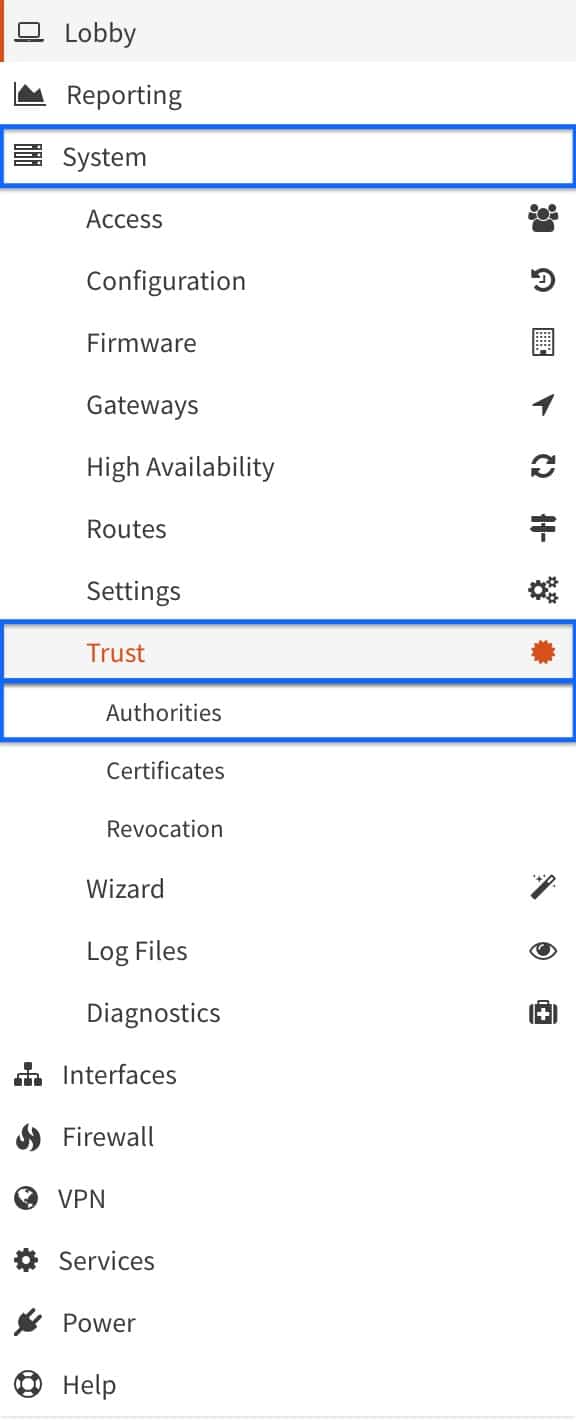
- From the side menus, go to System > Trust > Authorities. The main Authorities page is displayed.
- Click the + sign. The Authorities configuration page is displayed.

- Enter a name for your CA in the Descriptive name field.
- Select Create an Internal Certificate Authority from the Method drop-down menu.
- Set the Key Type to RSA.
- Set the Key Length to 4096.
- Set the Digest Algorithm to SHA-512.
- Set the Lifetime to 365 days.
- You can set random values for the Country Code, State or Province, City, Organization, and Email Address fields. Or, you can populate them with the proper information if you like. I simply used random values.
- Enter a common name for your CA in the Common Name field.
- Click Save at the bottom of the page.
- You’re taken back to the main Authorities page and we can see our newly created CA is displayed.

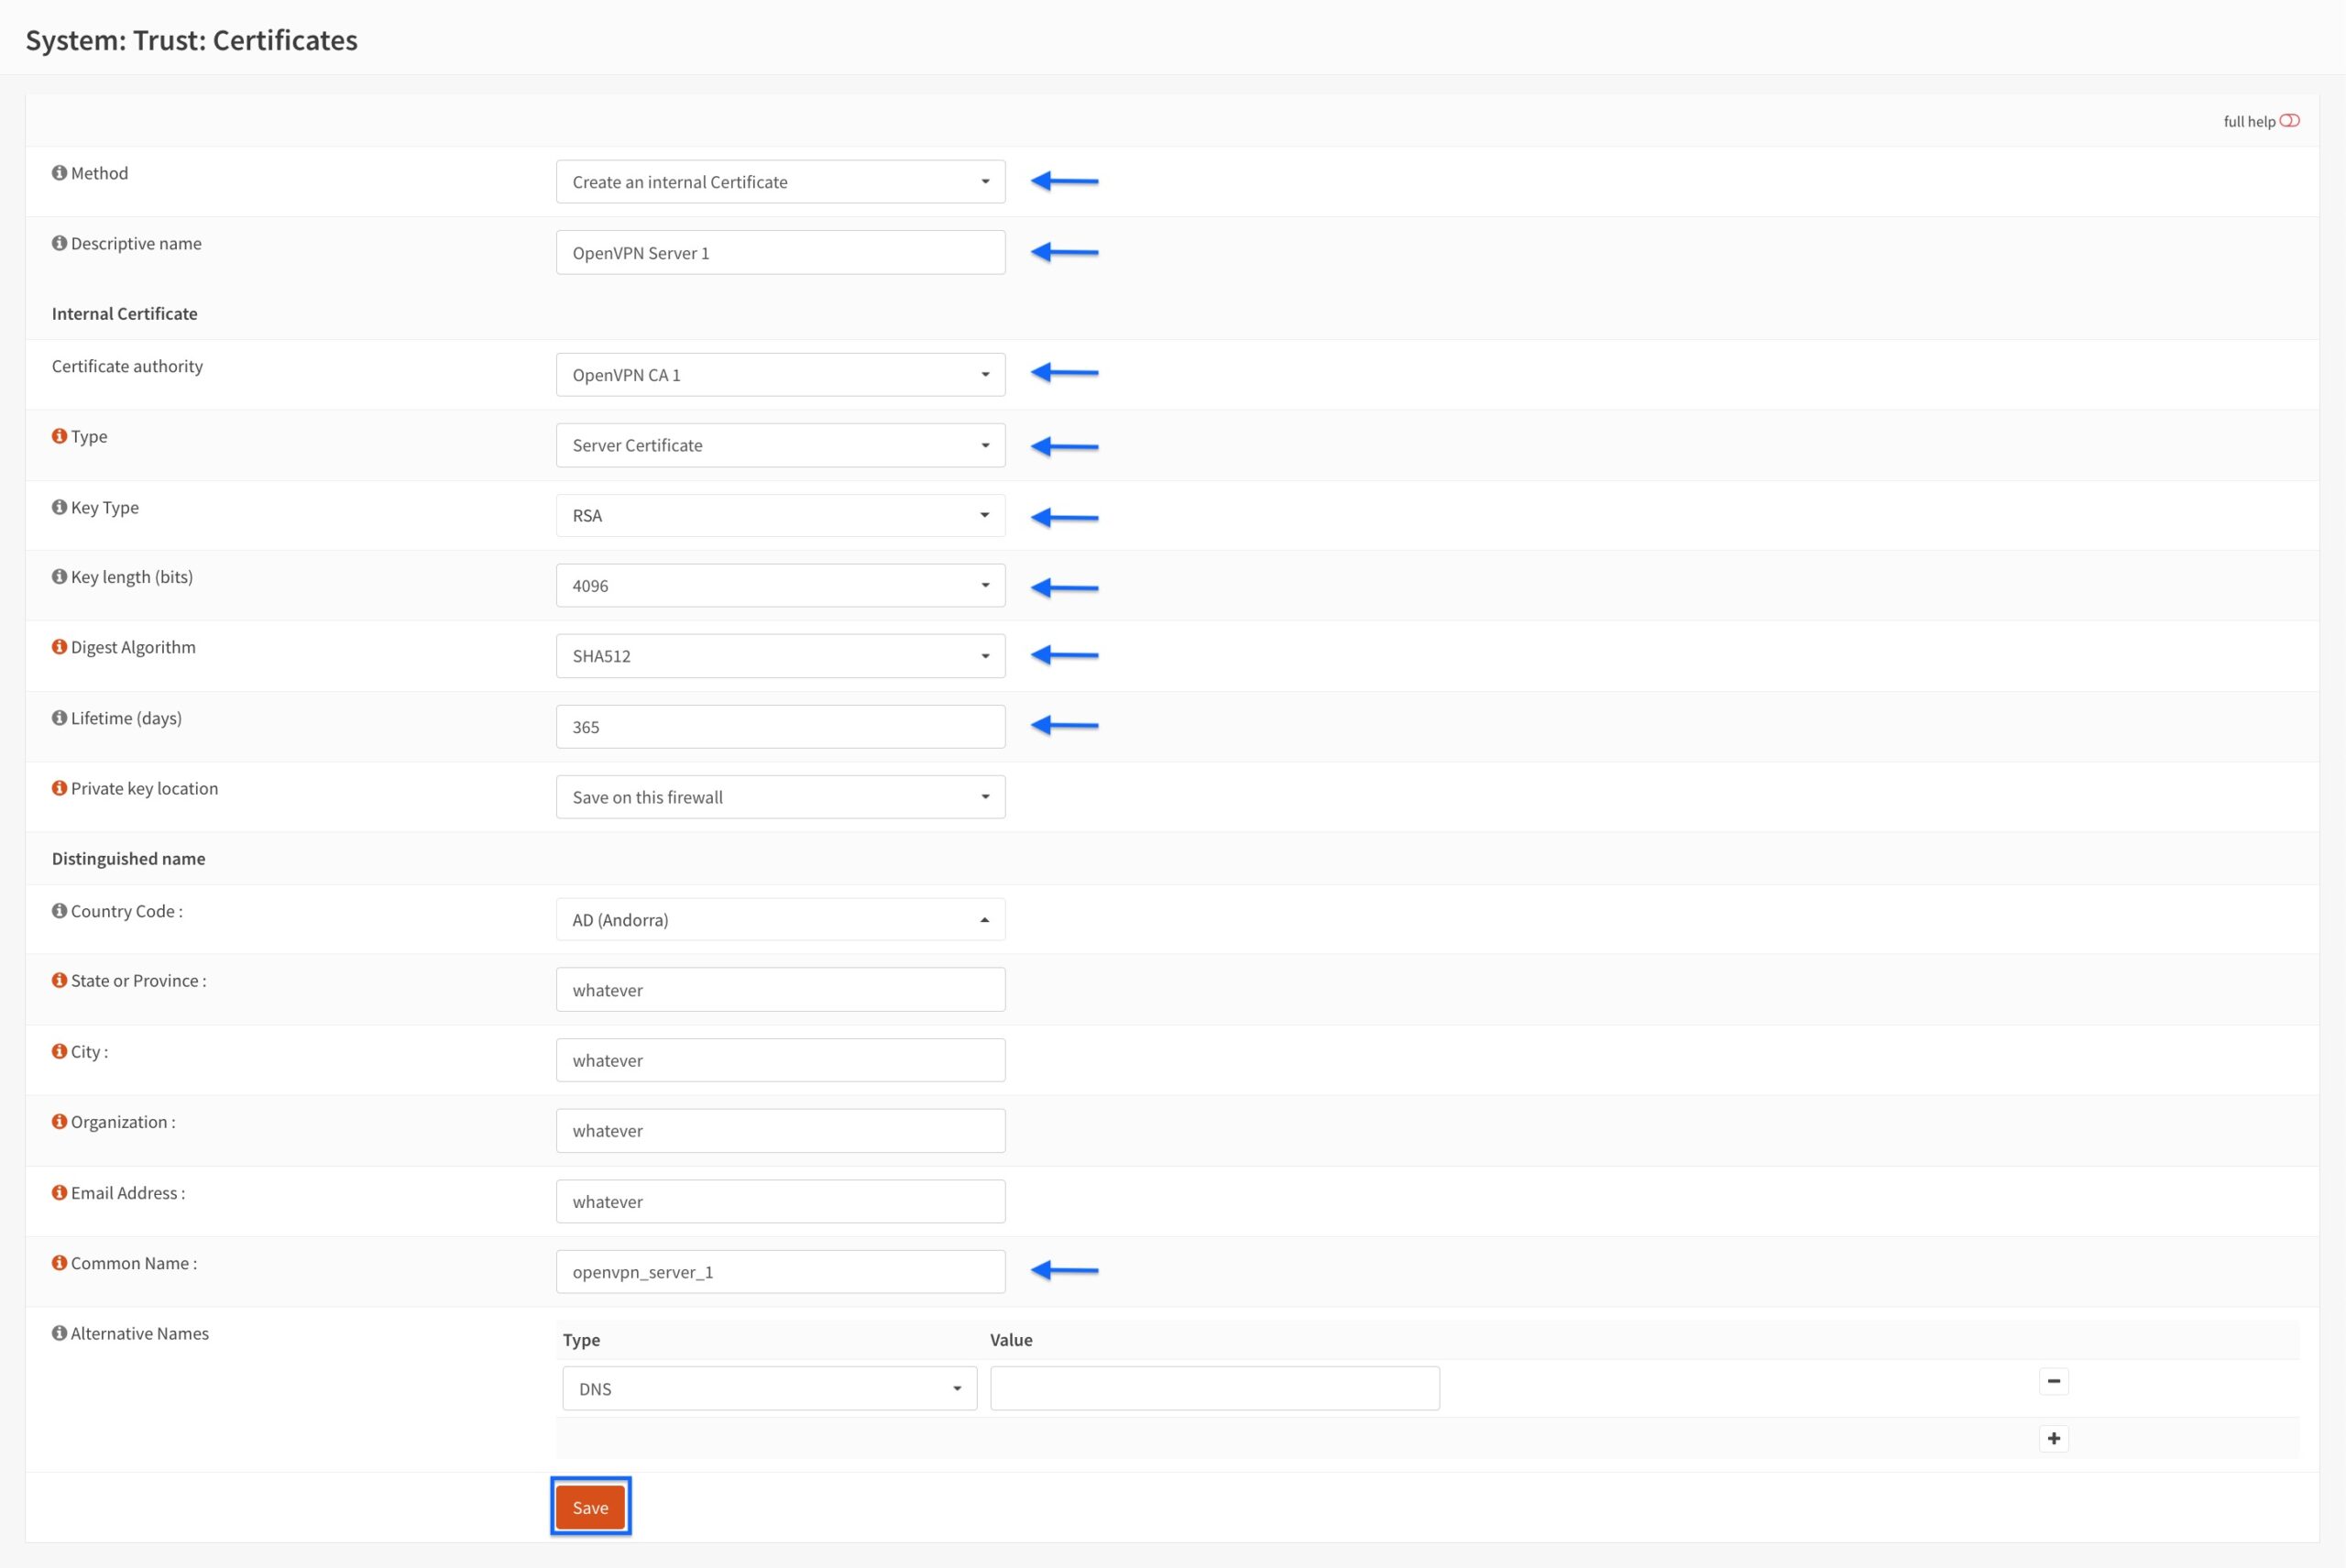
Generating the server certificate
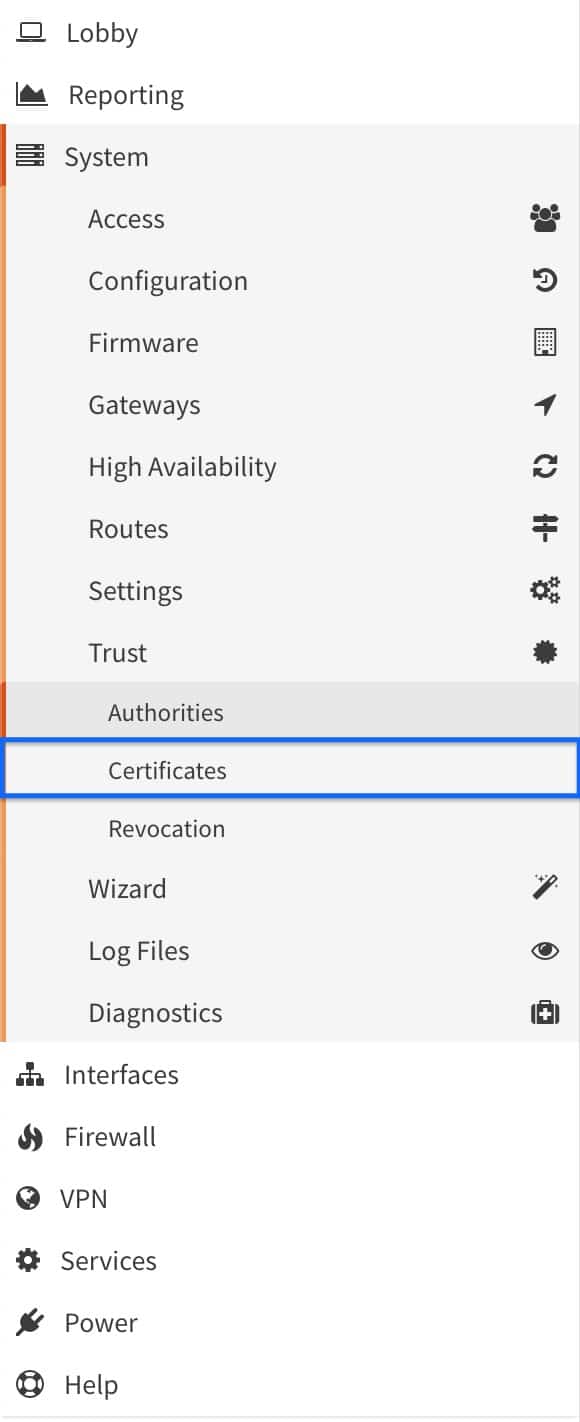
- From the side menus, select Certificates (we’re already in the System > Trust section of the UI). The main Certificates page is displayed.
- Click the + sign. The Certificates configuration page is displayed.

- Select Create an Internal Certificate from the Method drop-down menu.
- Enter a name for your server certificate in the Descriptive name field.
- From the Certificate Authority drop-down menu, select the CA we just created. This is OpenVPN CA 1, in my case.
- Set the Type to Server Certificate.
- Set the Key Type to RSA.
- Set the Key Length to 4096.
- Set the Digest Algorithm to SHA-512.
- Set the Lifetime to 365 days.
- The values for the Country Code, State or Province, City, Organization, and Email Address fields are automatically populated based on what you entered when configuring the CA.
- Enter a common name for your server certificate in the Common Name field.
- Click Save at the bottom of the page.
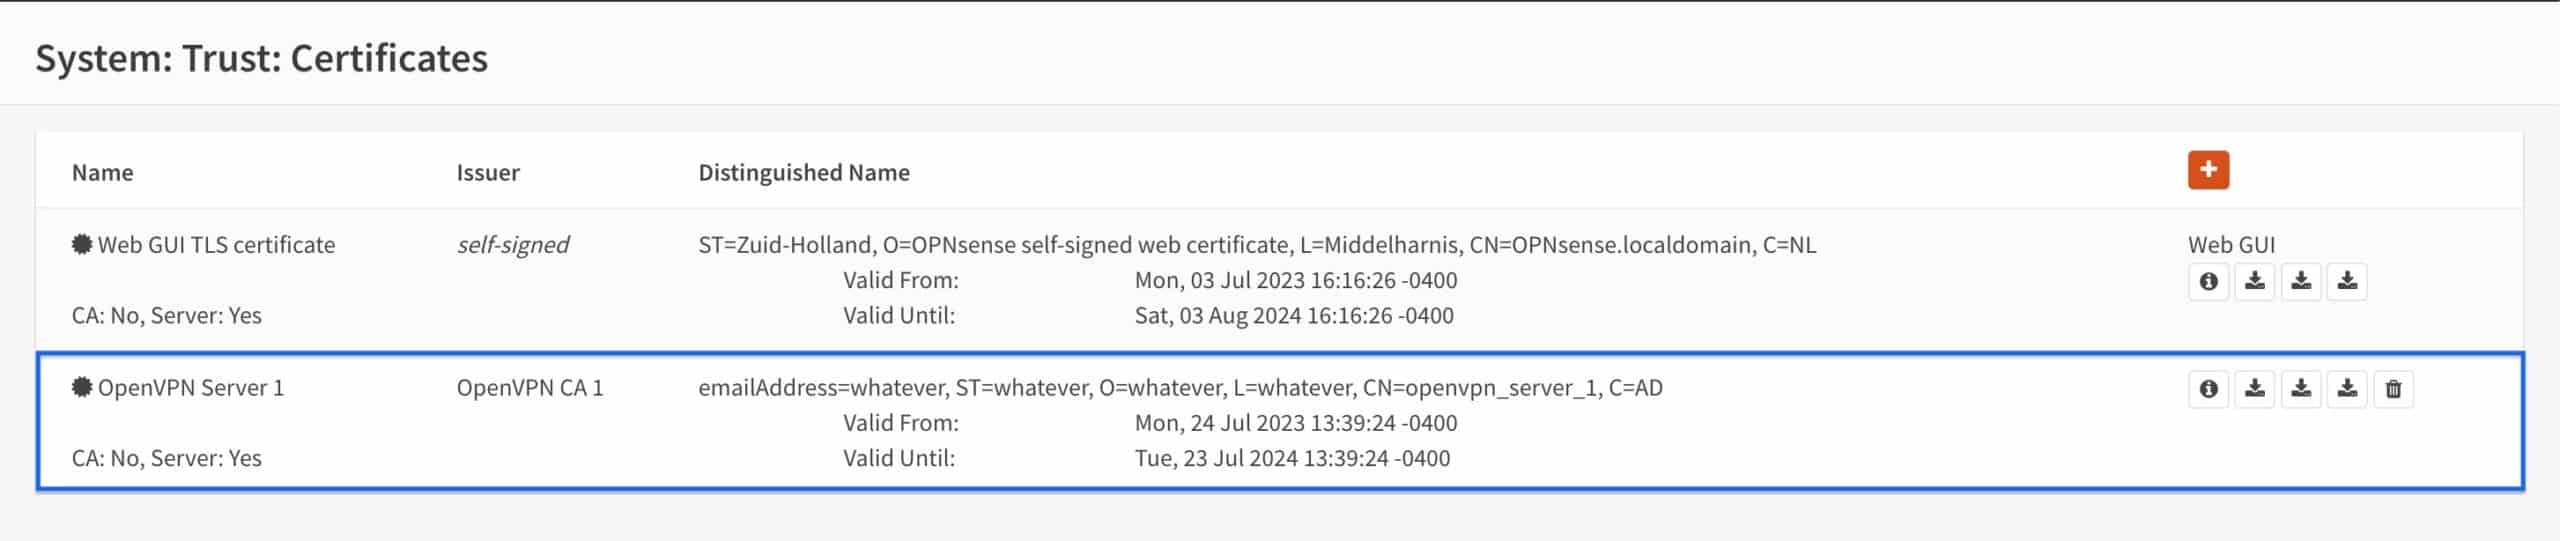
- You’re taken back to the main Certificates page, and we can see our newly created server certificate is displayed.
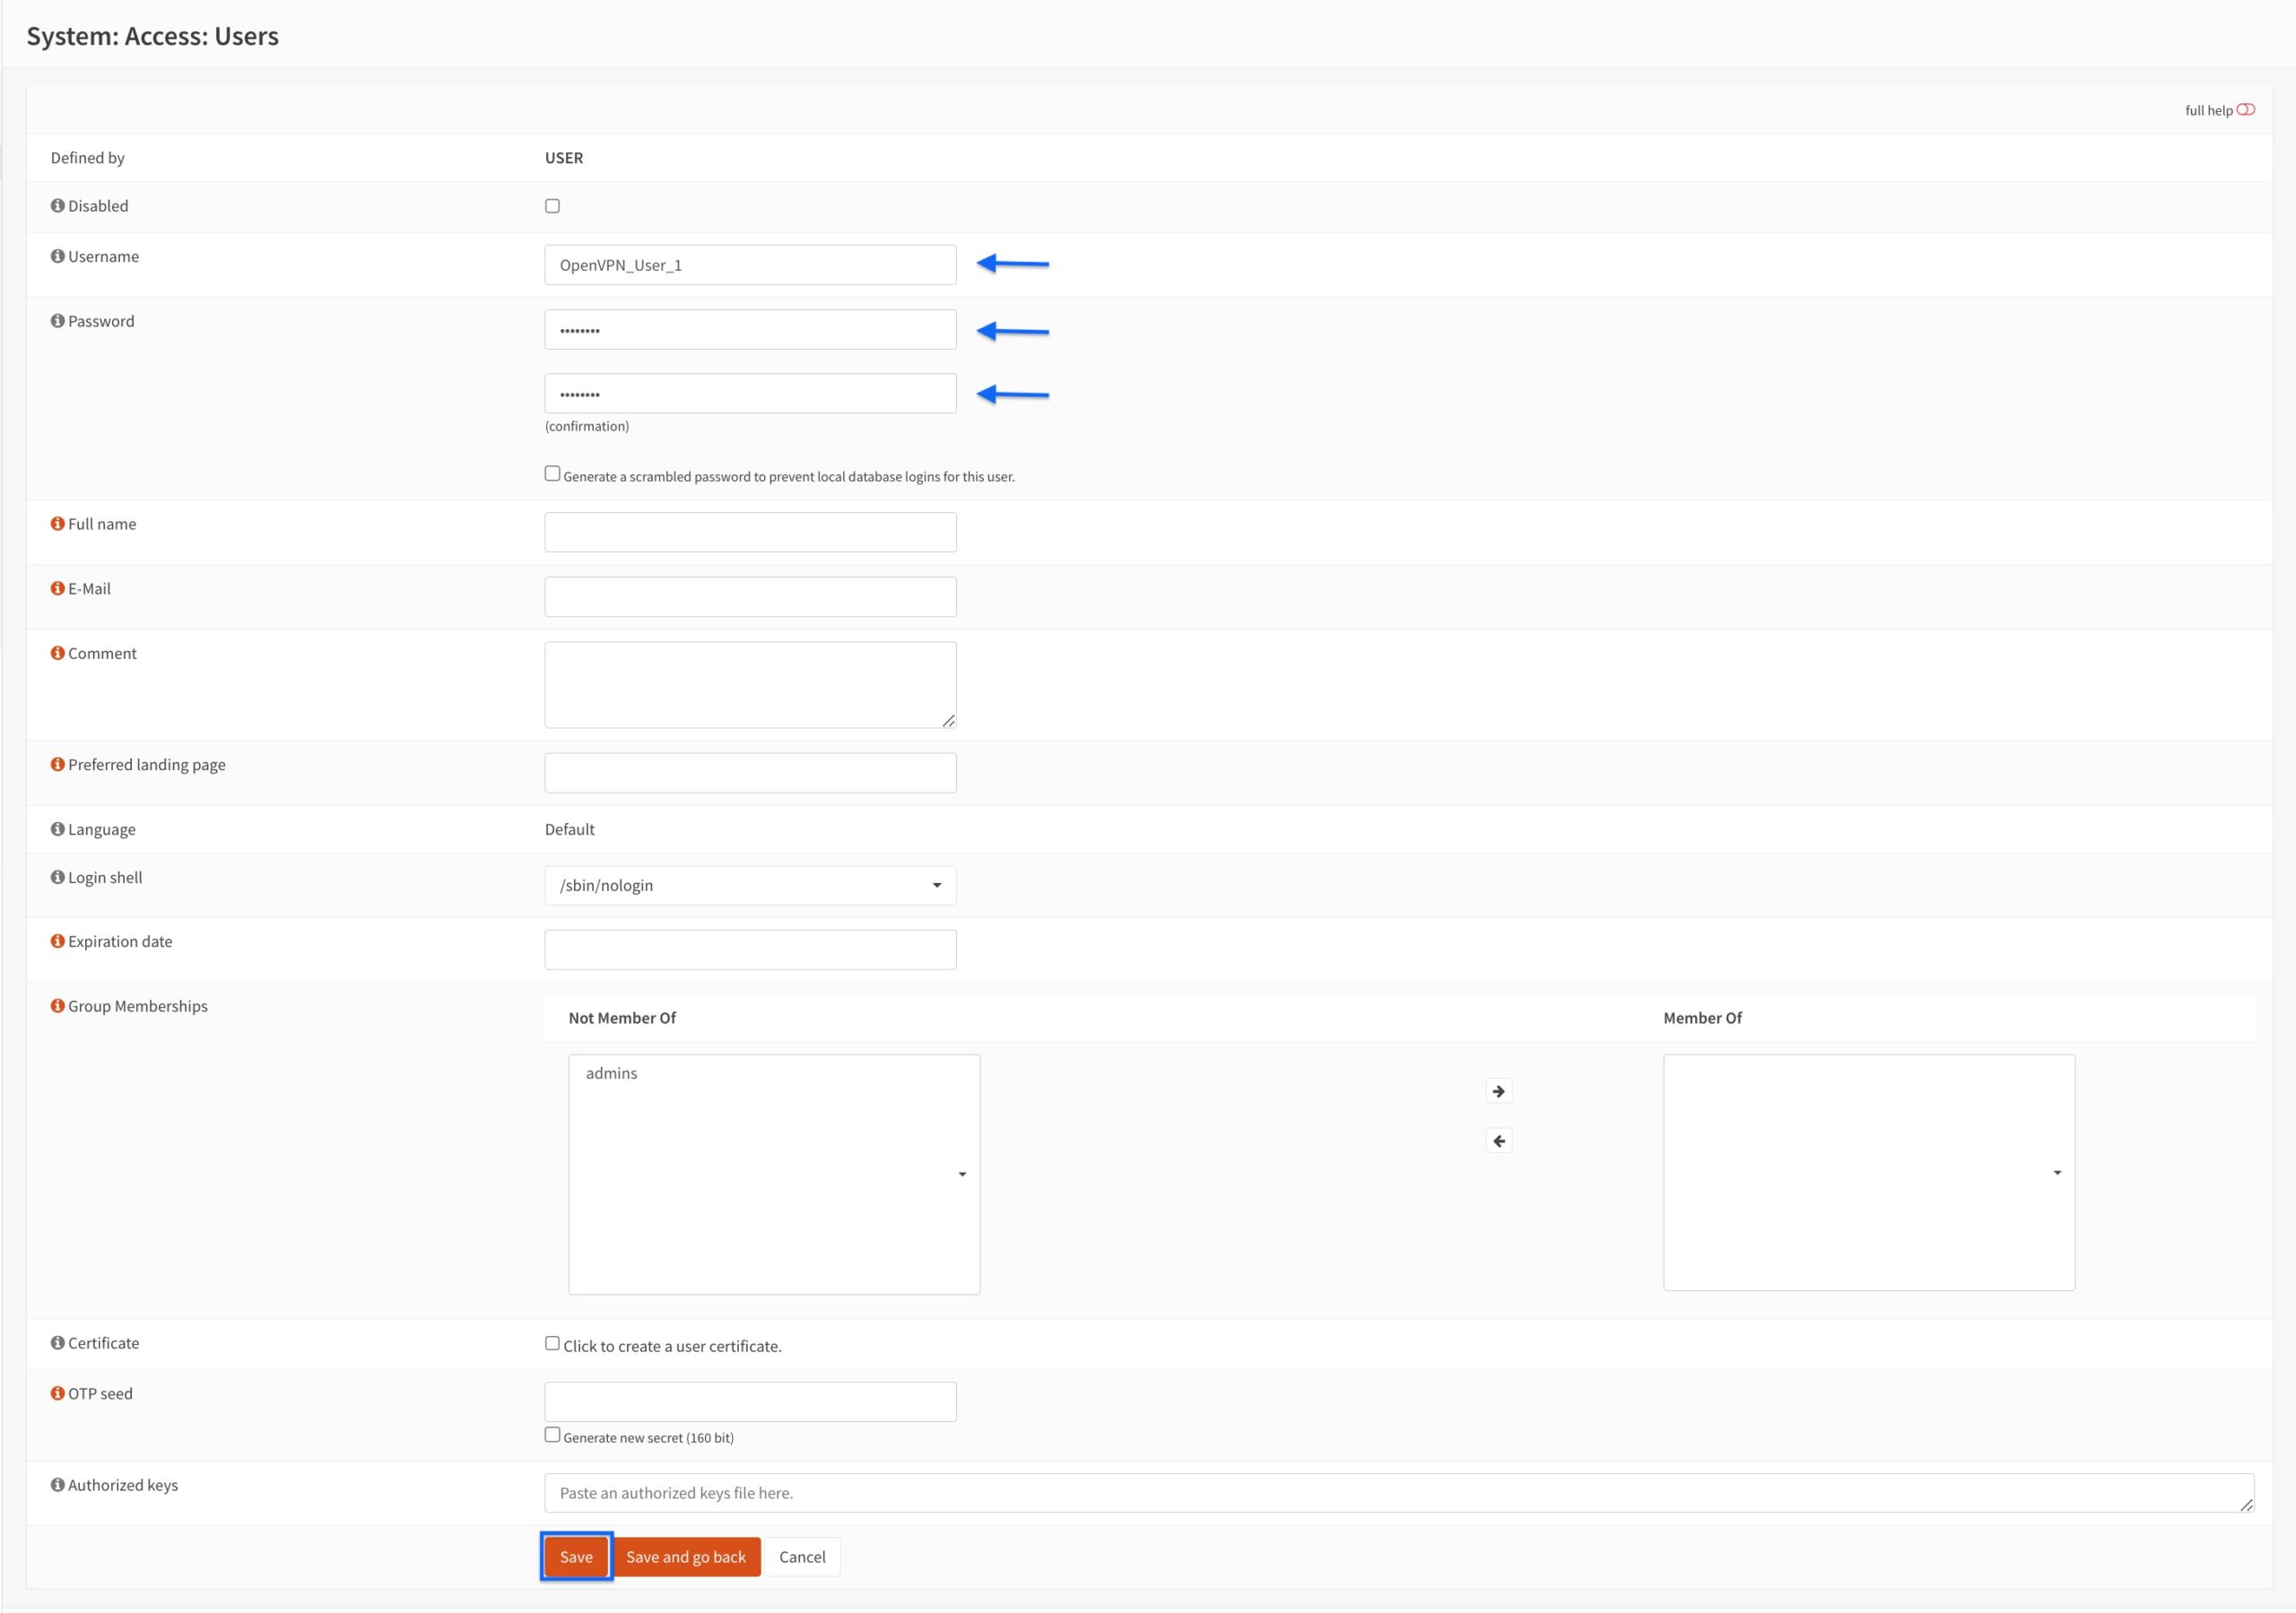
Creating a VPN user and its associated user certificate
We’re now going to create a user to access our OpenVPN server.
- From the side menus, select System > Access > Users. The main Users page is displayed.

- Click the + sign. The Users configuration page is displayed.

- Enter your user’s username in the Username field.
- Enter and confirm your user’s password in the Password fields.
- Click Save at the bottom of the page.
- The changes are saved, and you should see The changes have been applied successfully at the top of the page.

- Scroll down to the User Certificates section of the page and click the + sign to create a user certificate. The Certificates configuration page is displayed.
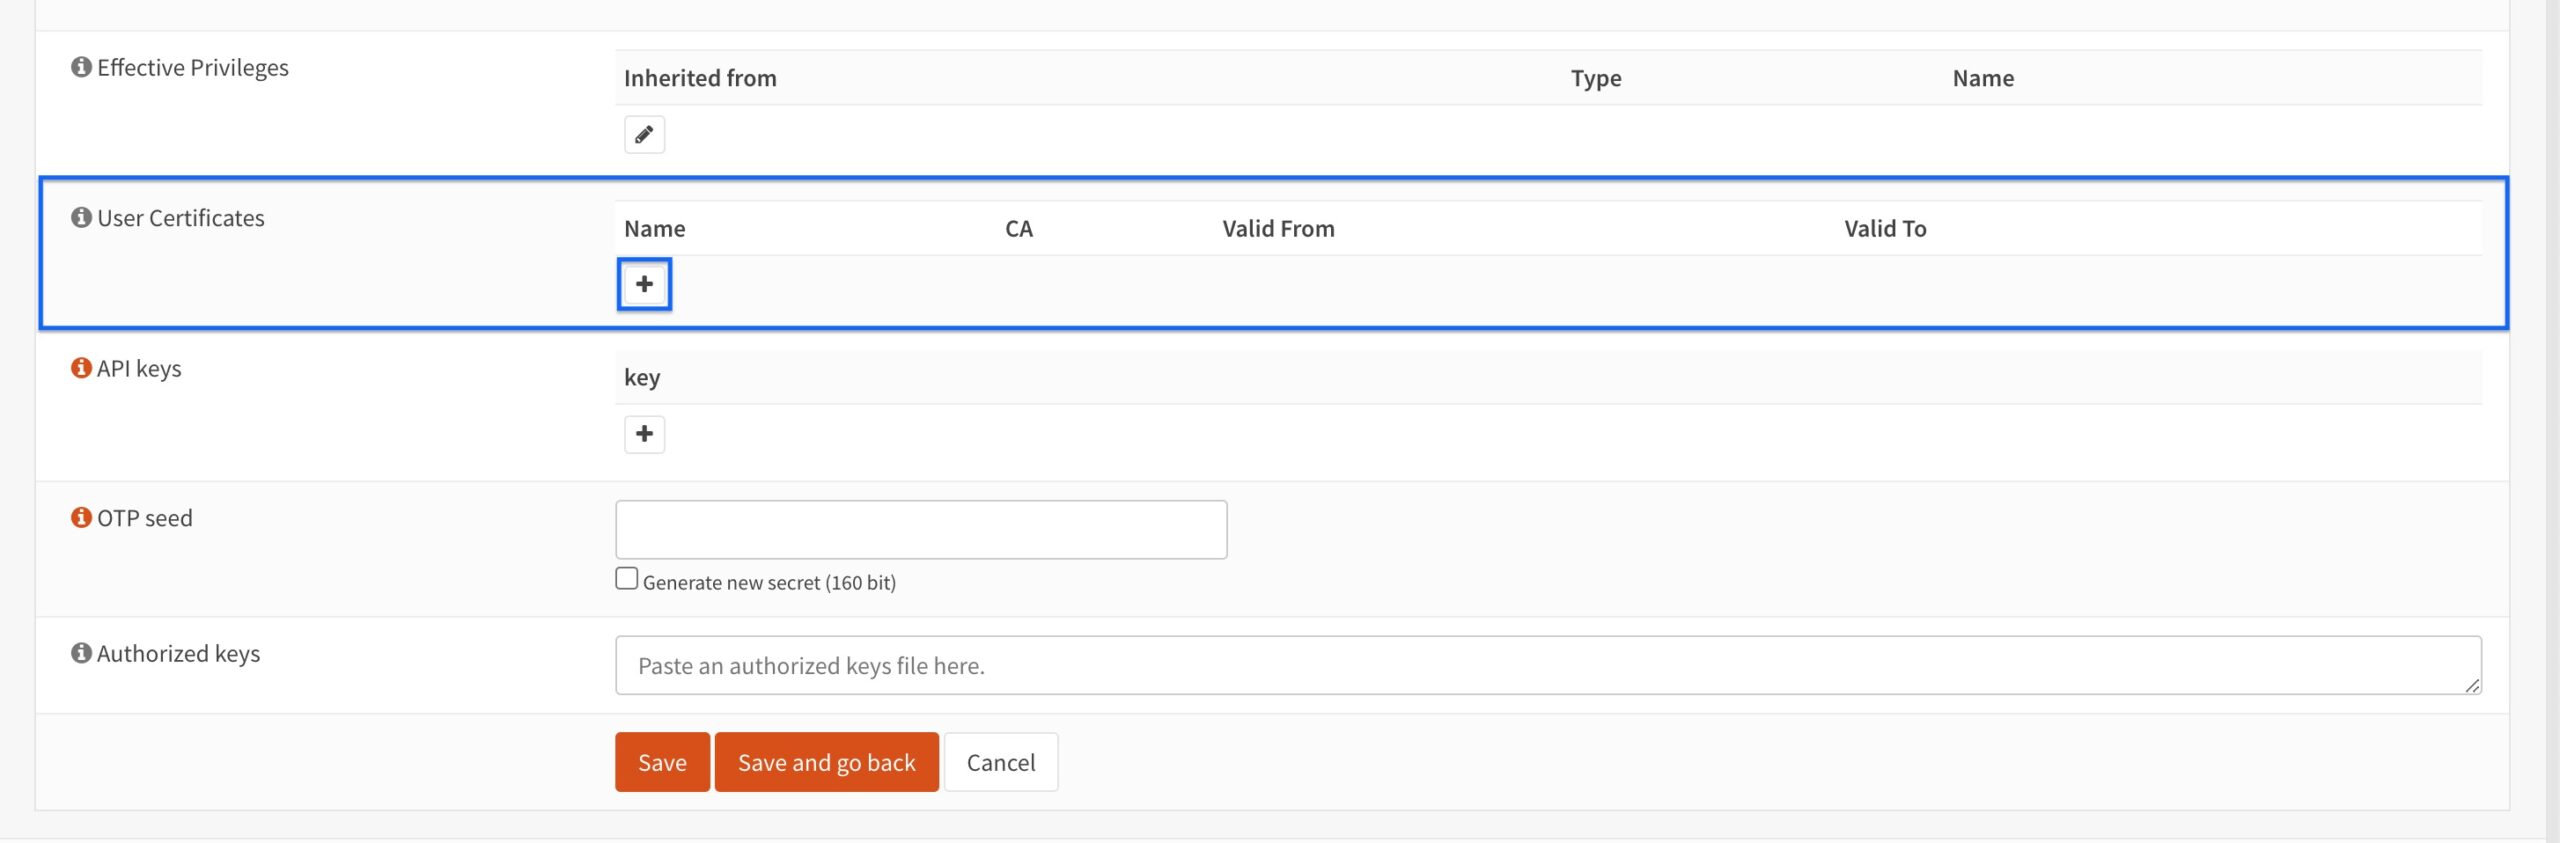
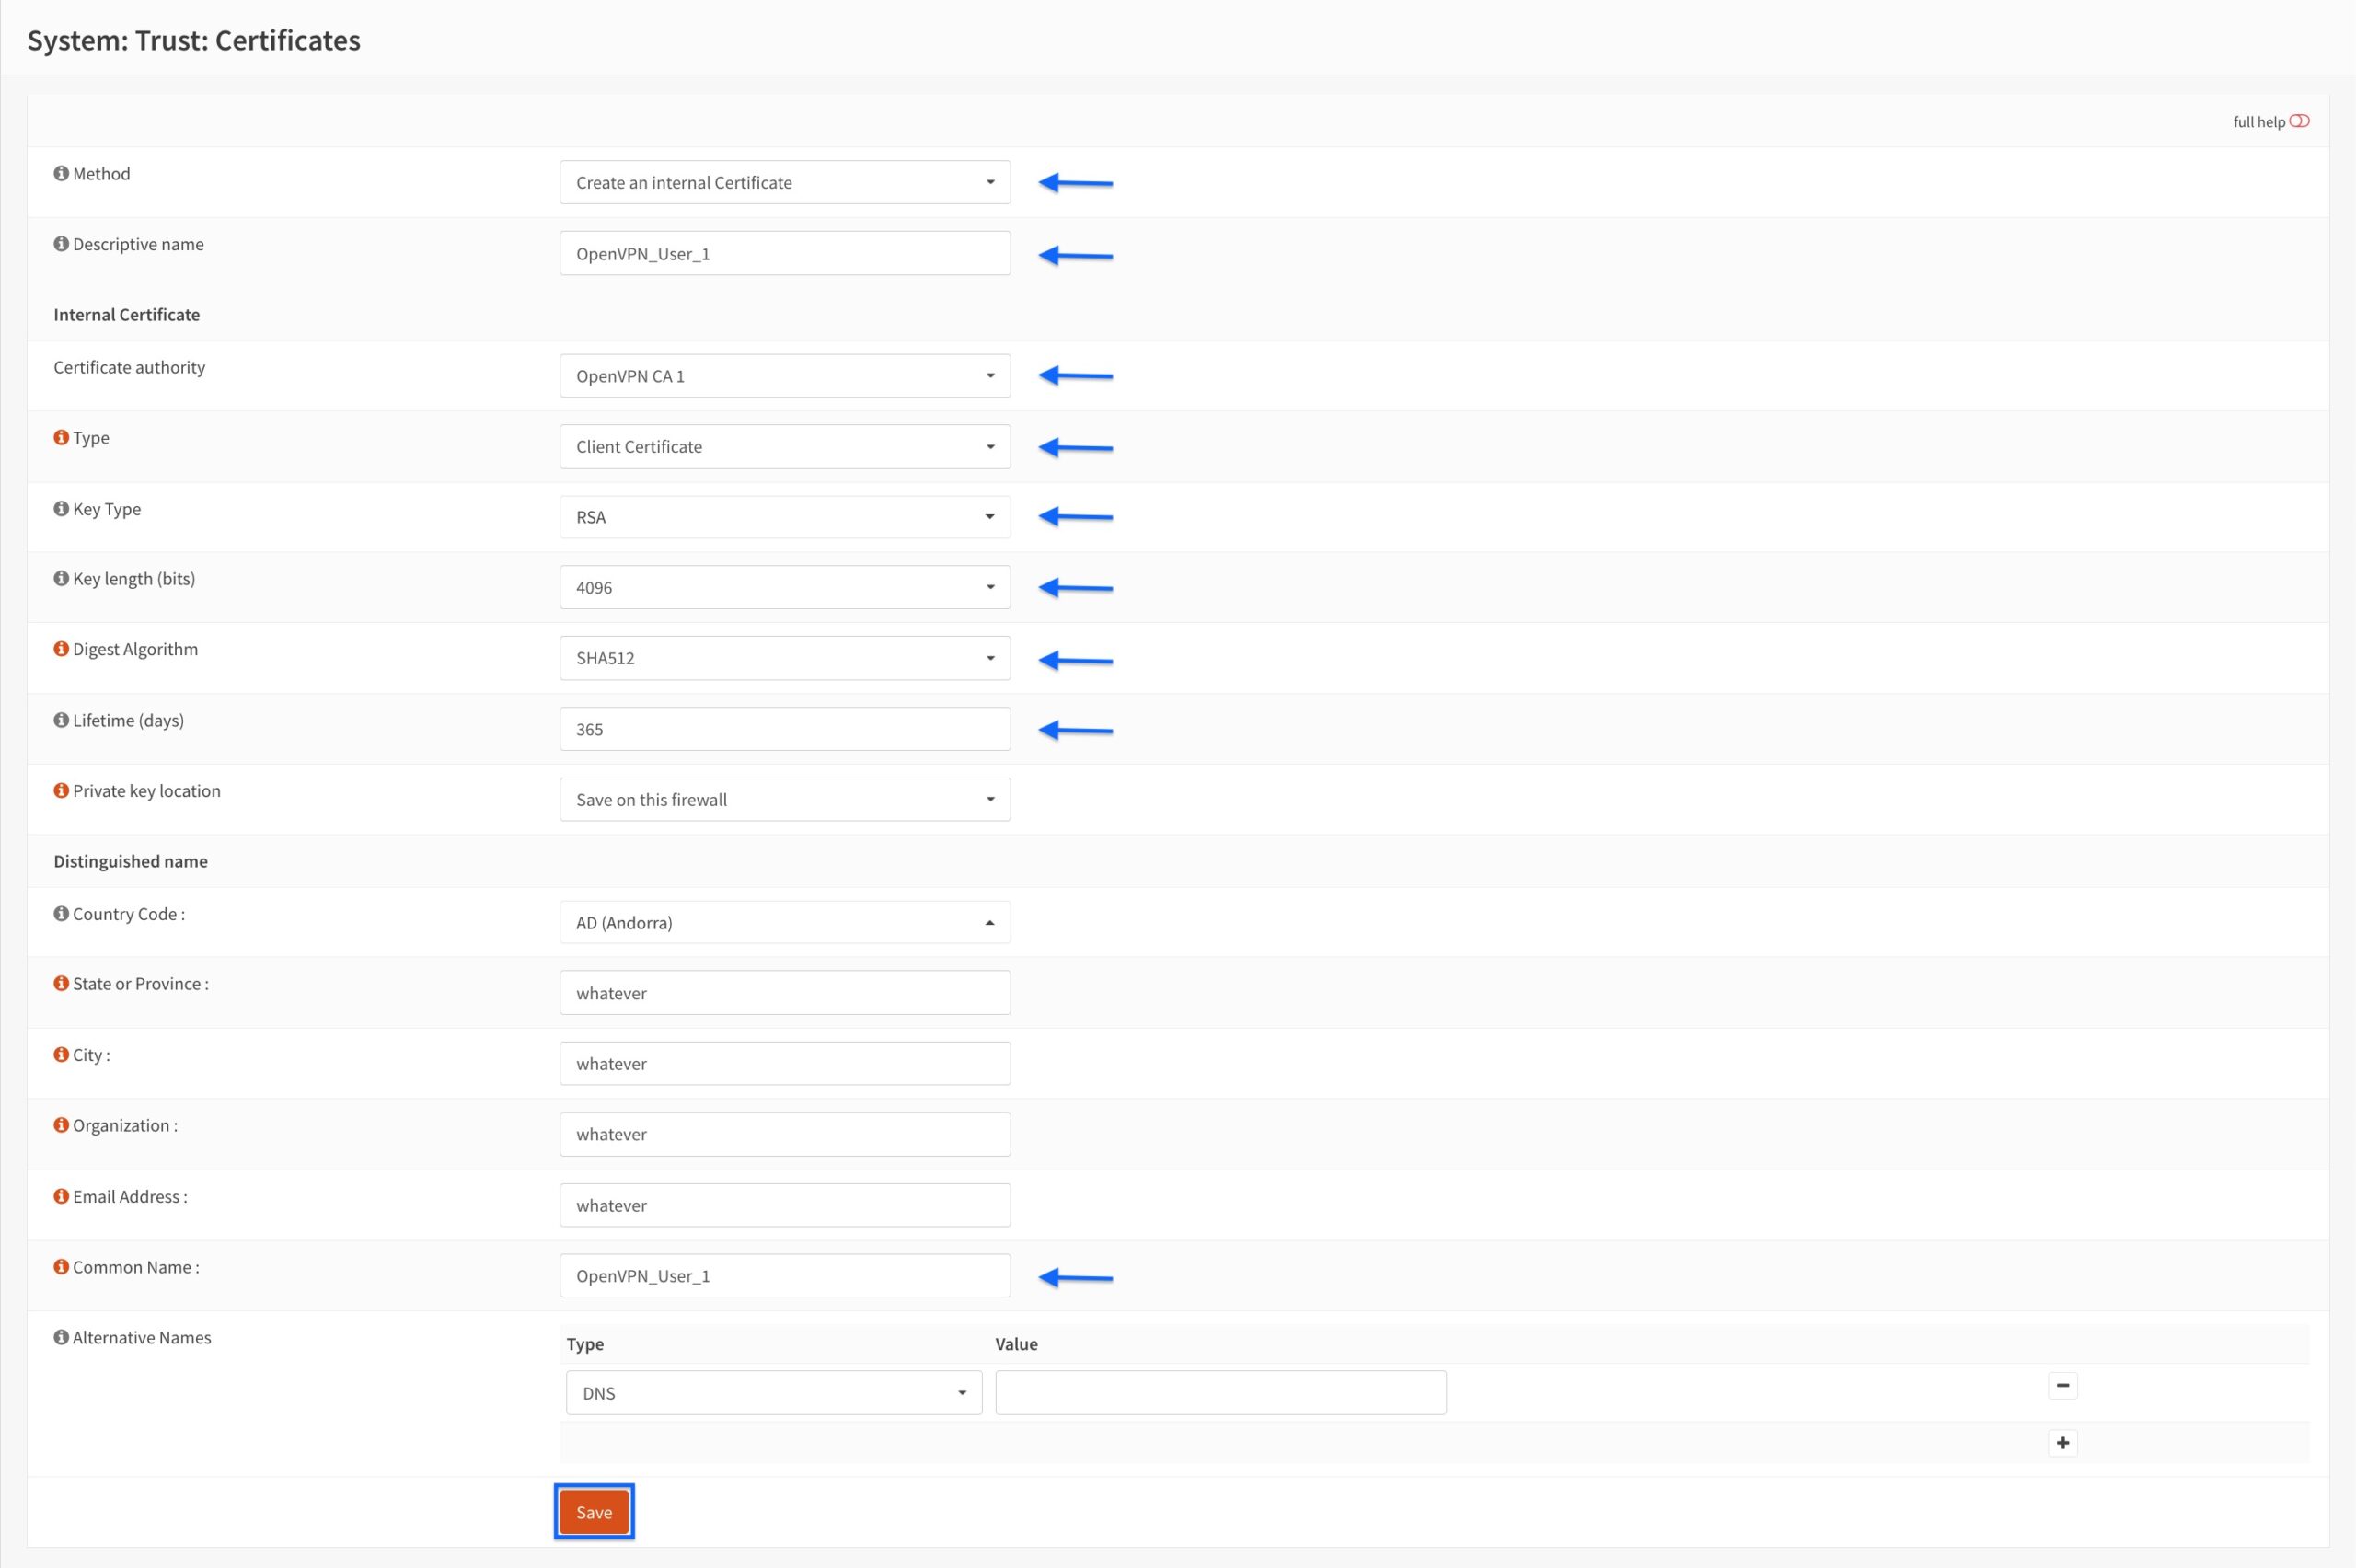
- Select Create an Internal Certificate from the Method drop-down menu.
- Enter a name for your client certificate in the Descriptive name field.
- From the Certificate Authority drop-down menu, select the CA we just created. This is OpenVPN CA 1, in my case.
- Set the Type to Client Certificate.
- Set the Key Type to RSA.
- Set the Key Length to 4096.
- Set the Digest Algorithm to SHA512.
- Set the Lifetime to 365 days.
- The values for the Country Code, State or Province, City, Organization, and Email Address fields are automatically populated based on what you entered when configuring the CA.
- Enter a common name for your client certificate in the Common Name field.
- Click Save at the bottom of the page.
- You’re taken back to the User configuration page, and we can see our newly created client certificate has been added to the user profile. Click Save again.
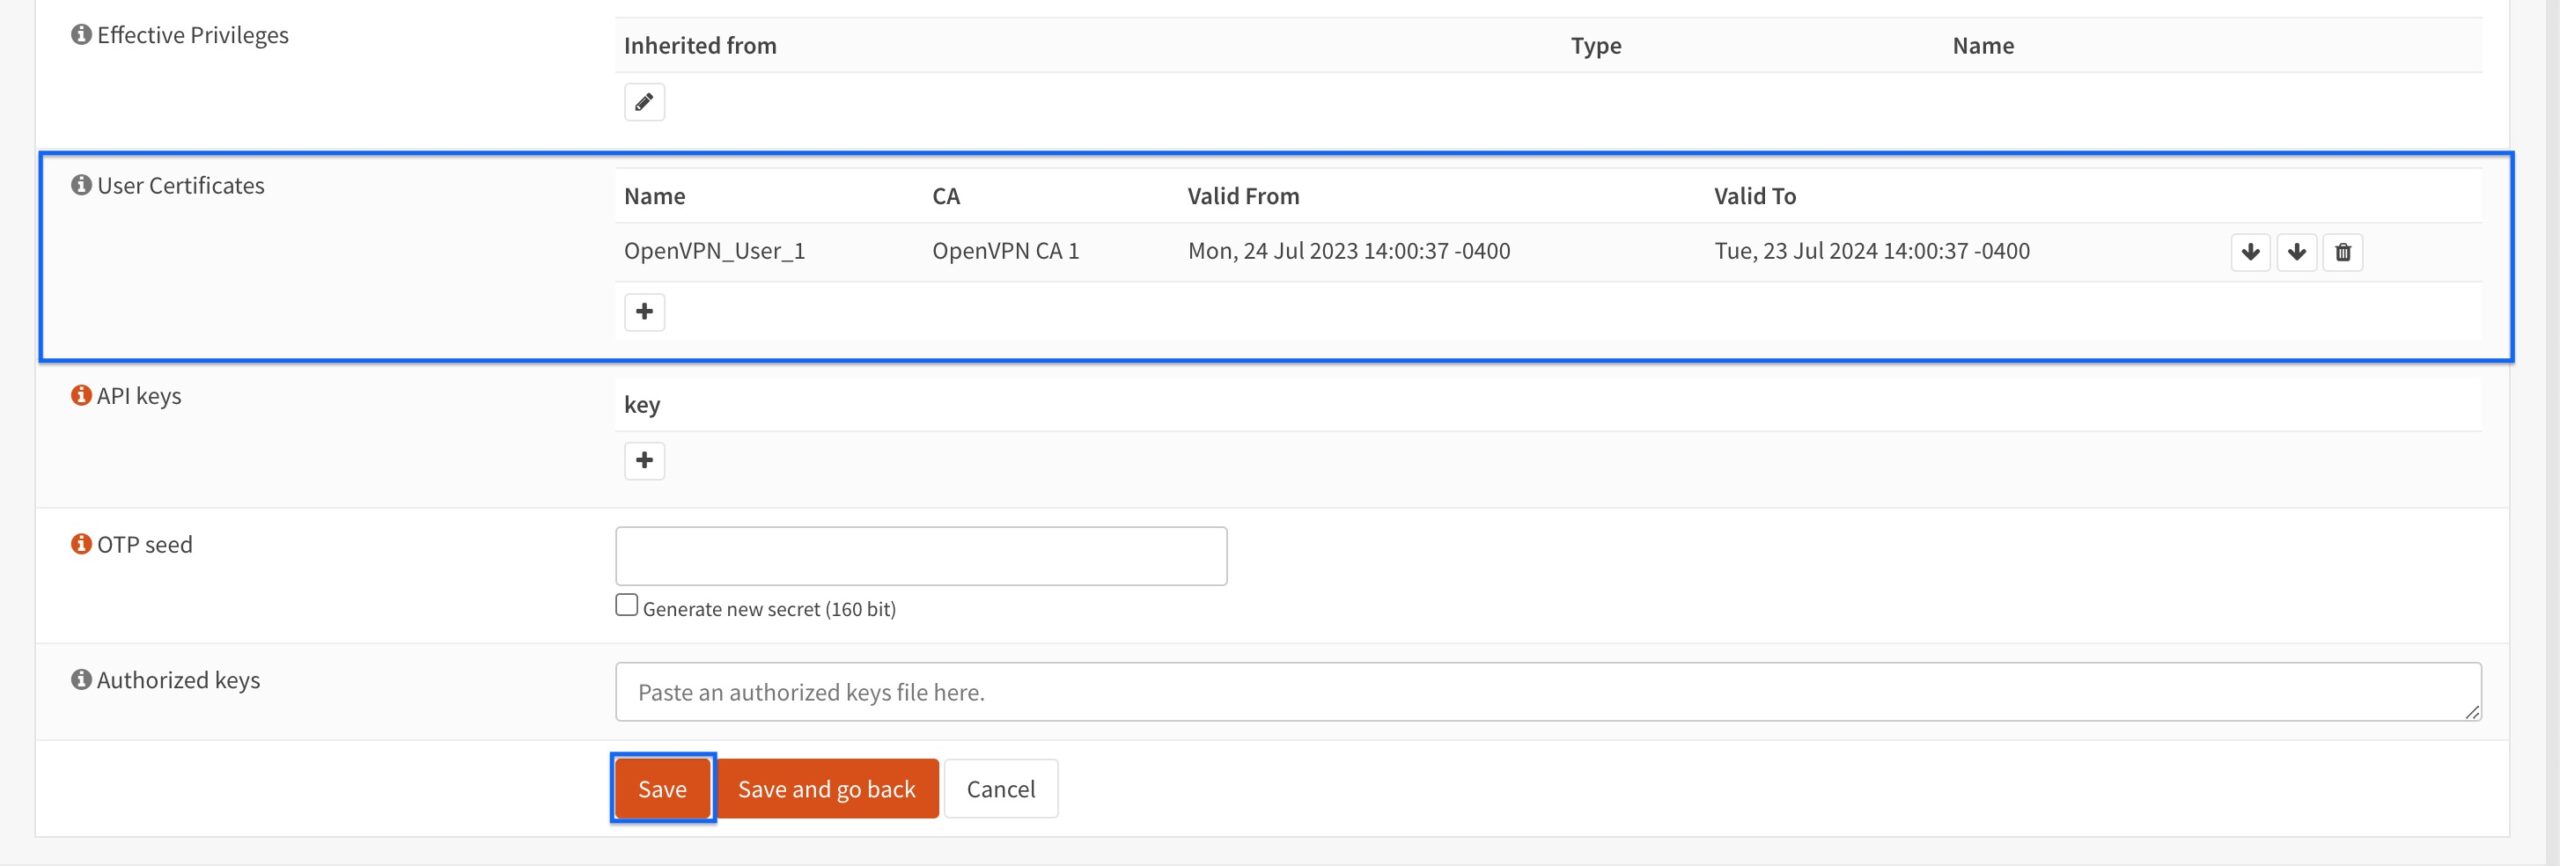
- The changes are saved, and you should see The changes have been applied successfully at the top of the page.

Creating the OpenVPN server
We now have everything we need to create the OpenVPN server.
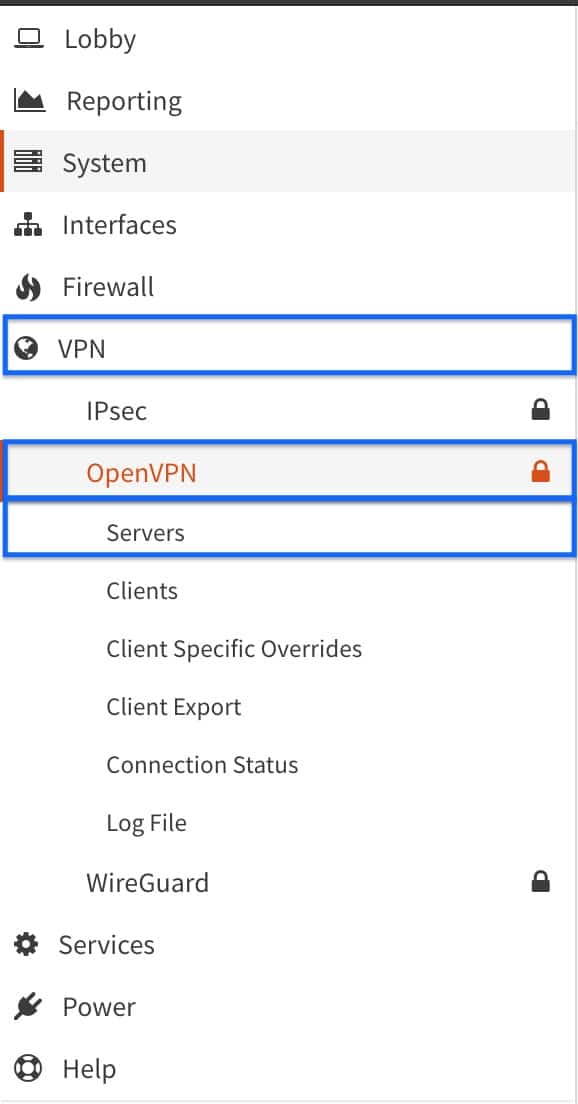
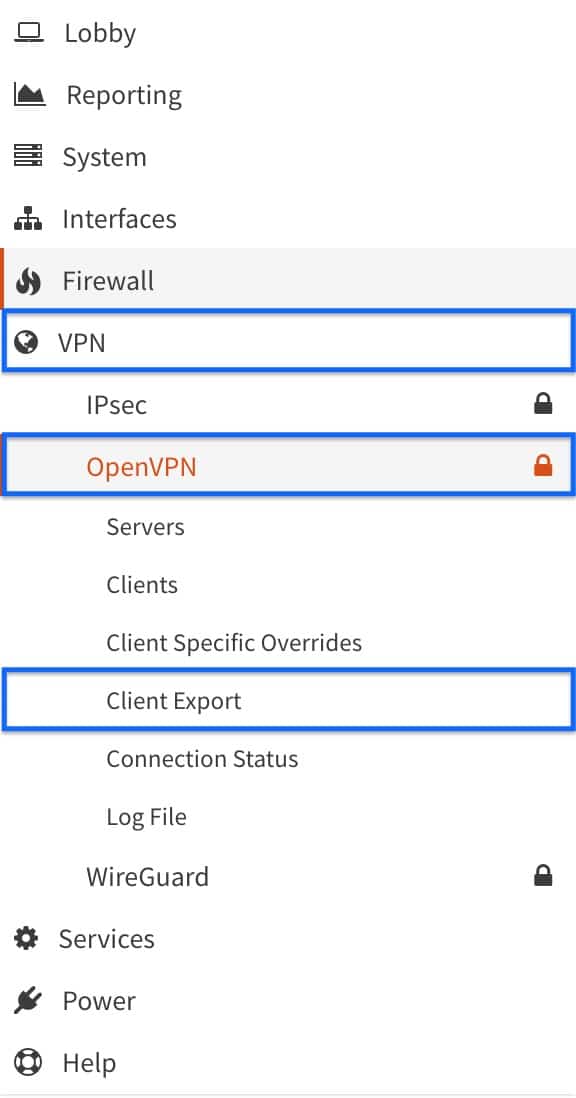
- From the side menus, select VPN > OpenVPN > Servers. The main OpenVPN Servers page is displayed.
- Click the + sign to add a new OpenVPN server. The main OpenVPN Server configuration page is displayed.

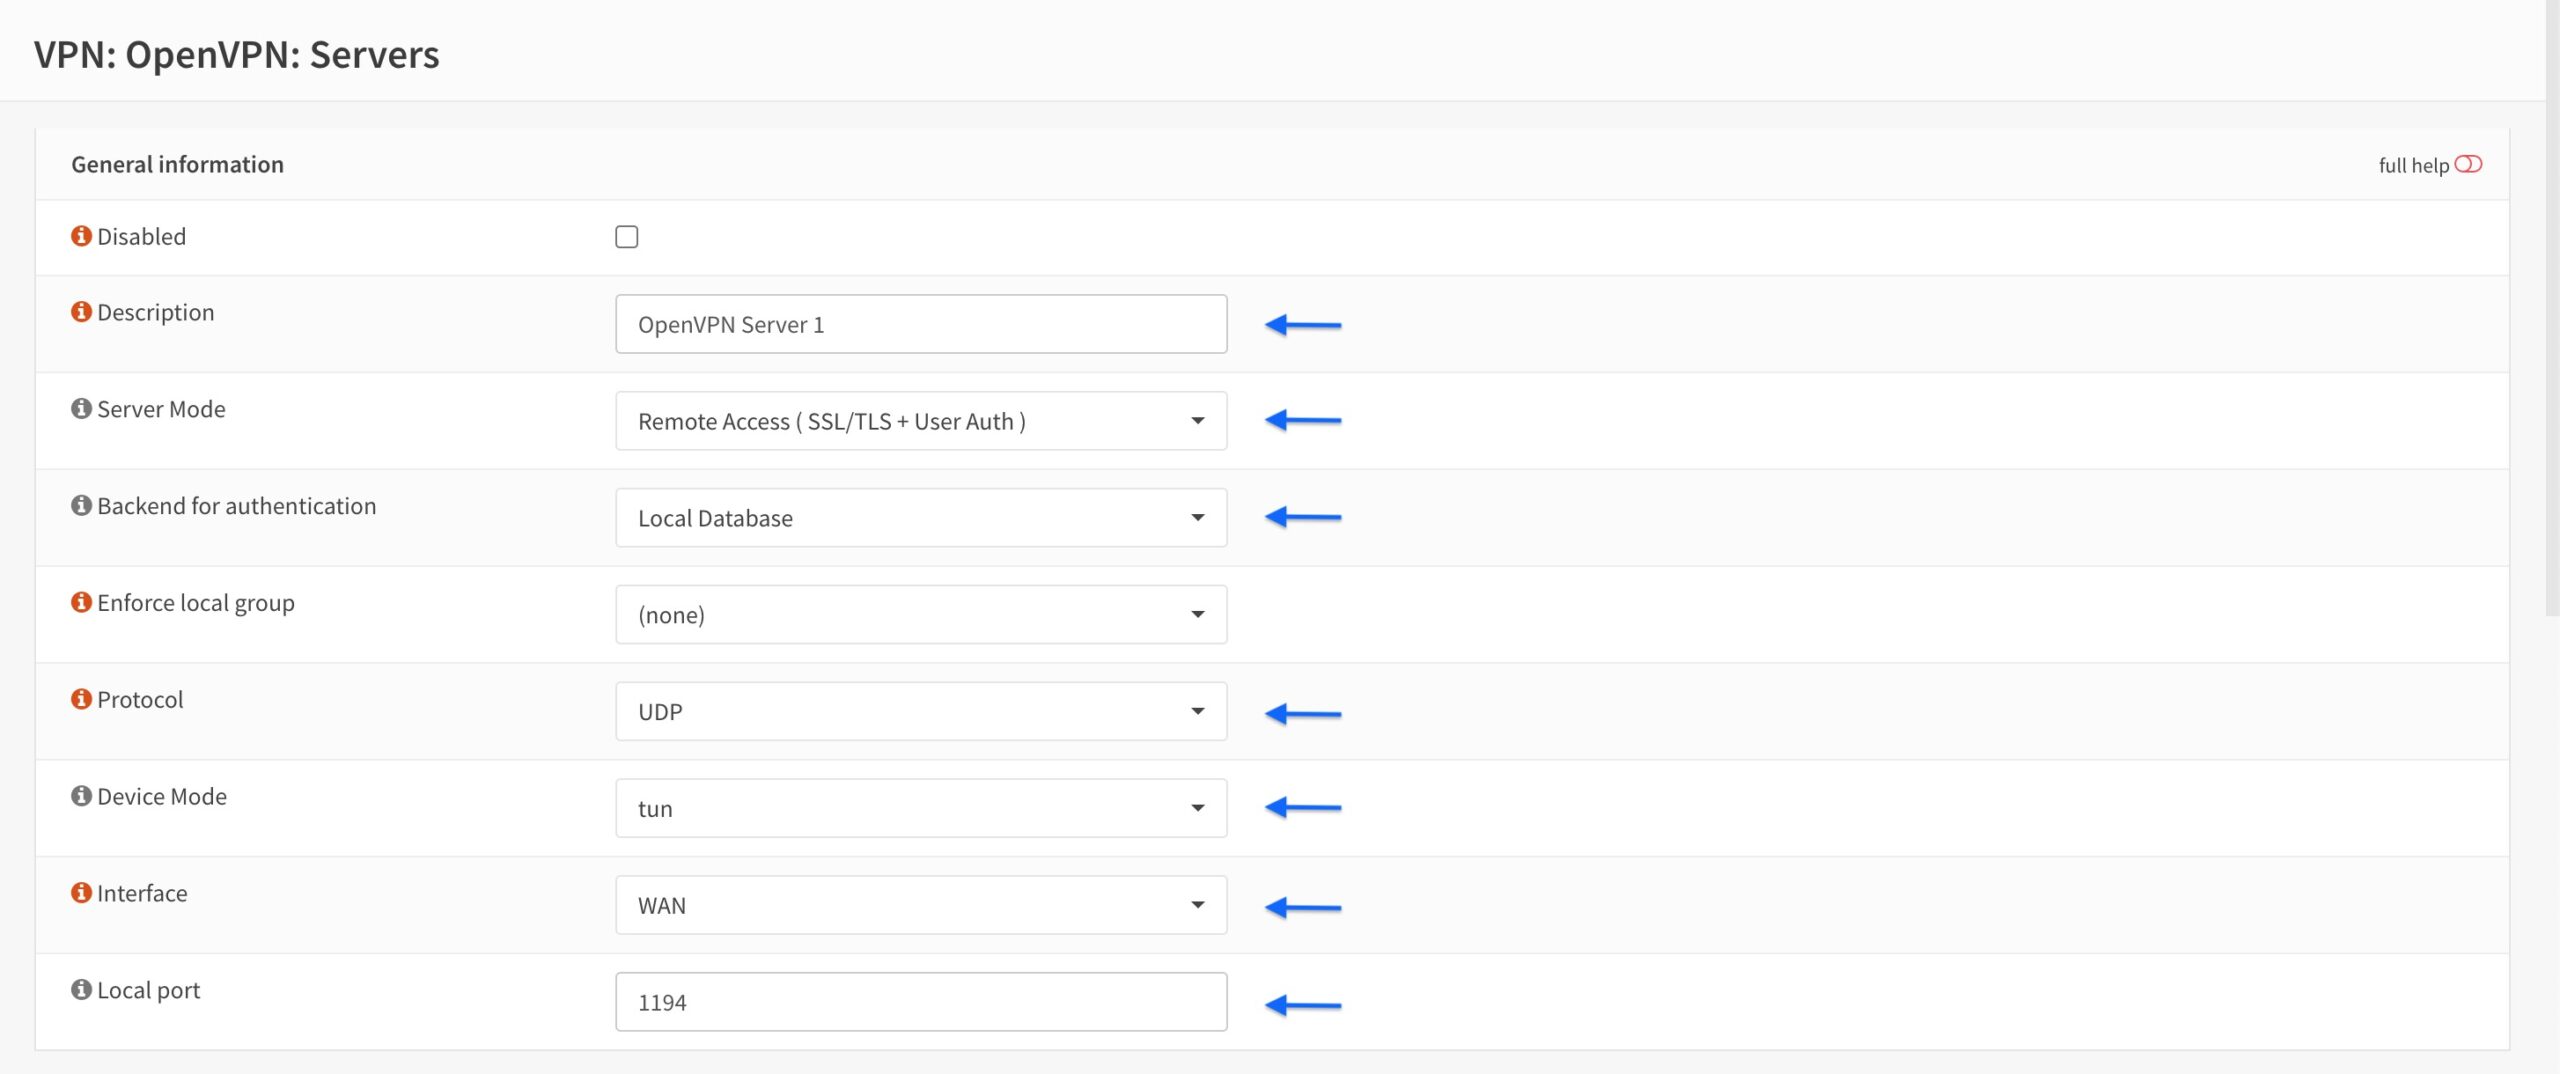
General Information
- Provide a name for your OpenVPN server in the Description field.
- Set the Server Mode to Remote Access (SSL/TLS + User Auth).
- Set the Backend for authentication to Local Database.
- Set the Protocol to UDP.
- Set the Device Mode to tun.
- Set the Interface to WAN (so we can connect from the outside).
- Set the Local port to whichever port you would like to use. I will leave this at 1194, the default port for OpenVPN.
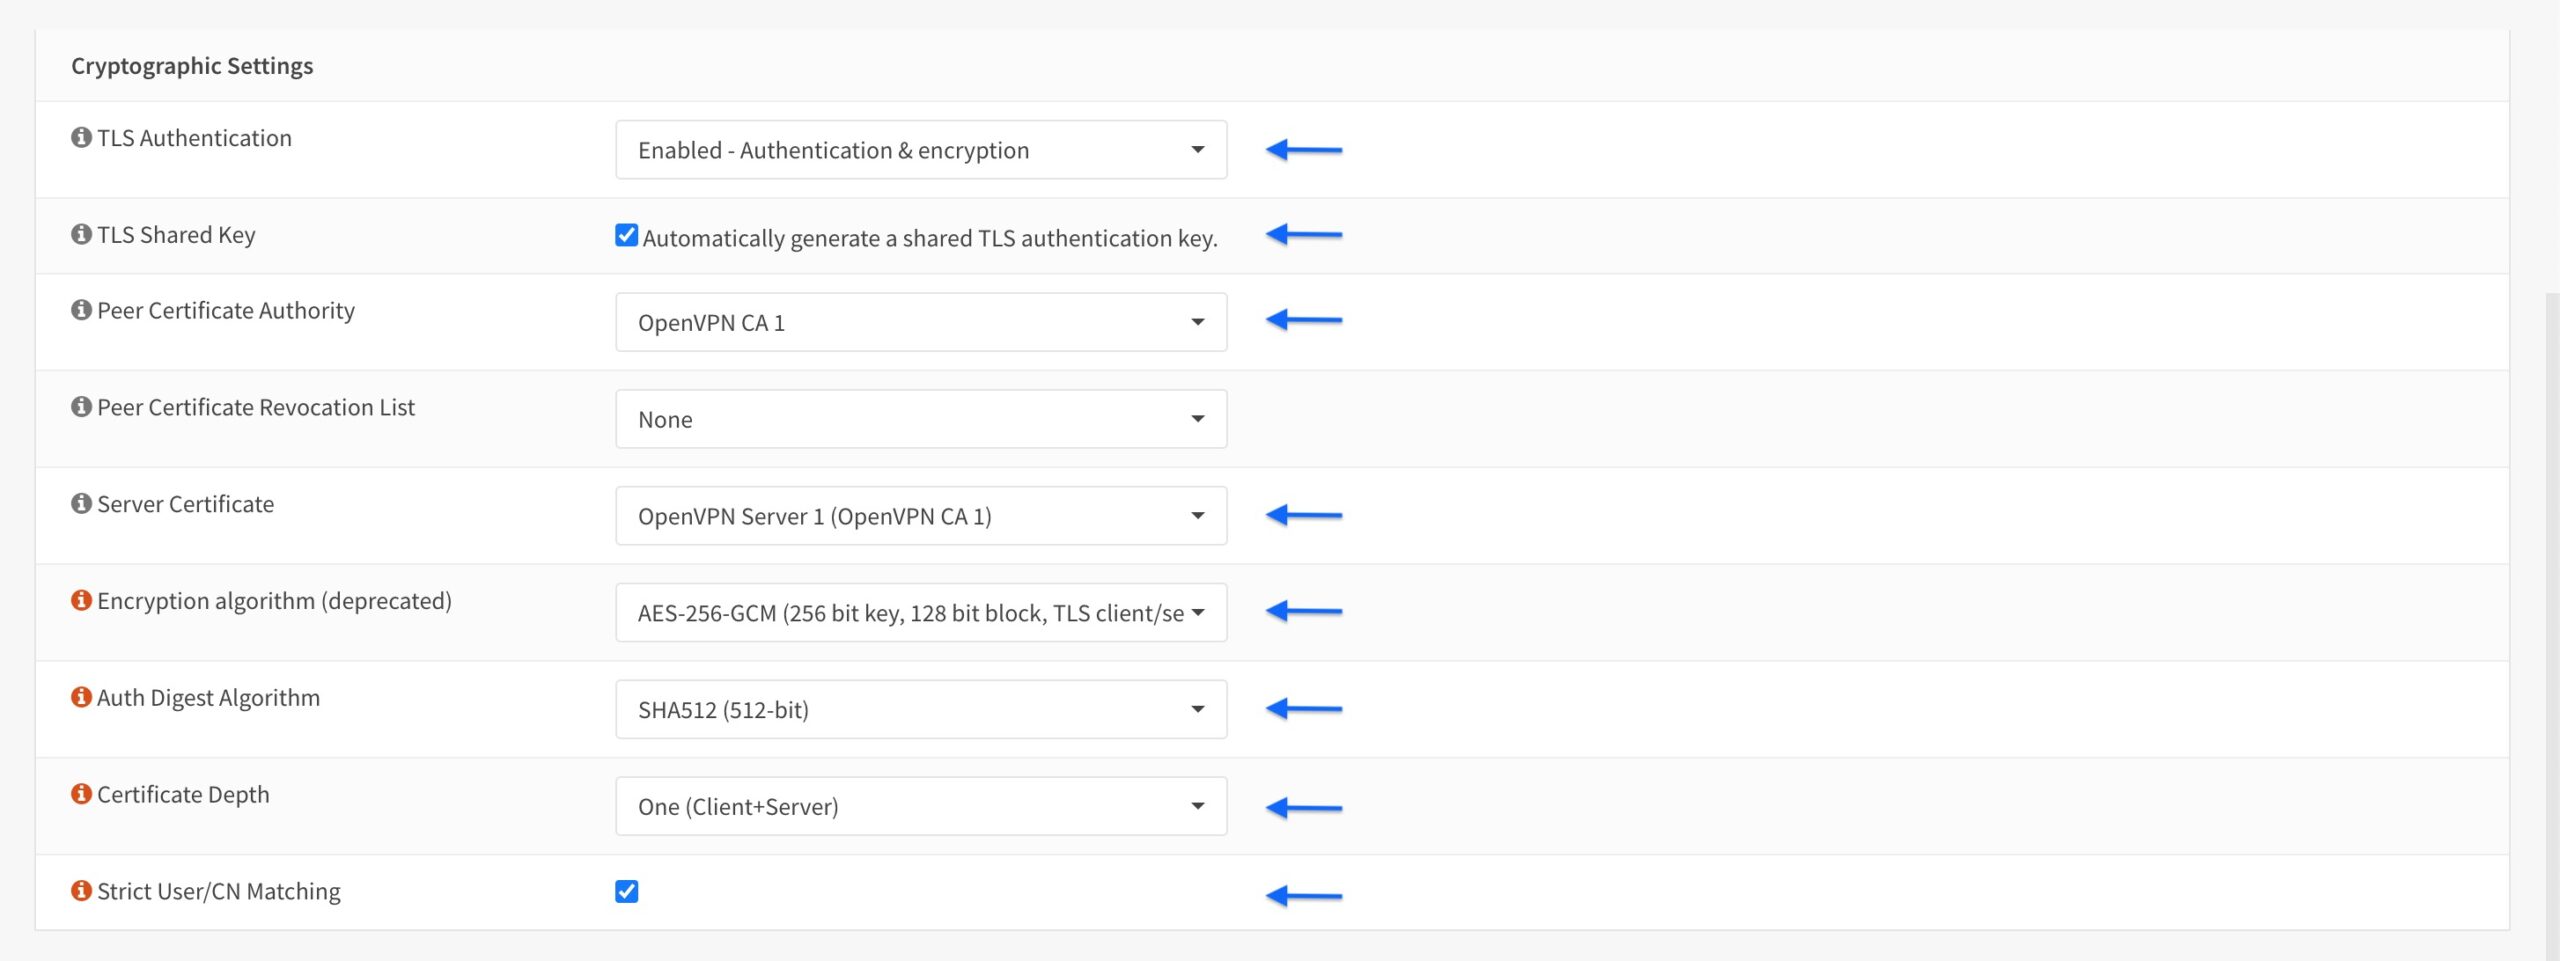
Cryptographic Settings
- From the TLS Authentication drop-down menu, select Enabled – Authentication and encryption.
- Tick the Automatically generate a shared TLS authentication key box.
- Set the Peer Certificate Authority to the CA we created earlier.
- From the Server Certificate drop-down menu, select the server certificate we created earlier.
- From the Encryption algorithm drop-down menu, select AES-256-GCM.
- Set the Auth Digest Algorithm to SHA512 (512-bit).
- Set the Certificate Depth to One (Client+Server).
- Tick the Strict User/CN Matching box.
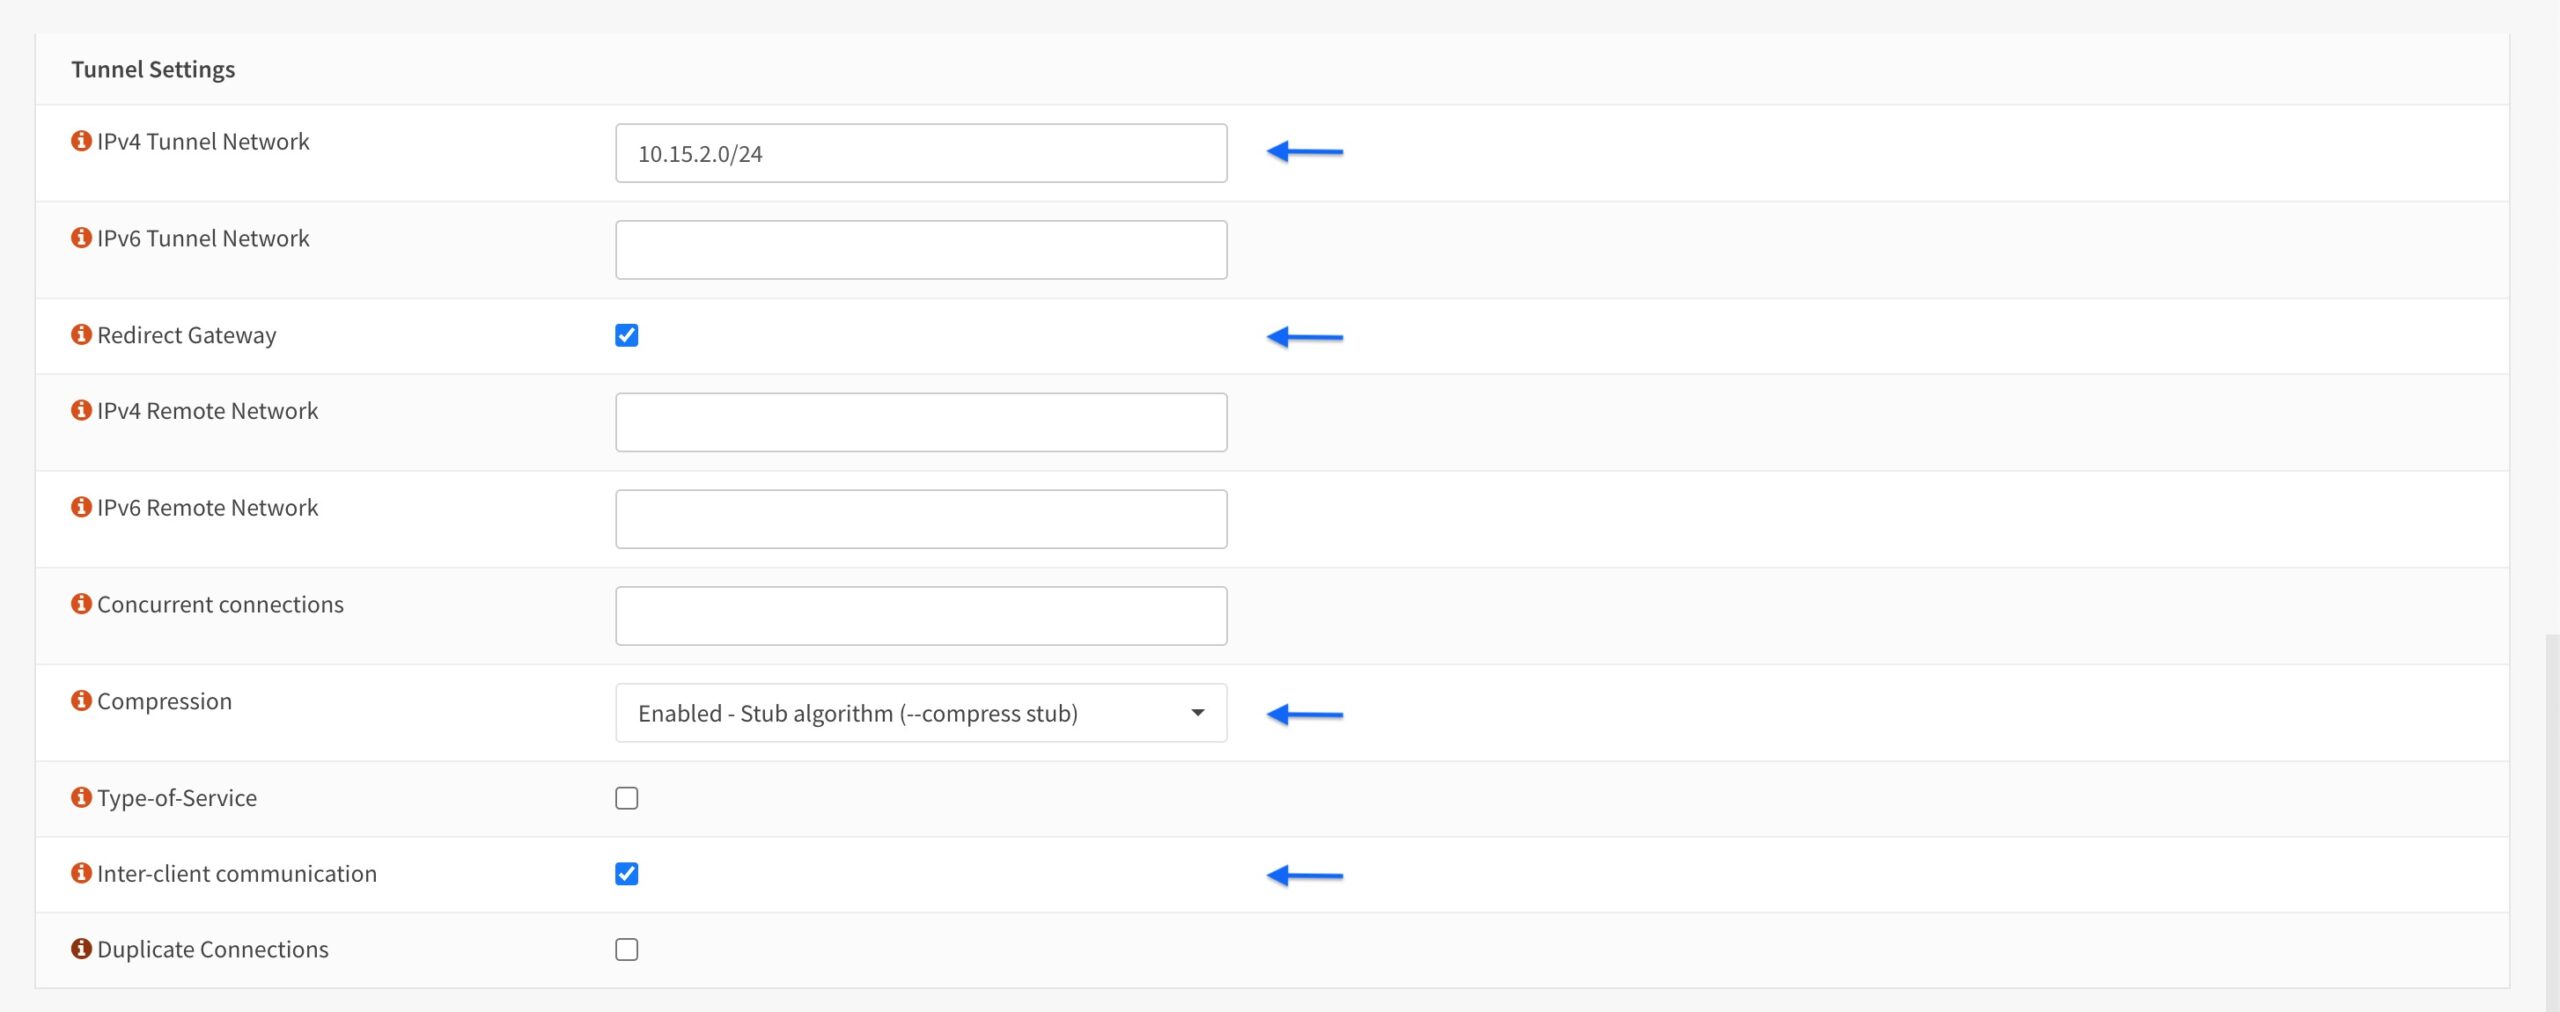
Tunnel Settings
- Enter a subnet that is not in use on your system in the IPv4 Tunnel Network field.
- Tick the Redirect Gateway box.
- Select Enabled – Stub algorithm (–compress stub) from the Compression drop-down menu.
- Tick the inter-client communication box.
Client Settings
- Tick the Dynamic IP box.
- Tick the Topology box.
- Click Save at the bottom of the page.

- You’re taken back to the main OpenVPN Servers page, and we can see our newly created server displayed in the list.

DNS
As the opening paragraphs mention, this guide assumes you’re using the built-in DNS Resolver for DNS resolution. We need to ensure that our OpenVPN interface/subnet also uses the DNS Resolver.
- From the side menus, select Services > Unbound DNS > General. The main Unbound DNS page is displayed.
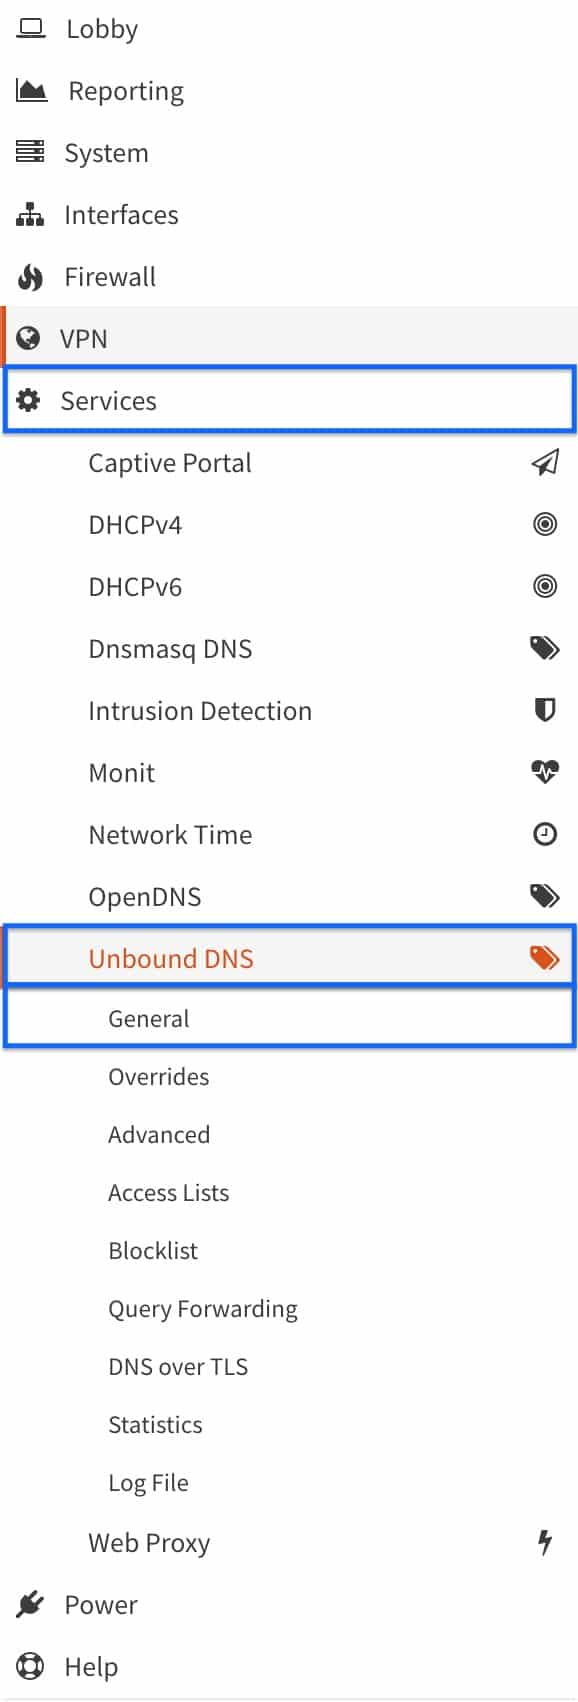
- In the Network Interfaces drop-down menu, make sure that either All (recommended) is selected or that the manually selected interfaces include OpenVPN Server.
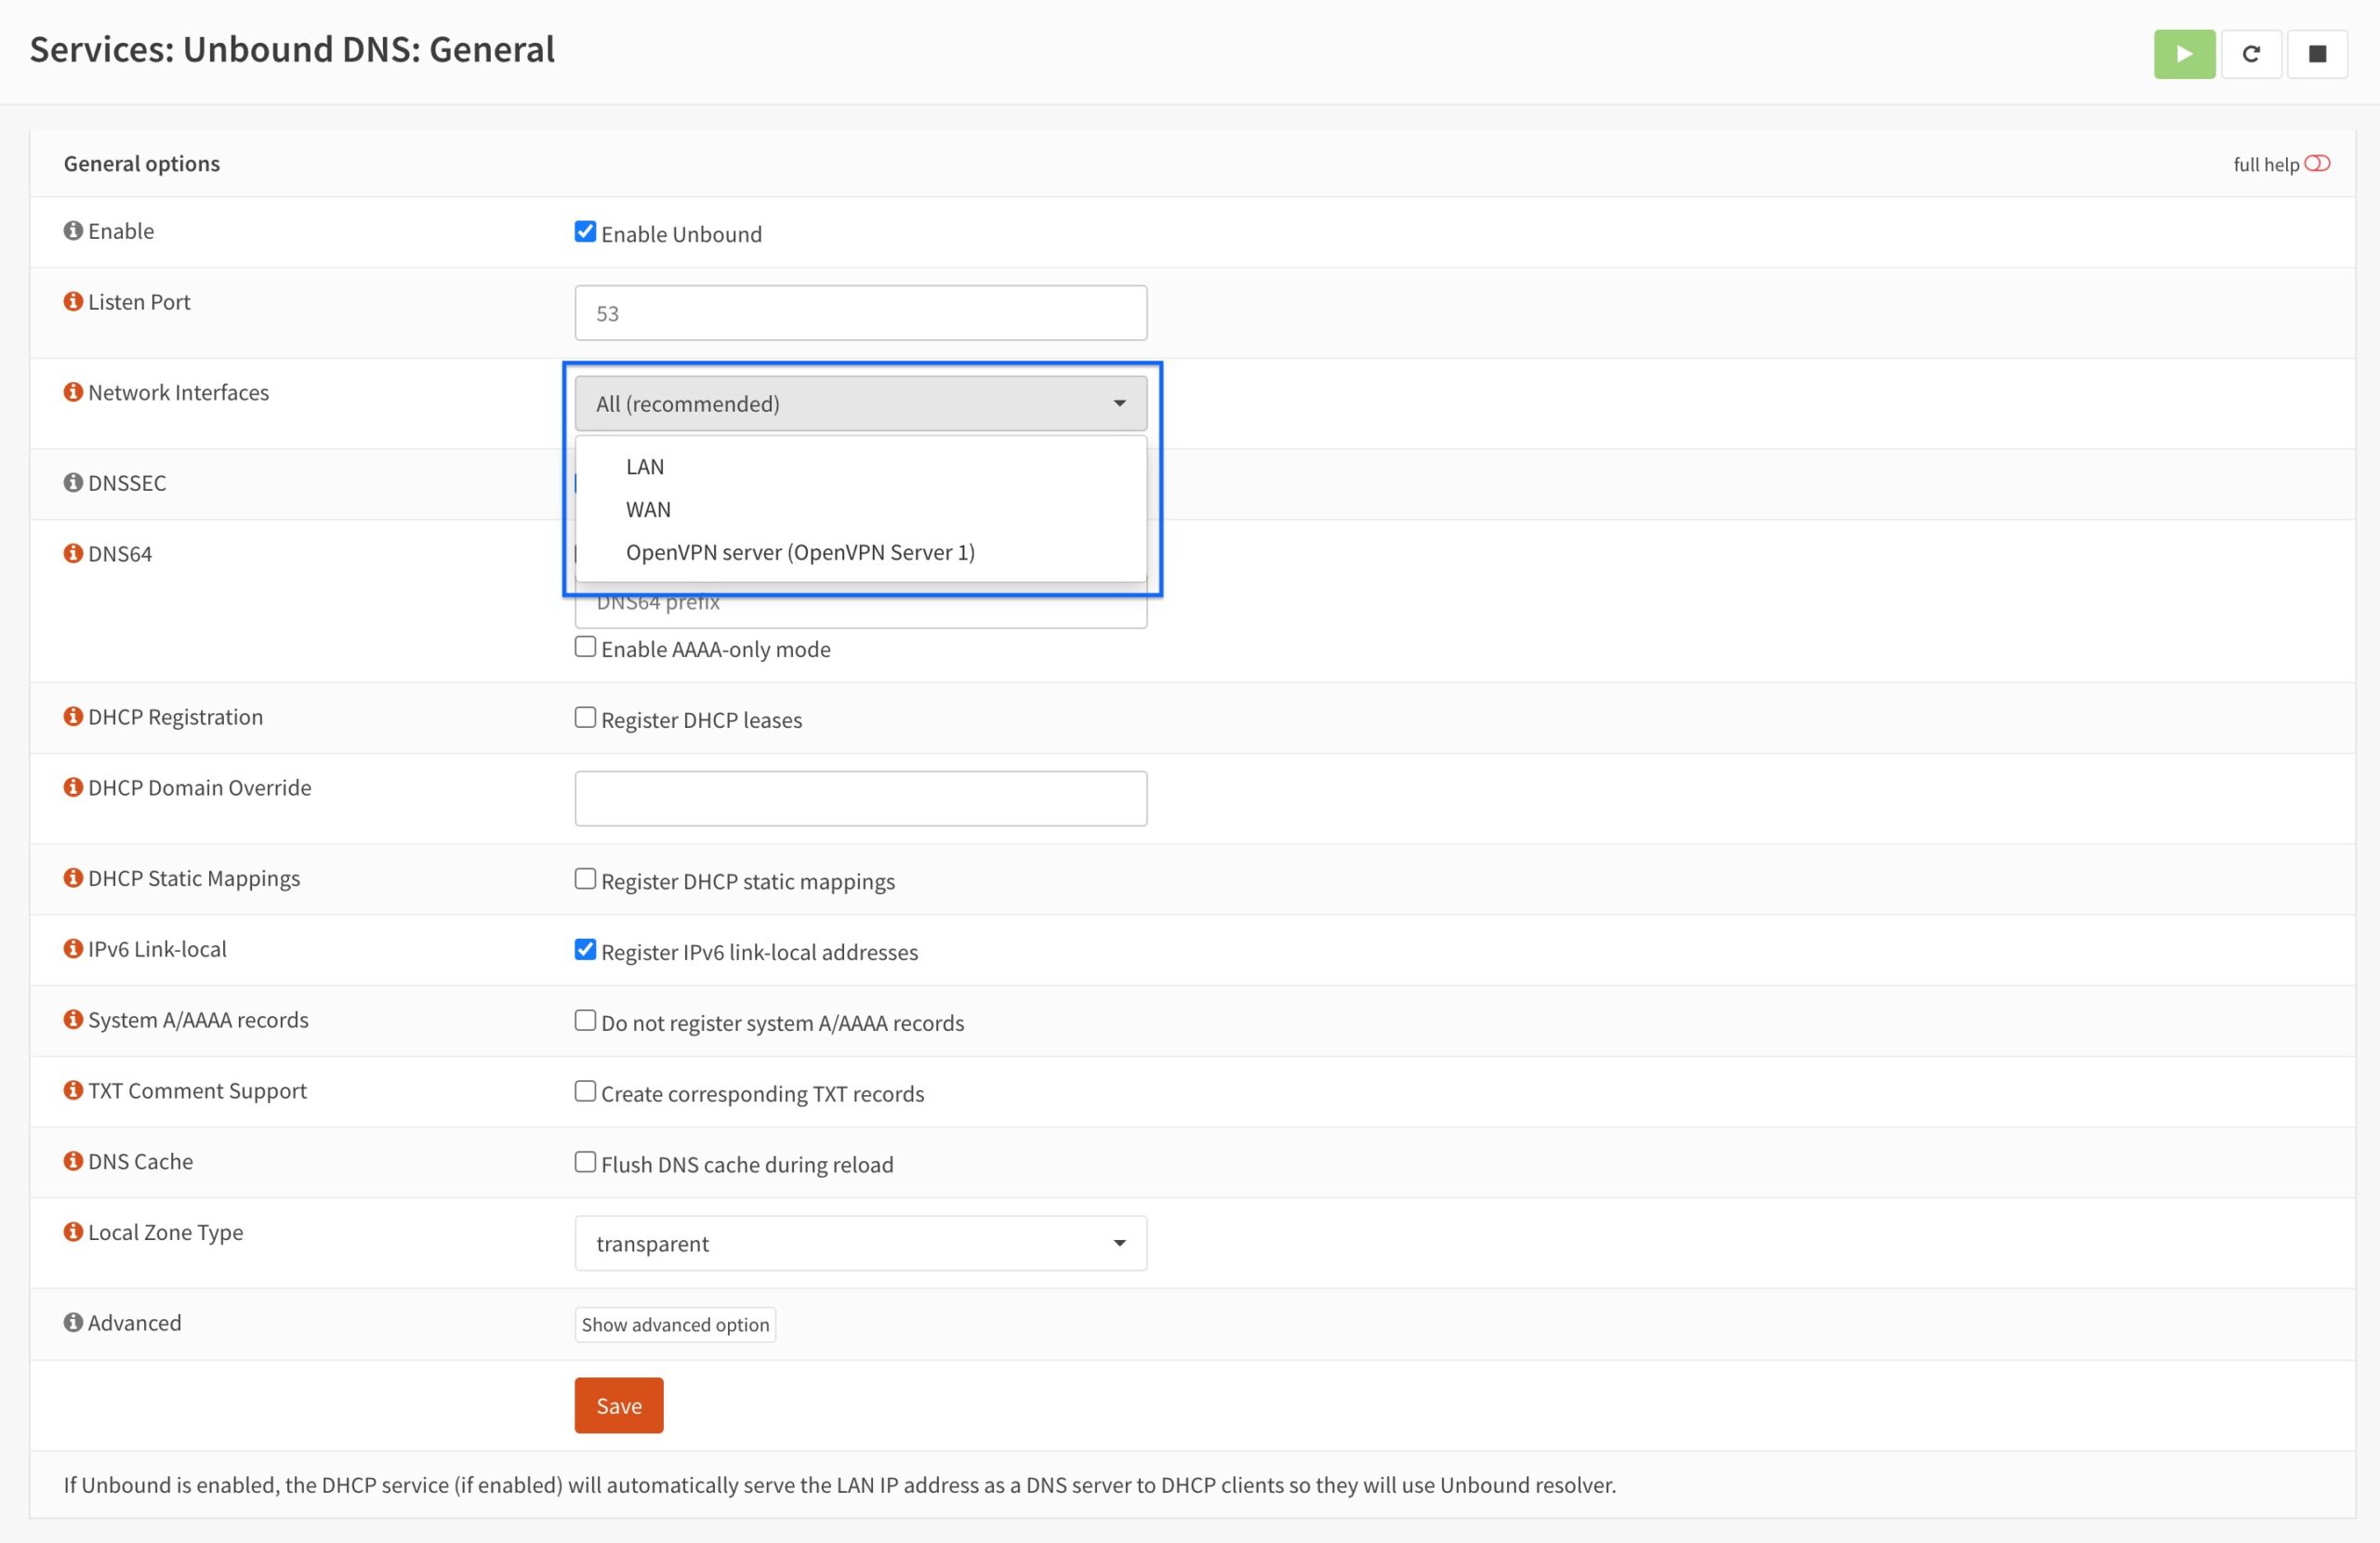
- Save and Apply Changes if needed.
Verifying the OpenVPN server configuration
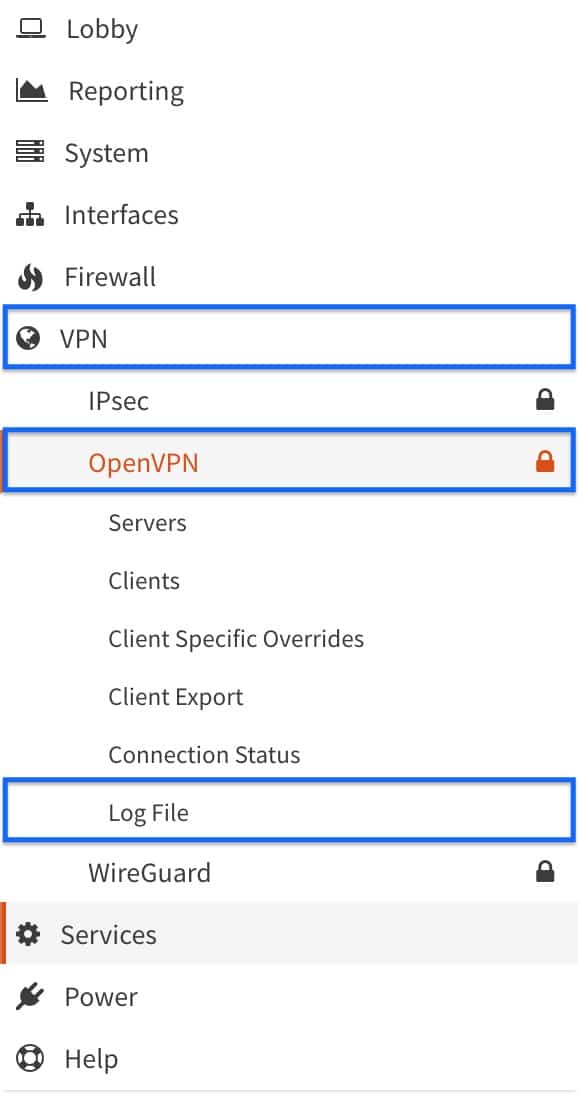
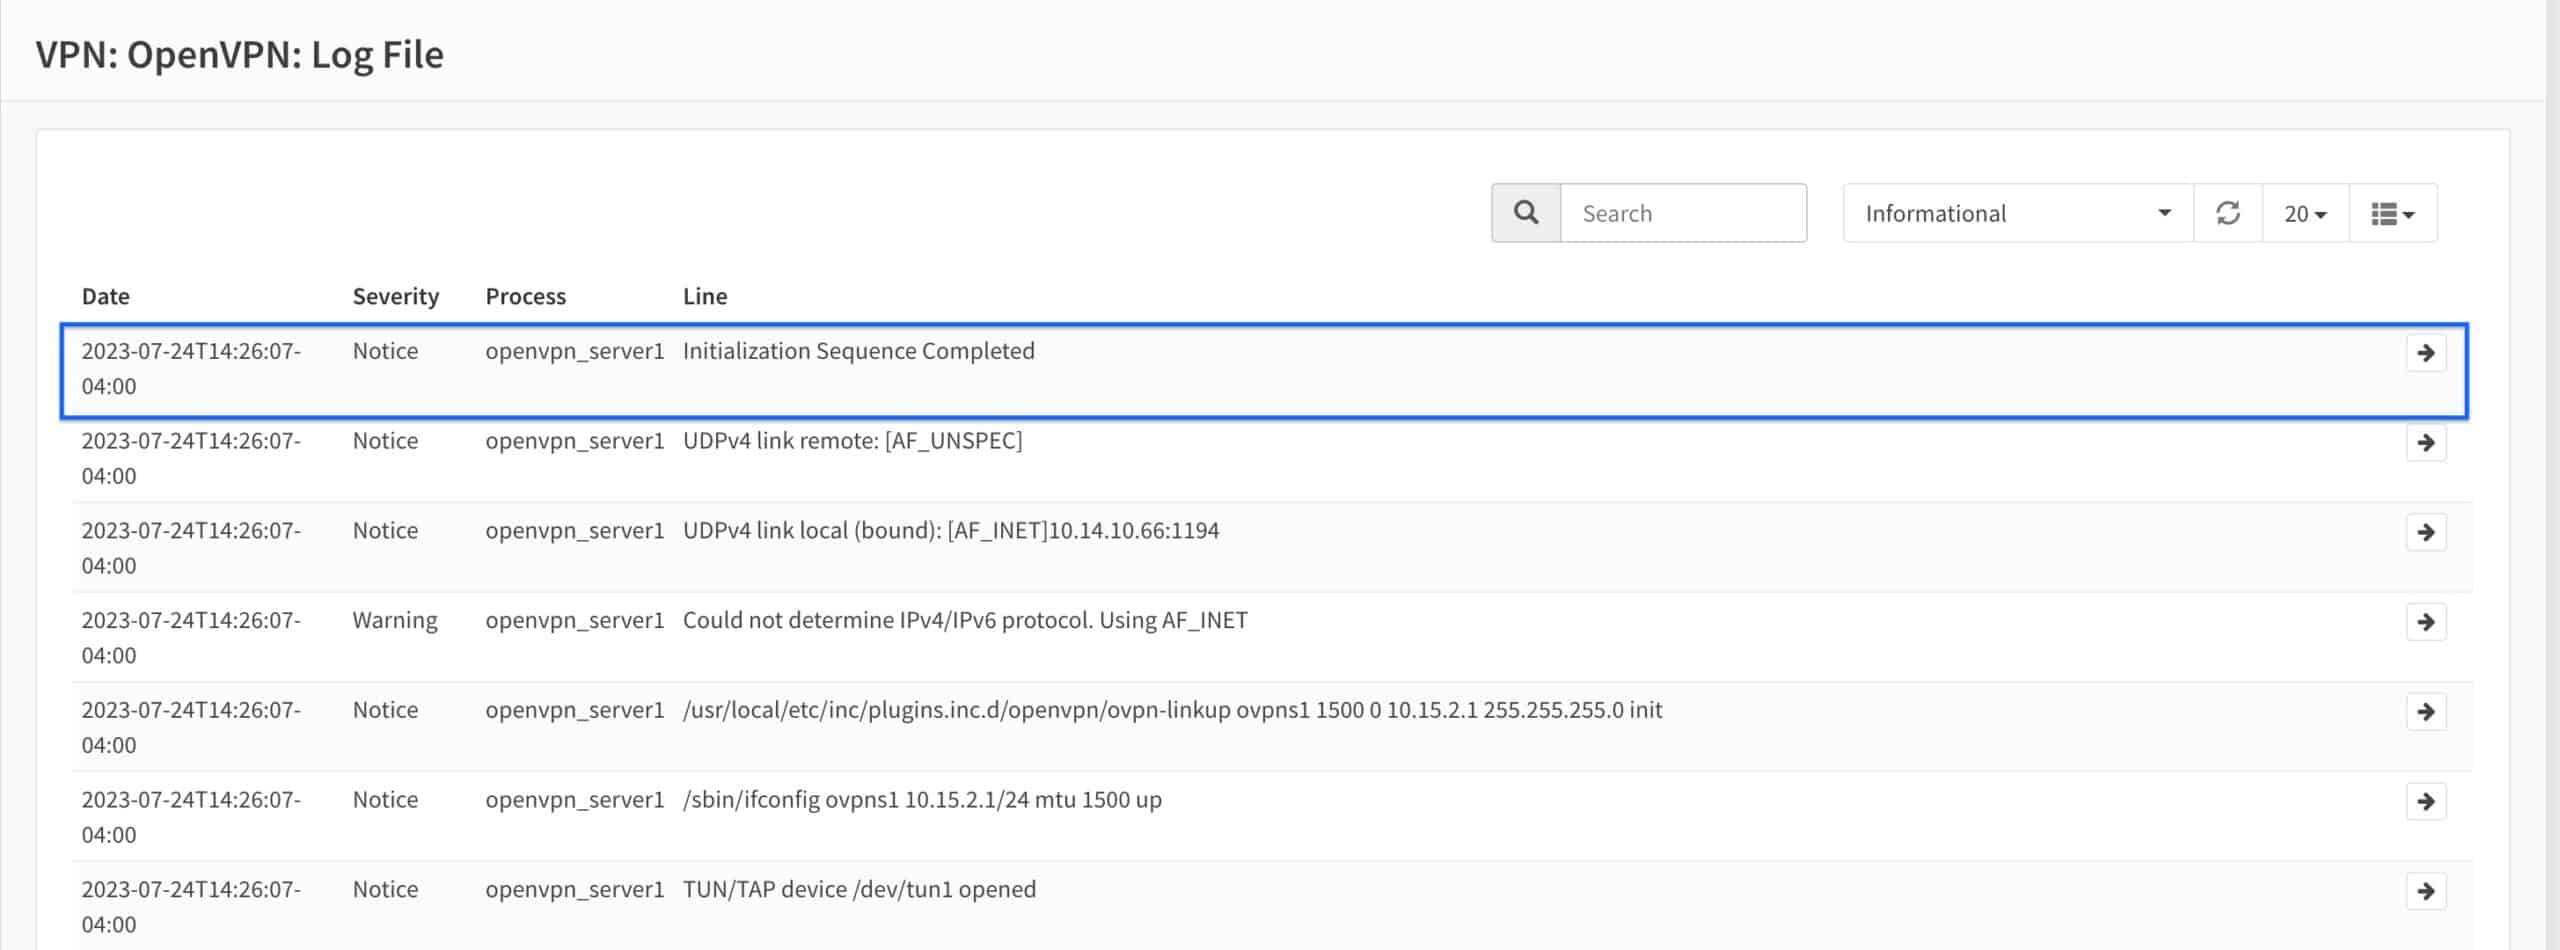
- Let’s check the OpenVPN logs to make sure our server is set up correctly. From the side menus, go to VPN > OpenVPN > System Logs. The OpenVPN Logs page is displayed.
- You should see Initialization Sequence Completed in the logs if everything is set up correctly.
Creating firewall rules
Now that we’ve configured our OpenVPN server, we need to create a firewall rule to allow traffic to and from our server.
OpenVPN rule
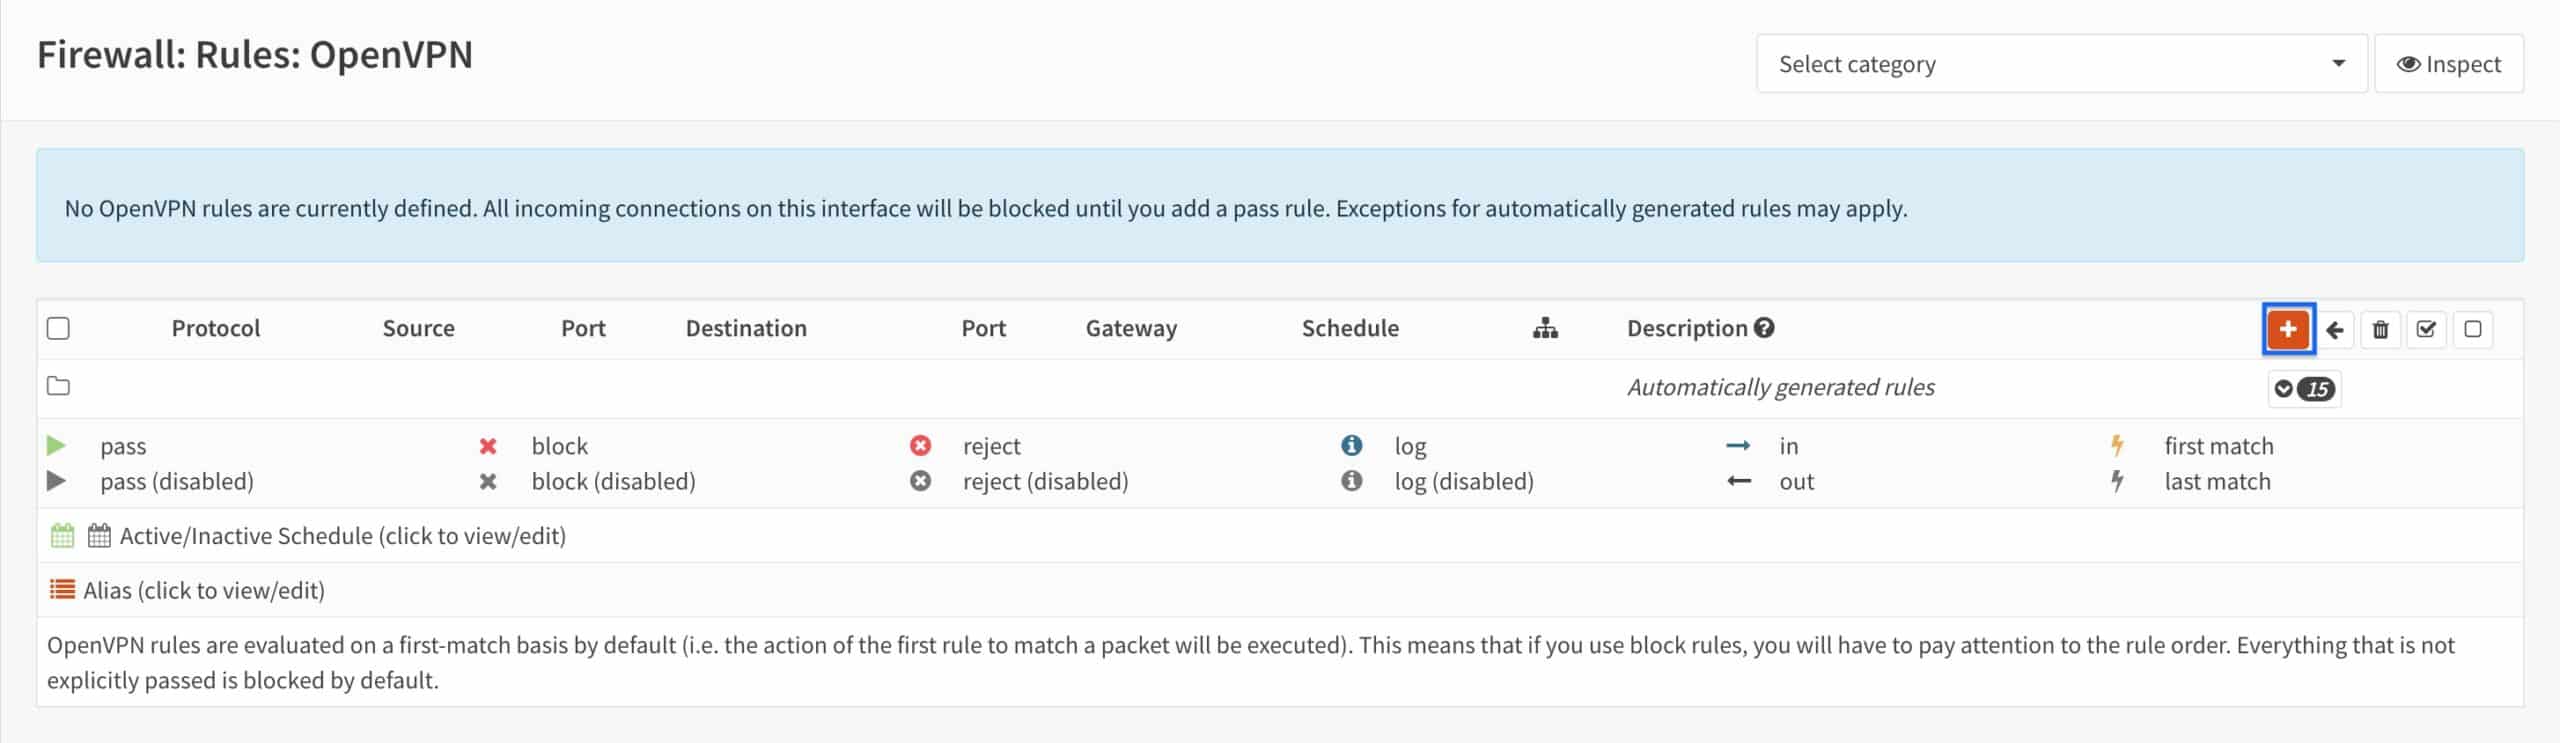
- From the side menus, select Firewall > Rules > OpenVPN. The OpenVPN Interface Rules page is displayed.
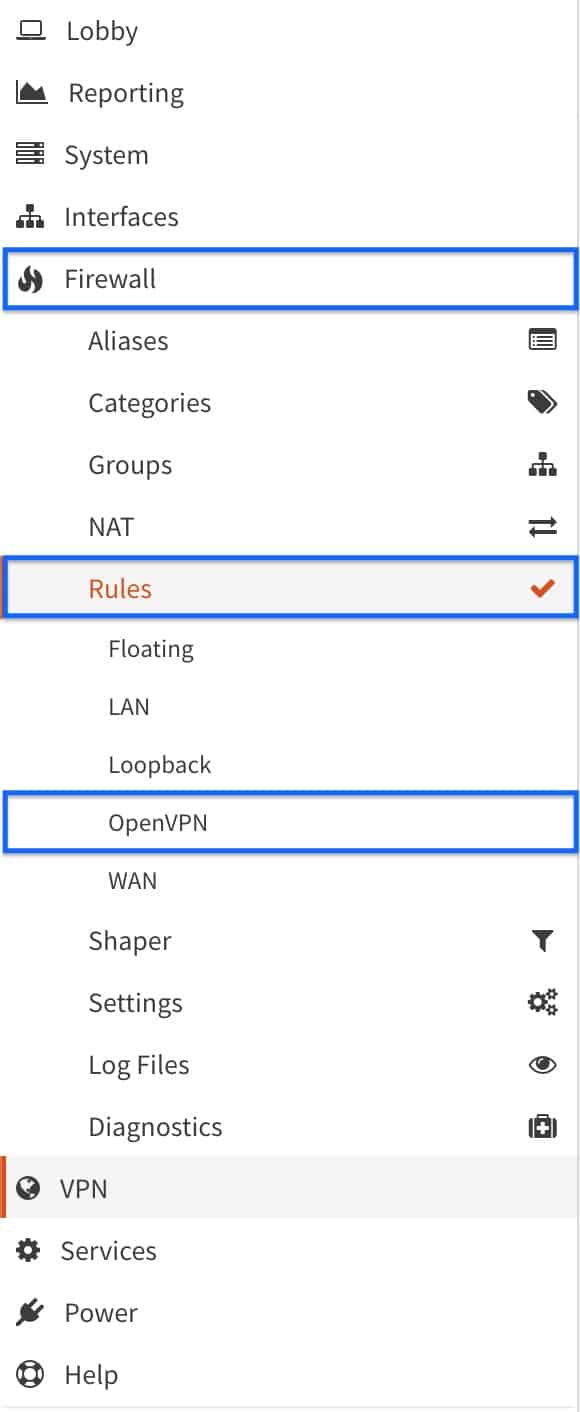
- Click the + sign to create a new rule. The Firewall Rule Configuration page is displayed.
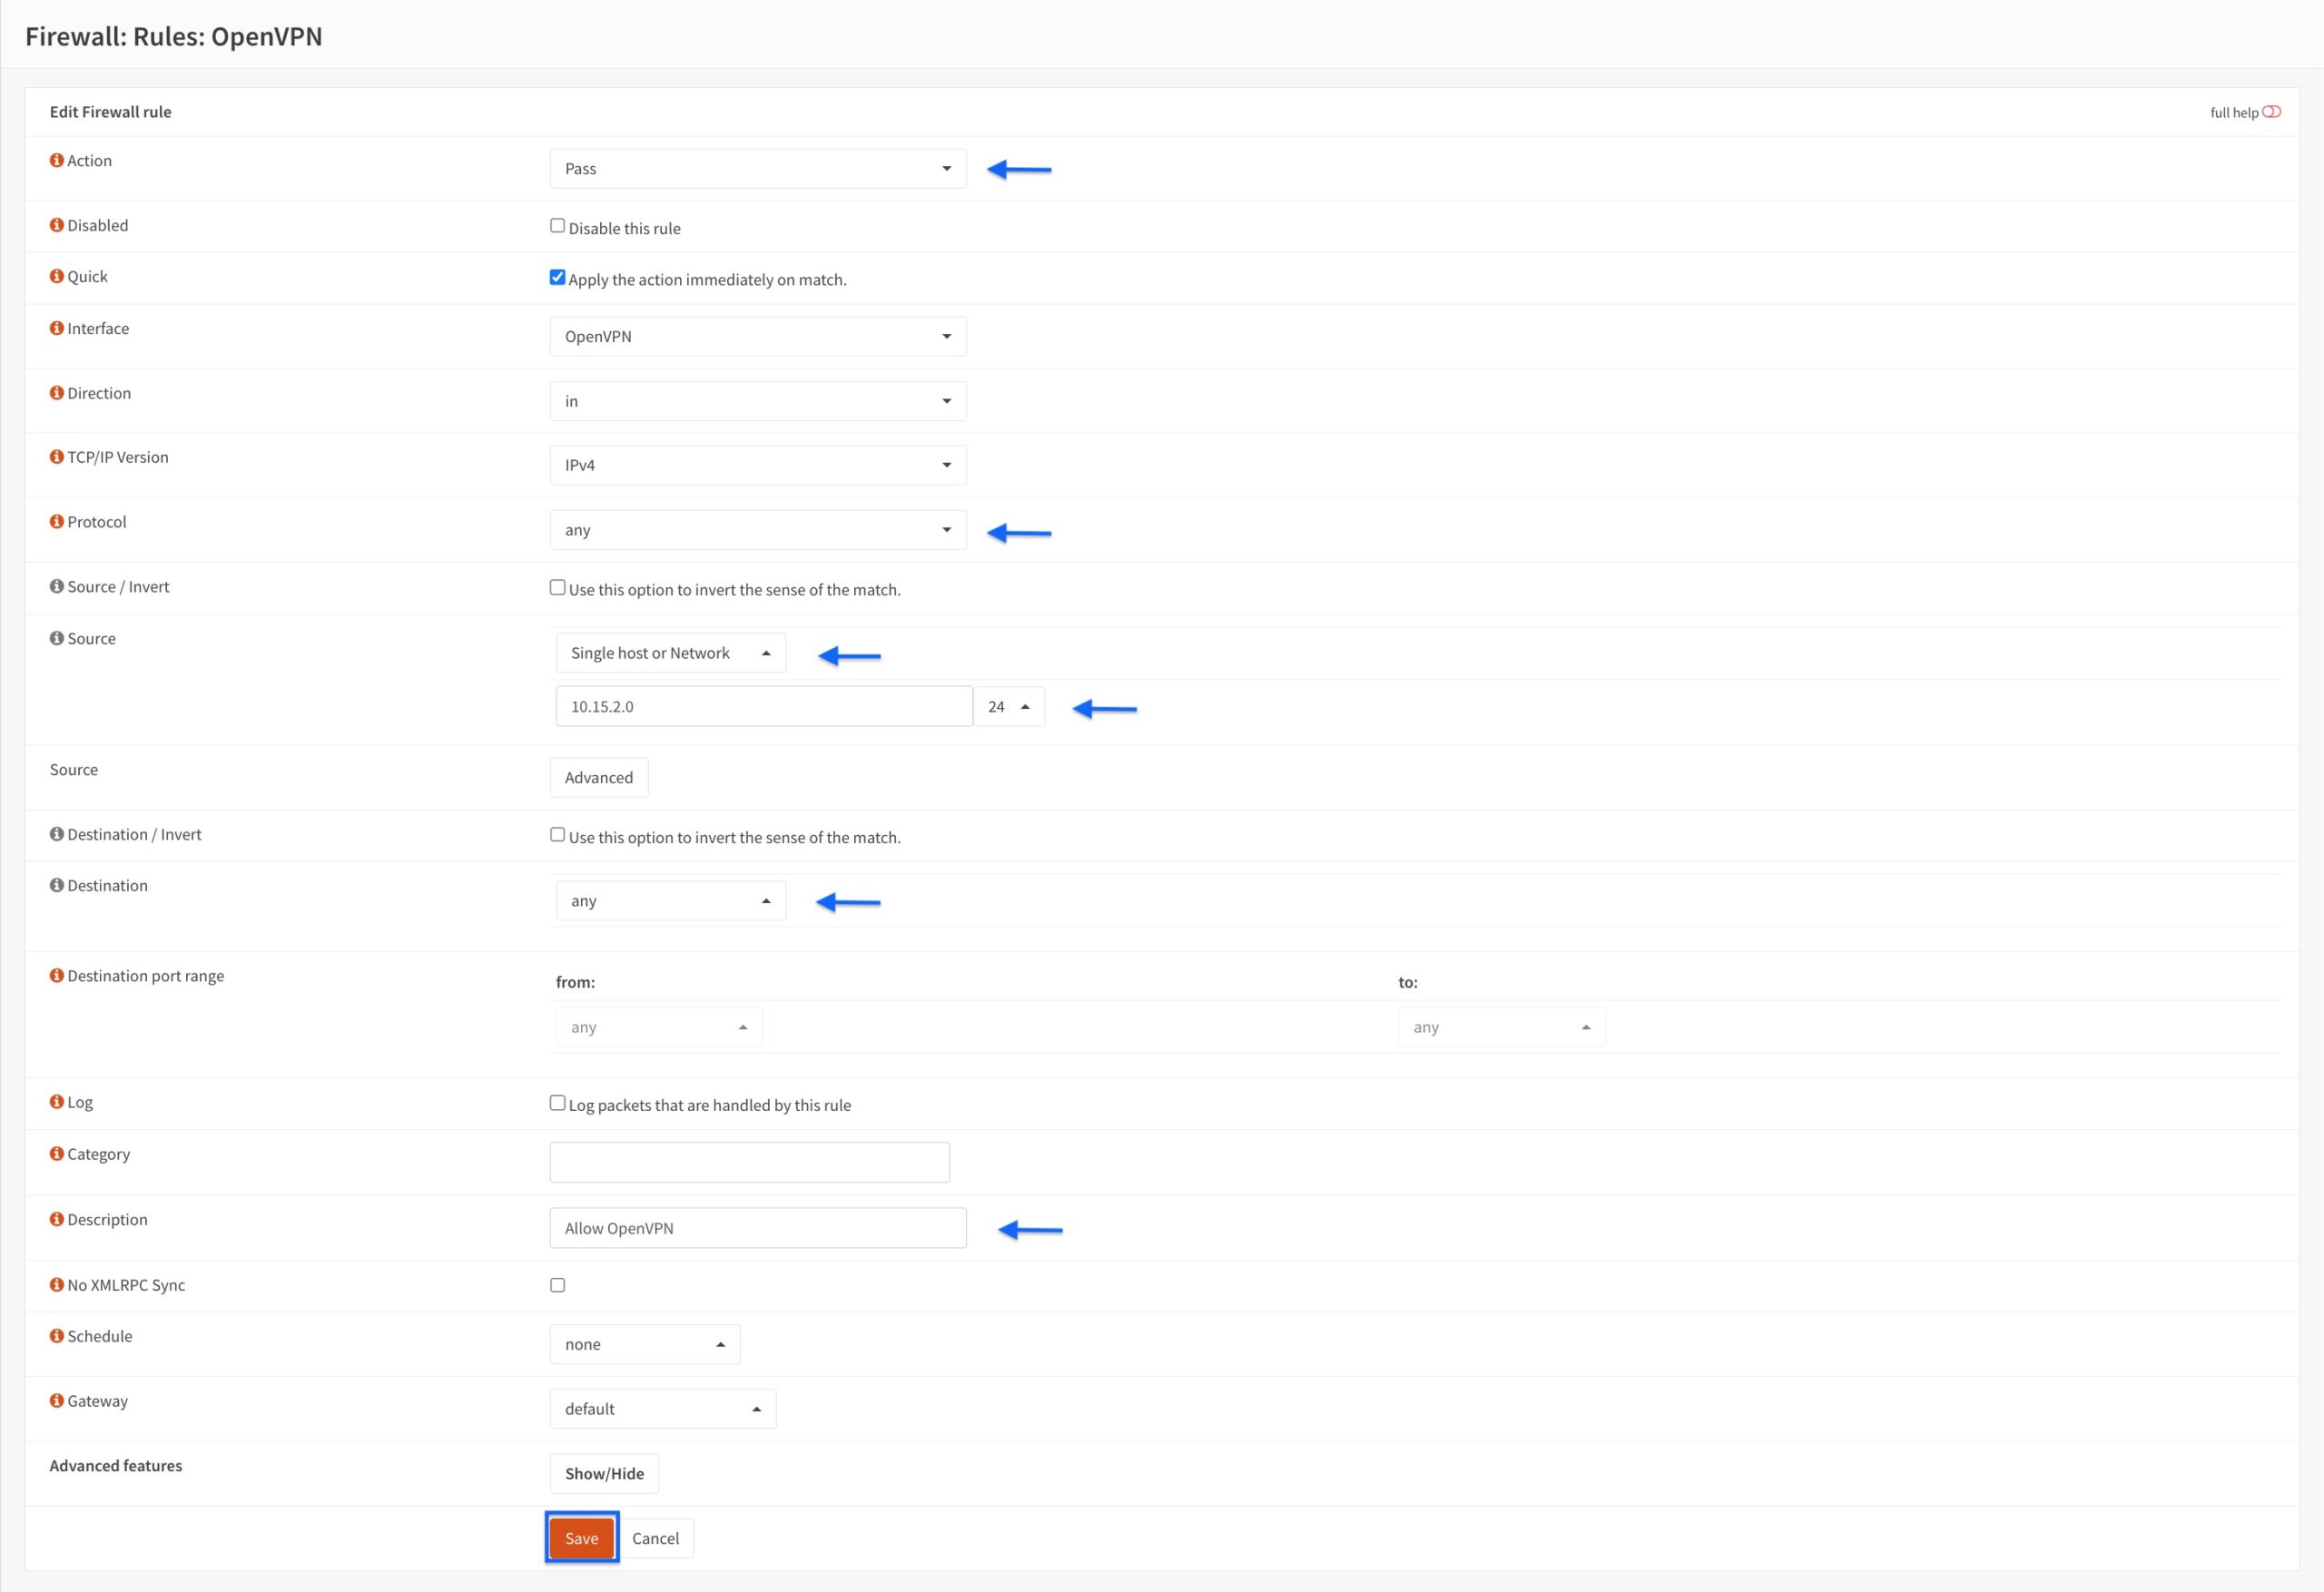
- Set the Action to Pass.
- Set the Protocol to any.
- Set the Source drop-down menu to Single Host or Network.
- Enter the subnet you selected when creating the OpenVPN server in the field under the Source drop-down menu. Set the subnet mask to /24.
- Set the Destination drop-down menu to any.
- Enter a description for your rule in the Description field.
- Click Save at the bottom of the page.
- You’re taken back to the OpenVPN Interface Rules page. We can see our rule is displayed. Click Apply Changes.
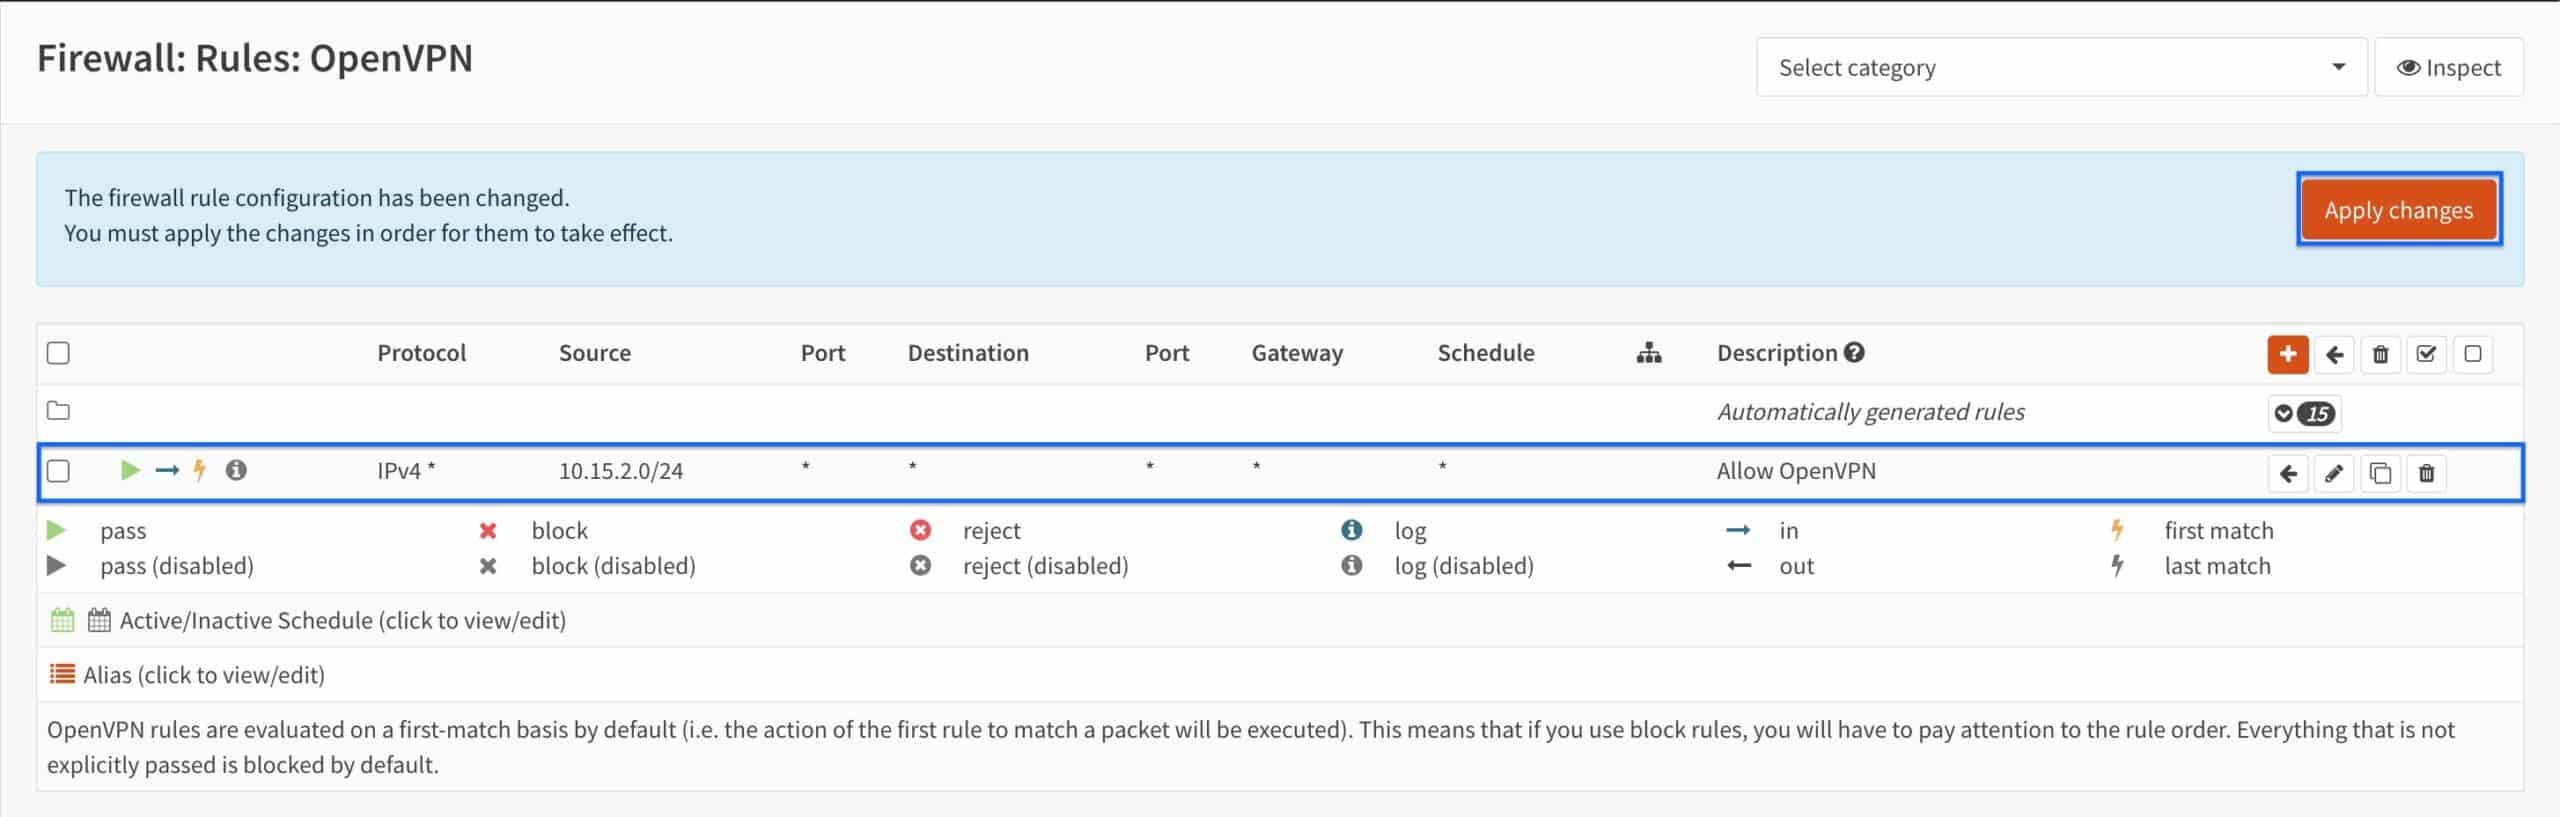
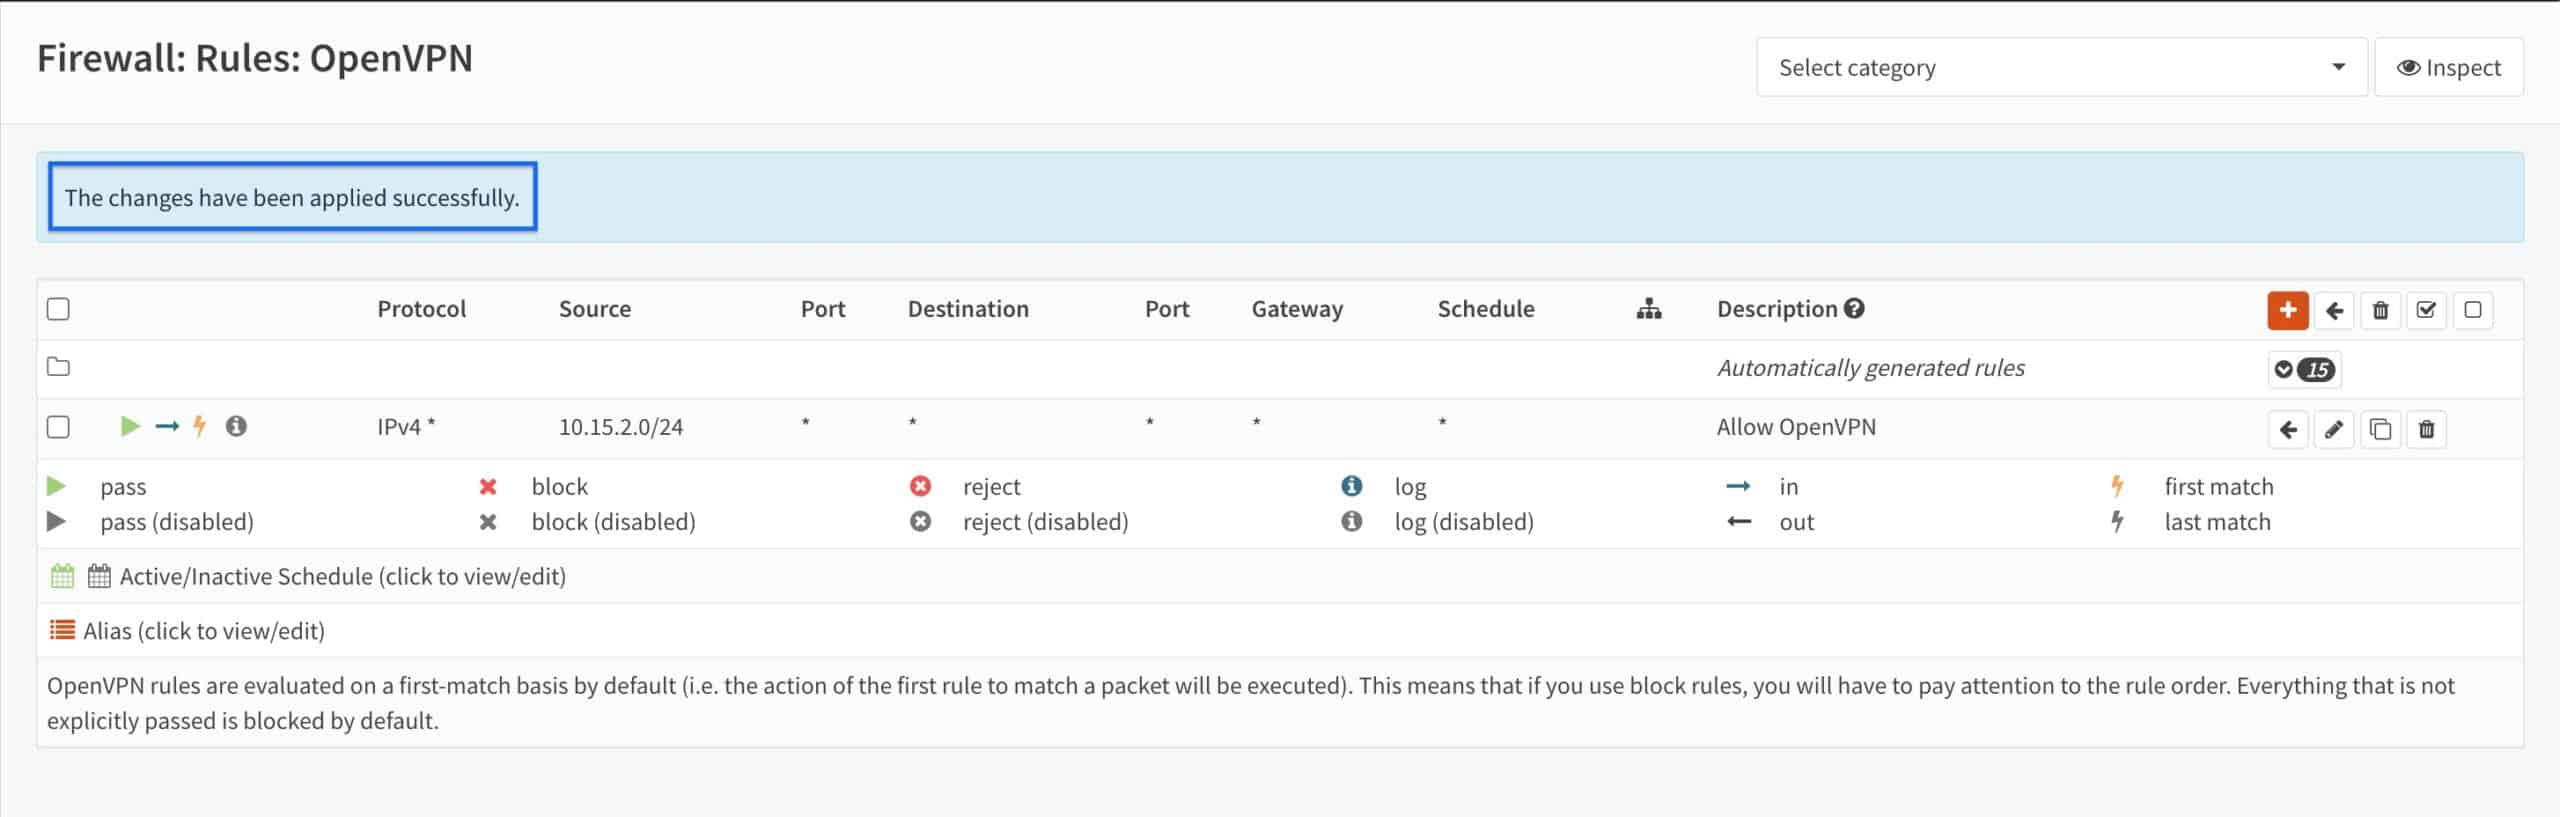
- You should see The changes have been applied successfully at the top of the page.
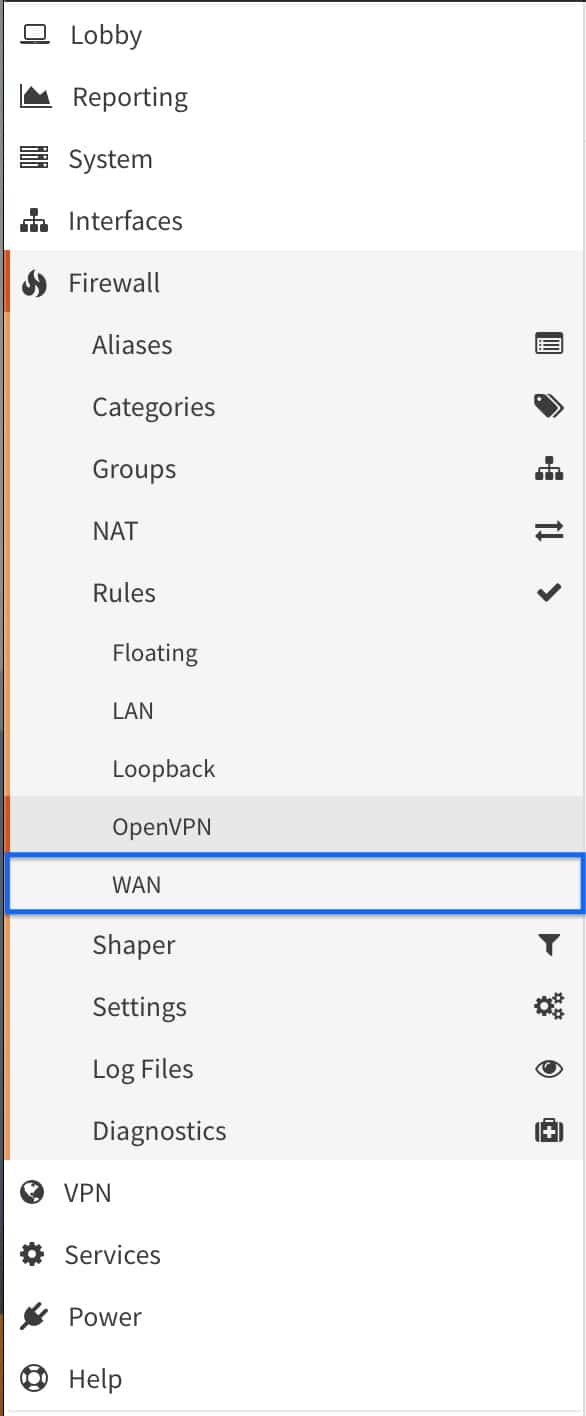
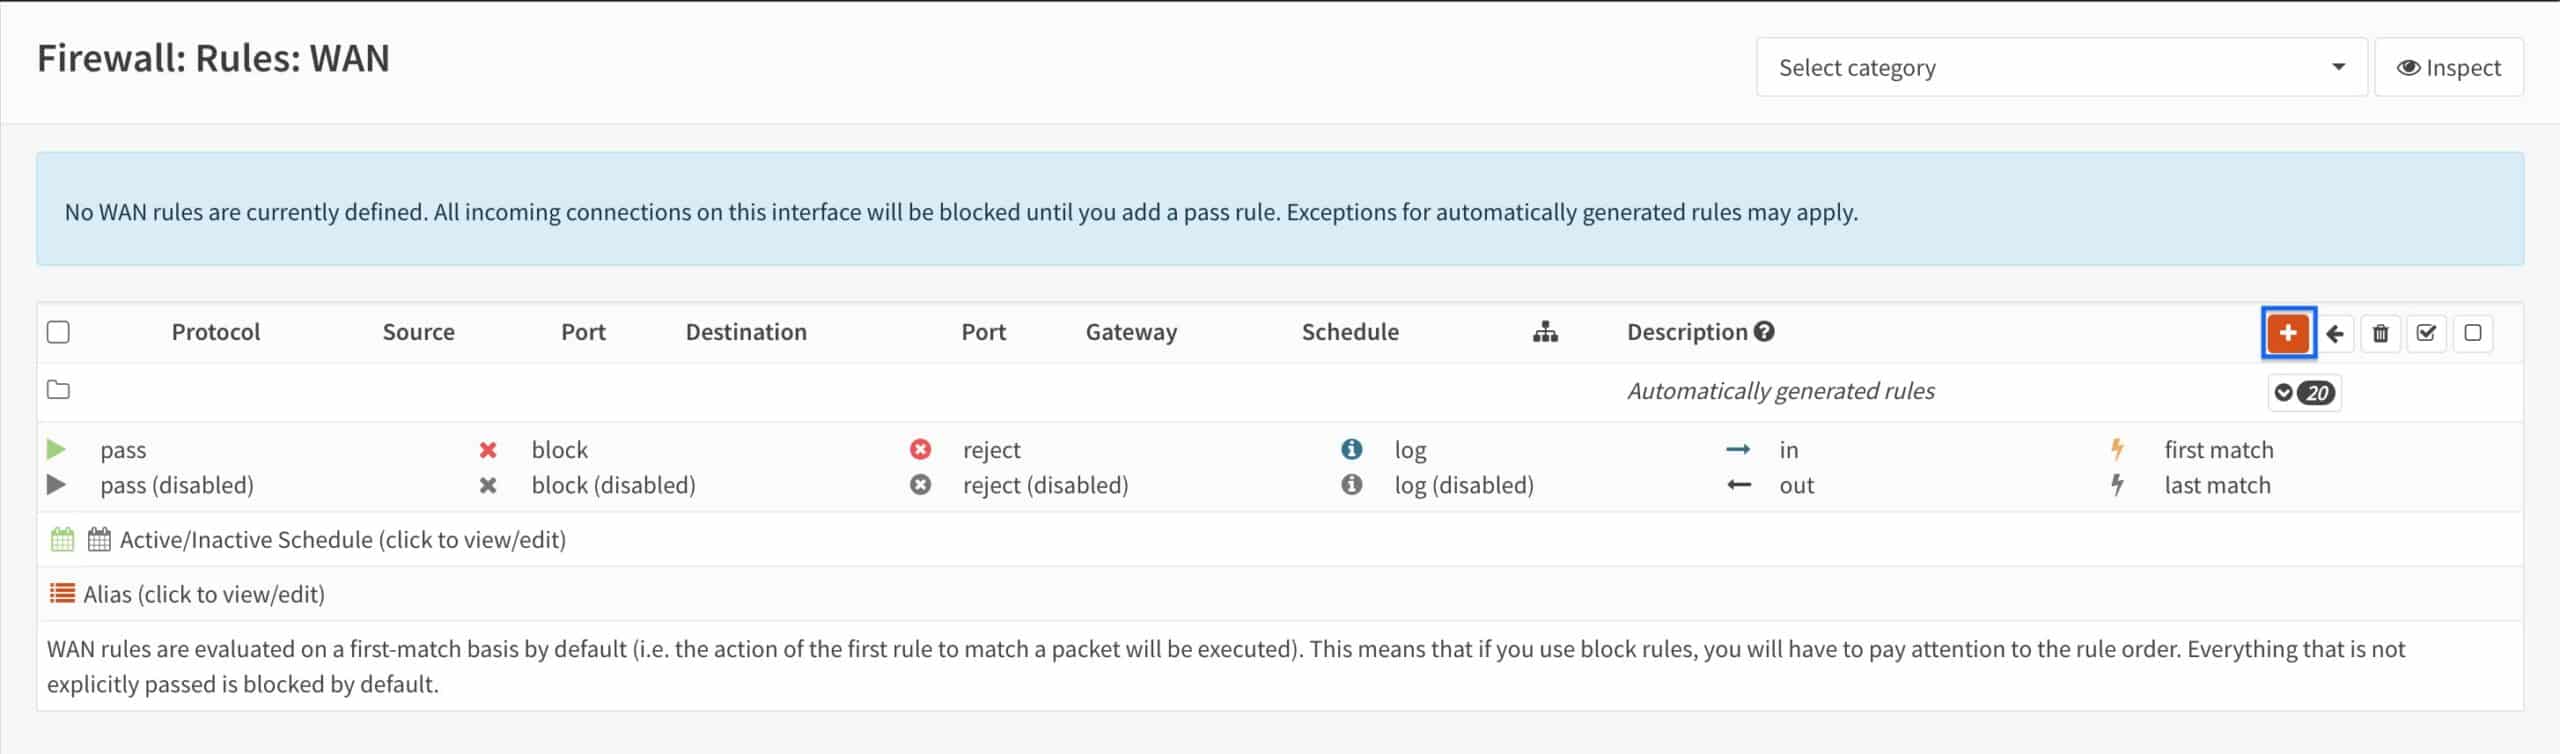
WAN rule
- From the side menus, select WAN (we’re already in the Firewalls > Rules section of the UI). The WAN Interface Firewall Rules page is displayed.
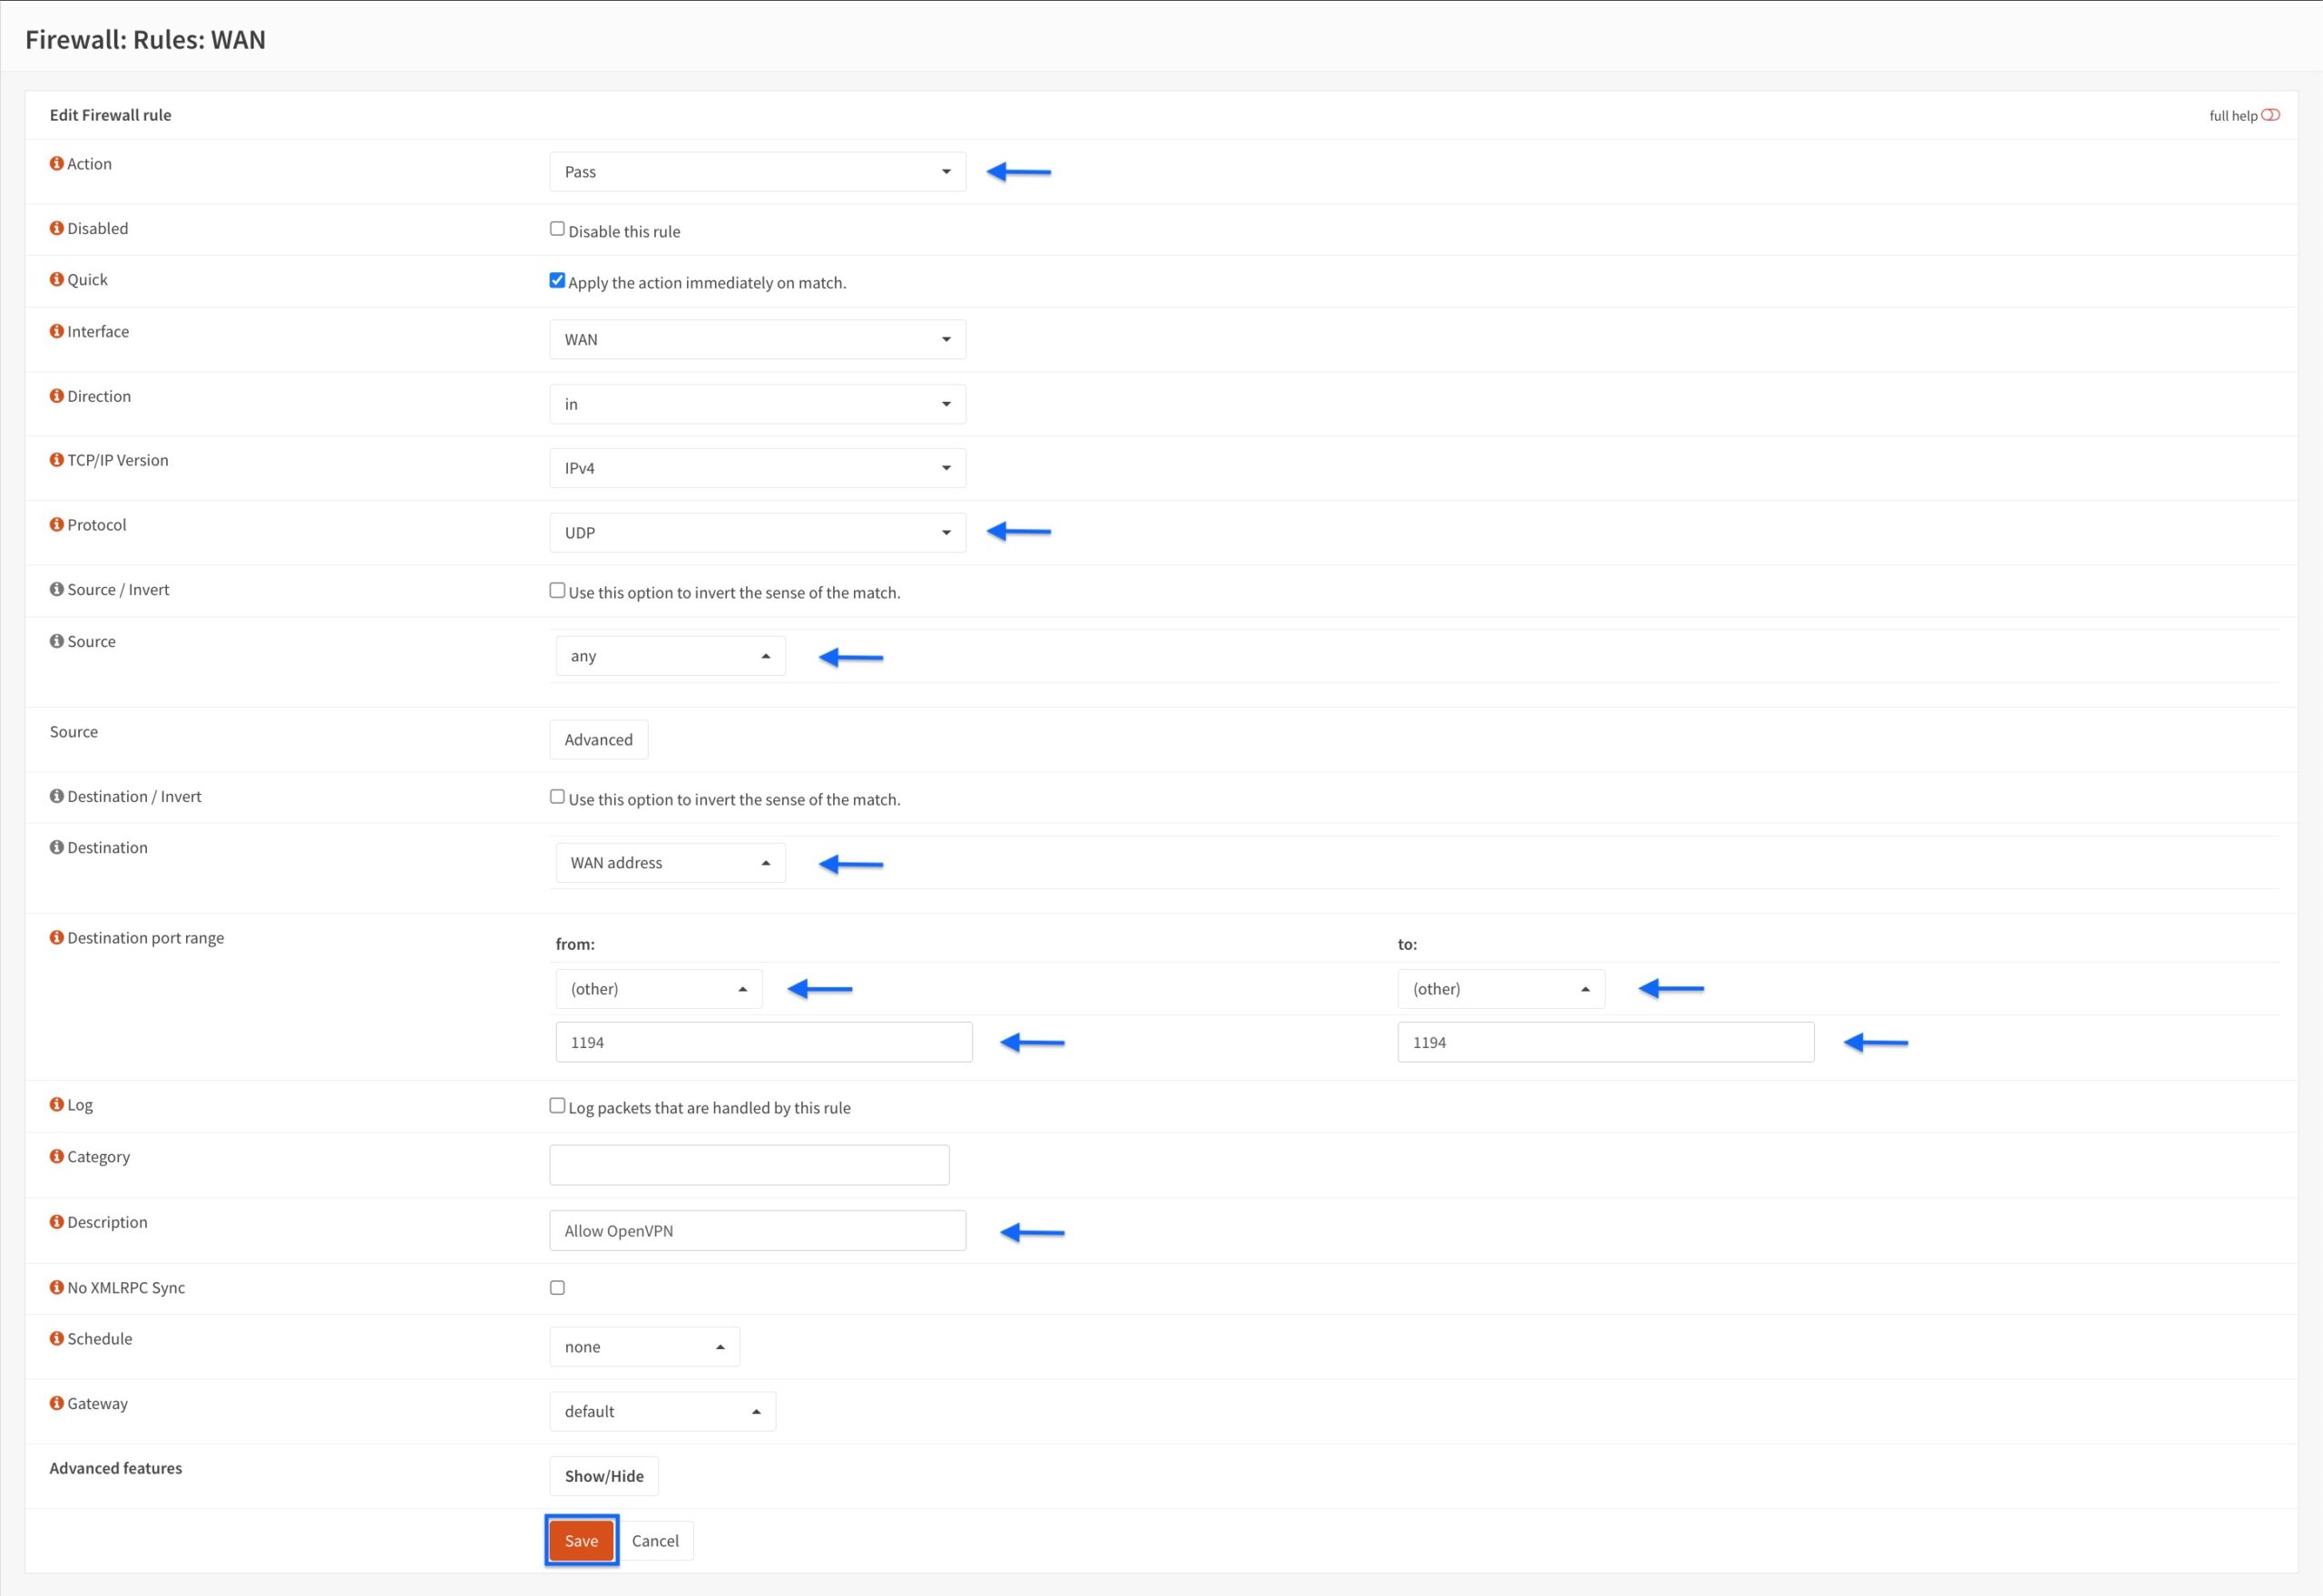
- Click the + sign to create a new rule. The WAN Firewall Rule Configuration page is displayed.
- Set the Action to Pass.
- Set the Protocol to UDP.
- Set the Source to any.
- Set the Destination to WAN Address.
- Set the Destination port range drop-down menus to Other and enter the OpenVPN port you chose when configuring the server in the below fields. This is 1194 in my case.
- Enter a description for your rule in the Description field.
- Click Save.
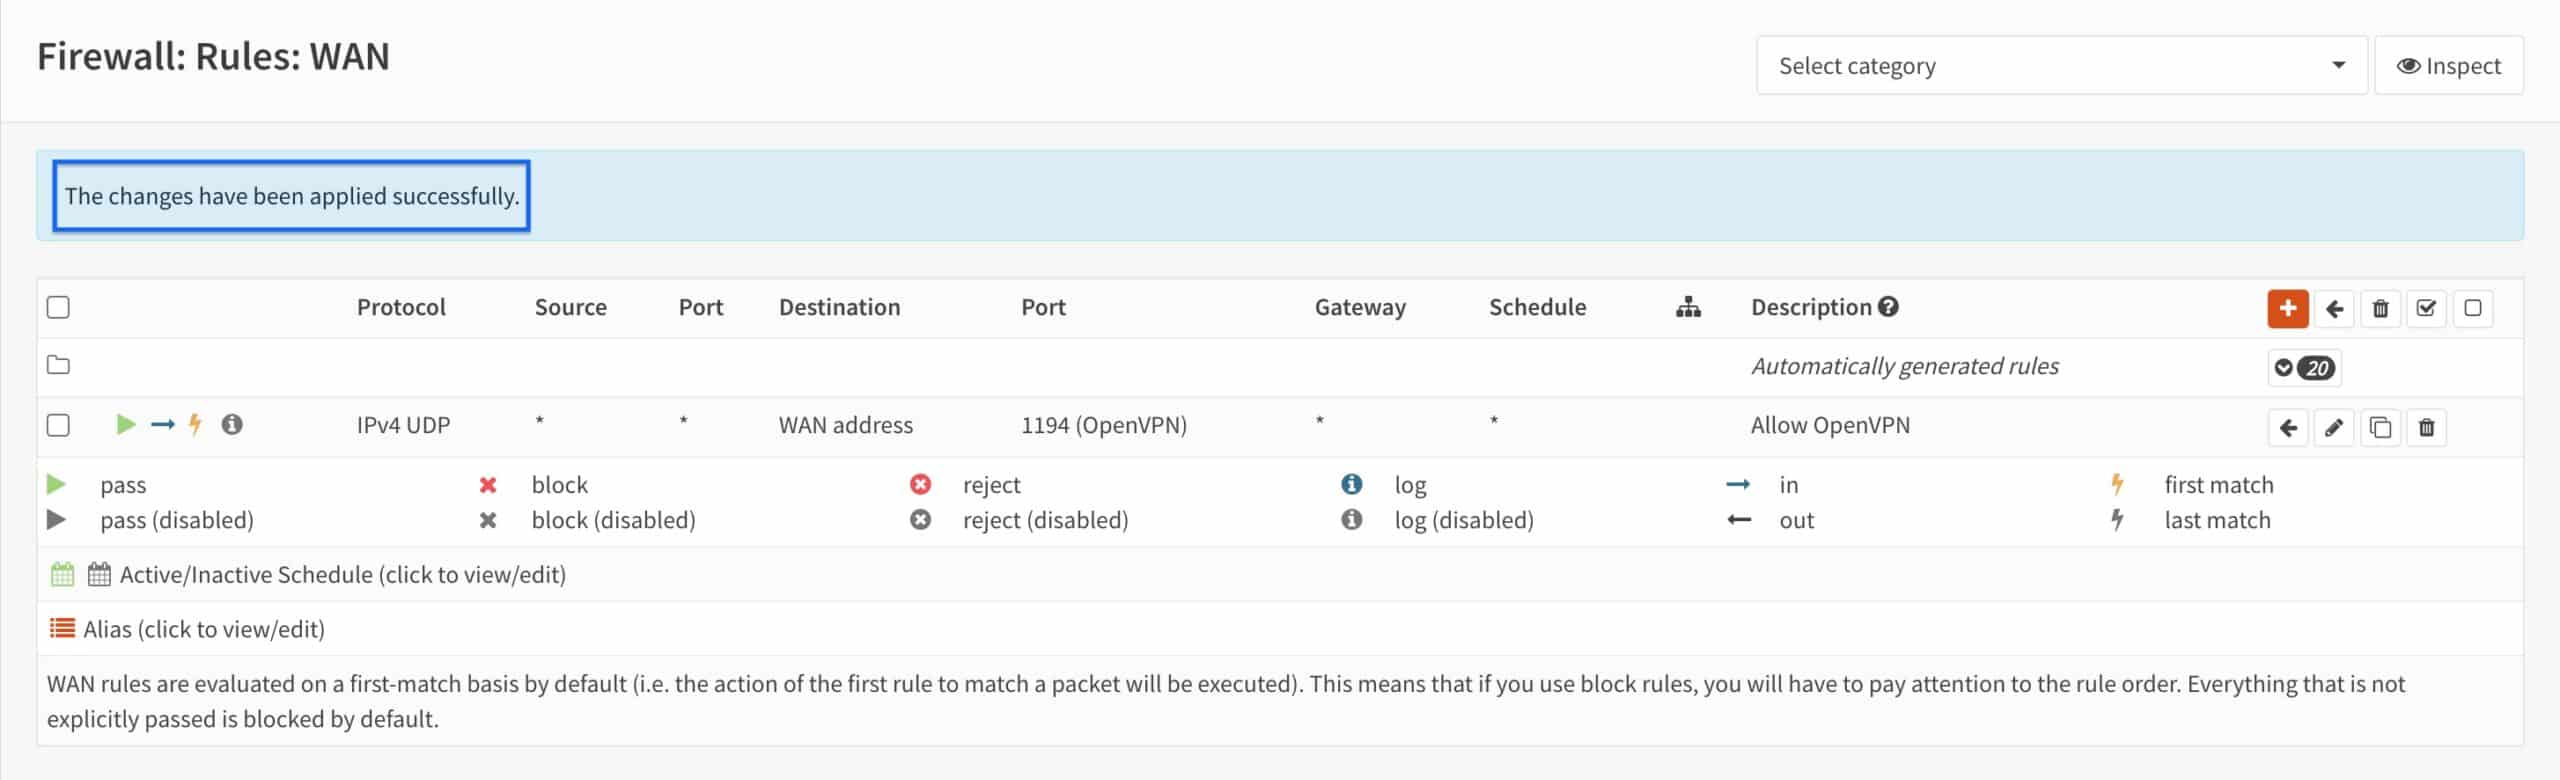
- You’re taken back to the WAN Interface Rules page. We can see our rule is displayed. Click Apply Changes.
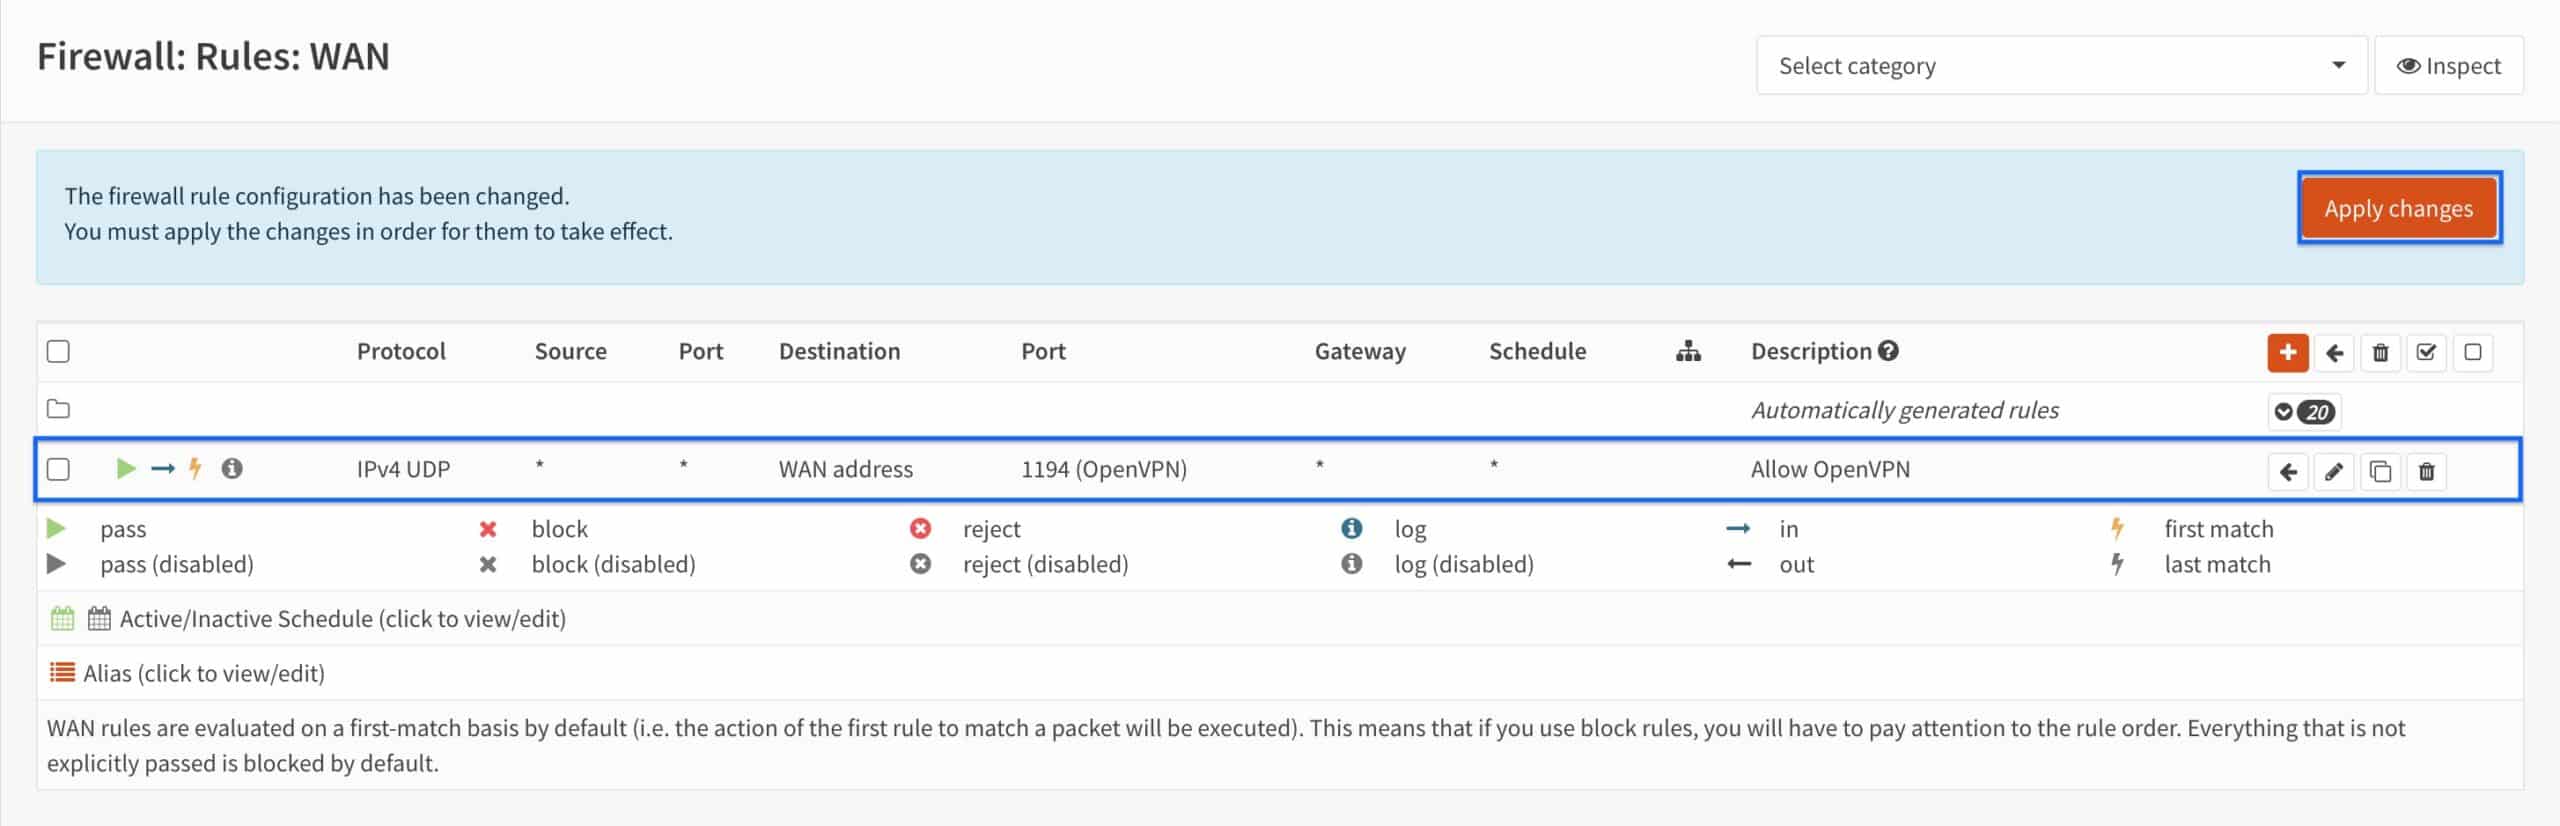
- You should see The changes have been applied successfully at the top of the page.
Exporting the OpenVPN client configuration
We’ve created our CA and certificates, OpenVPN server, and firewall rules. All that’s left is to export our user configuration and connect to our server.
- From the side menus, go to VPN > OpenVPN > Client Export. The Client Export page is displayed.
- Select the OpenVPN server we created from the Remote Access Server drop-down menu.
- Set the Export Type to File Only.
- Enter your public WAN IP address in the Hostname field. If you’re using Dynamic DNS to access the OPNsense WAN interface, you can enter your dynamic DNS hostname in this field and connect using that hostname as the server address.
- Enter the port you selected when creating the server in the Port field.
- Click the Download button next to the OpenVPN user’s username.
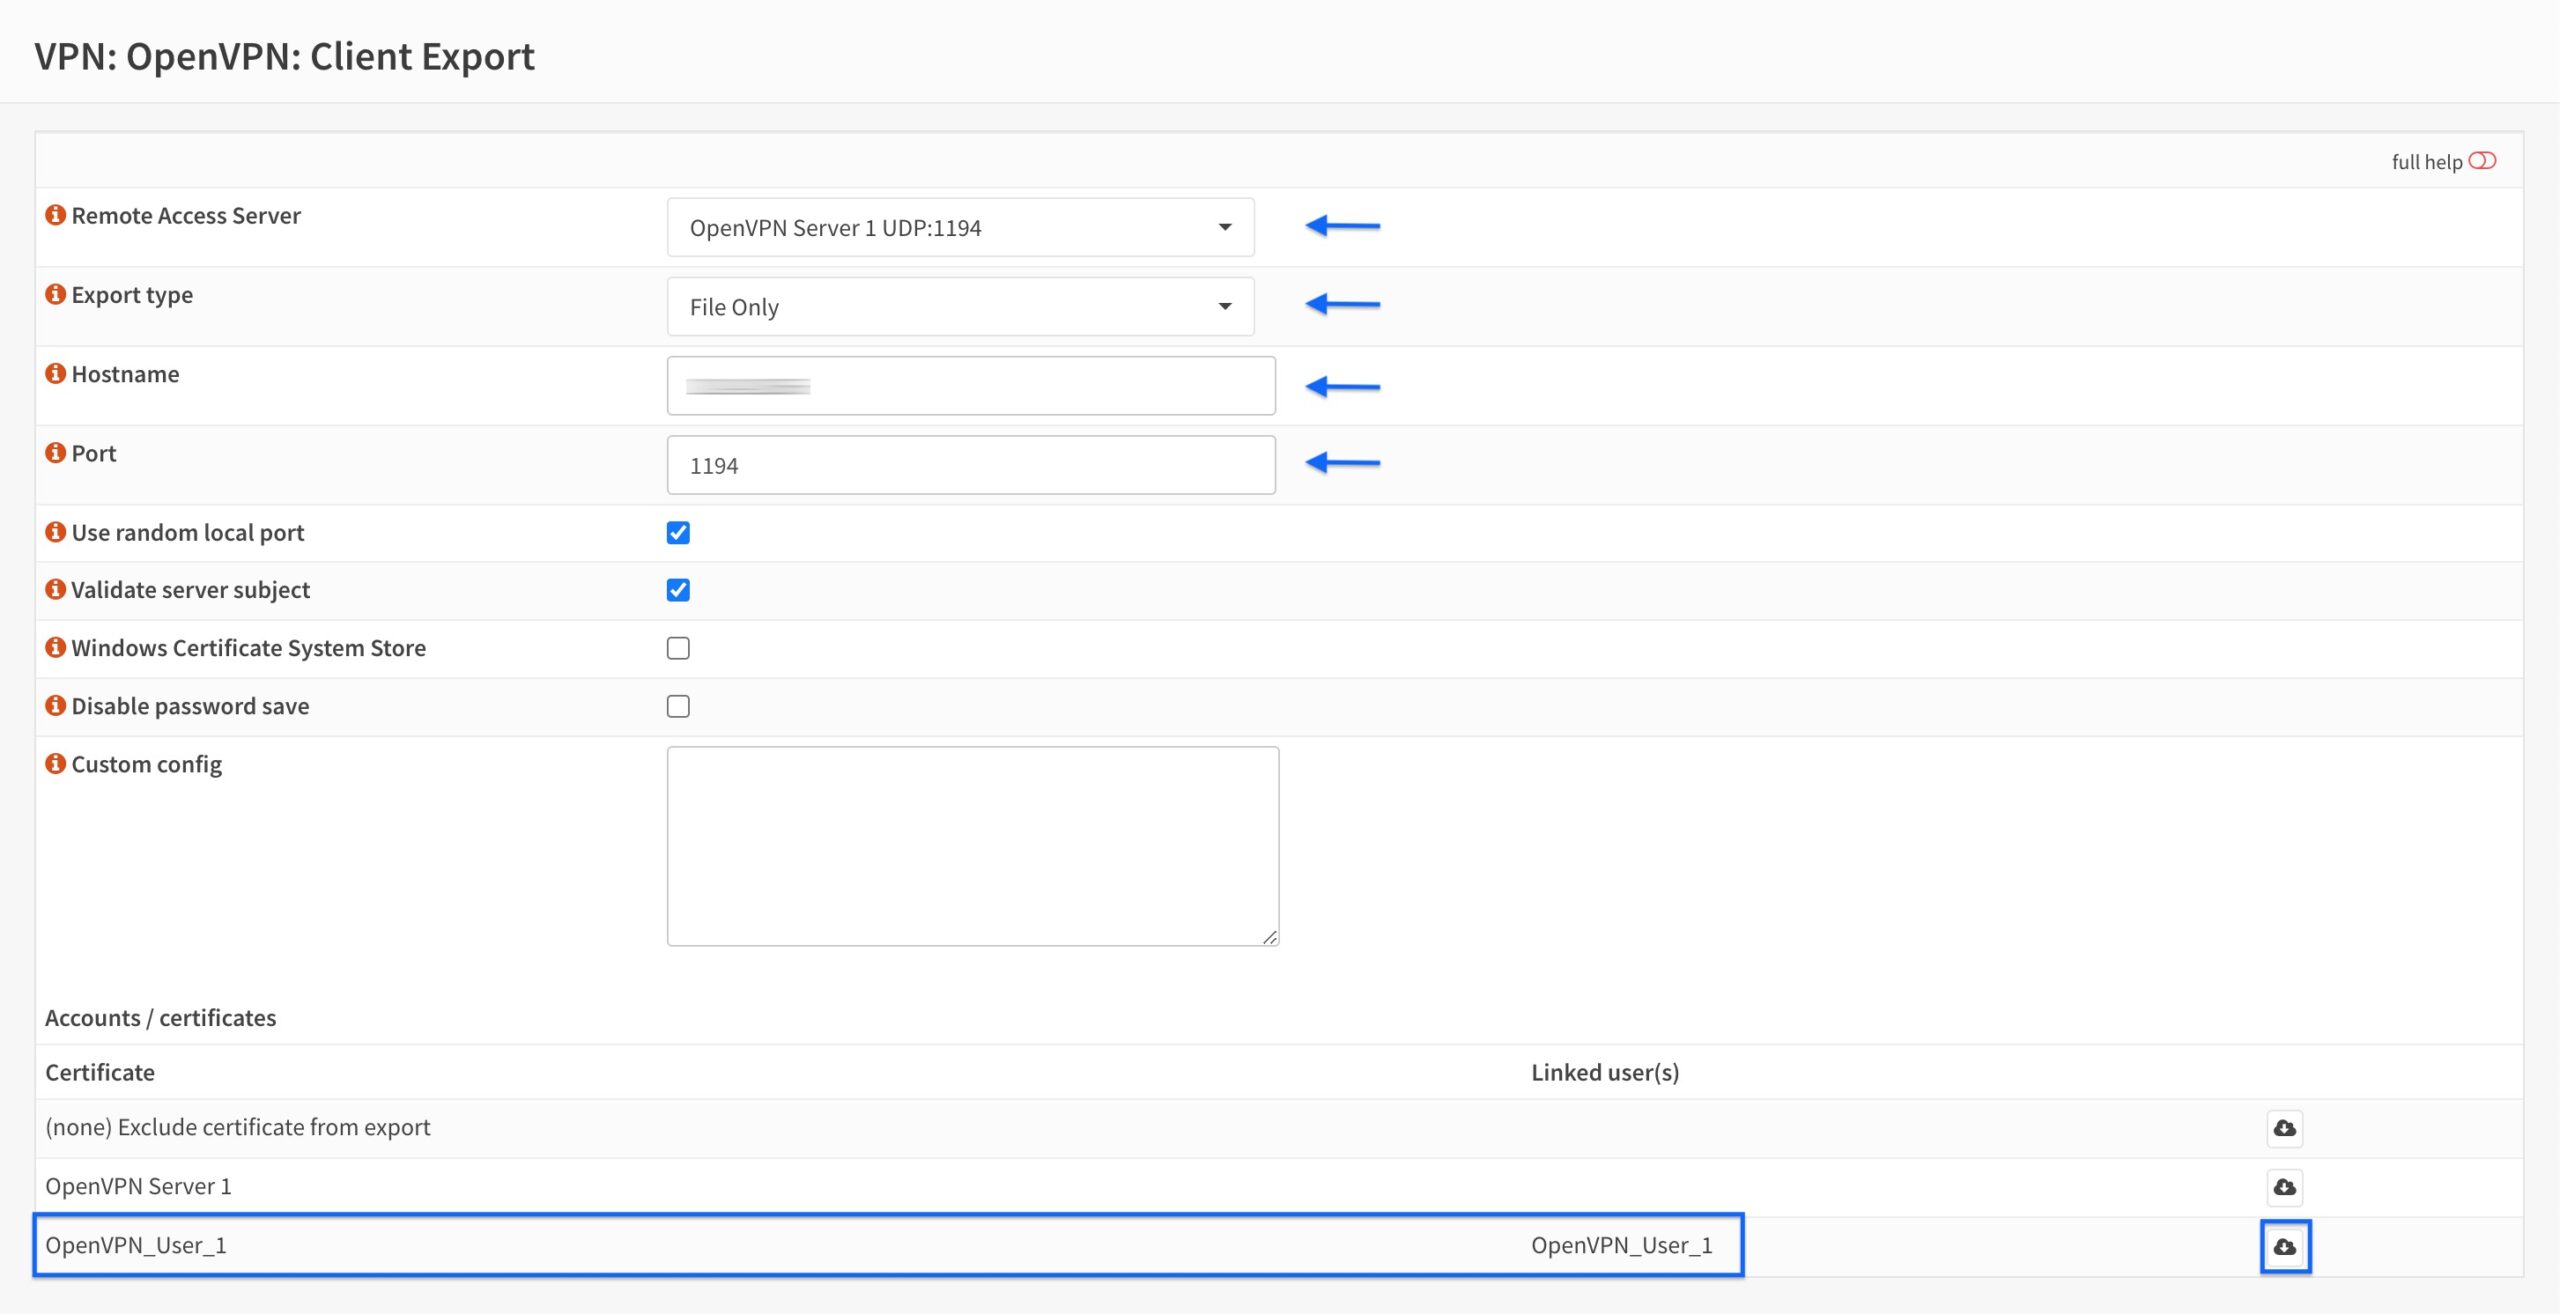
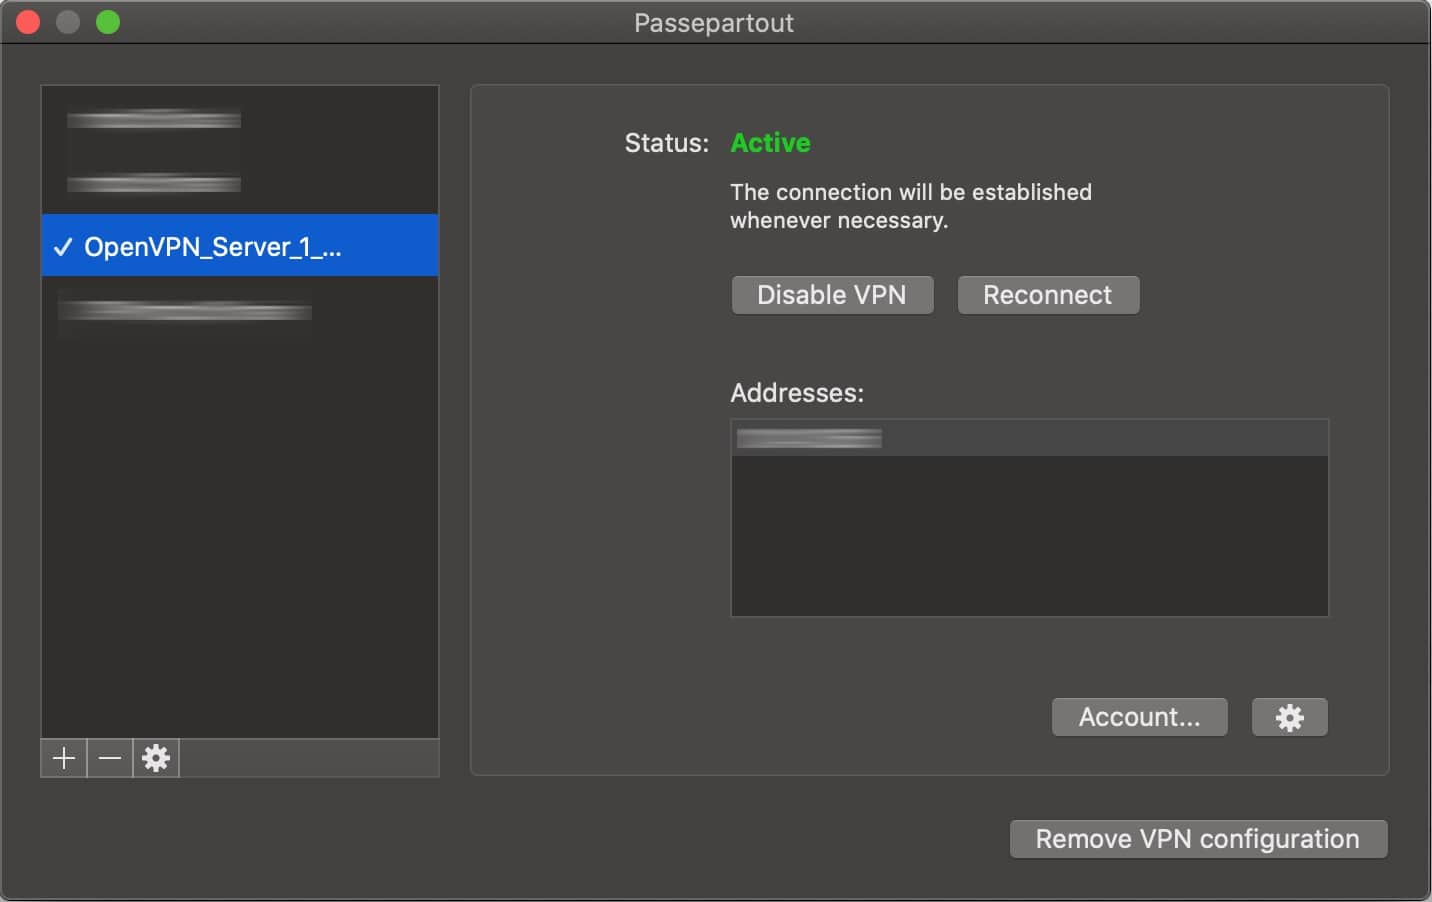
- Save the .ovpn file locally and import it into your OpenVPN client.
- Enter your username and password to initiate the connection.
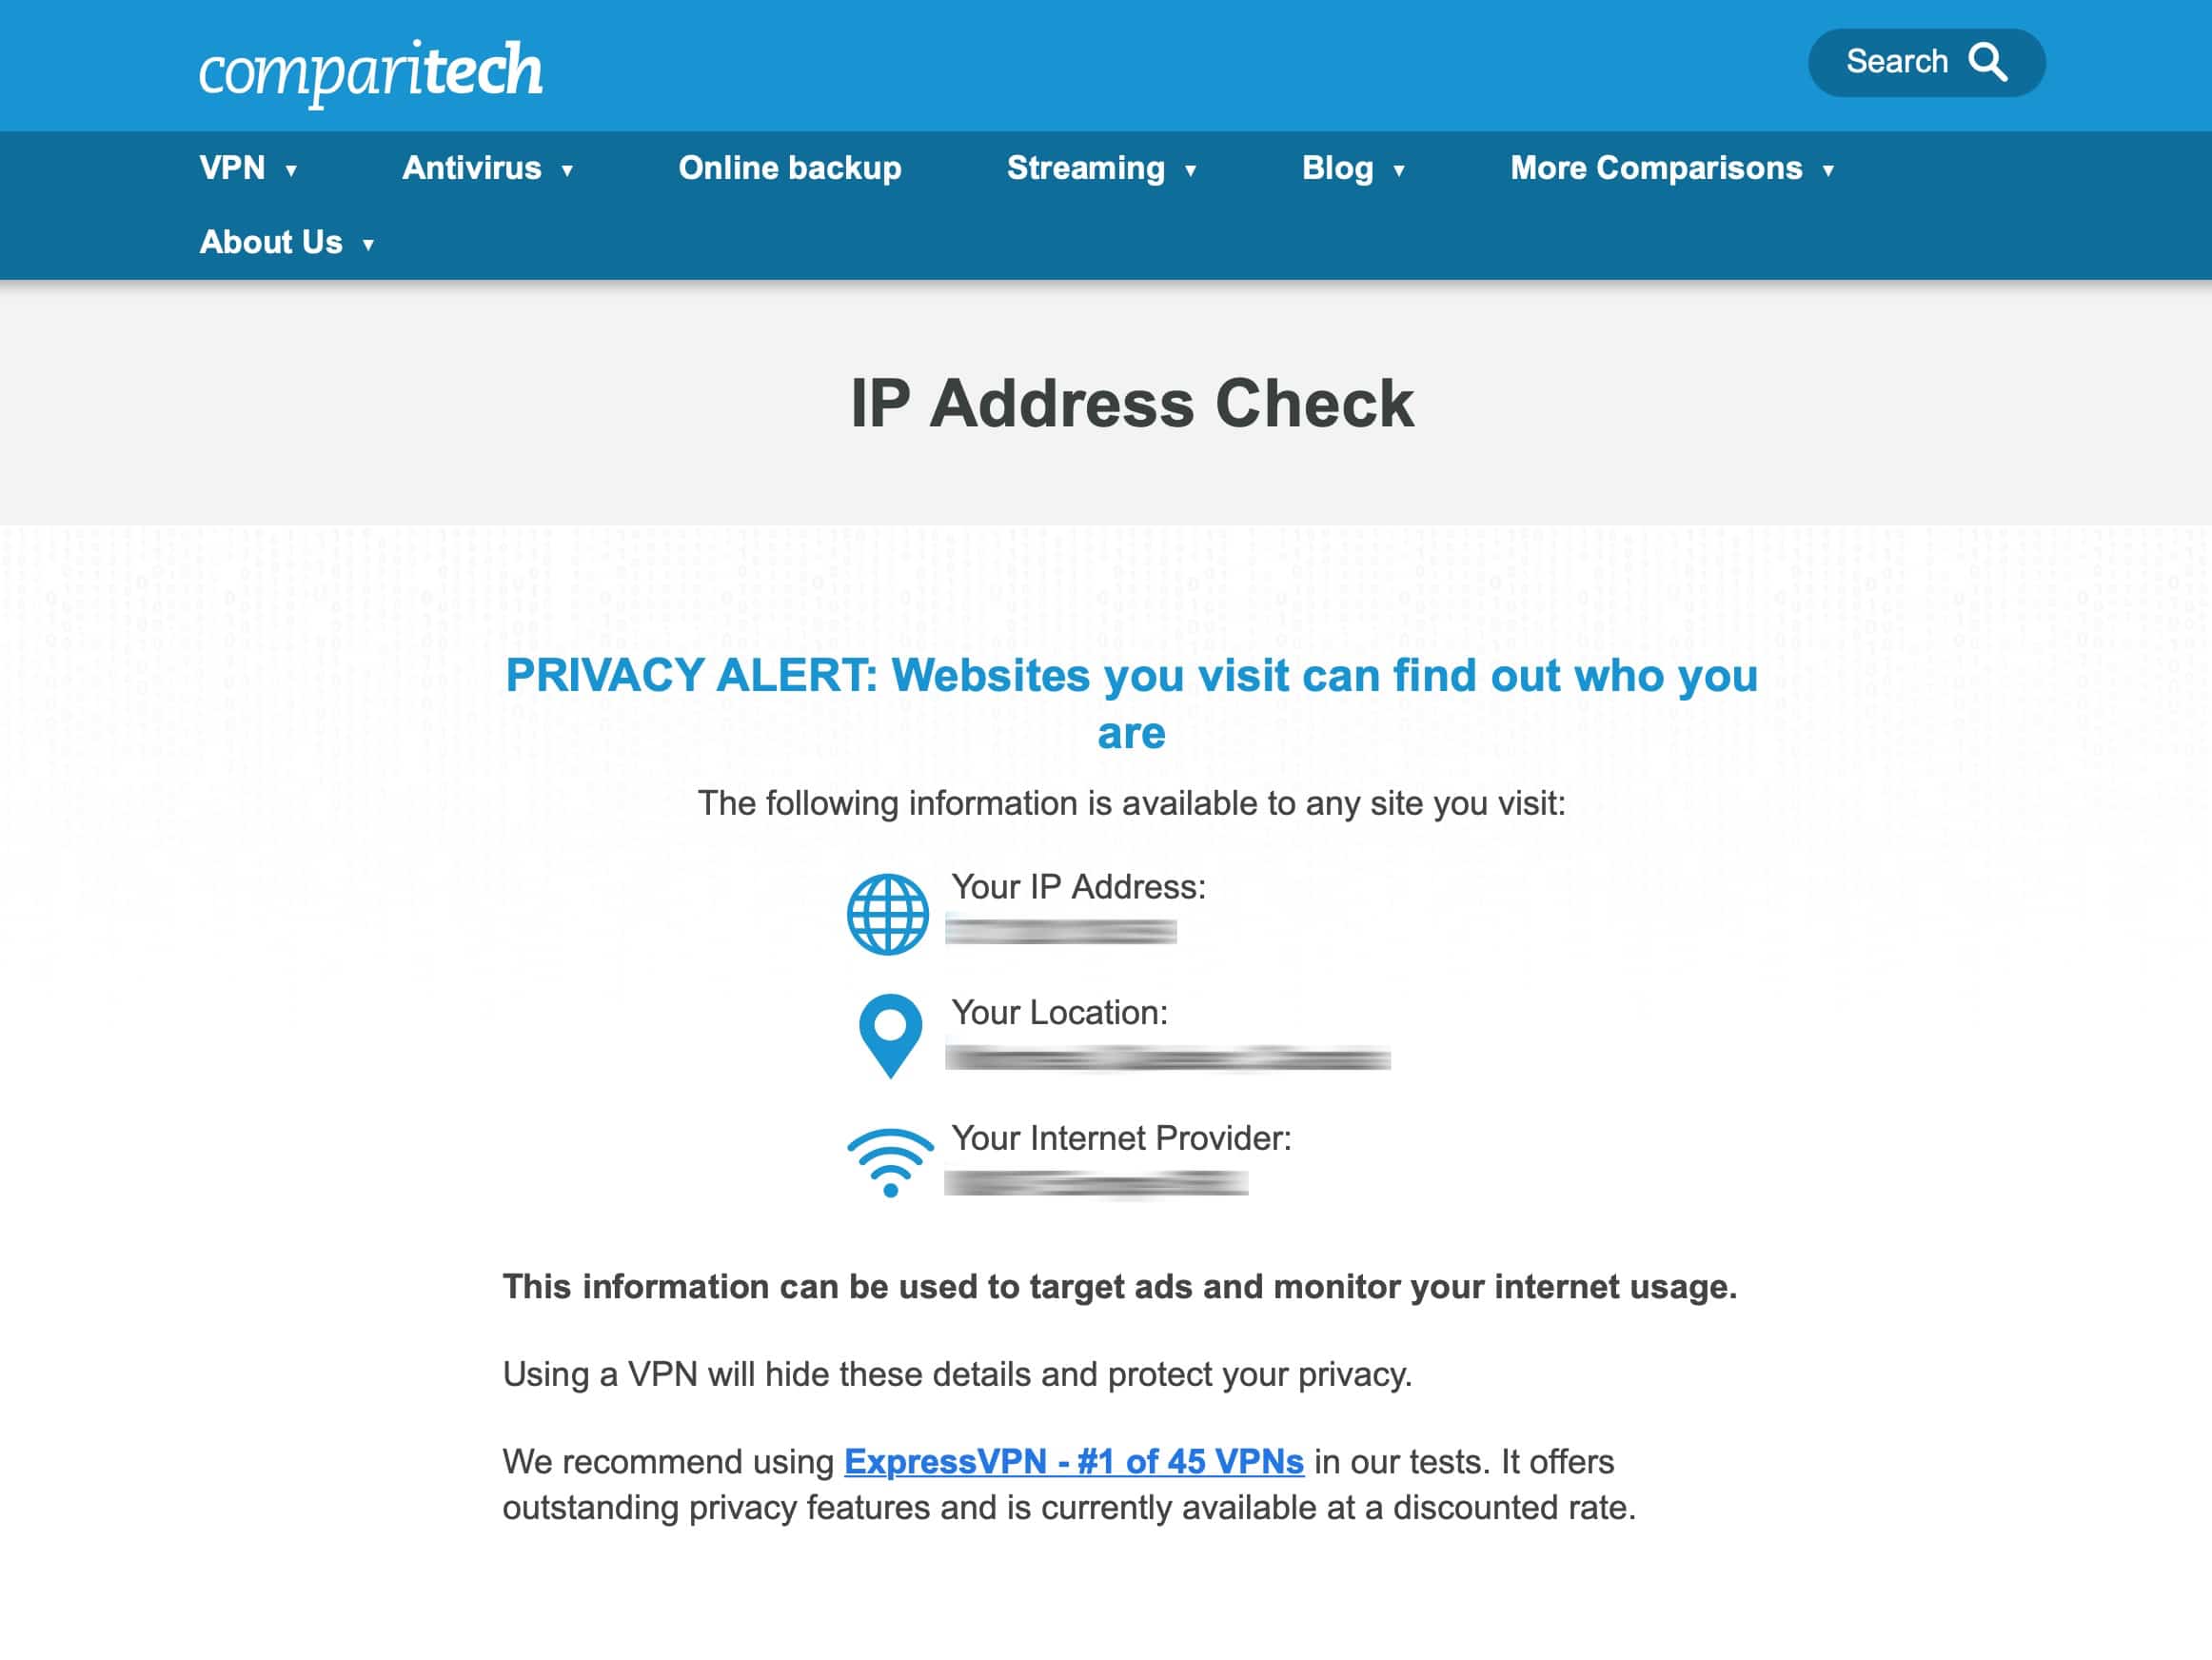
- To make sure we’re connected to our VPN server, we can use Comparitech’s IP Address Check tool. If everything is working properly, your public IP address should have been changed to the WAN address of your home internet.
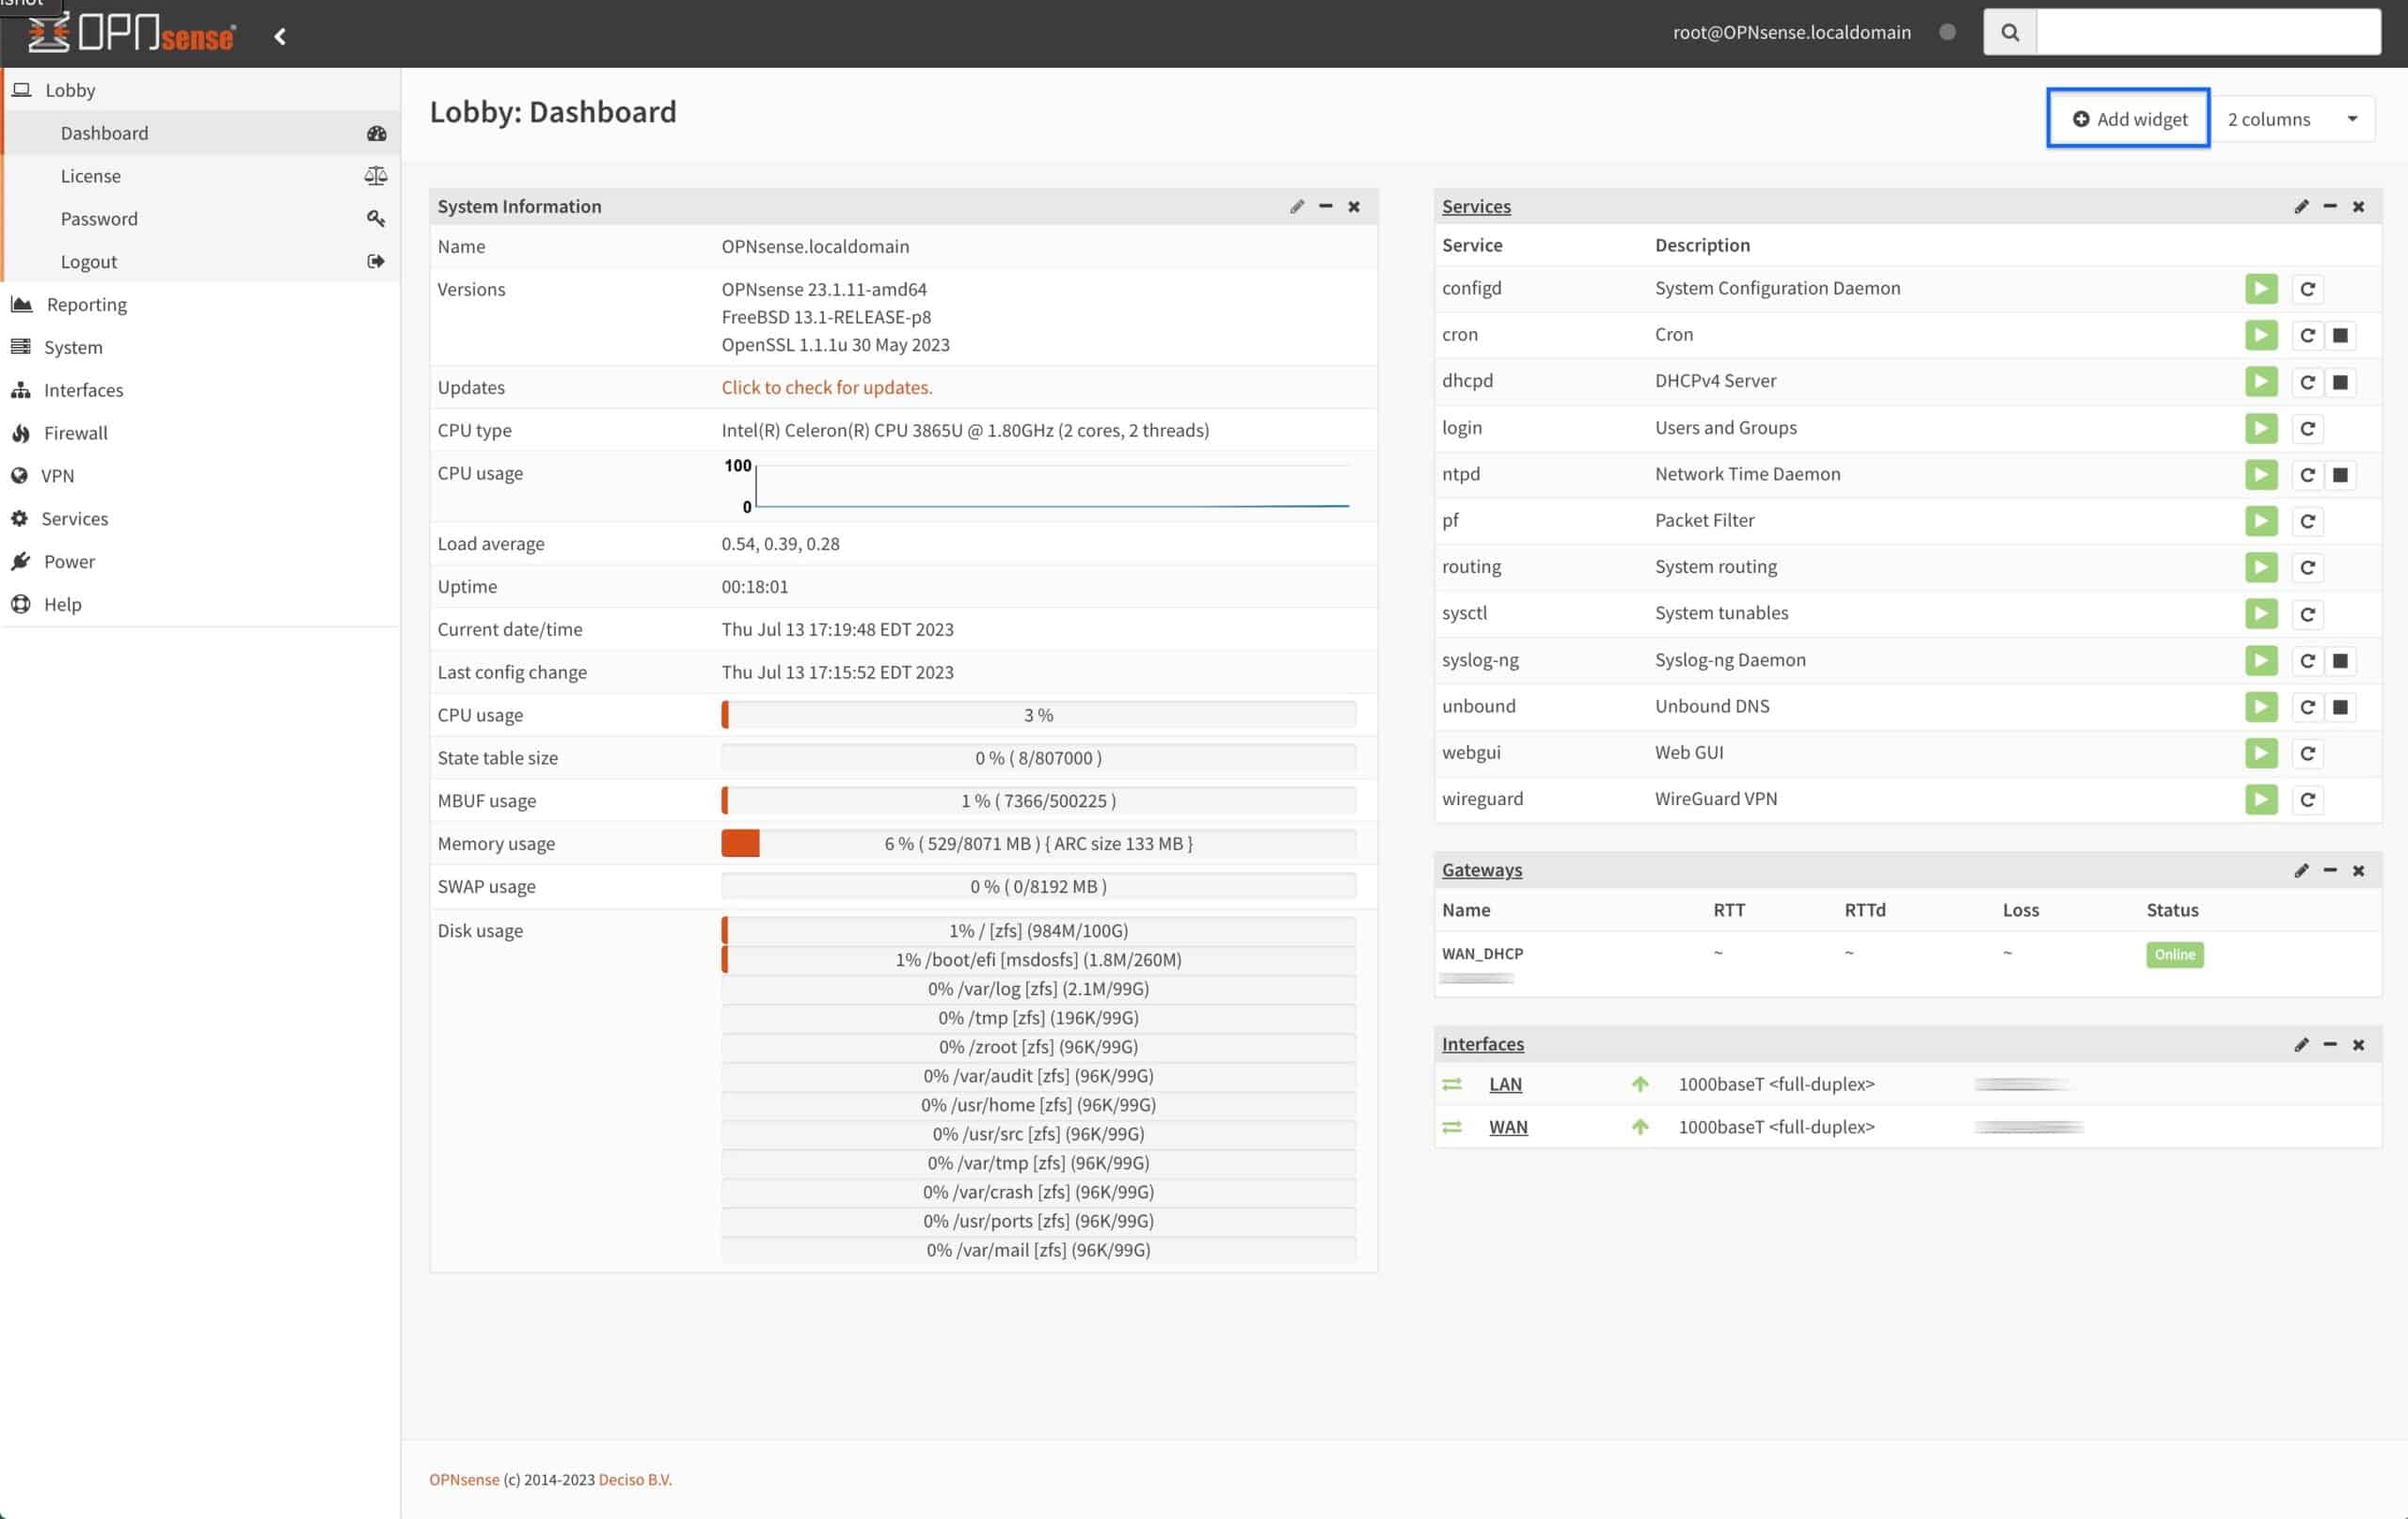
Adding the OpenVPN widget to the OPNsense dashboard
We can add an OpenVPN widget to OPNsense’s dashboard. The widget provides useful information about active OpenVPN connections.
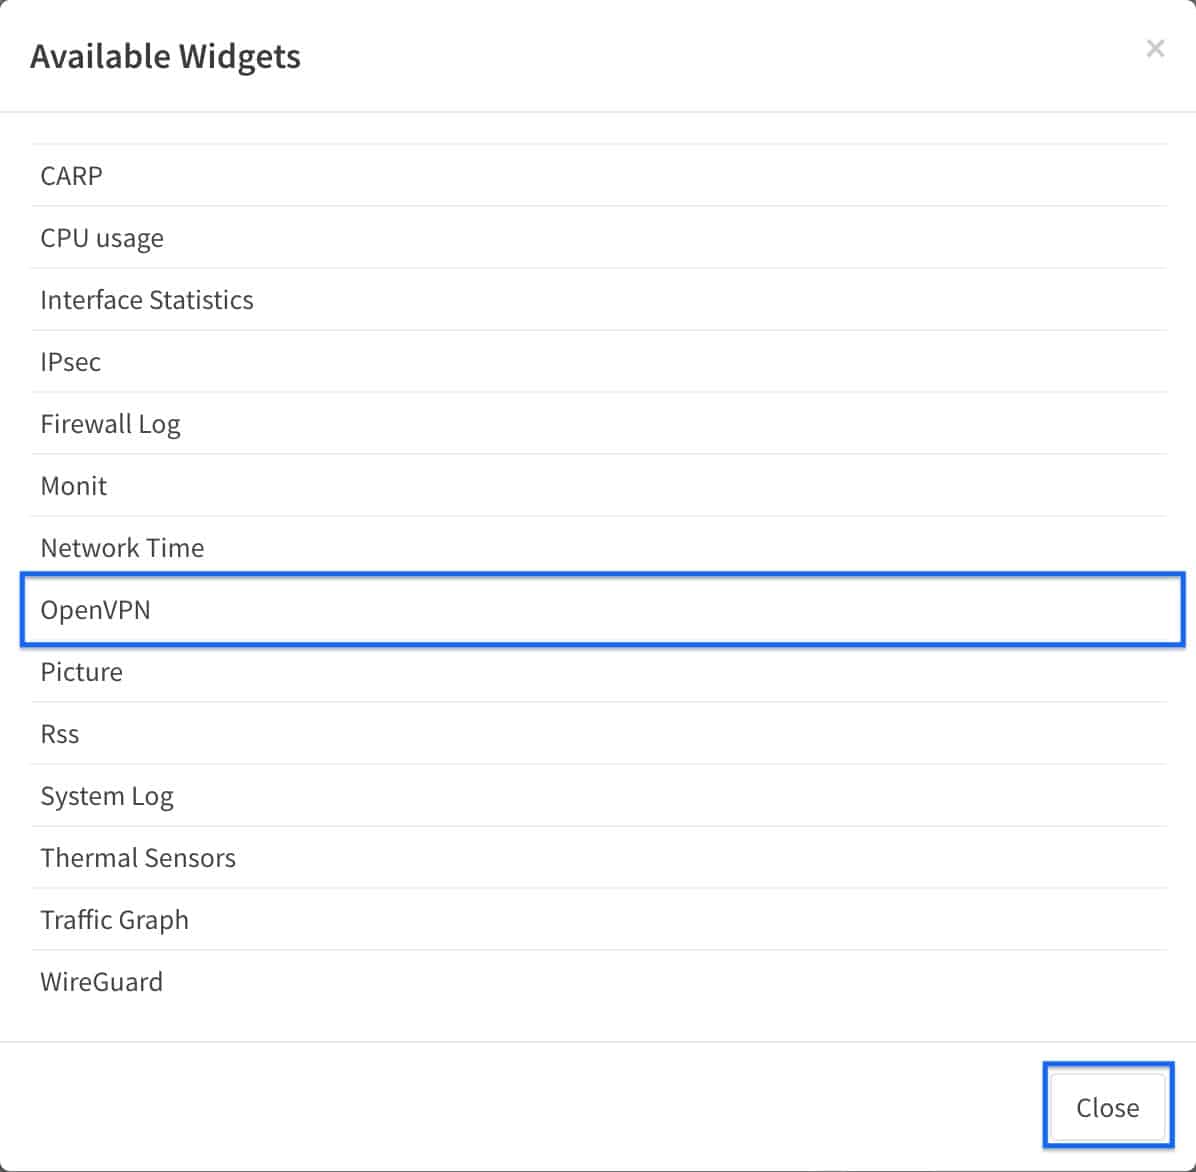
- From the main dashboard, click Add Widget at the top right of the UI. The Widget List is displayed.
- Select OpenVPN and click Close. The widget is displayed in the dashboard, but we need to save it for it to load.
- Click Save Settings at the top right of the UI.
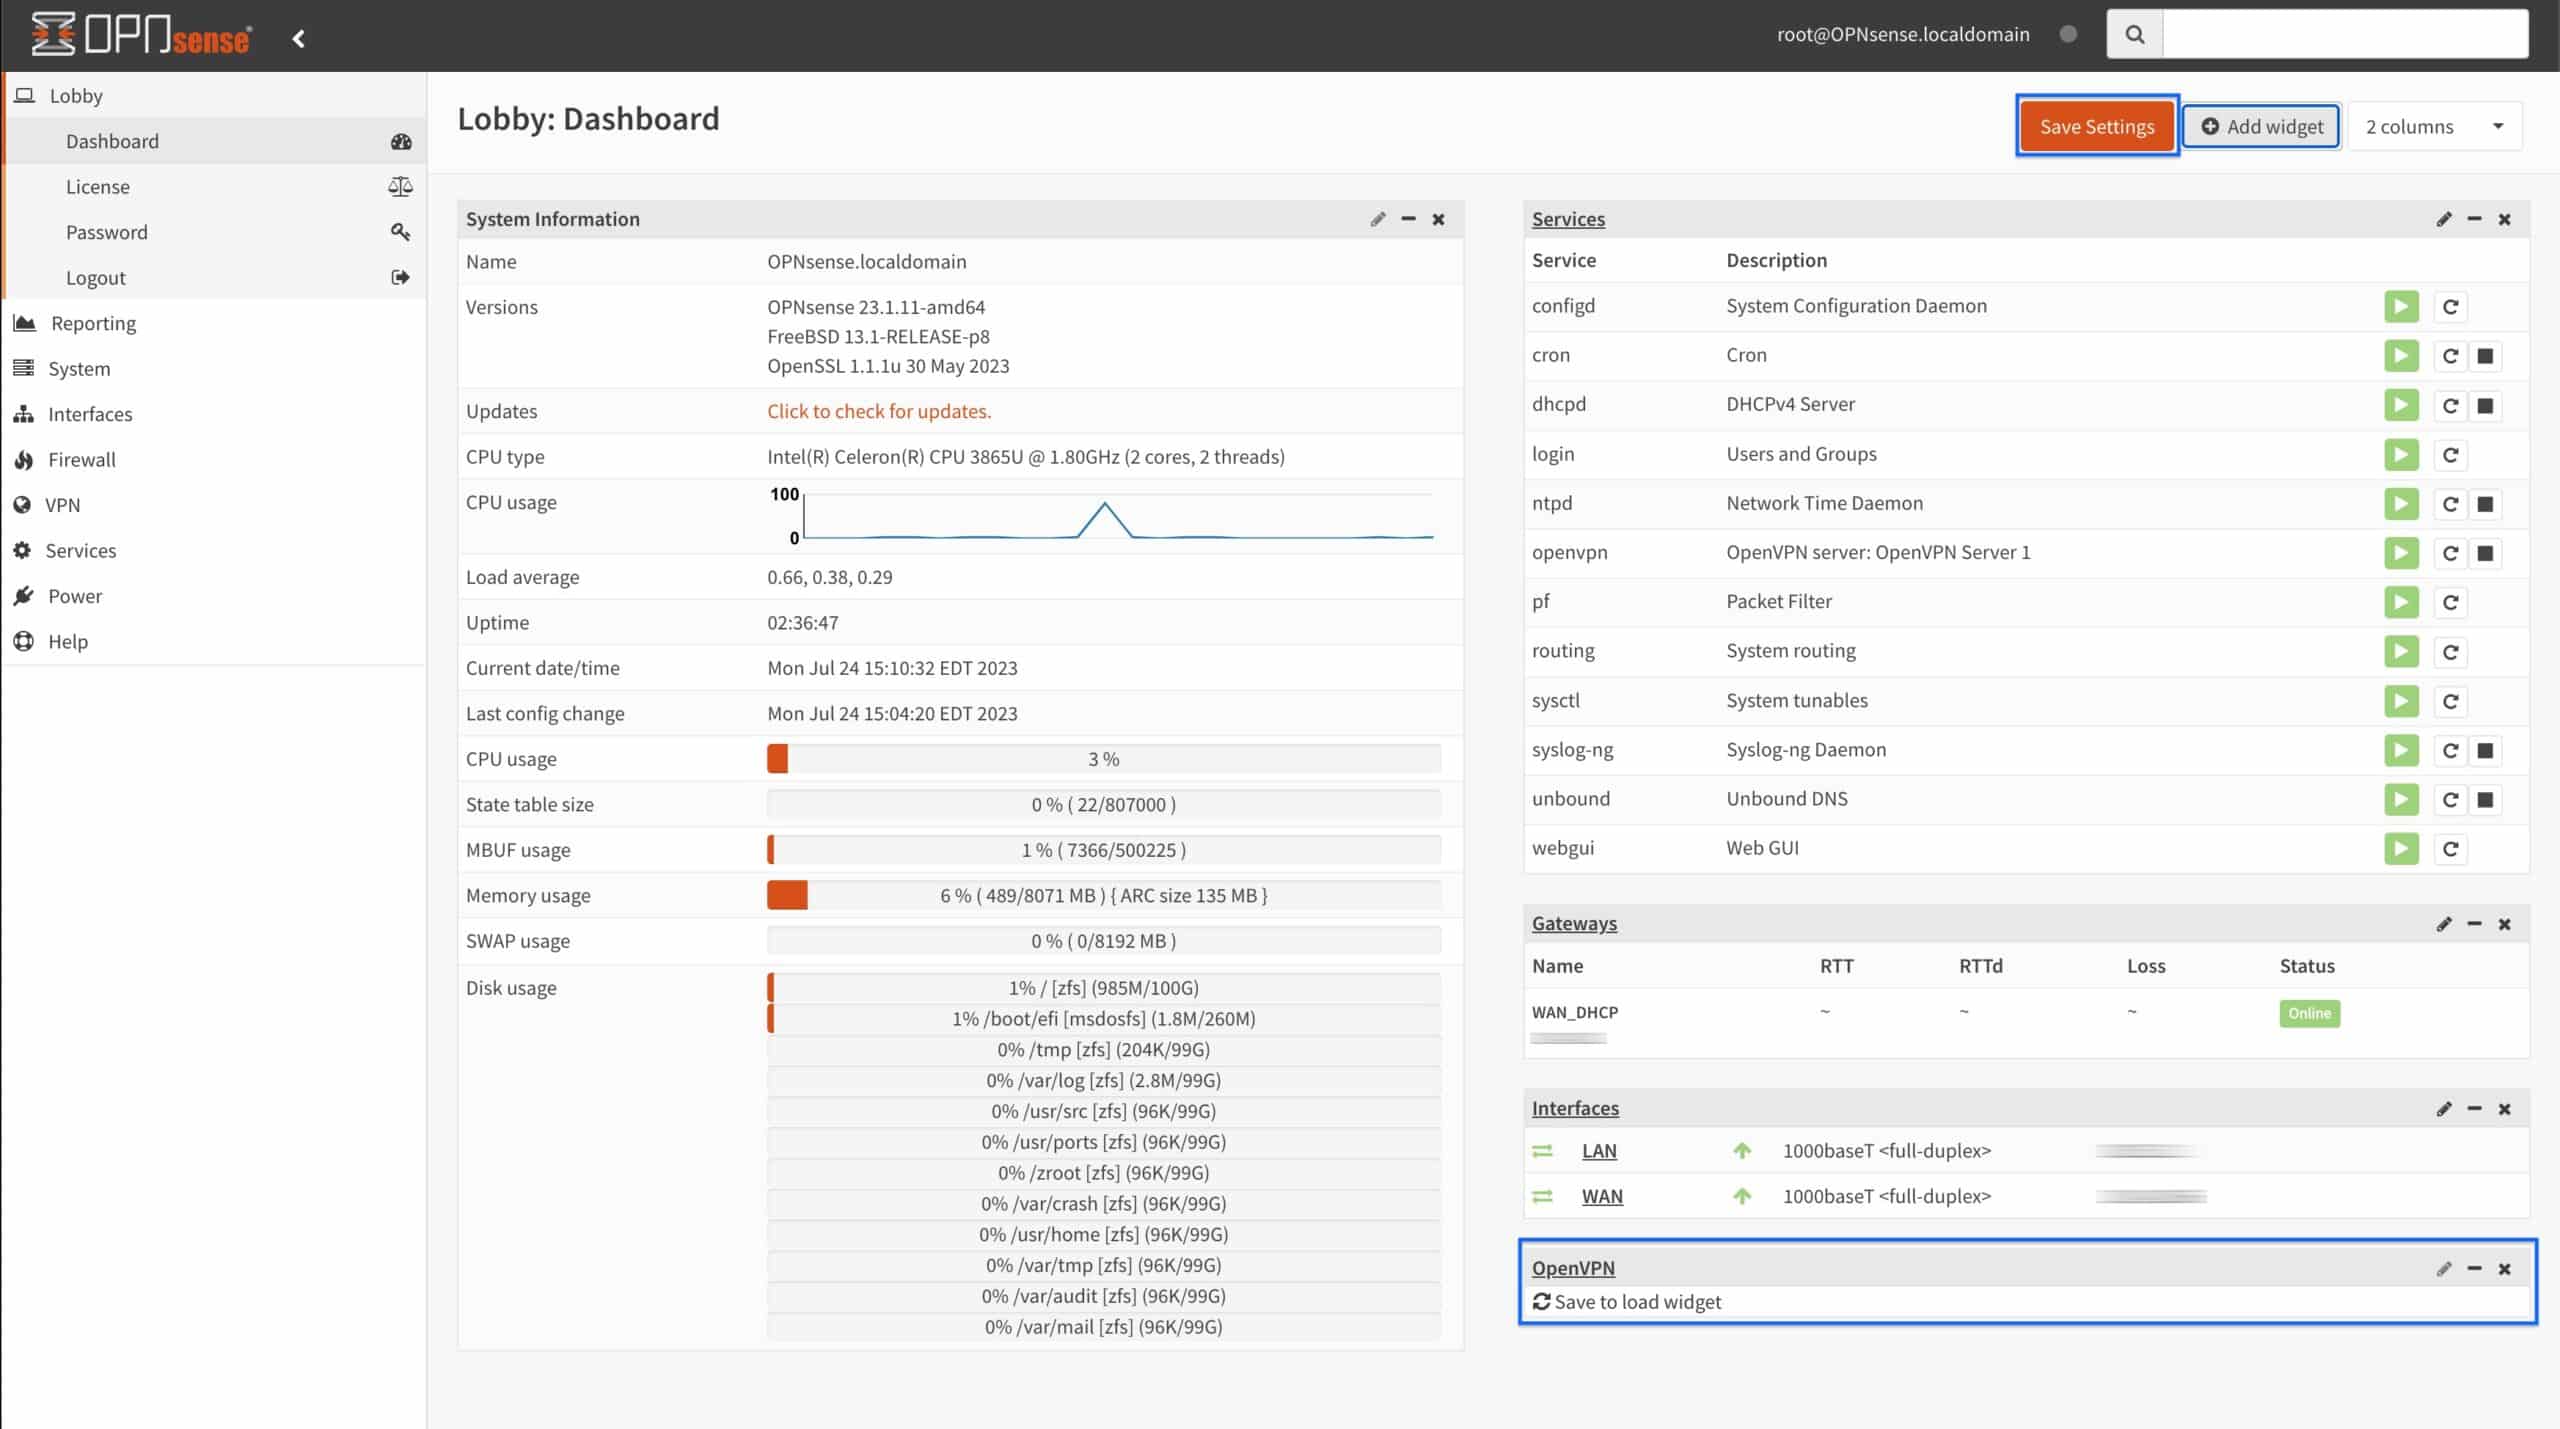
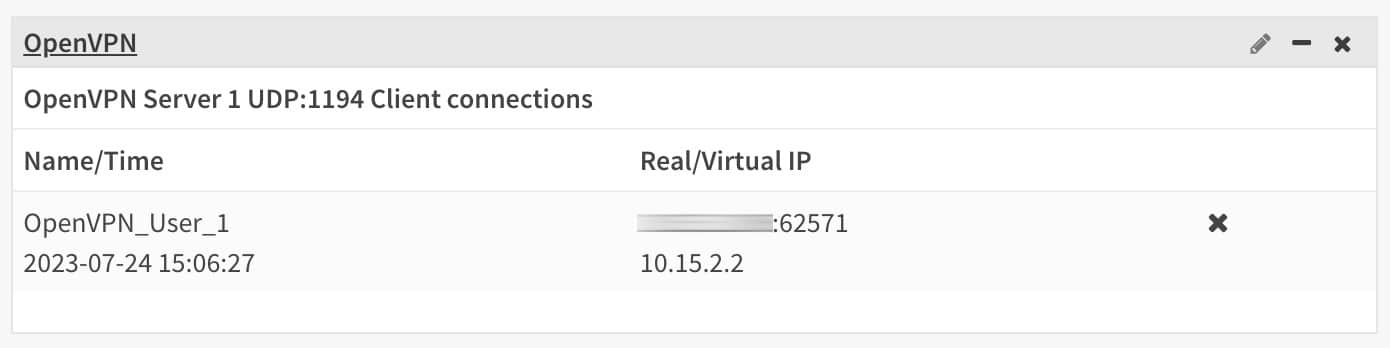
- The OpenVPN widget loads and displays the username, connection time, real IP/port, and virtual IP of connected users.
Wrap up
So we’ve successfully set up a basic OpenVPN server in OPNsense for remote access. We kept things simple. But OPNsense can accommodate much more complex setups. One example would be configuring content filtering on your OPNsense box to block ads and malware – and your OpenVPN clients would also benefit from this. Perhaps we’ll cover this in another tutorial moving forward.
Whatever the case, you now have a fully functional OpenVPN server configured on your home router (OPNsense), enabling you to use your home internet connection from any device, wherever you are.


Exellent! Thank you!