
pfSense is a powerful, open-source firewall/router that’s based on FreeBSD. Using pfSense instead of a typical consumer router has many benefits. Frequent OS updates to patch vulnerabilities is a big one. Most consumer routers never get firmware updates, and most people use their router for more than five years. But beyond better security, pfSense includes many tools that make it easy to configure pretty much any network configuration quite easily thanks to its comprehensive GUI.
One thing that’s easy to set up on pfSense is your own OpenVPN server. When you have a VPN server running on your router, you can connect to your home network securely and, from anywhere, access your local machine, and even use your home internet connection from your remote device. And that’s what we’re going to look at in this article. We’re going to guide you through all of the steps you need to go through to configure your own OpenVPN server on pfSense.
To learn how to configure an OpenVPN client connection to a commercial VPN provider in pfSense, you can read our dedicated guide.
Why should I install OpenVPN on pfSense?
Installing OpenVPN on pfSense provides several advantages. It allows secure remote access to your home network from anywhere, enabling you to use your home internet connection remotely. It also supports multiple connections, meaning you can connect several devices to a VPN service using a single session, which is more efficient than running individual VPN clients on each machine.
Managing firewall rules within pfSense becomes easier when running multiple tunnels with different policies. You can also configure content filtering on your pfSense box to block ads and malicious sites, benefiting all OpenVPN clients.
OpenVPN is compatible with many devices and operating systems, and supports various features and options, enhancing its flexibility. It’s also privacy-friendly and widely supported by many VPNs.
Having the VPN server on your router keeps your physical setup neat, without the need for additional boxes for different tasks. However, running more services on your pfSense router can increase the load and potential exposure to vulnerabilities, so keeping your software up-to-date is essential.
See also: Best VPN for pfSense
This guide assumes you’ve already got pfSense setup with working WAN and LAN interfaces.
Settings that are ignored in the instructions should be left at their default values (i.e., untouched).
Thinking about authentication
Before we configure our OpenVPN server, we need to choose an authentication method. Both OpenVPN and pfSense support password-based authentication, certificate-based authentication, or both. In this guide, we’ll be using both so that we cover all the bases. But you’re free to select one or the other. If you choose to use password-based authentication only, you can skip the steps of generating user certificates. But you still need to generate a Certificate Authority as well as a server certificate.
Generating the Certificate Authority (CA)
The first thing we need to do is generate our Certificate Authority (CA), which will validate the OpenVPN server’s identity and authenticate user certificates (if enabled).
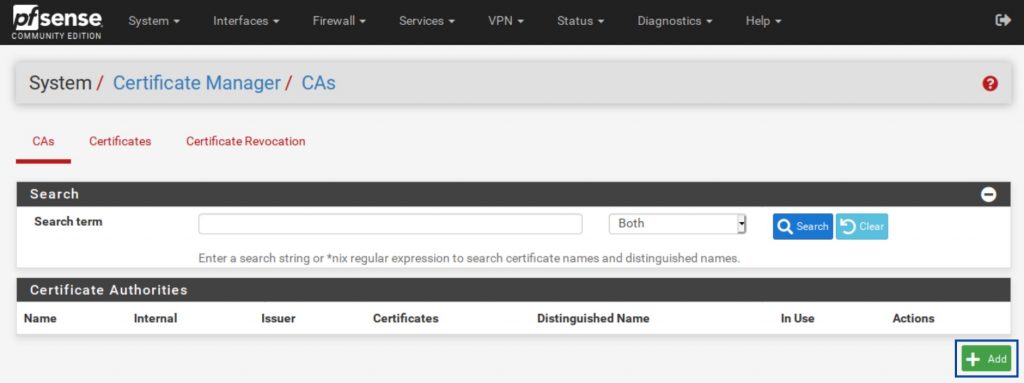
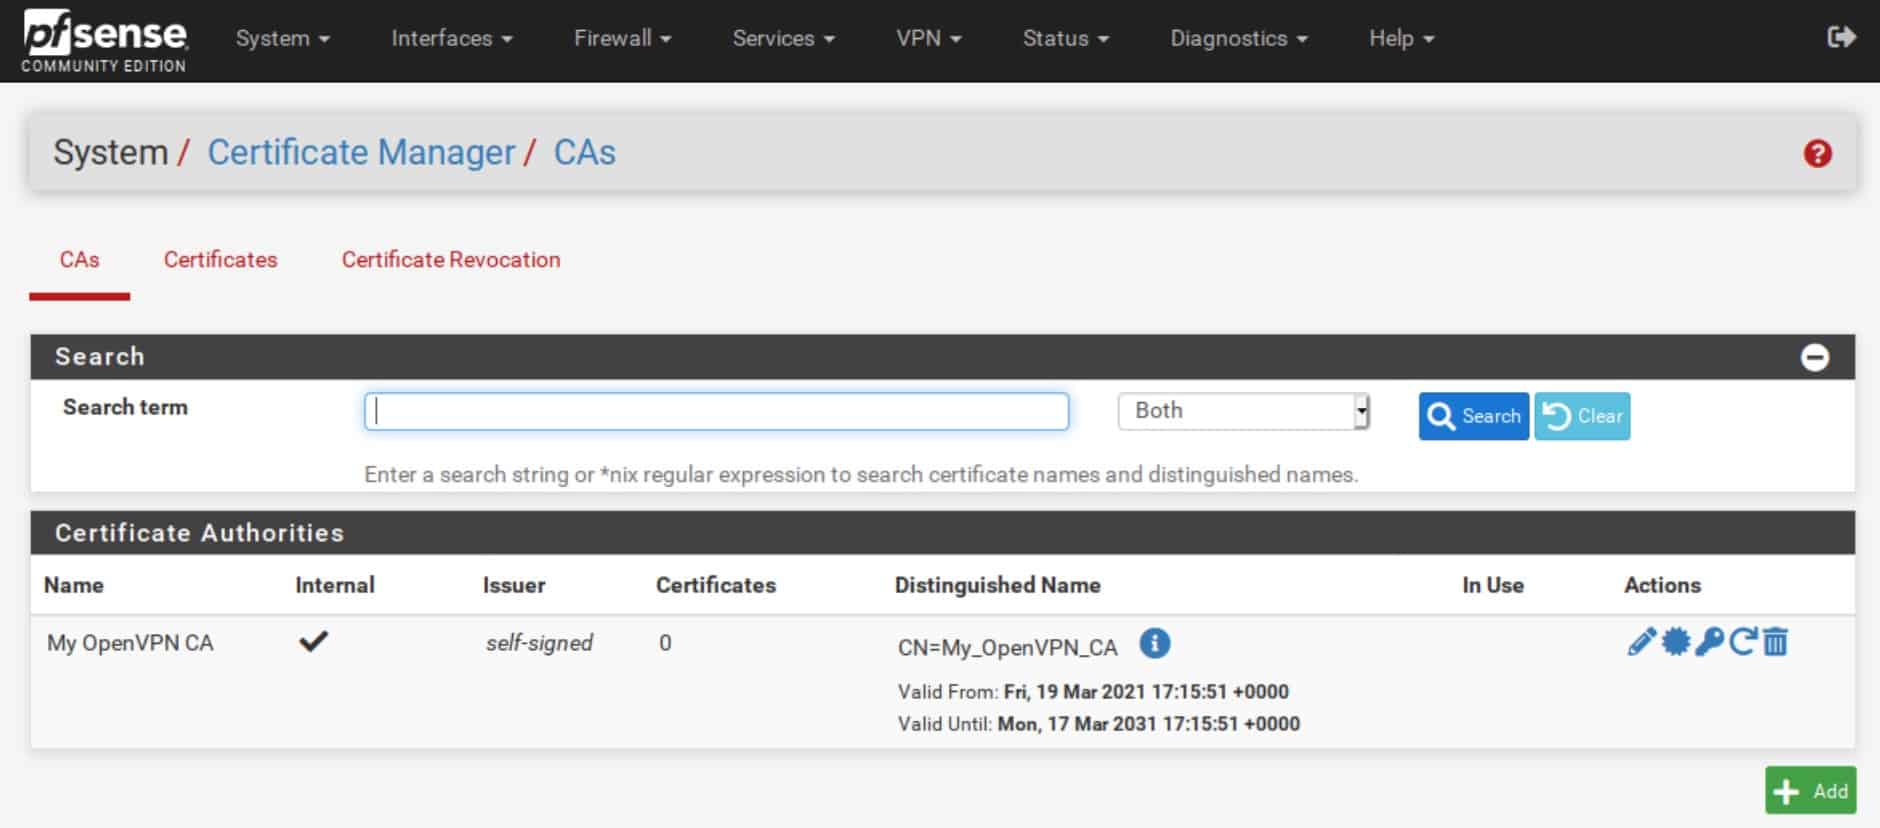
- From the menus at the top of the screen, select System > Cert. Manager.
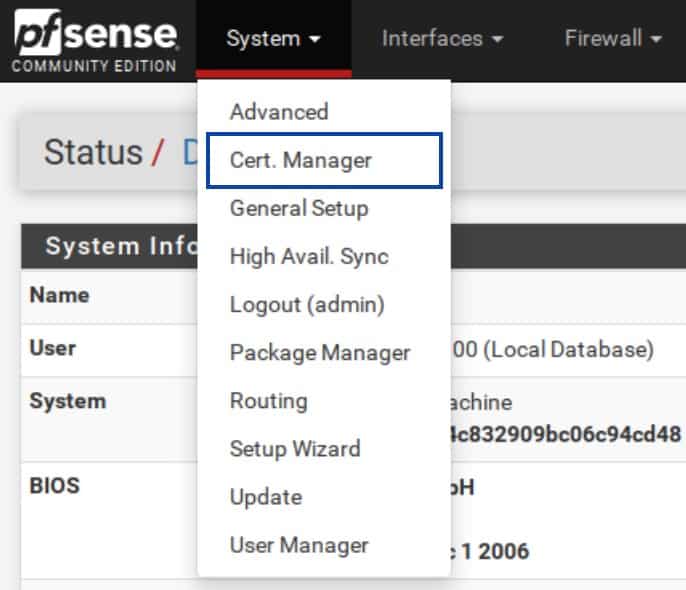
- Click the Add button at the bottom right.
- Enter a name for your CA.
- Make sure Method is set to Create an internal Certificate Authority.
- Select your Key type. I will be using RSA for this example, but you can also use ECDSA.
- Set your Key length to at least 2048. I will be using 4096 for this example.
- Set your Digest Algorithm to at least sha256. I will be using sha512 for this example.
- Choose a Common Name for your certificate or leave the default of internal-ca.
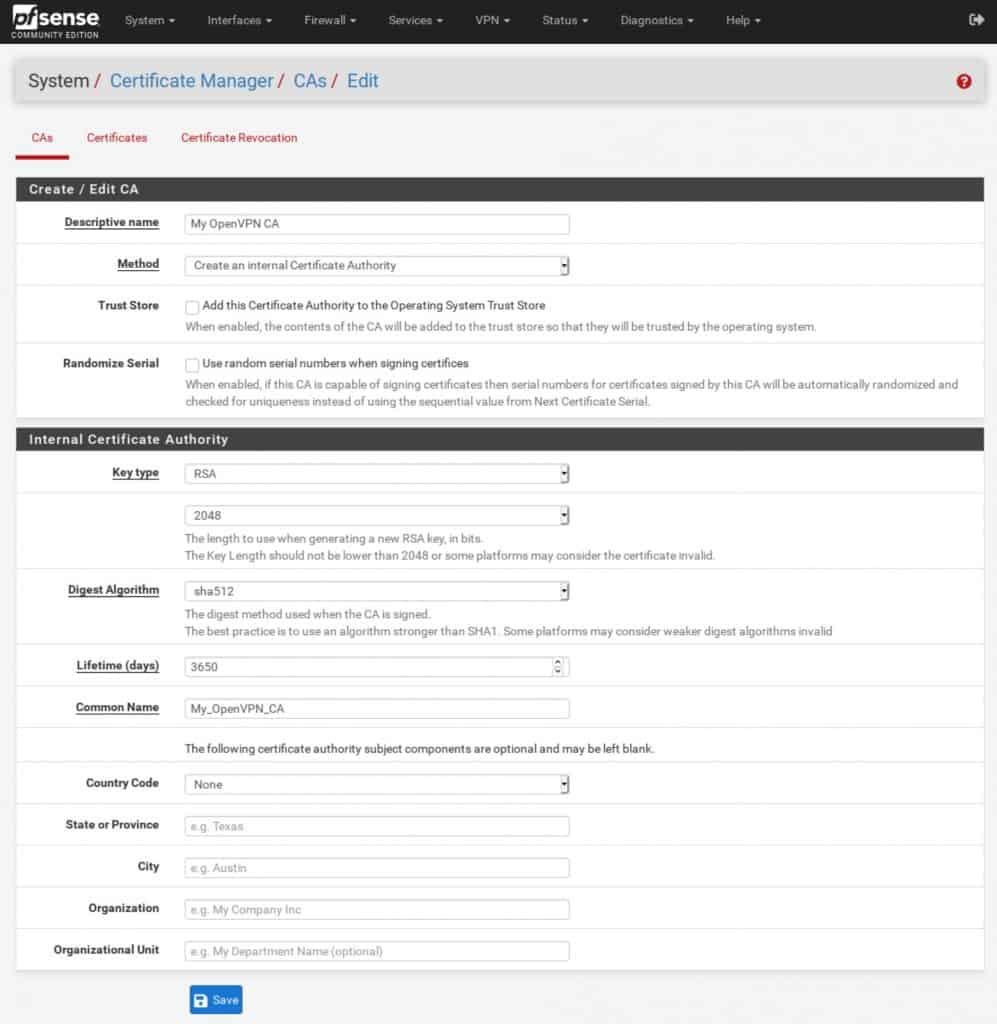
- Click Save at the bottom. You’ve created your Certificate Authority.


Generating the server certificate
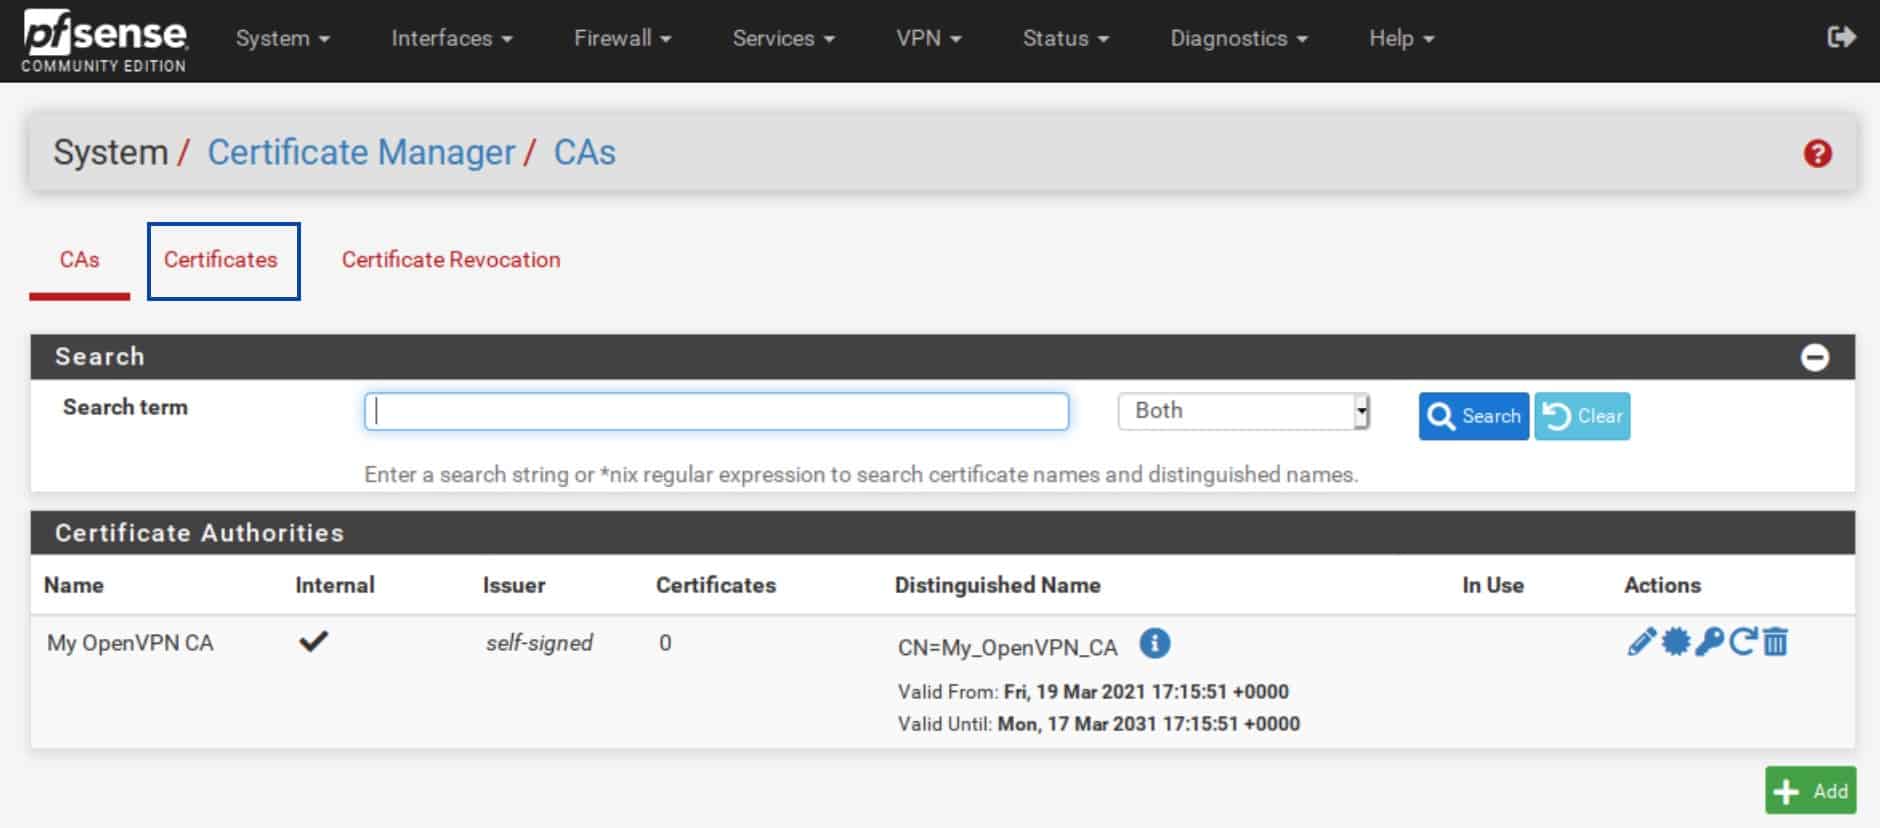
- If you’re not already there, from the menus at the top of the screen, select System > Cert. Manager.
- Select the Certificates sub-menu.

- From the Certificates sub-menu, click the Add/Sign button at the bottom right.
- Make sure Method is set to Create an internal Certificate.
- Enter a Descriptive name for your certificate.
- Use the same values you set for the Certificate Authority for the Key type and length, as well as for the Digest Algorithm.
- Set the Lifetime to 365 days.
- Select Server Certificate as the Certificate Type.
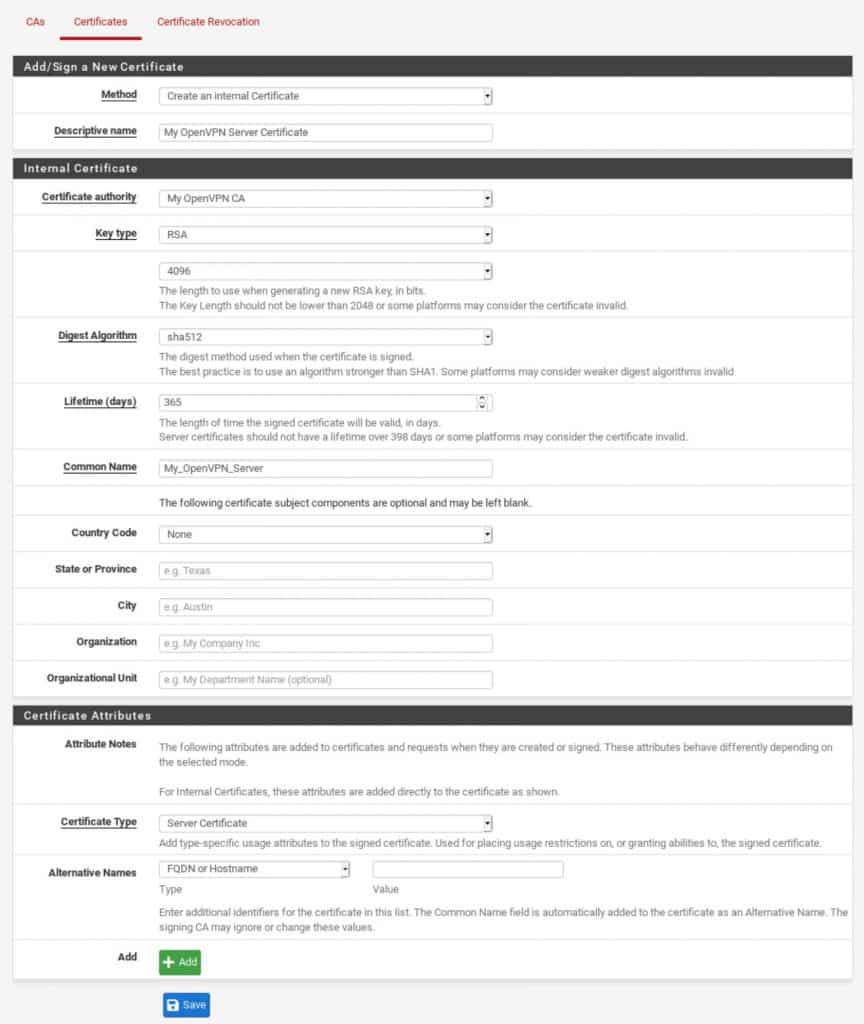
- Click Save. You’ve created your server certificate.

Create your OpenVPN user and your user certificate
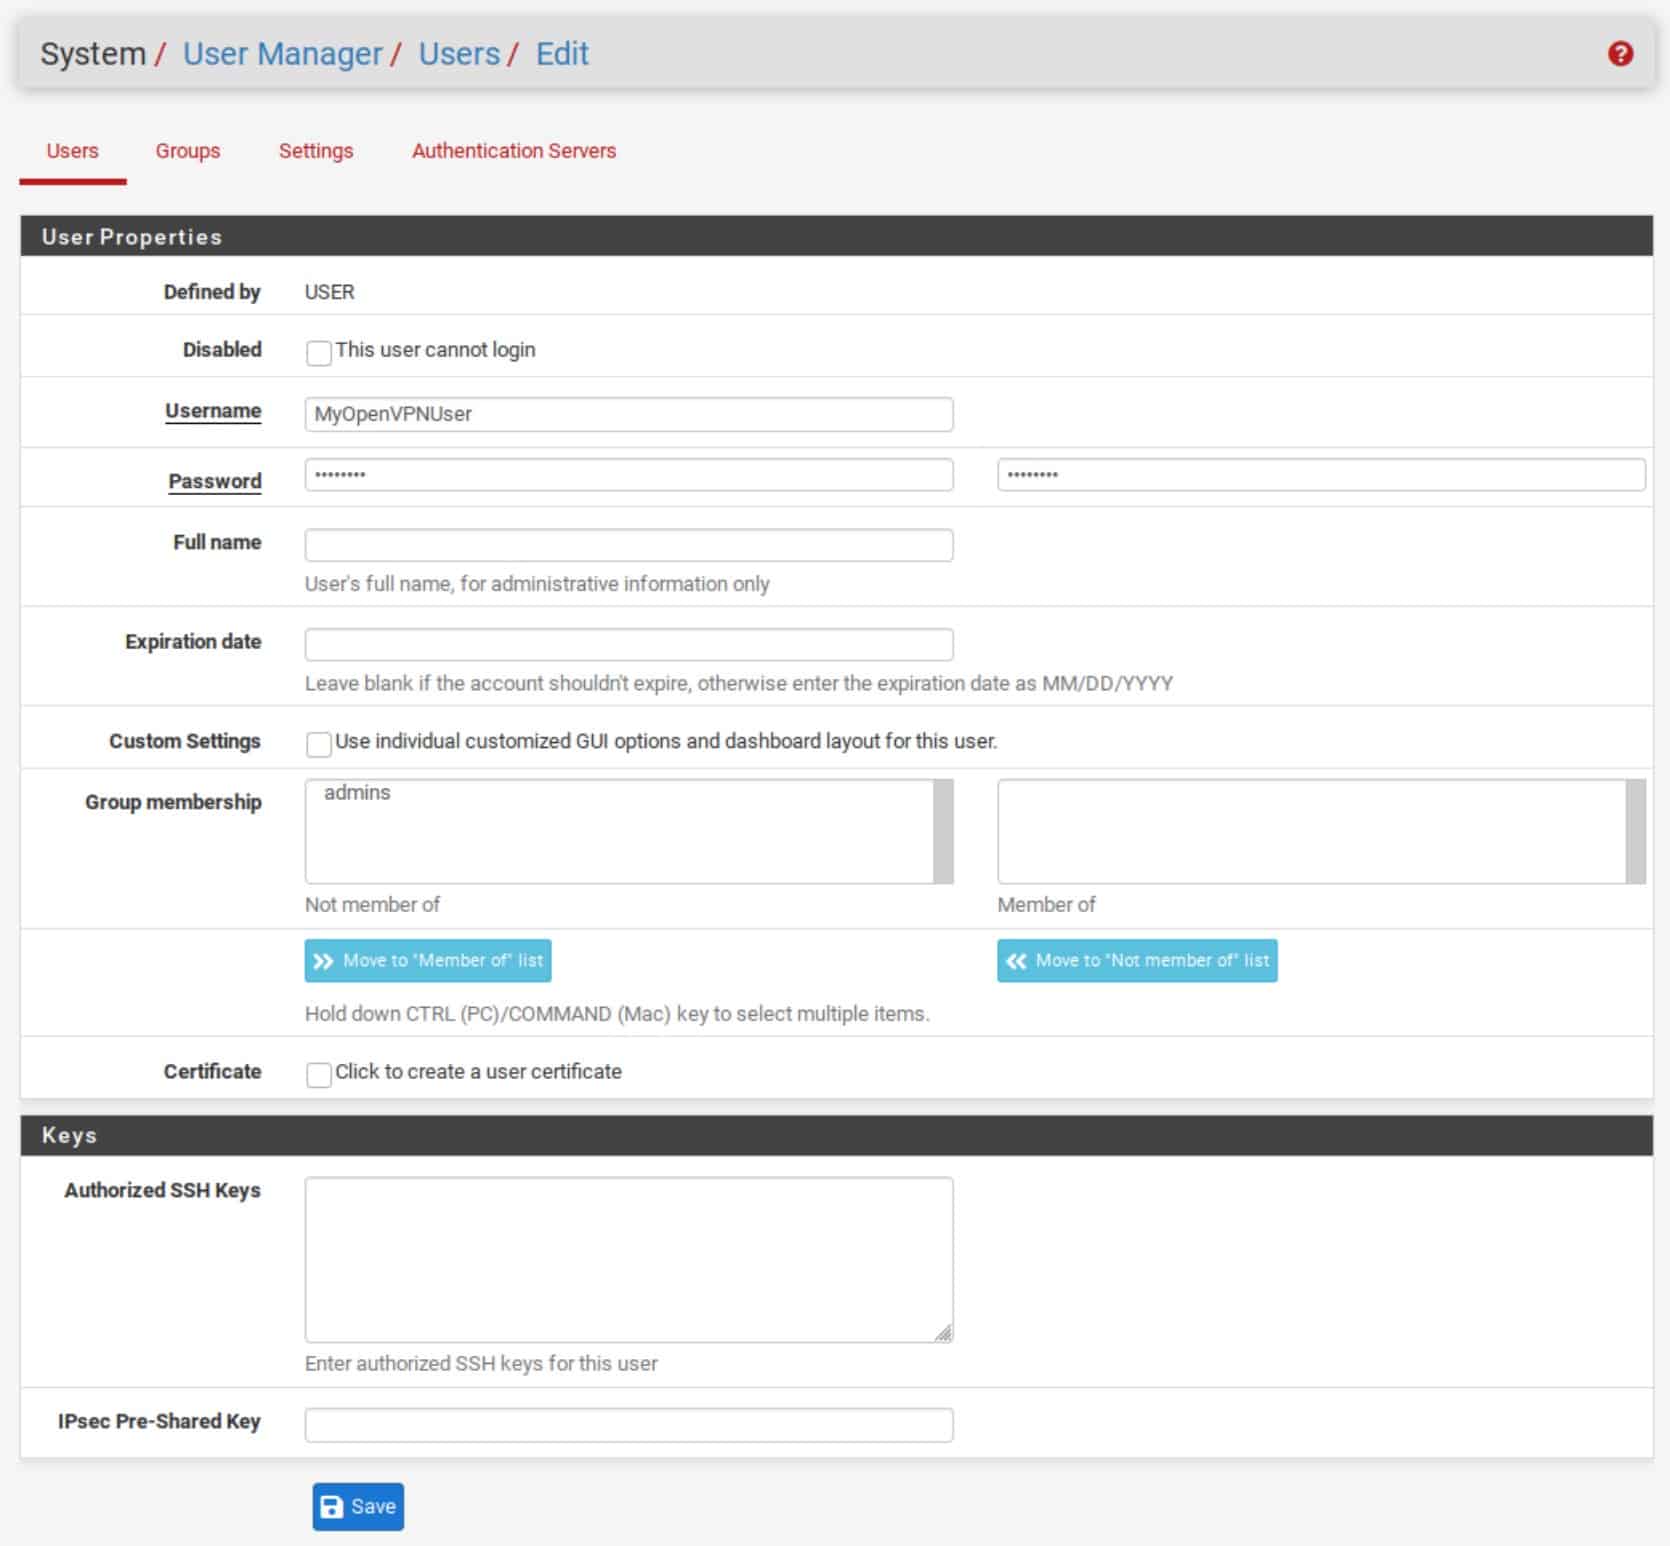
We now need to create a user to access the OpenVPN server.
I will be creating a single user for this guide, but you can create as many users as you need. Simply repeat these steps.
- From the menus at the top of the screen, select System > User Manager. You are taken to the User Manager.
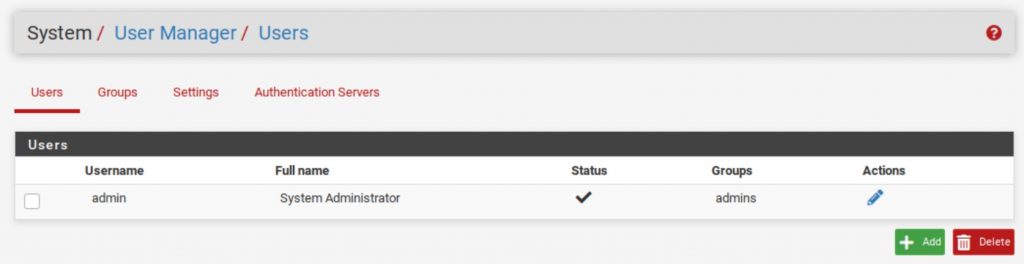
- Click the Add button at the bottom right.
- Enter a Username and Password for your user.

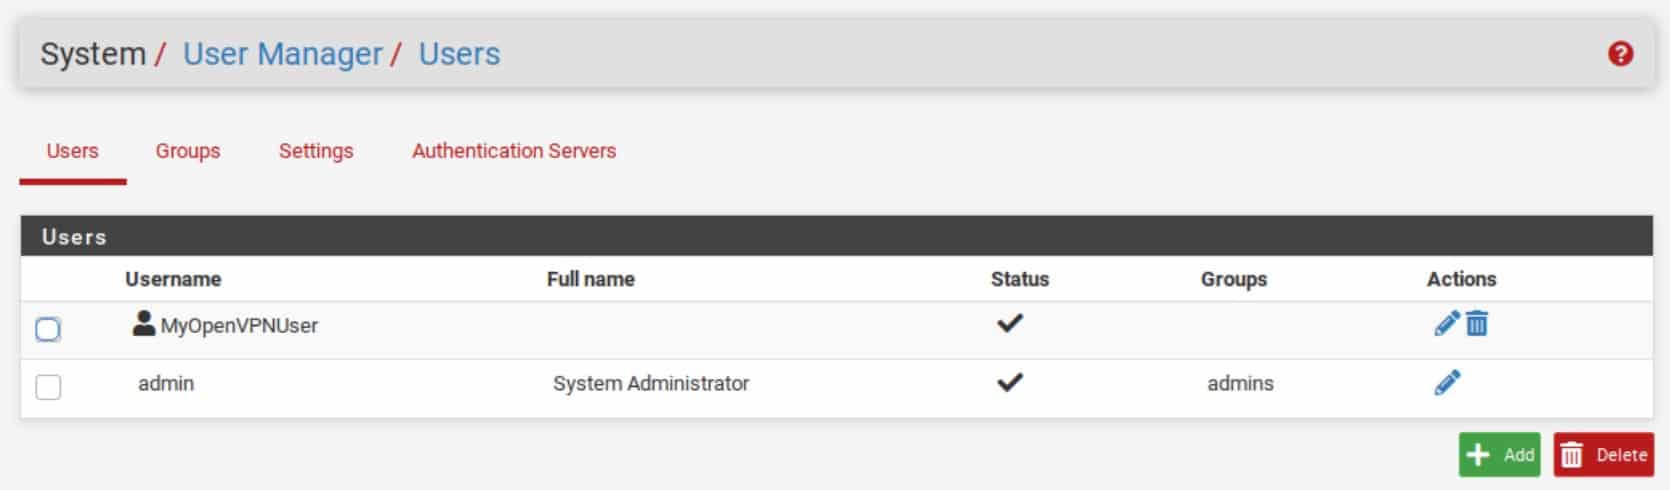
- Click Save. You’ve created your OpenVPN user and are taken back to the User Manager.
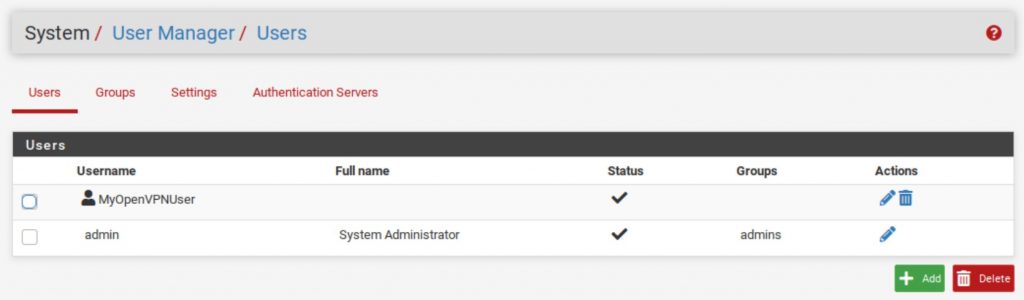
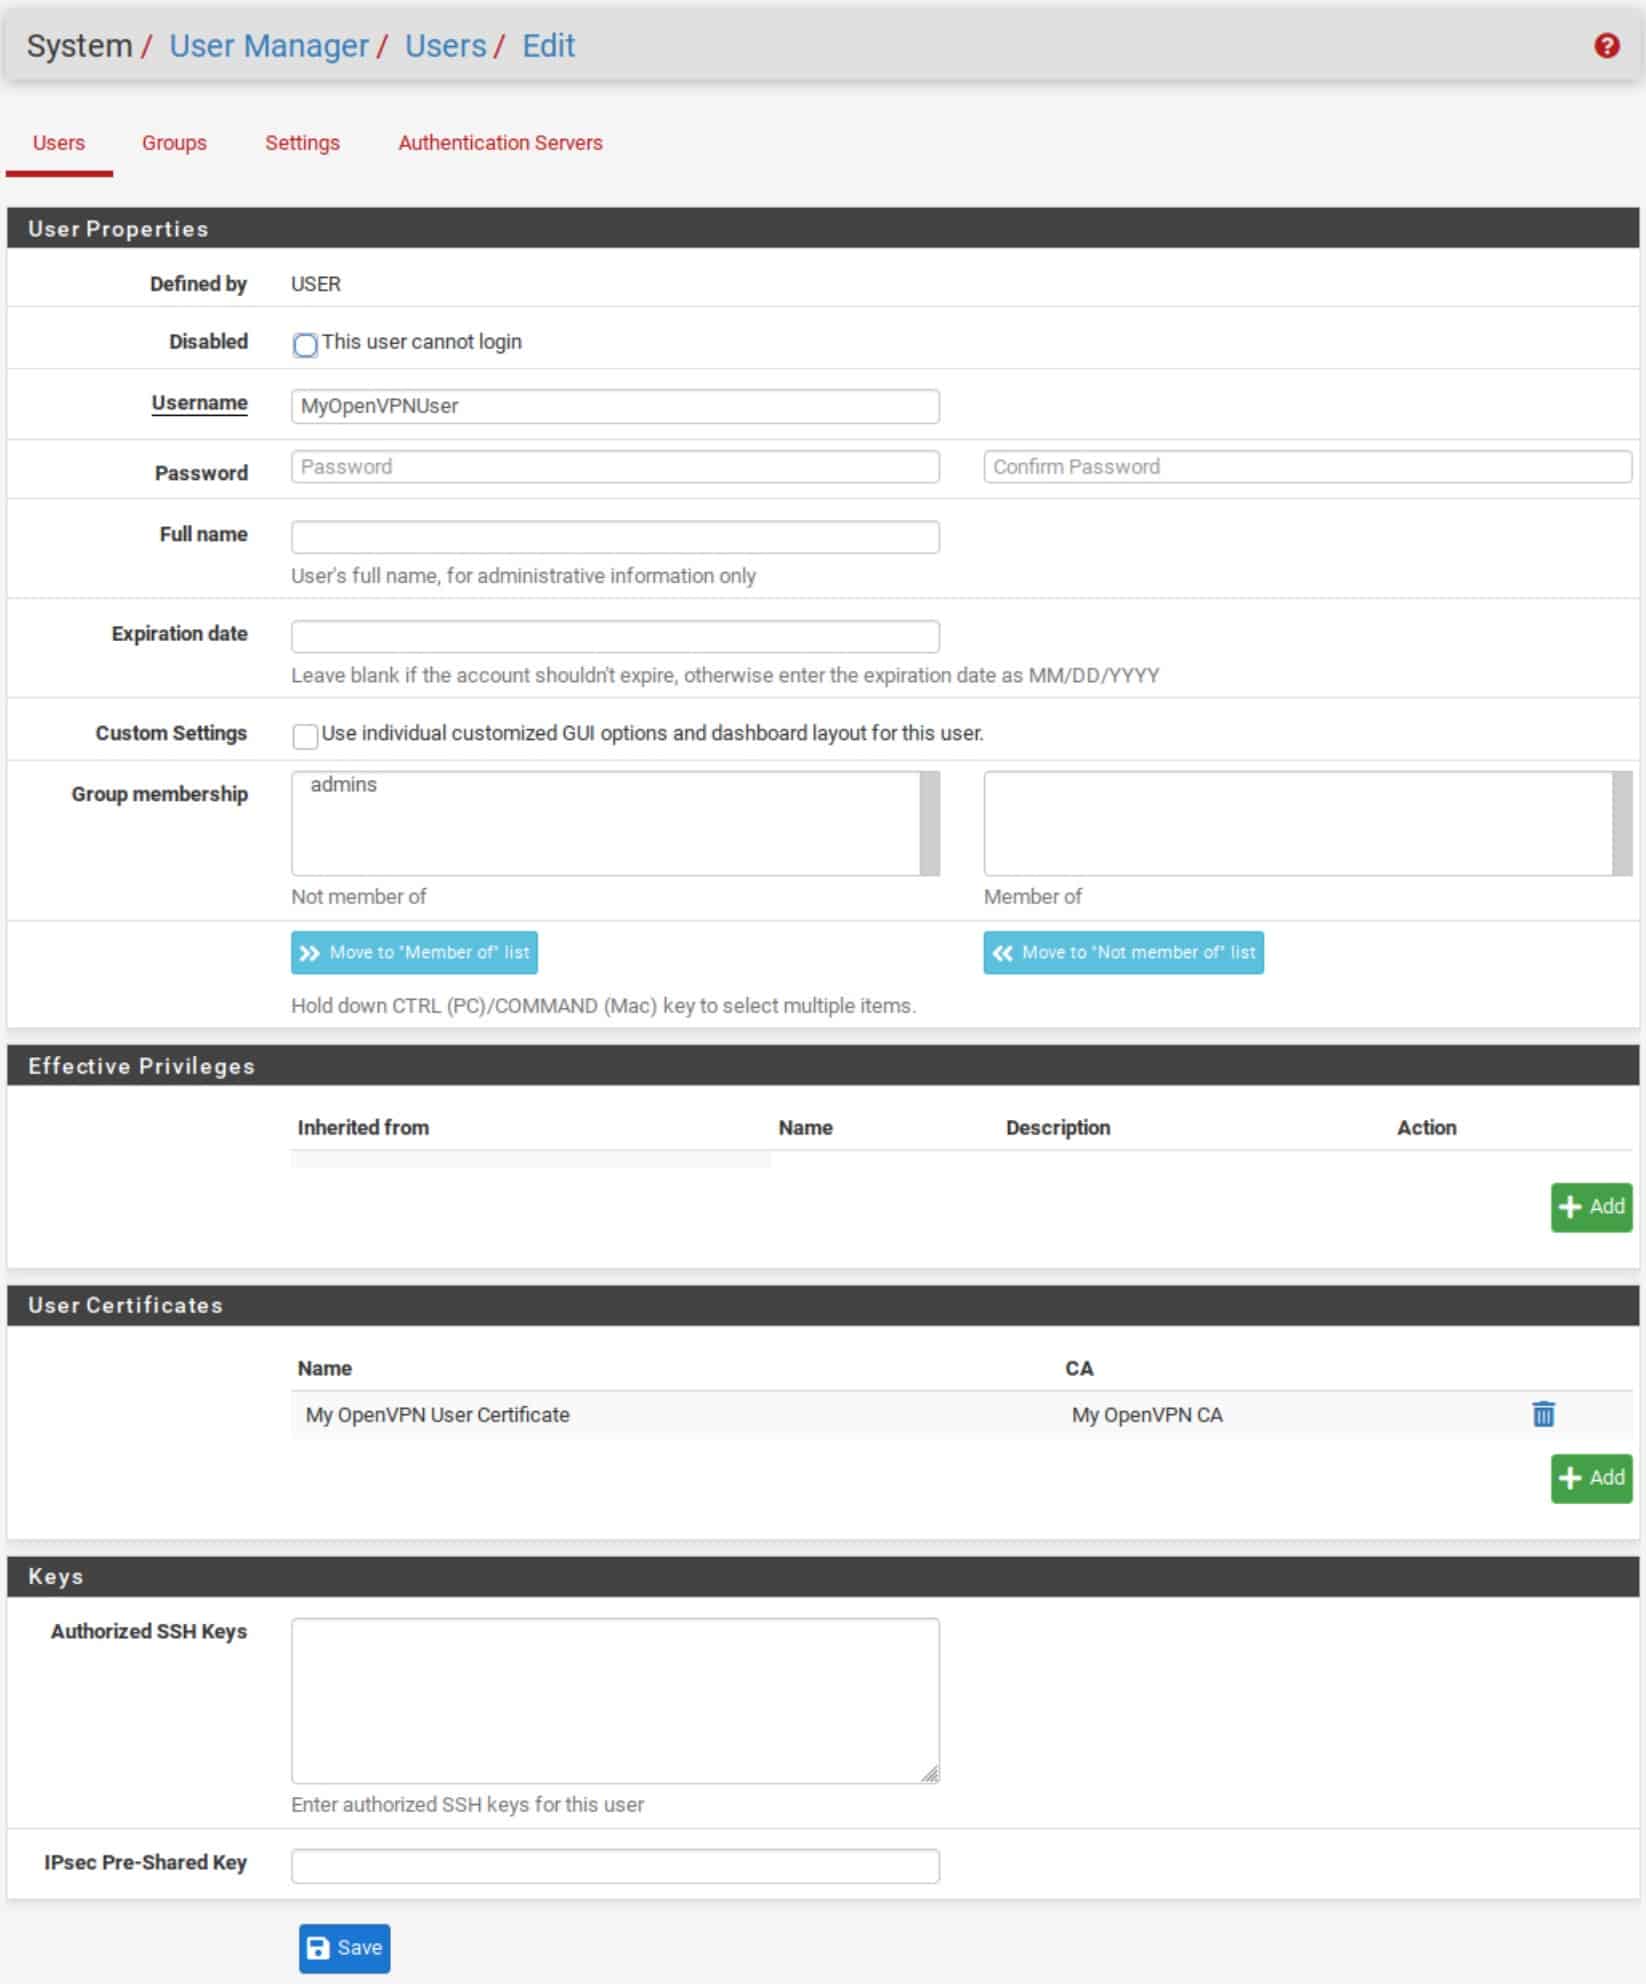
- If you chose to set up your server for certificate-based authentication or for certificate and password-based authentication, click the pencil icon to the right of your new user. You’re taken back to the Edit User window.
- Click the Add button under User Certificates. You’re taken to the Certificate Manager, and you’re prompted to input the parameters for your user certificate.

- Make sure Method is set to Create an internal Certificate.
- Enter a Descriptive name for your certificate.
- Set the same values you set for the Certificate Authority for the Key type and length, as well as for the Digest Algorithm.
- Set the Lifetime to 365 days.
- Make sure Certificate Type is set to User Certificate.
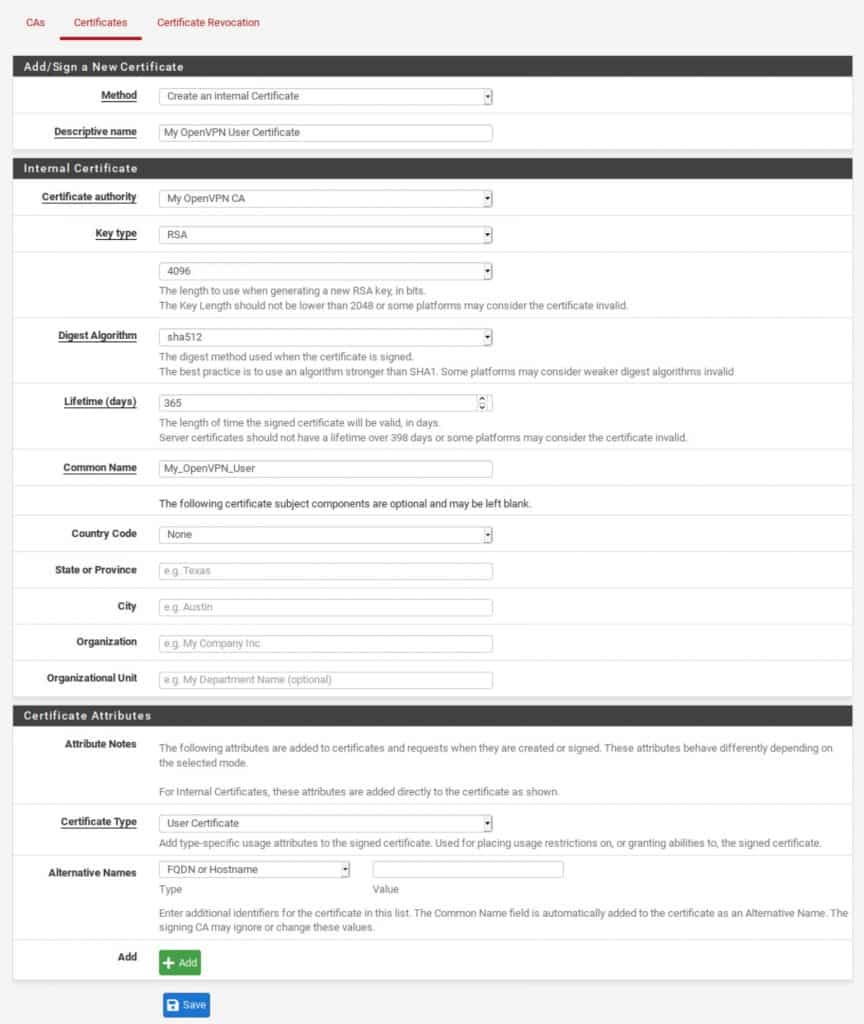
- Click Save. You’re taken back to the User Manager, and you can see that your newly created user certificate is now associated with your OpenVPN user.
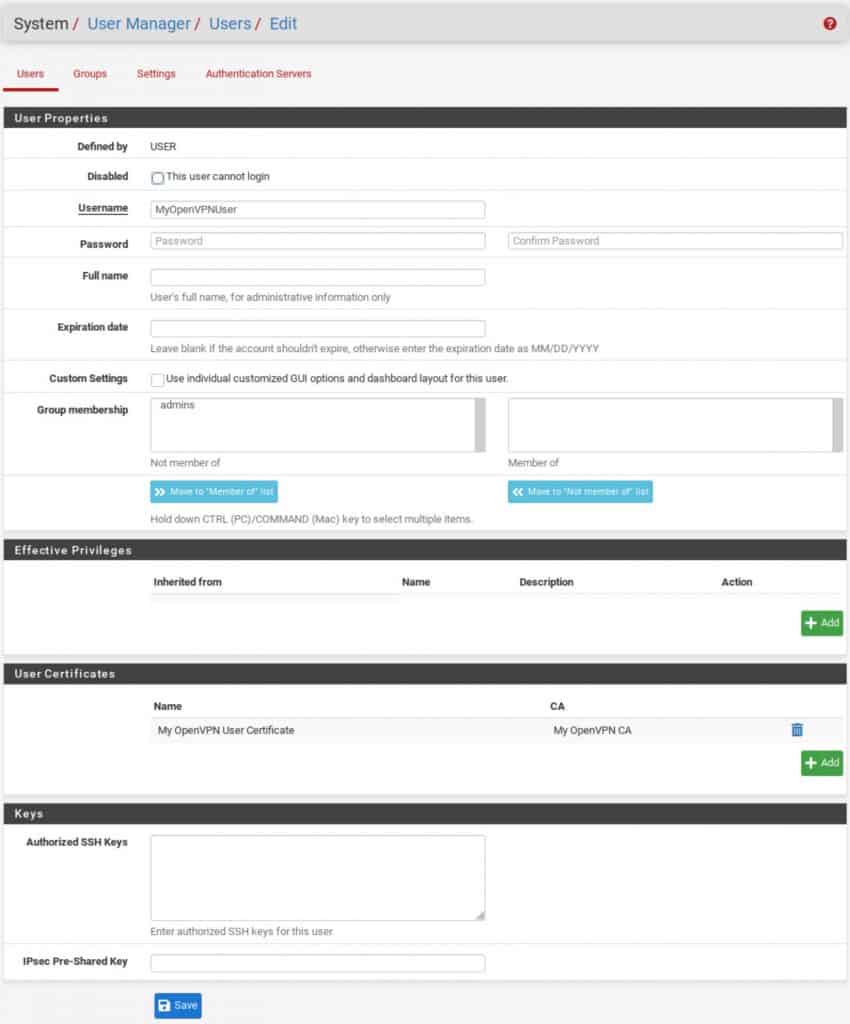
- Click Save.


Creating the OpenVPN server
We’re now ready to create our OpenVPN server.
- From the menus at the top of the screen, select VPN > OpenVPN. You are taken to the OpenVPN Servers sub-menu.
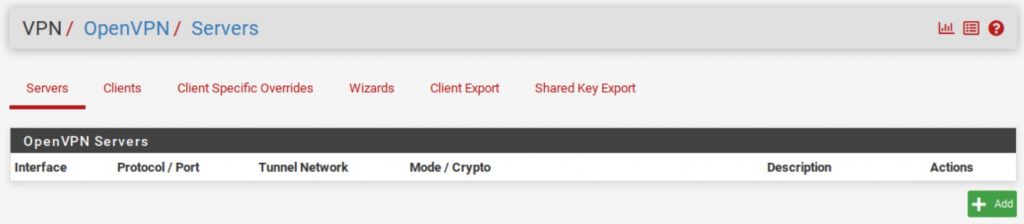
- Click the Add button on the bottom right.

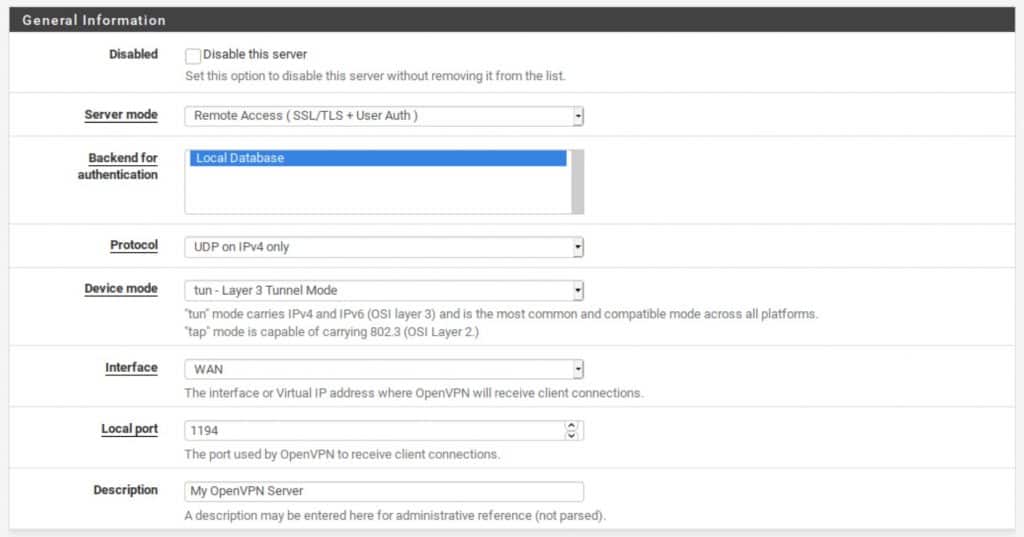
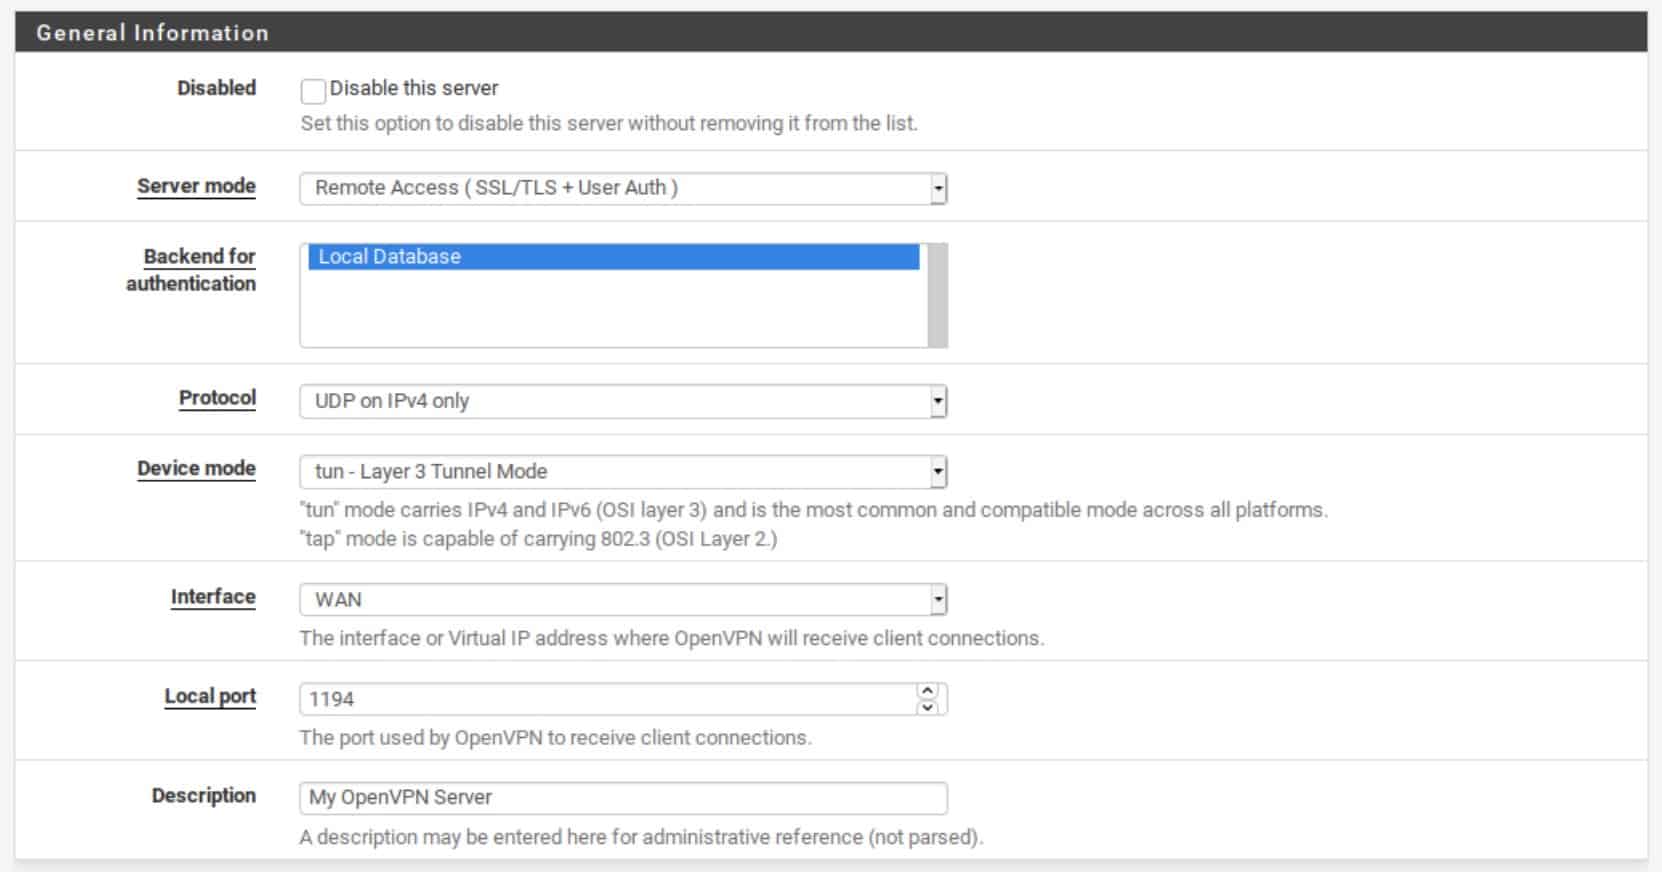
General Information
- Set the Server mode to either Remote Access (SSL/TLS), Remote Access (User Auth), or Remote Access (SSL/TLS + User Auth). As mentioned above, I will be using Remote Access (SSL/TLS + User Auth) for this example.
- Change the Local port to a different port if required by your network topology or leave it at the default (1194).
- Enter a name for your server in the Description field.
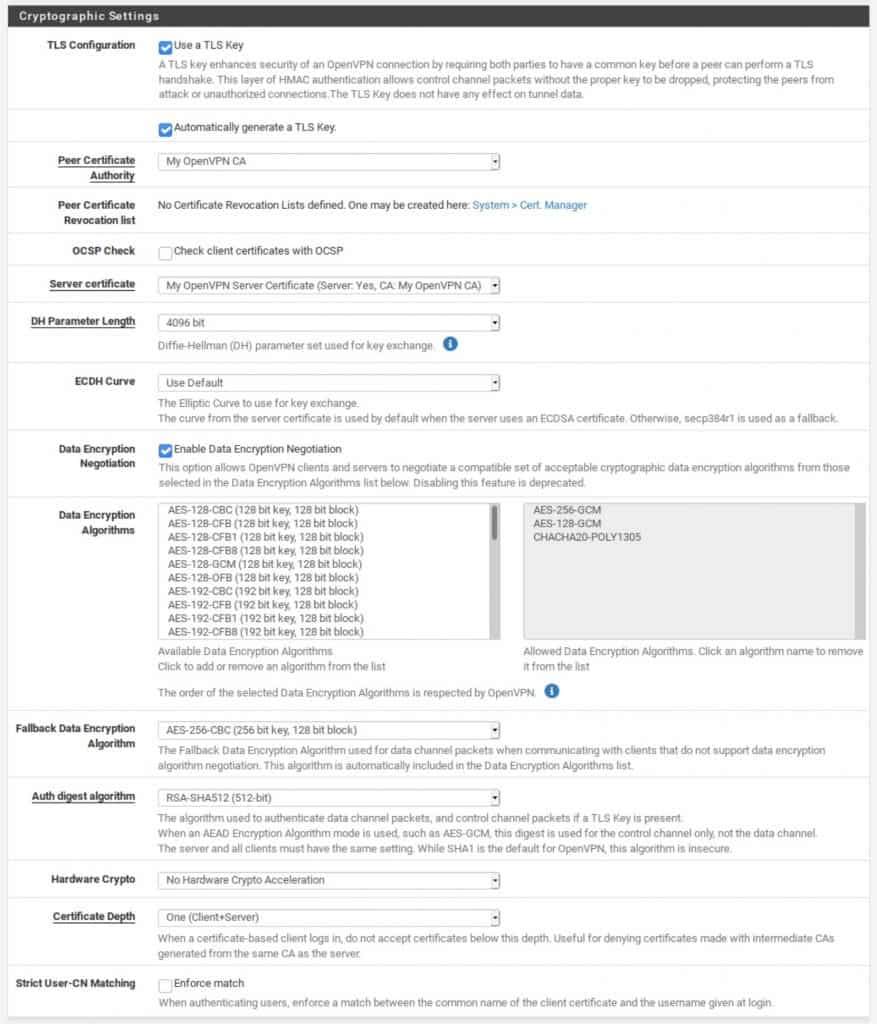
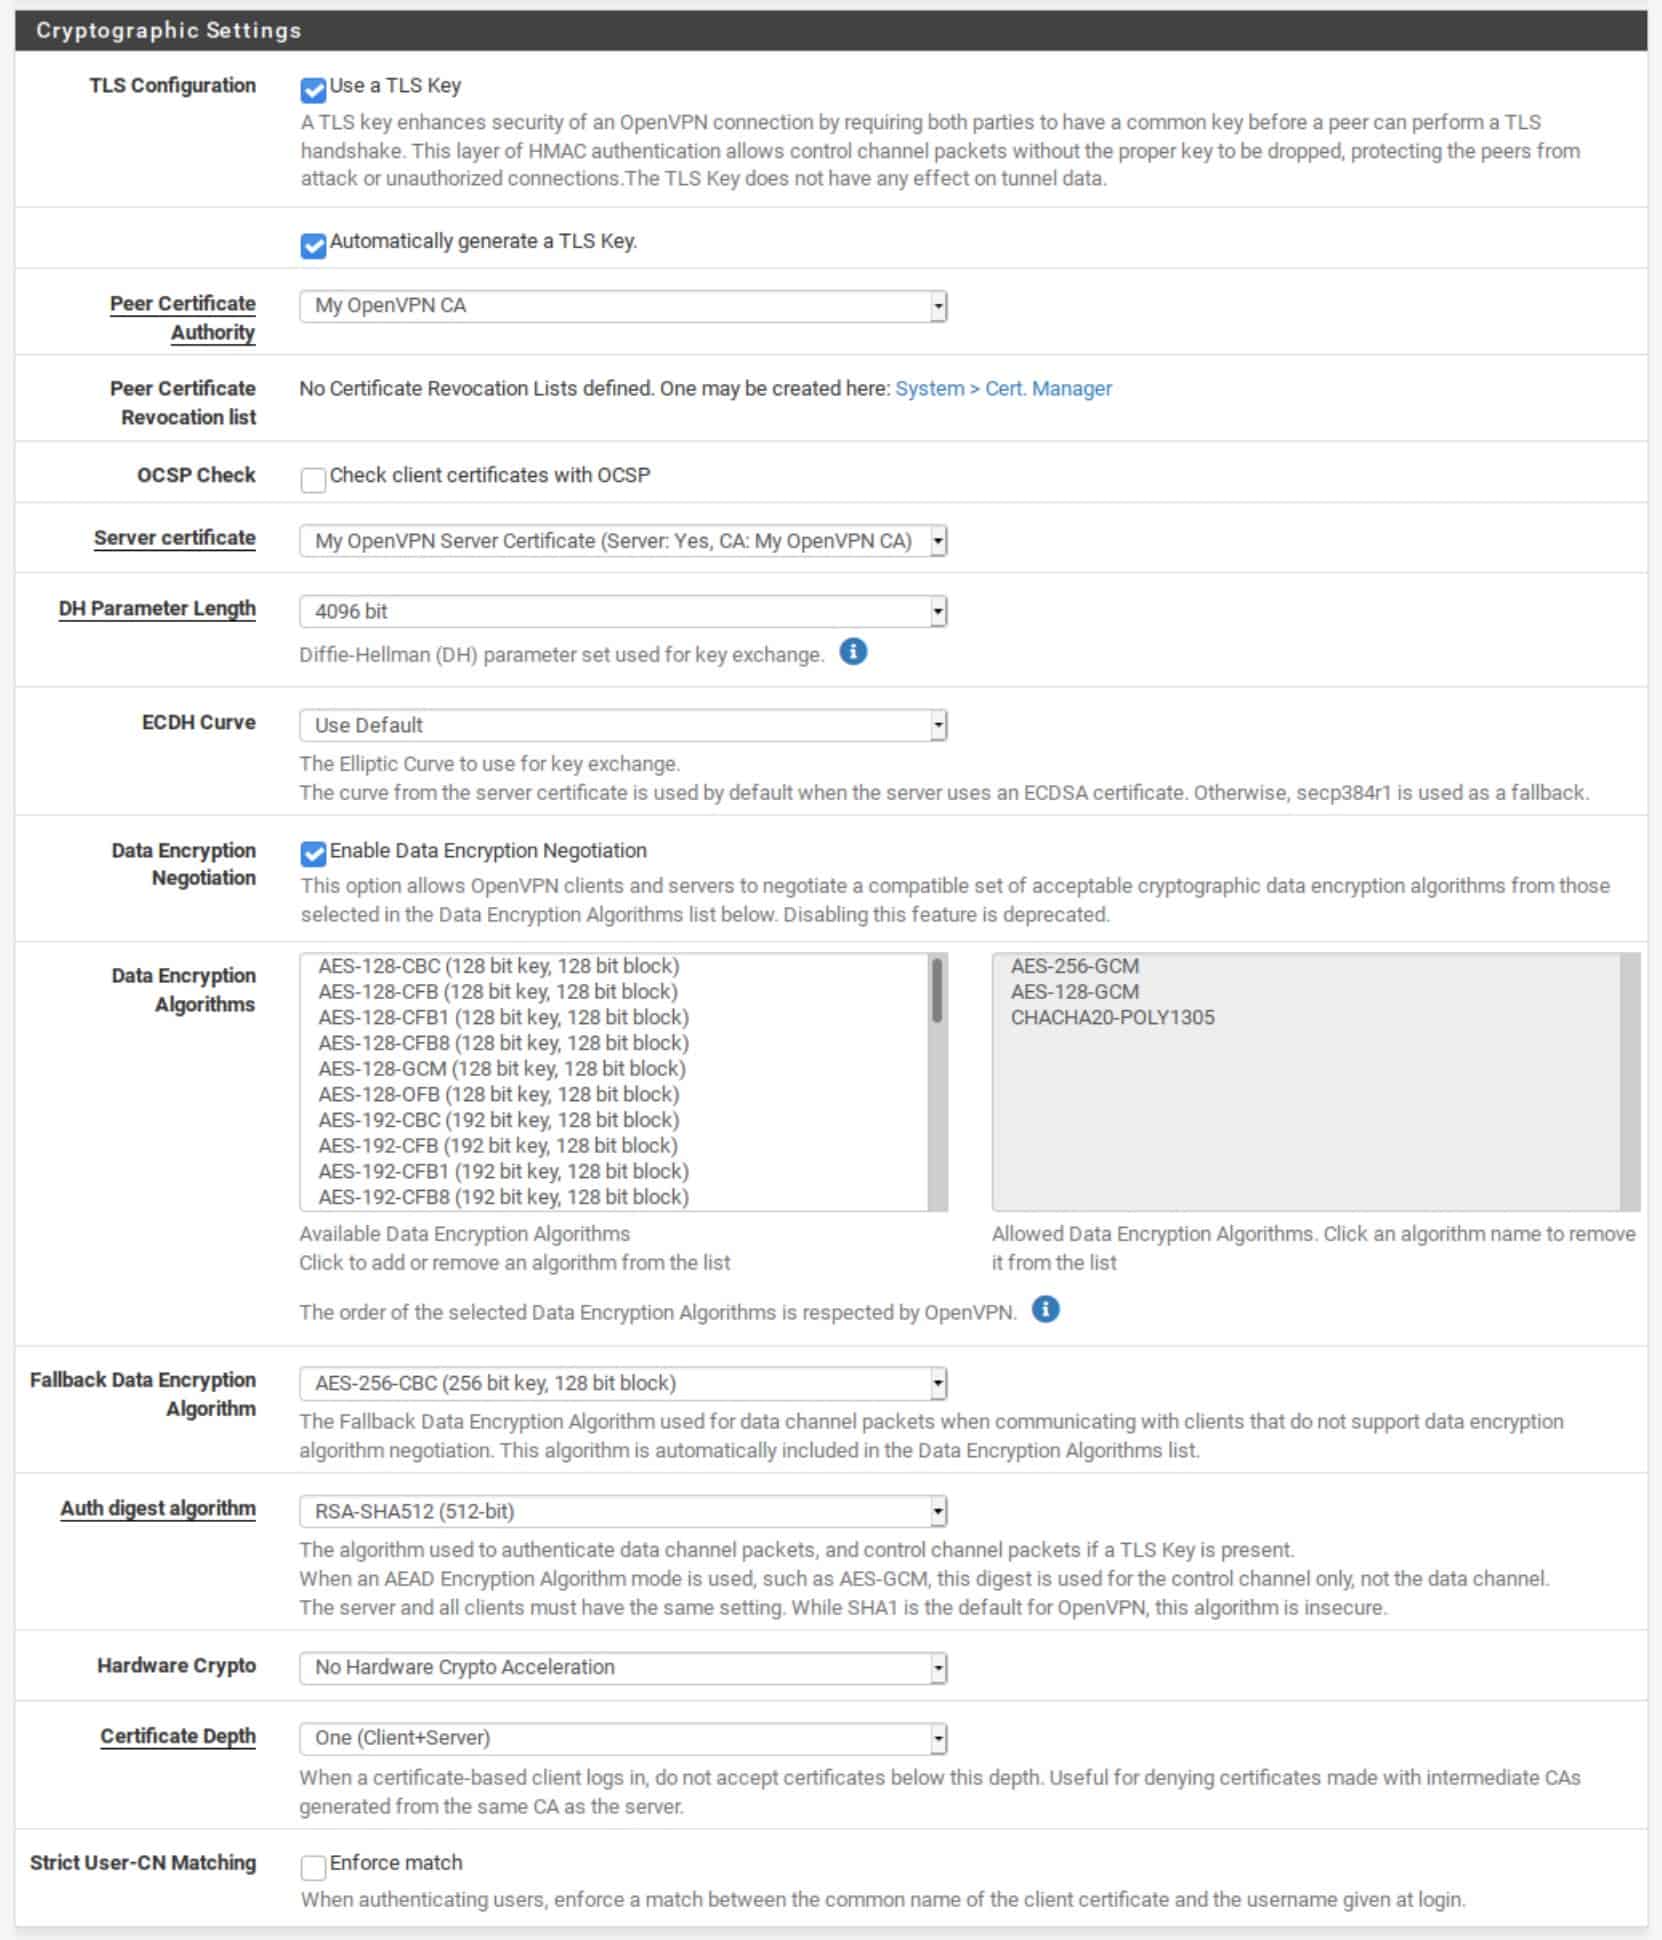
Cryptographic Settings
- Make sure Use a TLS Key and Automatically generate a TLS Key are enabled.
- Make sure your Peer Certificate Authority is set to the CA we created earlier.
- Set the Server certificate field to the server certificate we created earlier.
- Select 4096 for the DH Parameter Length setting.
- Set the Auth digest algorithm to RSA-SHA512 (512-bit).
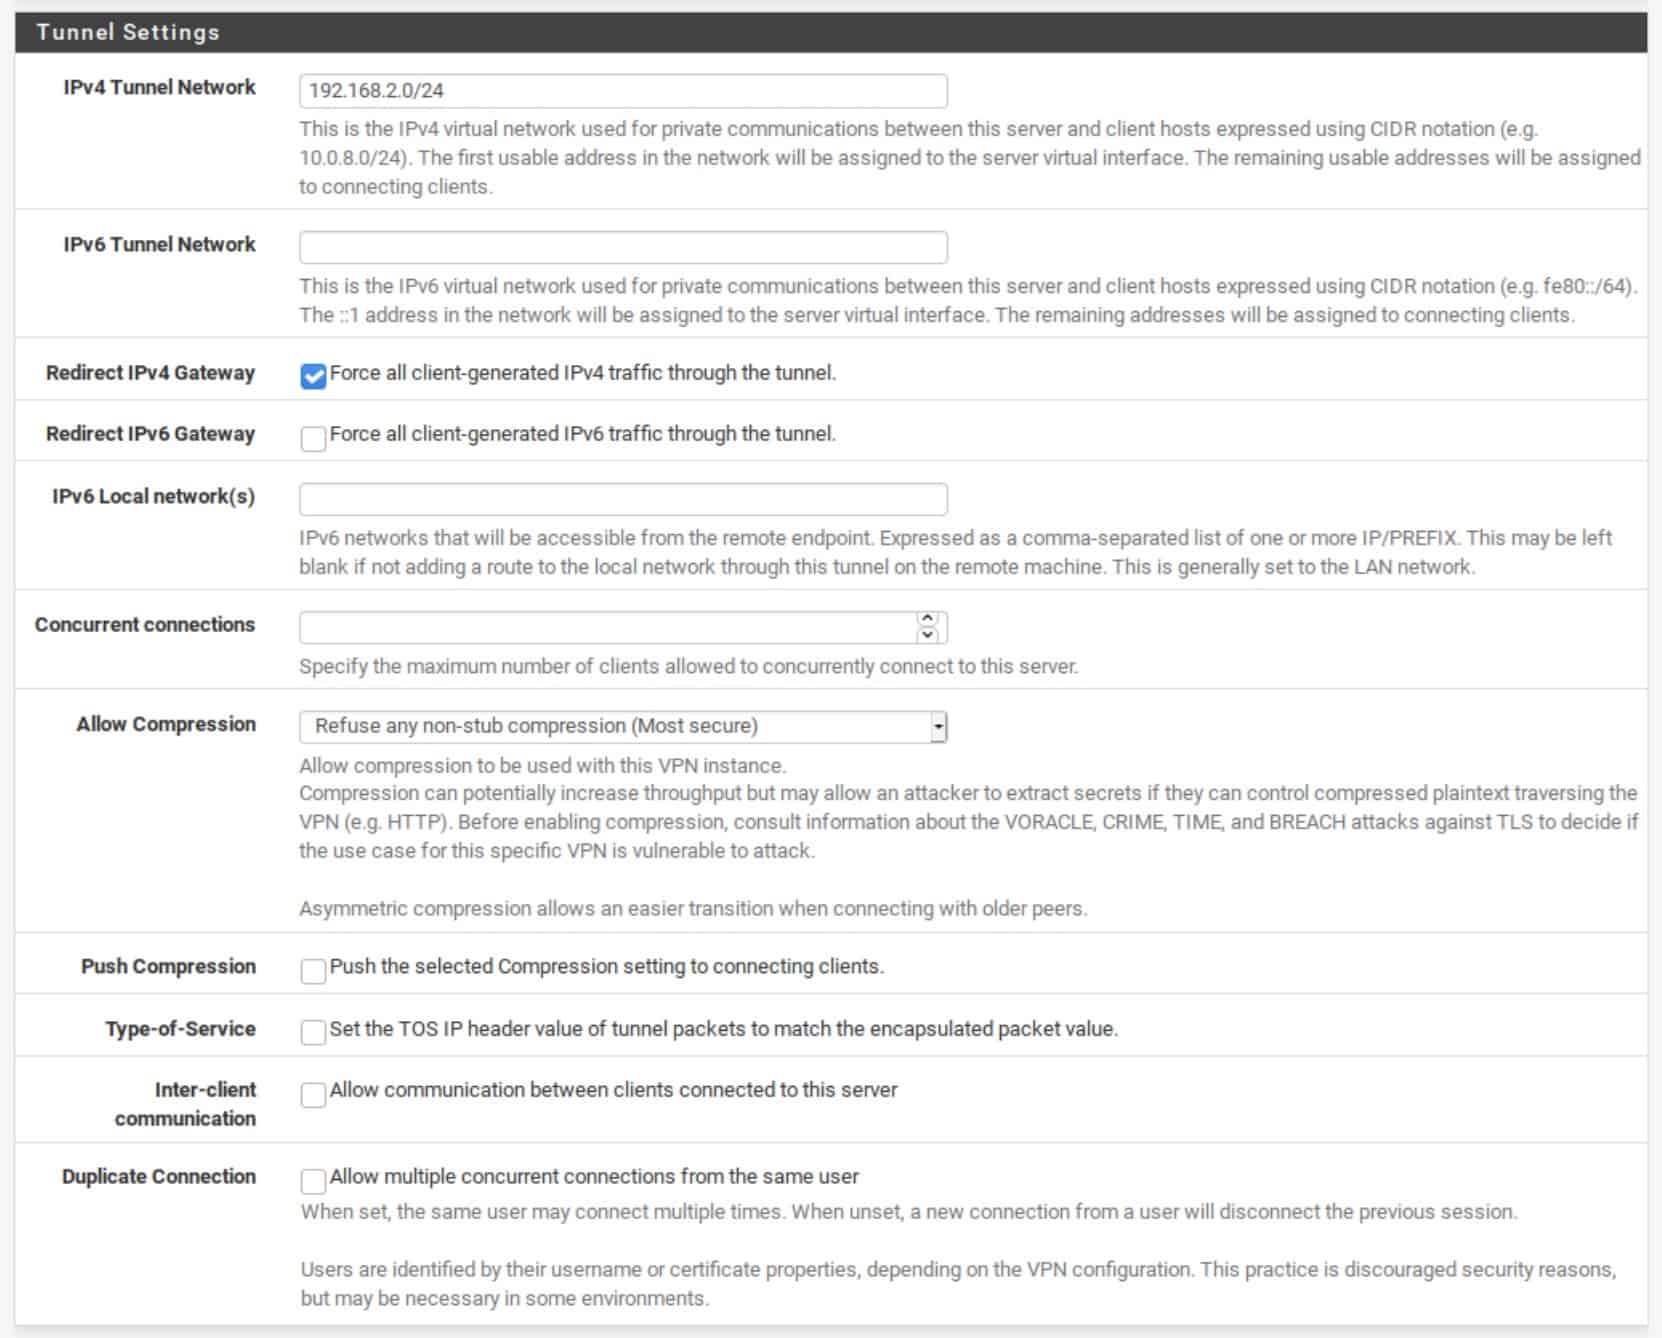
Tunnel Settings
- In the IPv4 Tunnel Network field, enter a subnet that is not present on your network to be used as the OpenVPN network’s internal subnet. In my case, I’m using 192.168.2.0/24.
- If your network also supports IPv6 and you want your OpenVPN tunnel to support IPv6 as well, enter an unused IPv6 subnet in the IPv6 Tunnel Network field. In this example, I am configuring my server for IPv4 only.
- Enable Redirect IPv4 Gateway in order to route all IPv4 traffic over the VPN tunnel.
- Enable Redirect IPv6 Gateway in order to route all IPv6 traffic over the VPN tunnel, if needed.

Advanced Configuration
- Enable UDP Fast I/O.
- If you’re only using IPv4, select IPv4 only in the Gateway creation field. If you’re using both IPv4 and IPv6, leave it set to Both.
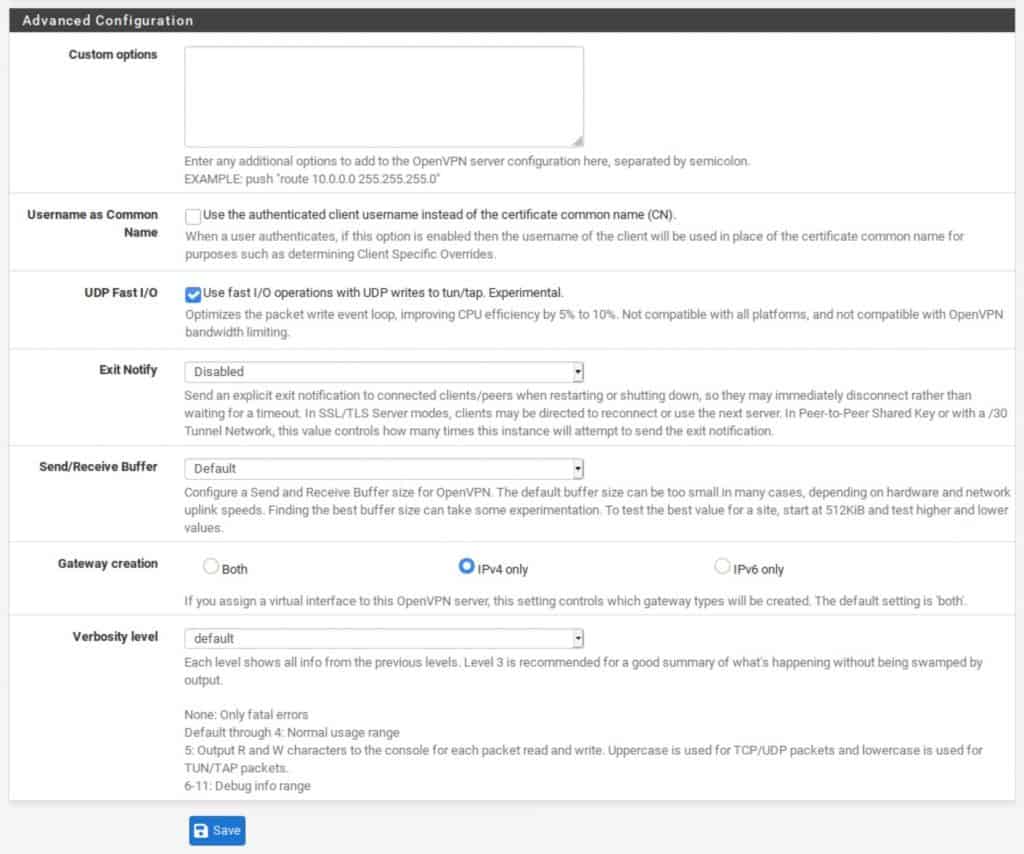
- Click Save. You’ve created your OpenVPN server.
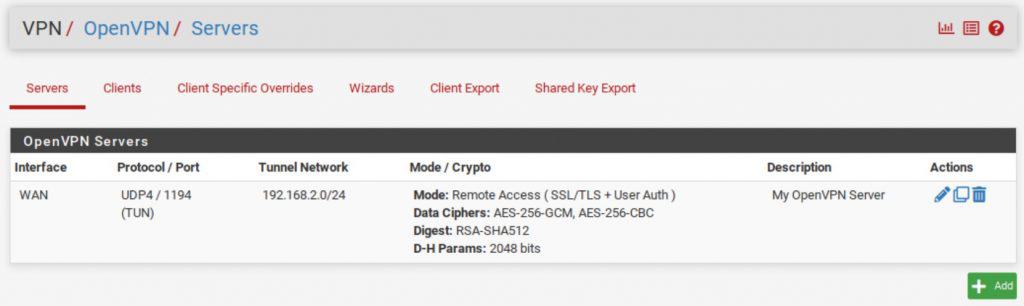


Verifying the OpenVPN server configuration
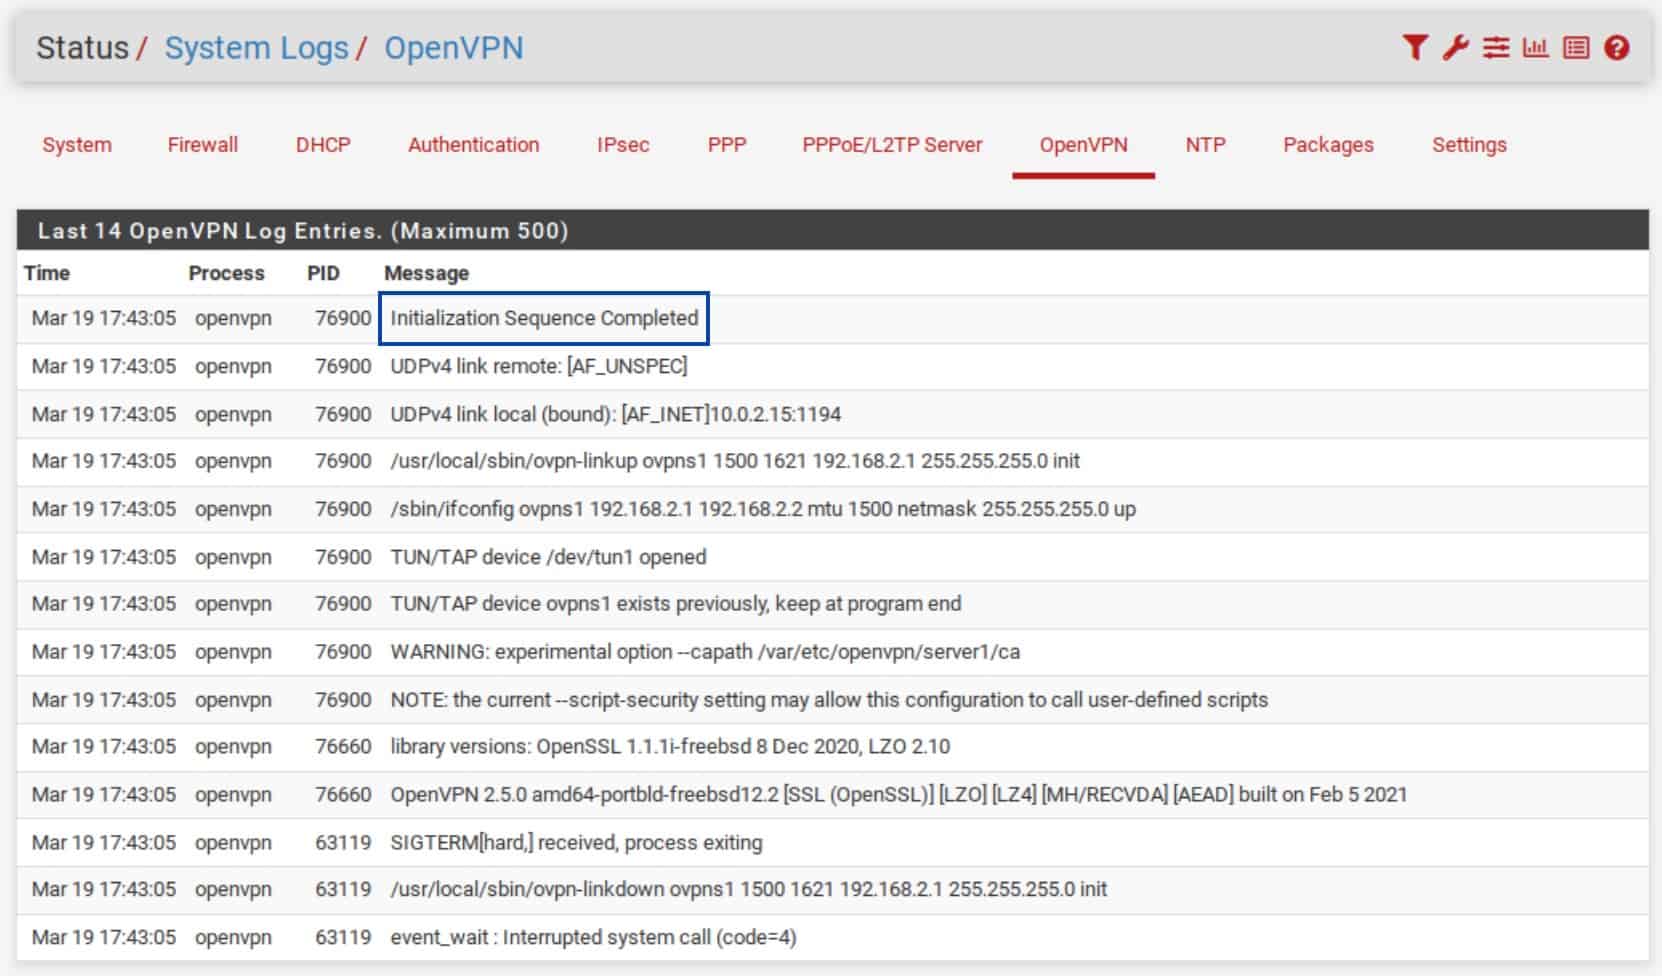
- To make sure our server is set up correctly, select Status > System Logs from the top menus.
- Select the OpenVPN sub-menu. The OpenVPN logs are displayed.
- If everything is set up correctly, you should see Initialization Sequence Completed in the logs.

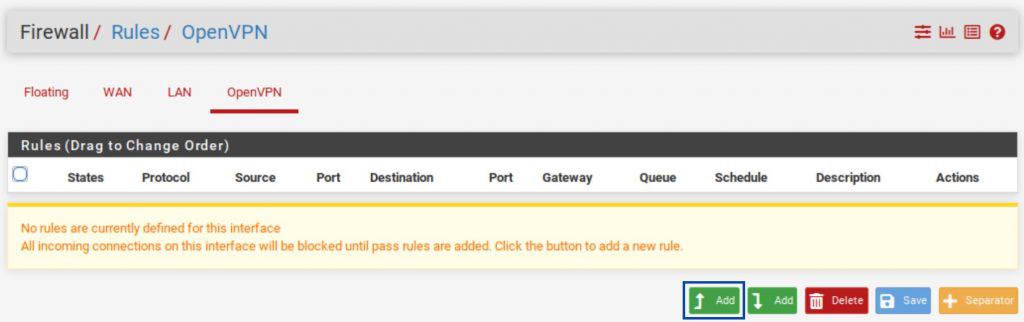
Create firewall rules
Now that our OpenVPN server is configured, we need to create a firewall rule to allow traffic to and from our server.
OpenVPN rule
This rule will allow traffic from the OpenVPN subnet out to the internet.
- From the menus at the top of the screen, select Firewall > Rules.
- Select the OpenVPN sub-menu.
- Click the Add button to create a new rule at the top of the list.
- Set the Address Family to IPv4 + IPv6 if your system is using both IPv4 and IPv6. If not, leave it at the default value of IPv4.
- Set the Protocol field to Any.
- Set the Source to Network.
- Enter the OpenVPN subnet you specified earlier in the Source Address field but without the /24. For example: 192.168.2.0.
- Select 24 from the drop-down menu to the right of the Source Address field.
- Enter a description for this rule in the Description field.
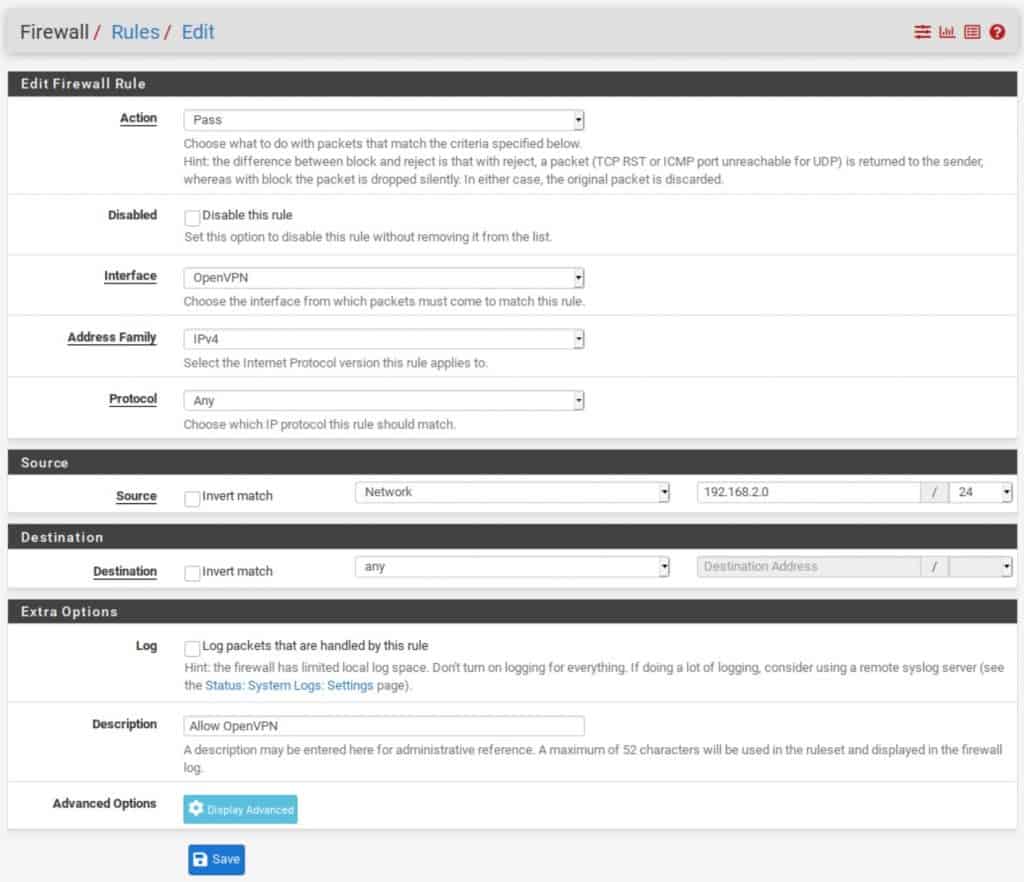
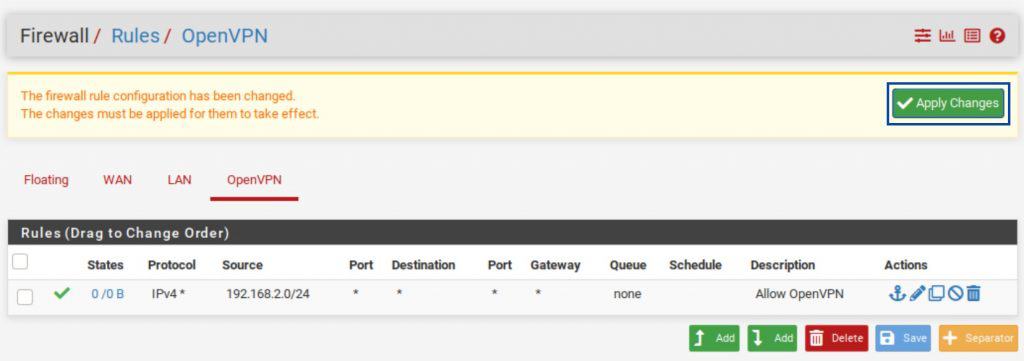
- Click Save. And click Apply Changes. Traffic will now be allowed out the firewall from the OpenVPN subnet.
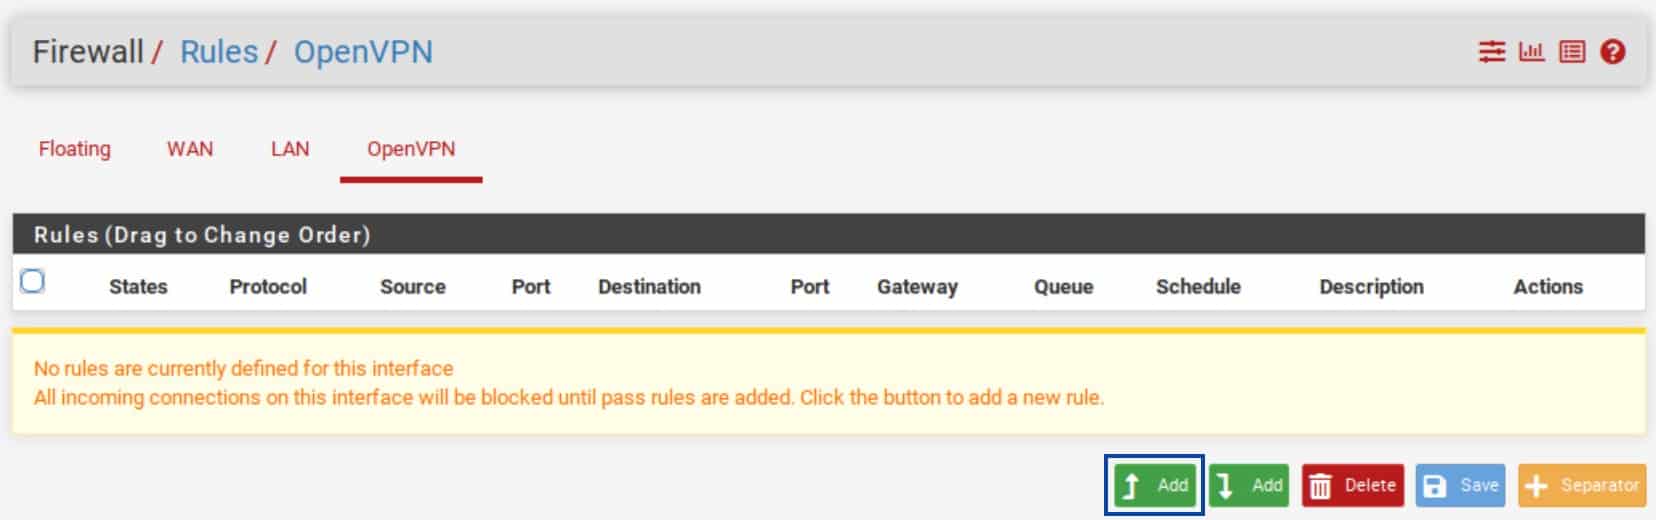


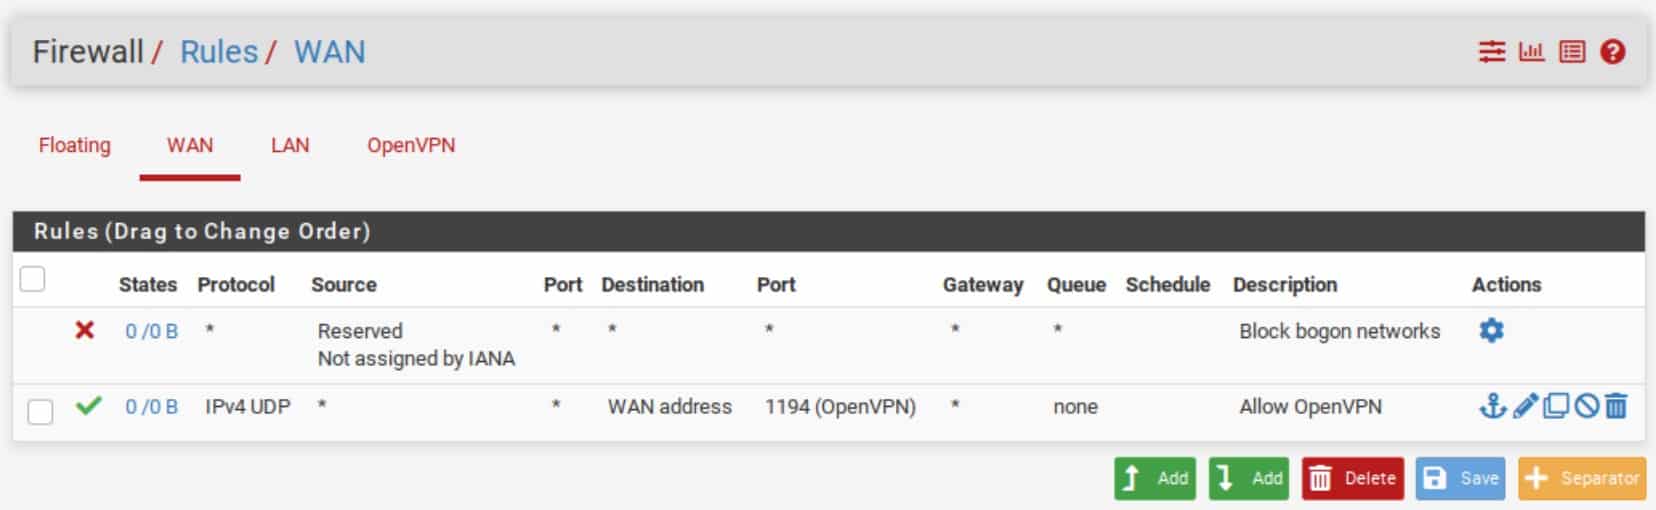
WAN rule
In order to connect to your OpenVPN server from the outside world (i.e., the internet), you’re going to need to open the port your server runs on (1194, in this example) on your WAN interface. This rule will allow your client to connect to your OpenVPN server from the internet.
- From the menus at the top of the screen, select Firewall > Rules.
- Select the WAN sub-menu (the default).
- Click the Add button to create a new rule at the top of the list.
- Set the Address Family to IPv4 + IPv6 if your system is using both IPv4 and IPv6. If not, leave it at the default value of IPv4.
- Make sure Source is set to Any.
- Set the Protocol field to UDP.
- Set the Destination Port Range to 1194.
- Enter a description for this rule in the Description field.
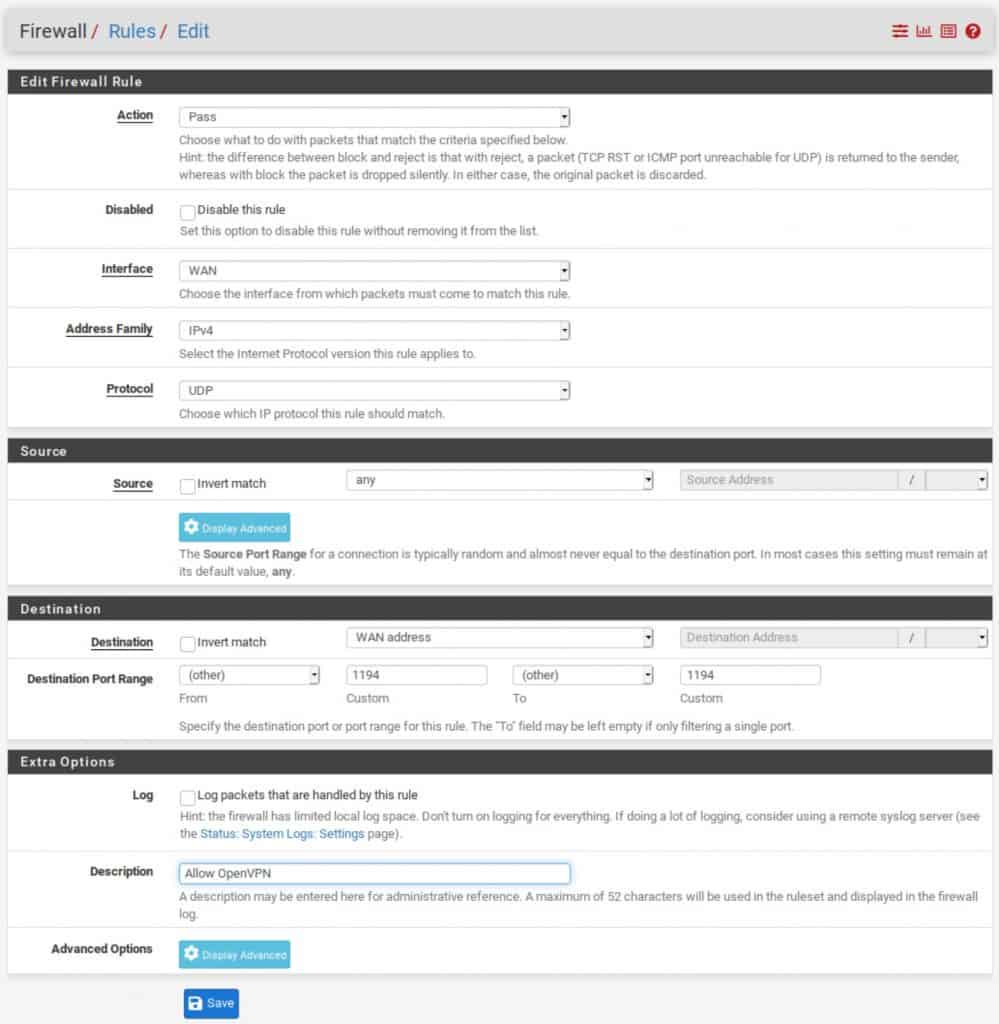
- Click Save. And click Apply Changes. Traffic will now be allowed from the internet to the OpenVPN server.


Install the OpenVPN Client Export Utility
In order to easily configure our OpenVPN client, pfSense provides an automated configuration generator for OpenVPN. However, it’s not installed by default. We need to install the package from the pfSense Package Manager manually.
- From the menus at the top of the screen, select System > Package Manager. You are taken to the Package Manager.
- Select the Available Packages sub-menu.
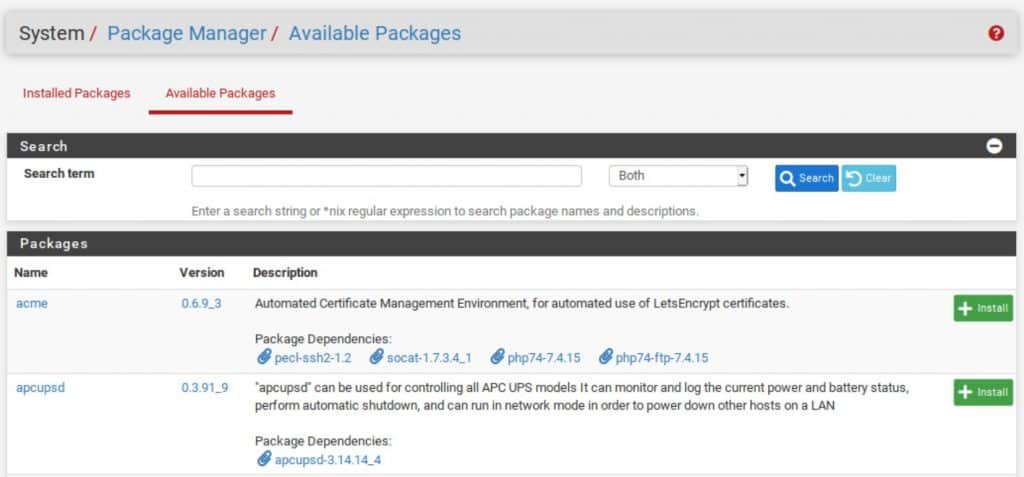
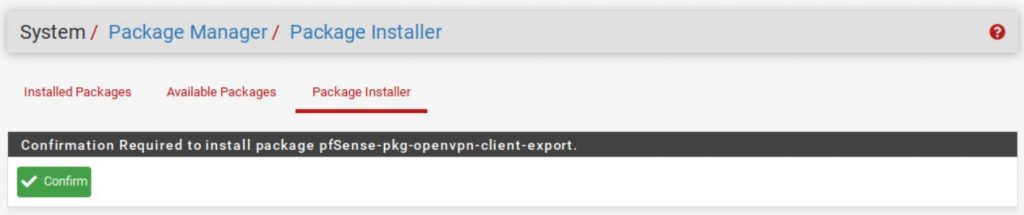
- Scroll down until you see openvpn-client-export and click the Install button to its right. You’re taken to the Package Installer page.
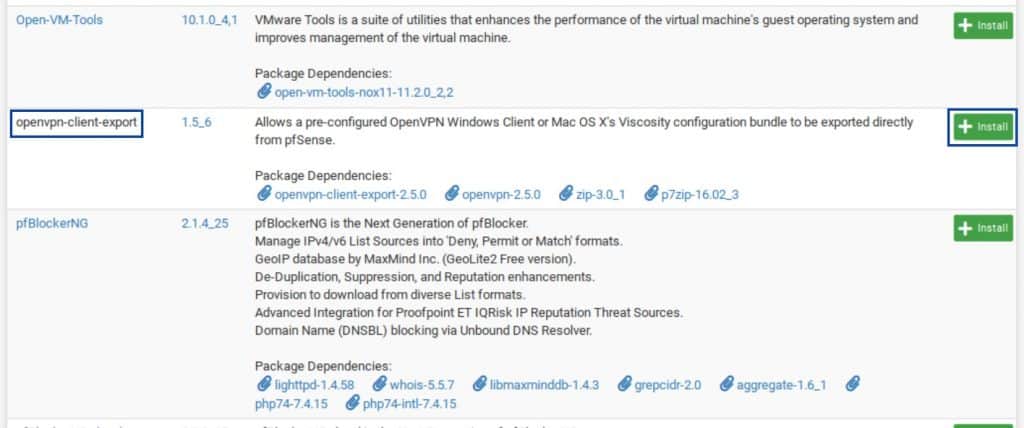
- Click Confirm. The installation begins.
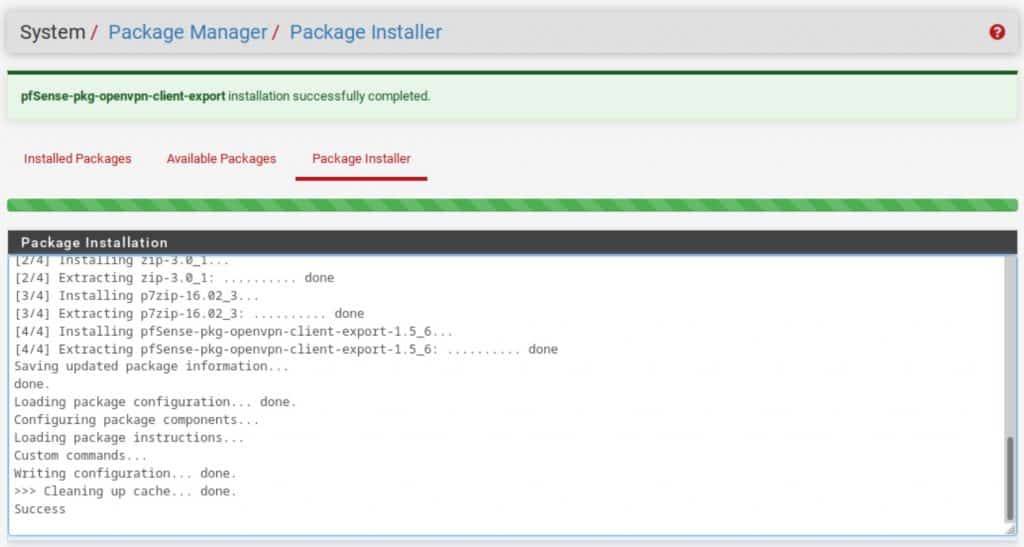
- Once the installation is finished, the progress bar turns green, and you should see Success displayed in the Package Installation window.


Export the OpenVPN client configuration
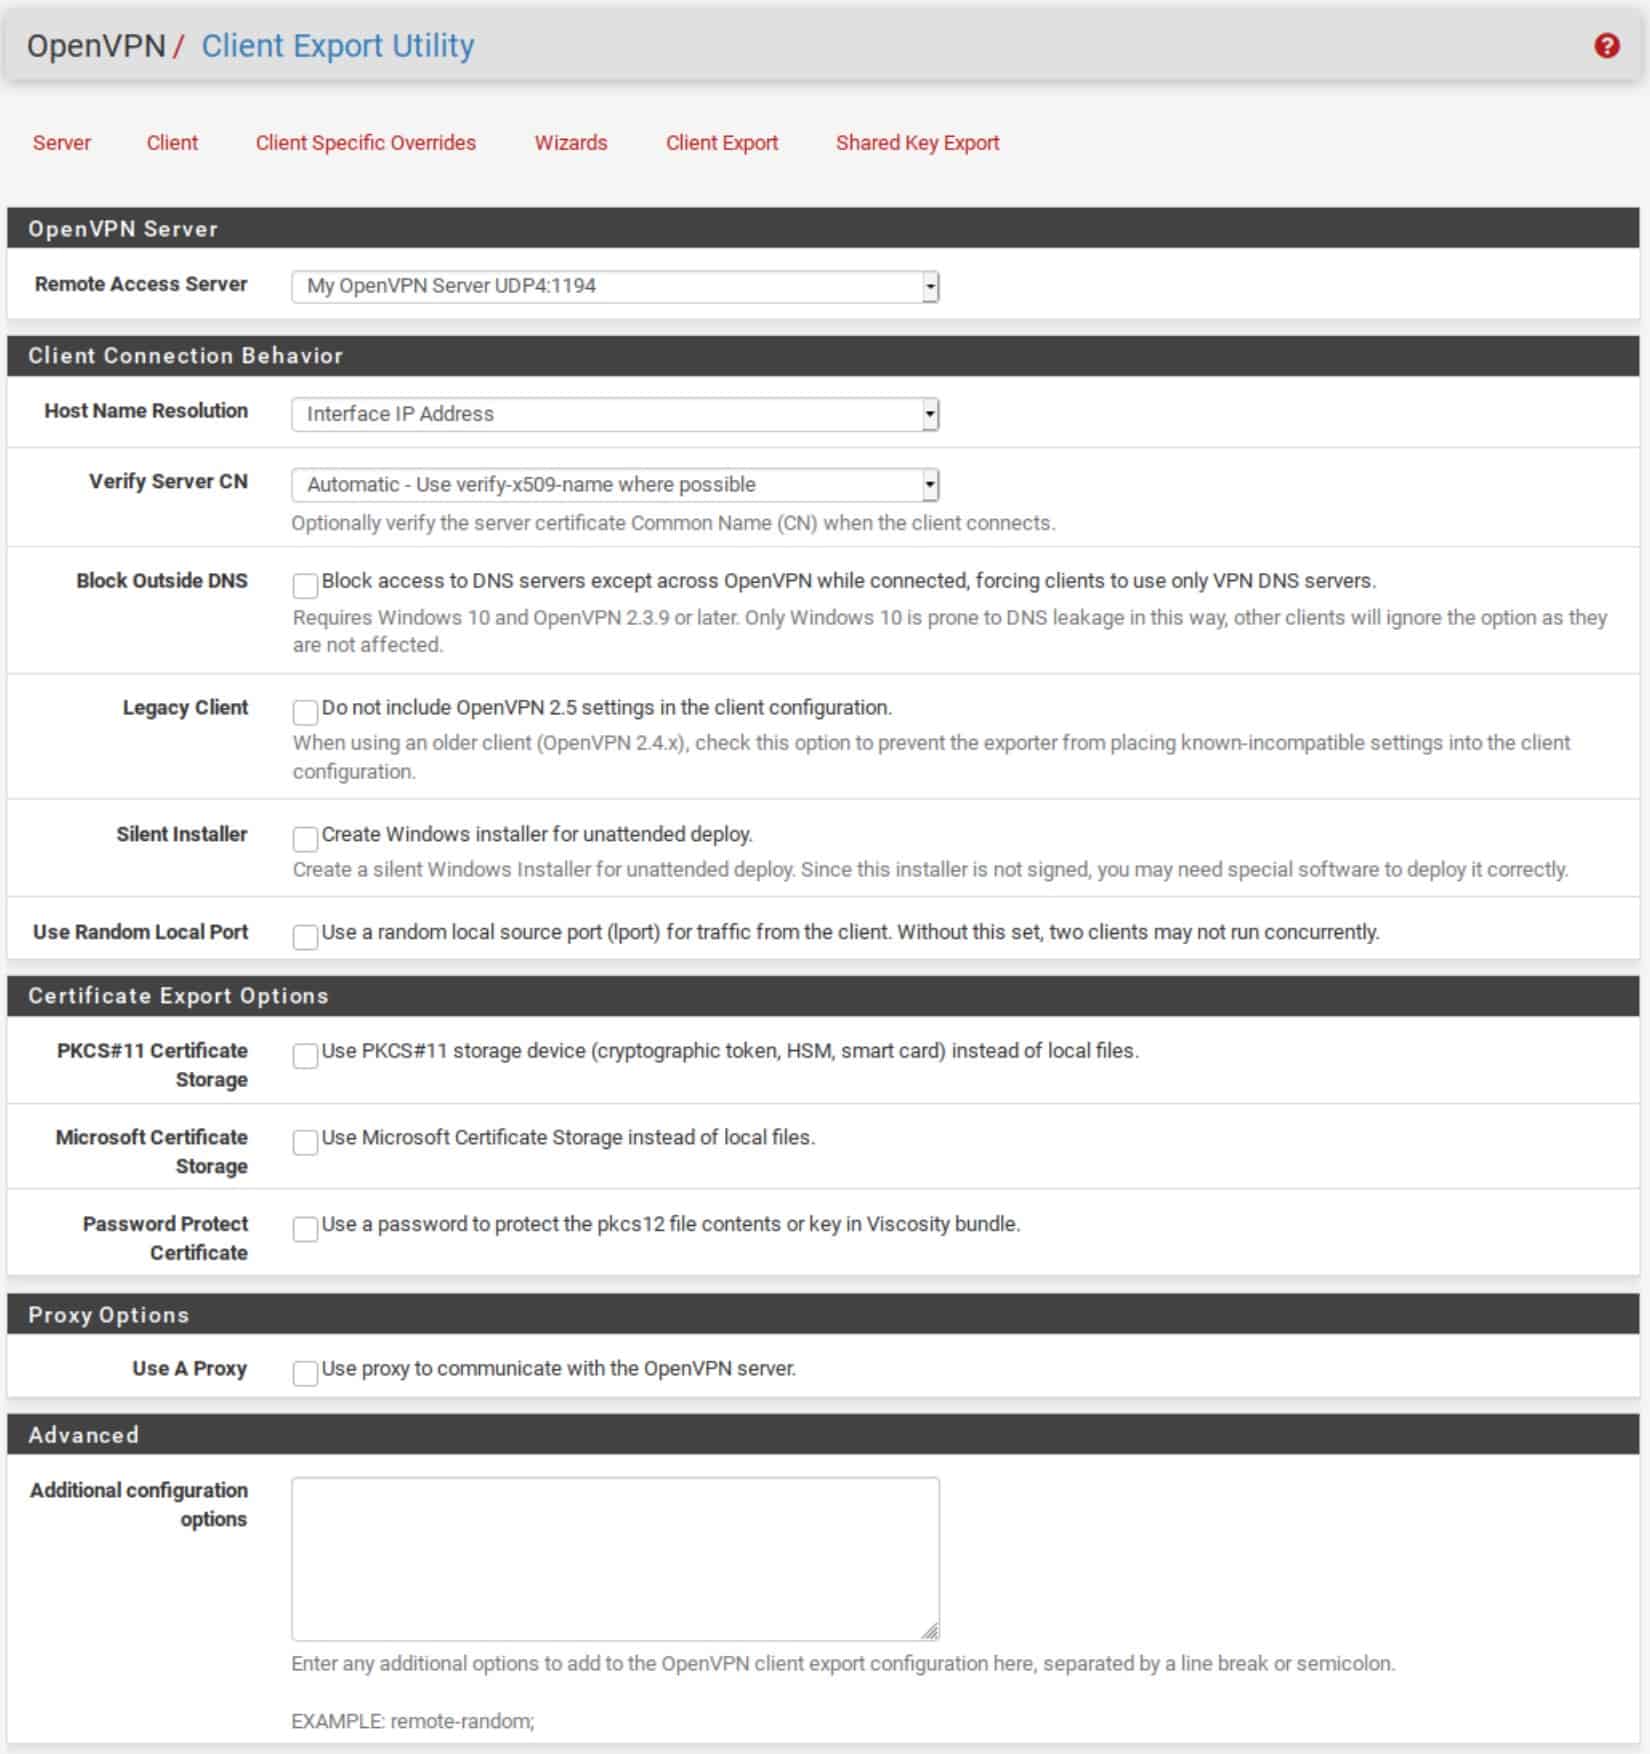
- From the menus at the top of the screen, select VPN > OpenVPN.
- Select the Client Export sub-menu.
- Make sure the correct OpenVPN server is selected next to Remote Access Server.
- If you’re using Dynamic DNS to access your pfSense WAN, select Other from the Host Name Resolution drop-down menu. Then enter the hostname in the Host Name box that appears below. This allows you to access your pfSense WAN by hostname rather than IP address, which means that you won’t lose access to your OpenVPN server if your ISP changes your WAN IP address. If you’re not using Dynamic DNS, leave Host Name Resolution set to Interface IP Address.

- Scroll down to the bottom of the page, and you’ll find generated configurations for various systems and apps. Click on the appropriate configuration for your device(s) to download it to your computer.

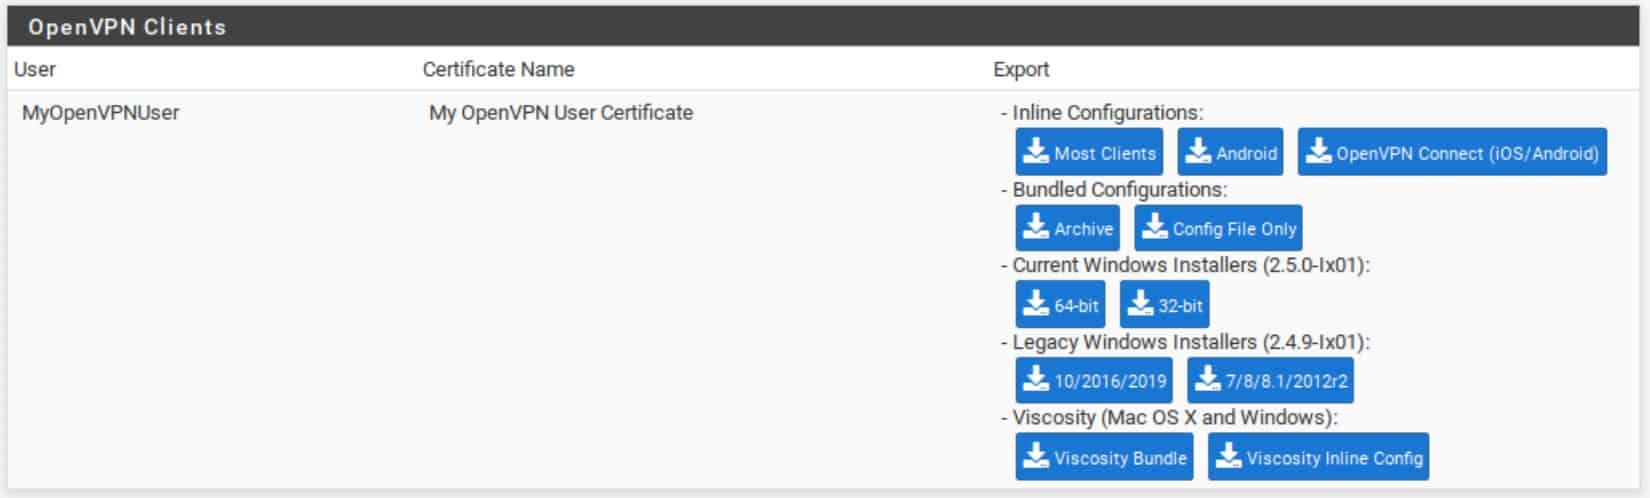
I’m going to be connecting a Linux laptop, so I downloaded the Most Clients inline configuration.
Upon importing my configuration in Linux’s Network Manager, I simply need to input my username and password (they’re not included in the configuration file), and I can connect to my OpenVPN server.

I can then check to make sure that my public IP address has been changed to the WAN address of my home internet, using Comparitech’s IP Address Check tool.

Wrap-Up
So that’s how you set up a basic OpenVPN server in pfSense for remote access. There are a lot of places to go from here to accommodate more complex setups. You could also configure content filtering on your pfSense box to block ads and malicious sites. Your OpenVPN clients would benefit from this as well. But for now, you have a fully functional OpenVPN server configured on your home router (pfSense), enabling you to use your home internet connection from any device, wherever you are.
VPN on, friends.


Yeaaa best guide, thanks!!!
Marc,
Thank you VERY MUCH for posting this tutorial. It worked like a charm!
A+++
Thank you!!
Great directions. Had a few hiccups the first 3 times. The main problem I found was that by setting up users [I will be using Remote Access (SSL/TLS + User Auth) for this example.] I wasn’t getting the option to select the various OpenVPN Clients export(s) files. That area of the page failed to render. After a few times thinking I must have NOT entered the options correctly, it occurred to me that the users being [SSL/TLS + User Auth] just might require a user certificate to be generated. So, then I opted too just do [User Auth] w/o SSL/TLS, and Voila! the option to select the various OpenVPN Clients export(s) files section rendered. OpenVPN is now working on two different phones.
Thank you, very helpful tutorial.
Outstanding guide, got my first VPN working first try. Thank you!
Thank you, save my day after weeks of searching about fragmentation
Awesome Tutorial
Great Guide
Thanks. After following all the Steps, one by one, I was able to setup OpenVPN… Thank you once again.
Awesome tutorial, worked first time…. thank you! 🙂
Great tutorial, really covers everything!
Followed you instructions brilliant is it possible to make it more robust
Thank you, very helpful tutorial.
Nice Job! Figuring this out would have taken a lot of time.
Thankyou ! My previous VPN had stopped and I could not work it out.
Deleted everything, followed this guide and presto ! Working VPN
Thankyou!
Many thanks for your sharing!
Great Guide.
Thank you. Nice work. I appreciate it.
Great work, it’s really worked for my case. I was struggling since more than a month. Thanks a ton.
Thanks very much for this guide, it’s really appriciated
Thank you for the guide.
I had intermittent problems. The client would always connect, but it couldn’t reliably use the network. Some websites would load (https://wikipedia.org) and others wouldn’t (https://google.com). After a bunch of tinkering and some help on Reddit, I finally found the solution.
In the VPN Server Config ==> Advanced Configuration ==> Custom Options I set the following to limit UDP packet size:
link-mtu 1400;
I hope that helps others who run into similar problems.
Thank you.