

Commercial VPN providers tend to make their own apps, which can be installed with just a few clicks. The apps come pre-configured with all of the provider’s VPN servers, ready to go.
But, for one reason or another, a plug-and-play VPN app might not be an option. Maybe your VPN provider doesn’t make its own app, or the app is inaccessible where you live. Or perhaps you don’t have permission to install new apps on your device. If your employer runs its own enterprise VPN, there’s a good chance that manual setup is required.
In some cases, manual configuration might work in places where the VPN app is blocked. In the UAE, for example, local internet service provider Etisalat blocked connections from the NordVPN app, but allowed NordVPN connections that had been manually configured.
In these scenarios, you’ll have to manually set up your VPN. How you do this depends largely on the VPN protocol used by your provider. This guide shows you how to manually configure a VPN on Windows 10 using the following protocols:
- OpenVPN
- IPSec: L2TP, SSTP, and IKEv2
- WireGuard
These are the most common VPN protocols in use today. Windows 10 has built-in support for IPSec protocols, and the others require a third-party app.
Before you start, ask your VPN provider or IT admin which protocol to use. Then skip to the appropriate section below. We’ll be using NordVPN and StrongVPN for our tutorials, but the process is similar with any VPN provider.
See also: Best VPNs for Windows 10
How to manually configure an OpenVPN client on Windows 10
What you’ll need:
- An OpenVPN client application
- OpenVPN config files from your provider (.ovpn)
- Username
- Password
Windows doesn’t support OpenVPN out of the box, so you’ll need a third-party application to set up a connection. If your provider or IT admin doesn’t specify which app to use, we recommend downloading the official OpenVPN GUI for Windows 10. Both 64-bit and 32-bit options are available.
If your provider is using OpenVPN, then it should have OpenVPN configuration files available for download. These files typically contain connection specifications, a certification key, and an encryption key. You can open and edit them with a text editor, but for our purposes that won’t be necessary.
Here’s how to configure your OpenVPN connection on Windows 10:
- Download and install your OpenVPN app in the default location. We’ll use the official OpenVPN GUI app linked above for this demonstration. It uses a standard installation wizard.
- Get the OpenVPN configuration file(s) for the server(s) to which you want to connect. These will either have .ovpn or .conf file extensions. NordVPN lets me download .ovpn files directly from its website. One config file per server. Take note whether you need UDP or TCP config files, which will be determined by your provider.
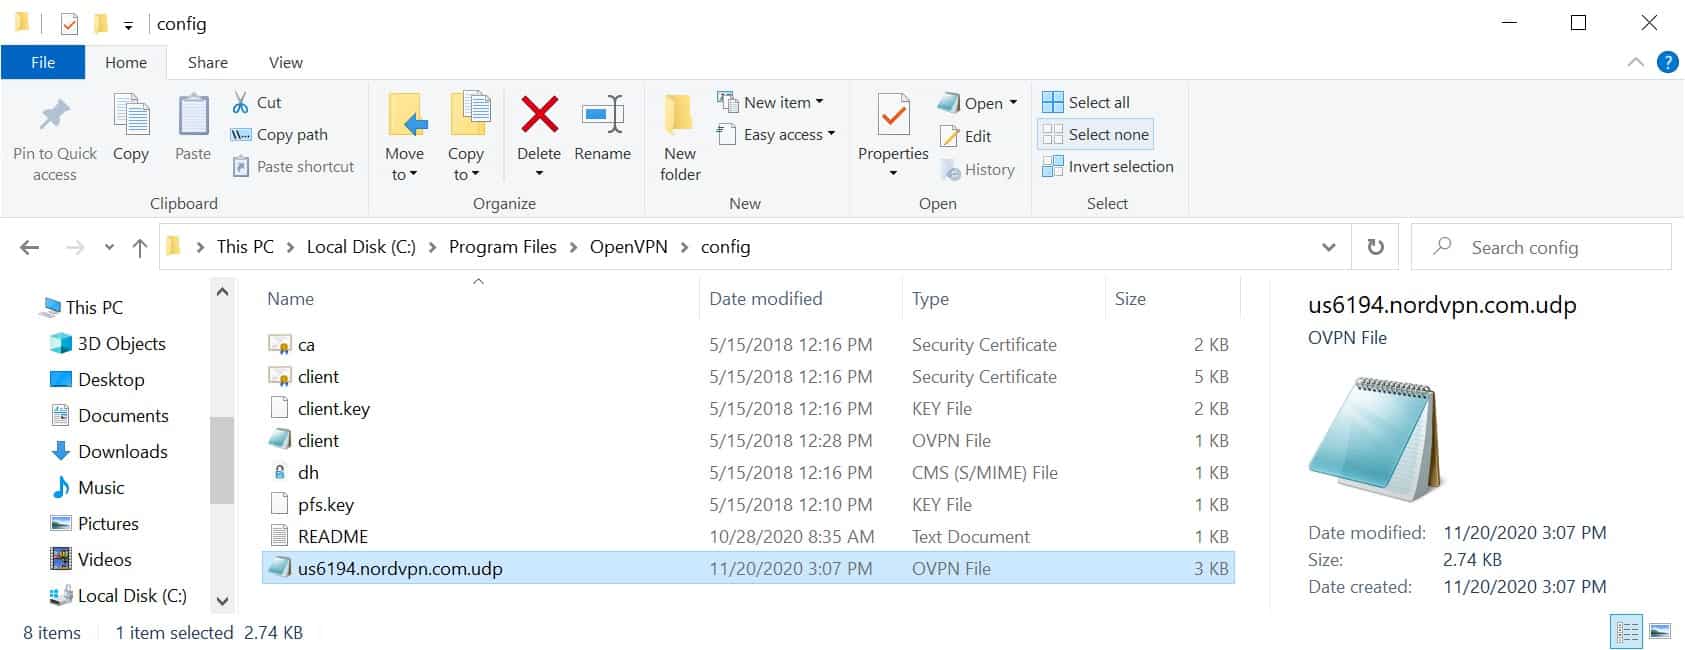
- Copy or extract the config files into your OpenVPN app’s configuration directory. By default on Windows, this will be C:\Program Files\OpenVPN\config. Click Continue if prompted for administrator permission. On some apps, you might need to use a built-in import function.

- Open the OpenVPN client app and allow it to make changes to your device if prompted. On Windows, the OpenVPN app runs in your system tray on the bottom right.
- Right click the system tray icon, select the imported config, and click Connect.
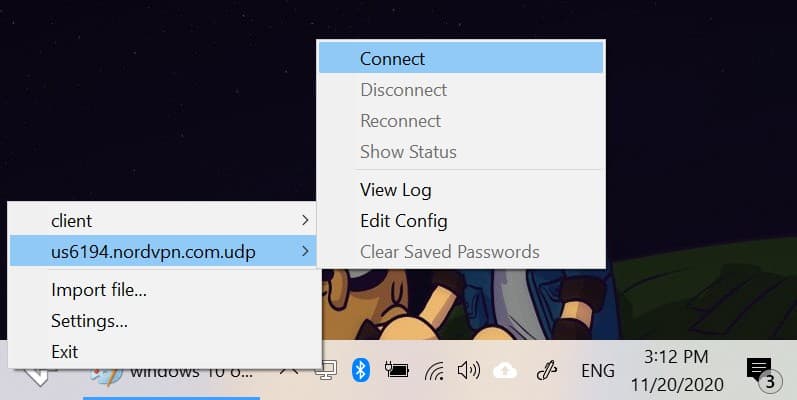
- Enter your VPN account username and password.


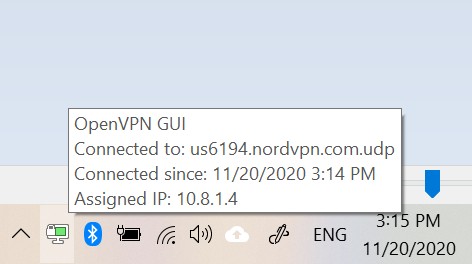
If everything goes according to plan, the app will take a few seconds to connect and then the VPN will be ready to protect your online activity.
How to manually configure IPSec VPN on Windows 10 (L2TP, SSTP, IKEv2)
What you’ll need:
- Server hostname
- Username
- Password
- Certificate or shared secret
Windows has built-in support for IPSec-based VPN tunneling protocols including L2TP, SSTP, and IKEv2. Although each of these protocols works a bit differently, the setup is more or less the same. In this tutorial, I’ll focus on IKEv2.
Note that different providers can use different encryption schemes. If your provider uses a certificate, for example, you might need to install the certificate and import it into your PC’s trusted root certification authorities. That’s beyond the scope of this article, so we’ll just be doing the basic VPN setup.
Here’s how to configure an IPSec VPN connection on Windows 10 (IKEv2):
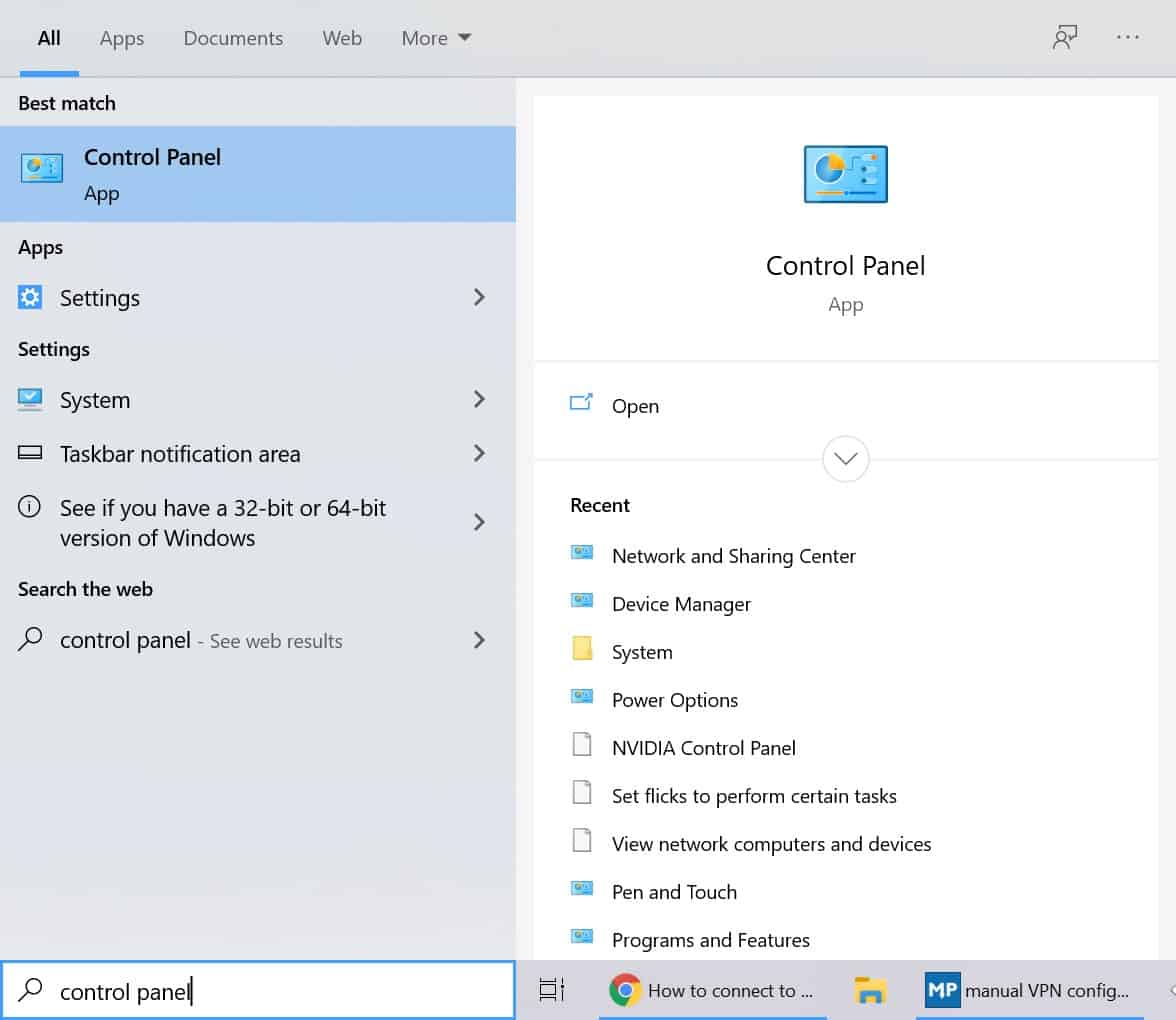
- Type “Control Panel” into the Windows search bar and choose the top option.

- Go to Network and Internet > Network and Sharing Center.

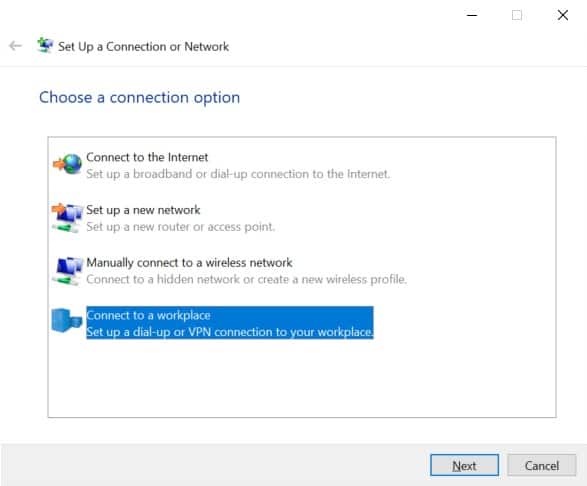
- Click Set up a new connection or network.
- Choose Connect to a workplace.
- Tick the option that states, No create a new connection and click Next.

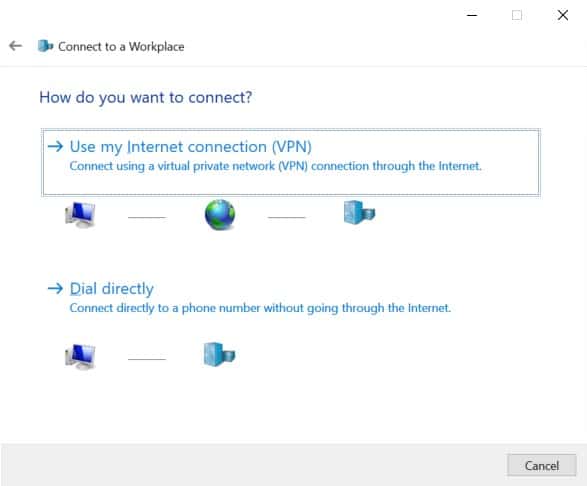
- Choose Use my internet connection (VPN).
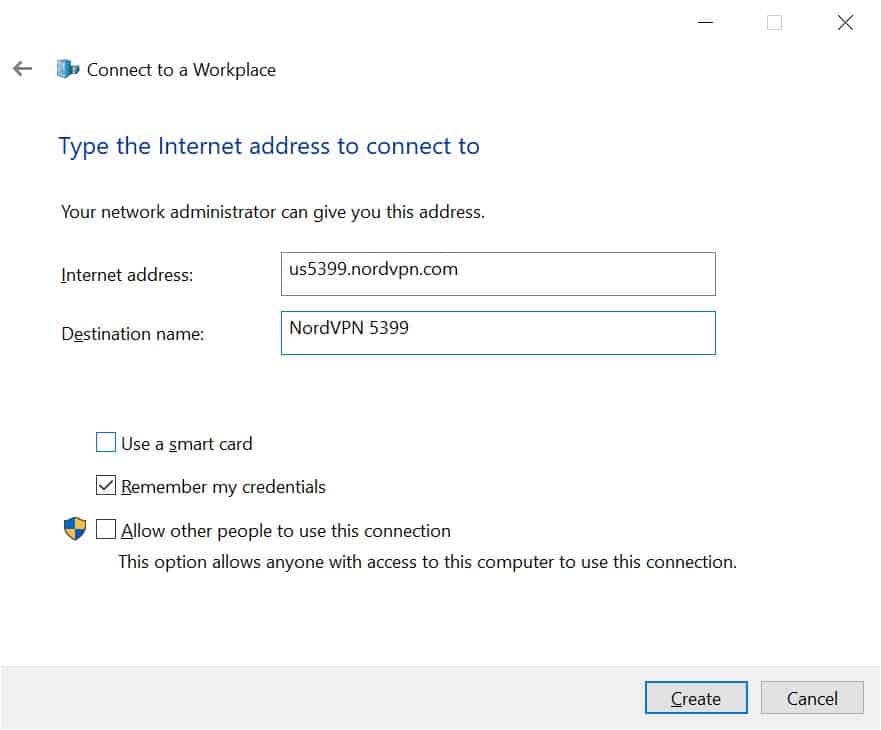
- Enter your server hostname into the Internet address box, enter any name you wish for the Destination name, and click Create.
- Back on the Network and Sharing Center window, click Change adapter settings in the left sidebar.
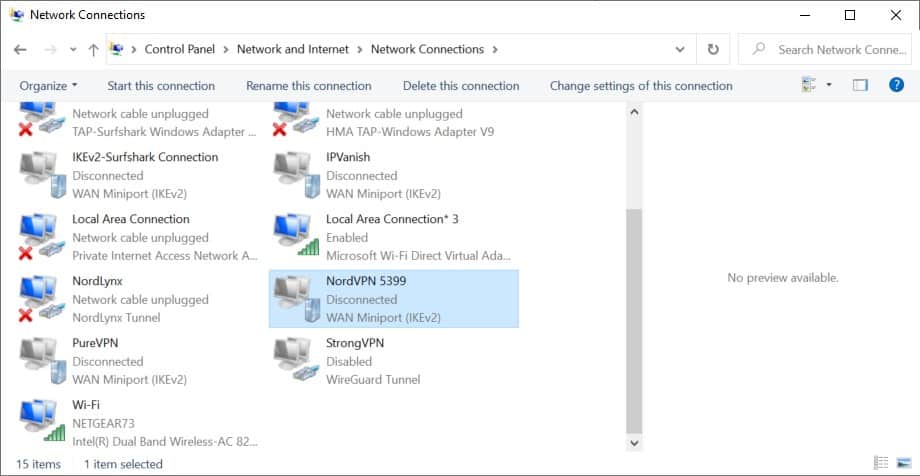
- Right-click the connection we just created and select Properties. Go to the Security tab.
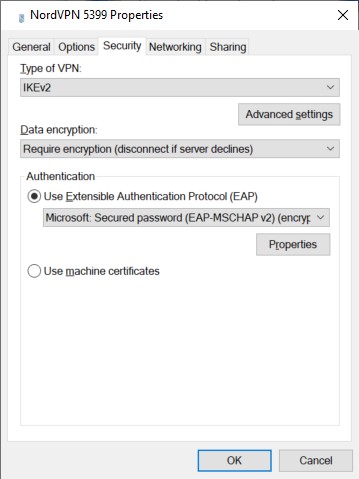
- Enter your VPN configuration details as specified by your provider, including type of VPN, encryption, and authentication.
- Optional: Go to the Network tab and uncheck Internet Protocol Version 6 (TCP/IPv6). This can help prevent IPv6 data leaks.
- Click Ok to save your changes.
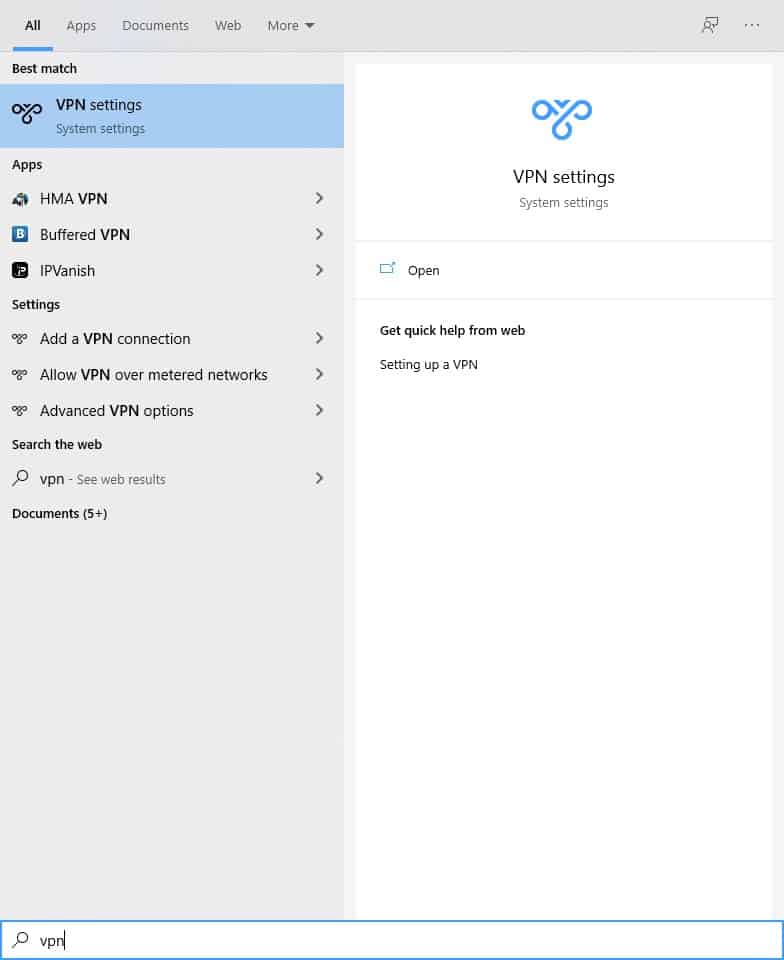
- In the Windows search bar, type “vpn” and select VPN settings, which for me is the top result.
- Click the VPN connection you just set up and choose Advanced Options.
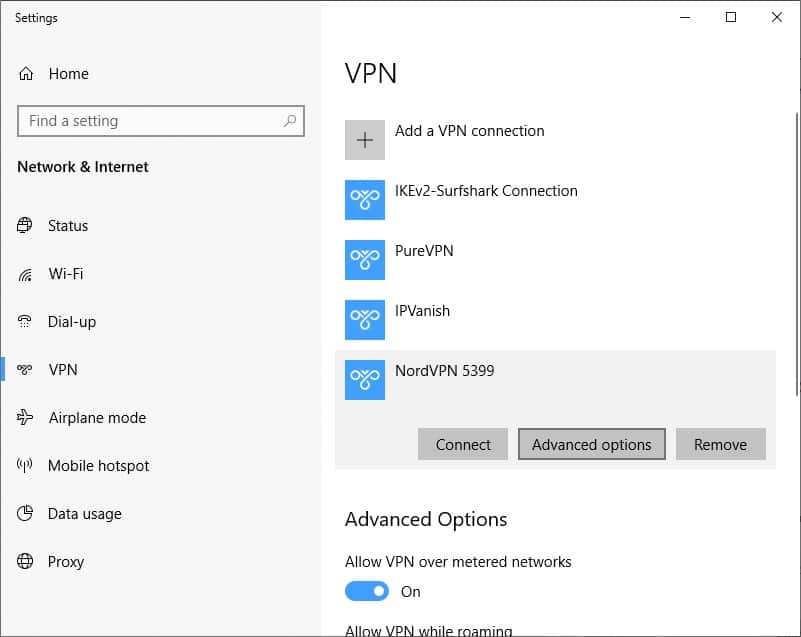
- Under Connection properties, click Edit.
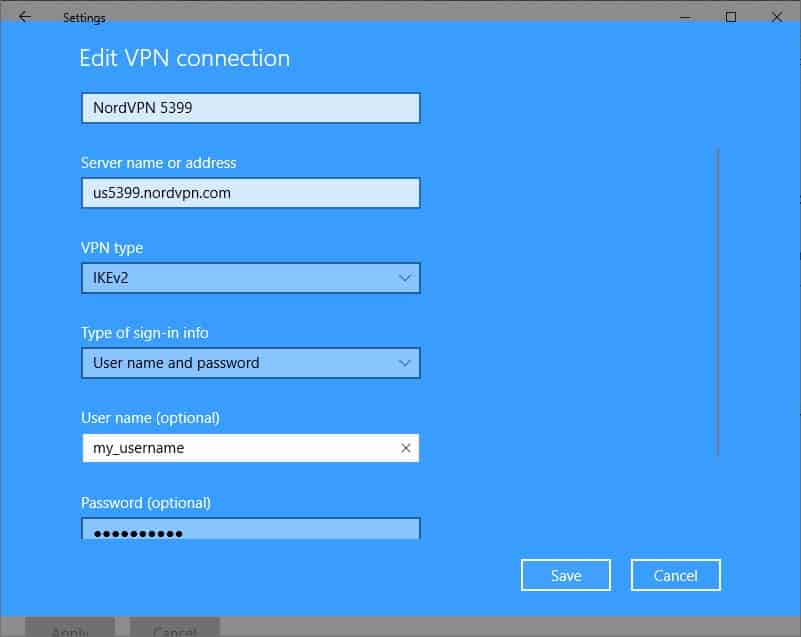
- Enter your username and password, if needed, then click Save.
- Back on the VPN settings page, click your VPN connection and then click Connect.

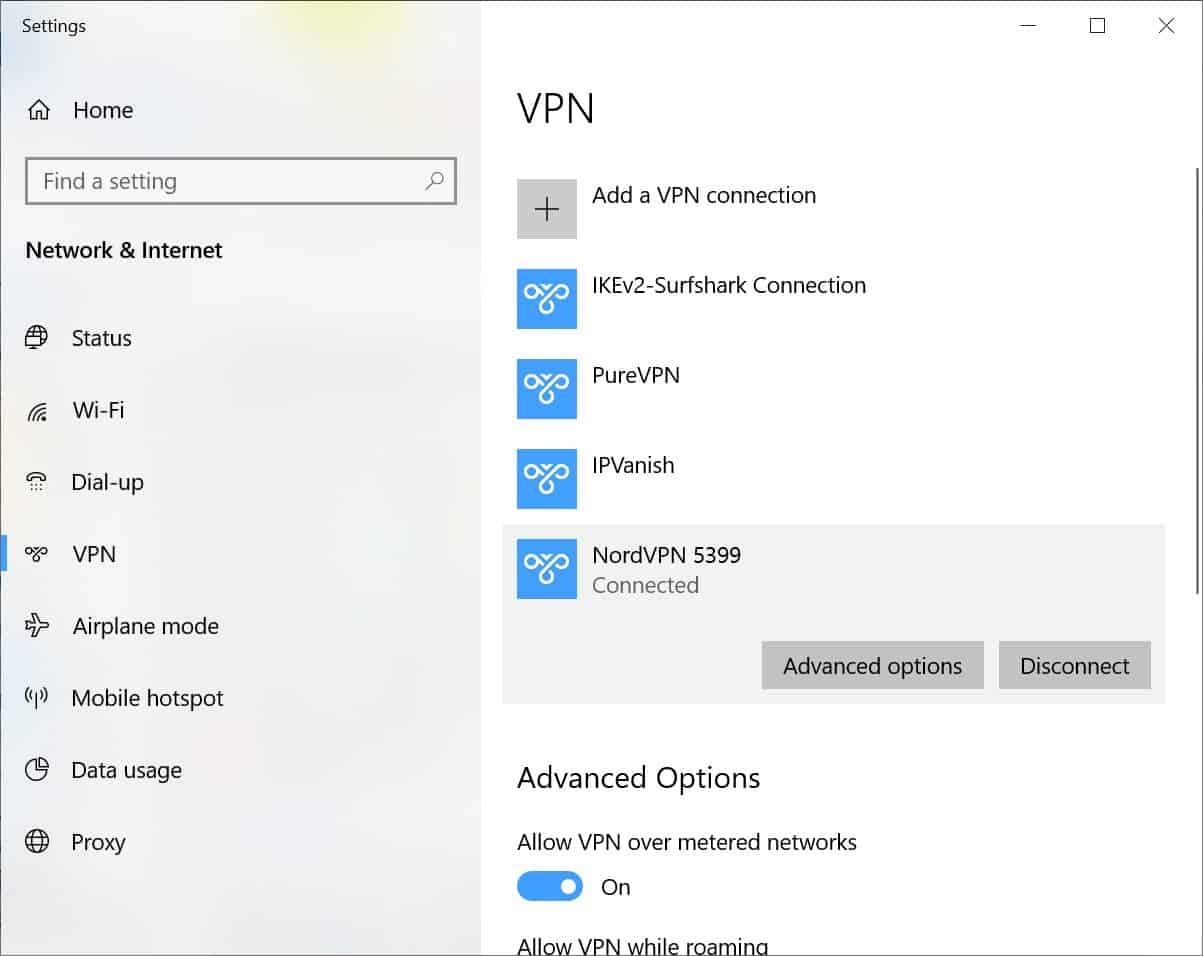
After a few moments, the connection will be established and the VPN will display the status Connected.
How to manually configure a WireGuard client on Windows 10
What you’ll need:
- WireGuard client app
- WireGuard configuration file
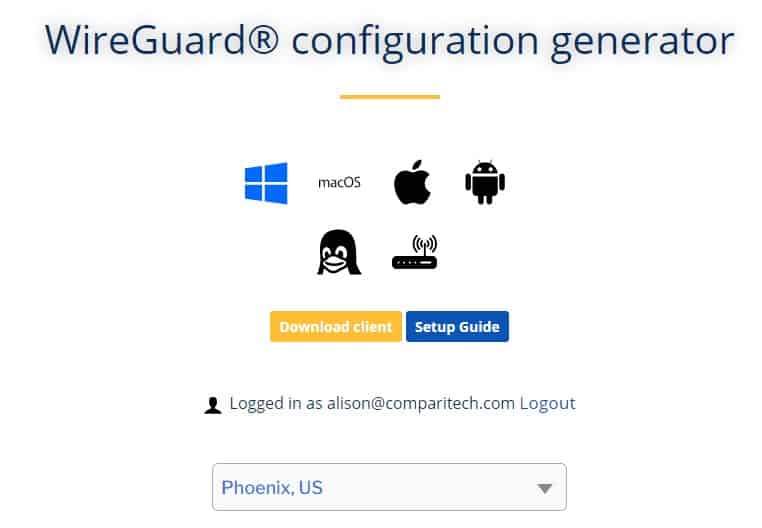
WireGuard setup is similar to OpenVPN in that it requires a third-party client and a configuration file from your provider. The config file will contain all of the connection and encryption specifications you need, including login credentials.
You can download and install the official WireGuard app from here. We’ll be using it to connect to StrongVPN in this tutorial, though the process should be similar for any other VPN service.
Here’s how to manually set up a WireGuard client on Windows 10:
- Download and install the WireGuard client using the link above.

- Get the WireGuard configuration file for the server you wish to connect to from your VPN provider or network administrator. It will have a .conf extension.
- Open the WireGuard app. Click Import tunnel(s) from file.

- Navigate to your configuration file and click Open.
- Click Activate.


After a few seconds, you should receive a notification informing you that the VPN is connected.


