
LibreELEC is a great little operating system. Its slogan is “just enough OS for Kodi”, and because there’s no unnecessary extra features, it’s ideal for low-powered devices like Raspberry Pi, Intel NUC boards, or Odroid boxes.
However, this is a double-edged sword. With no network configuation menu or other apps, any Virtual Private Network (VPN) configuration has to be done in Kodi itself. Below, we’ll explain how to install and configure a VPN on Kodi, one step at a time. And don’t worry: the whole process shouldn’t take more than a few minutes.
Why you should use a VPN with Kodi
VPNs increase your privacy by encrypting your network traffic. This prevents anyone from seeing what you’re doing, rendering most Man-in-the-Middle attacks useless. It also stops your ISP from selling your traffic history or throttling your internet connection based on your streaming habits.
While all VPNs will slow your network down to some degree, some have more of an impact than others. Streaming video requires a fast, consistent connection, so it’s important to choose a VPN that has minimal effect on your speeds. Also, some VPN providers keep logs of your activities, ultimately leaving you no more protected than someone who isn’t using a VPN.
We recommend using NordVPN. This is one of the fastest providers on the market, and it works with almost every streaming service we’ve tested. What’s more, it offers top-tier security features and includes a 30-day money-back guarantee, meaning you can try it completely risk-free.
TRY THE TOP VPN FOR KODI RISK-FREE
NordVPN is offering a fully-featured risk-free 30-day trial if you sign up at this page. You can use the VPN rated #1 for Kodi with no restrictions for a month.
There are no hidden terms—just contact support within 30 days if you decide NordVPN isn't right for you and you'll get a full refund. Start your NordVPN trial here.
Installing a VPN on LibreELEC systems
LibreELEC is essentially a very stripped down Linux distro, but it lacks many of the tools and utilities we’ve come to consider standard. For instance, the default VPN configuration menu you’re used to is missing. As such, getting set up is a multi-stage process. We’ll begin by installing a Kodi addon that lets us access these settings directly:
Step 1: Install the VPN Manager for OpenVPN addon
Normally, to connect to a VPN, you’d simply launch an app and click the connect button. That’s not an option here, so we’ll have to use the VPN Manager for OpenVPN Kodi addon to manually set up our connection. Here’s how:
- Download VPN Manager for OpenVPN from the developer’s GitHub page (click the green Code button, then Download ZIP)
- Transfer this ZIP file to your LibreELEC system (ideally using a USB stick, though we have instructions for SSH transfers below if you’d prefer)
- In Kodi, select Add-ons in the main menu, then click the box icon in the top-left
- Hit Install from zip file, then navigate to your VPN Manager addon’s location
- Click on the ZIP file you just downloaded and wait a moment while it installs
Step 2: Connecting to a VPN on Kodi
Believe it or not, this is the easy part! We just have to tell VPN Manager for OpenVPN which provider we’re with and change a couple more options. Let’s get started:
-
- First, visit our IP address checker and make a note of your current address
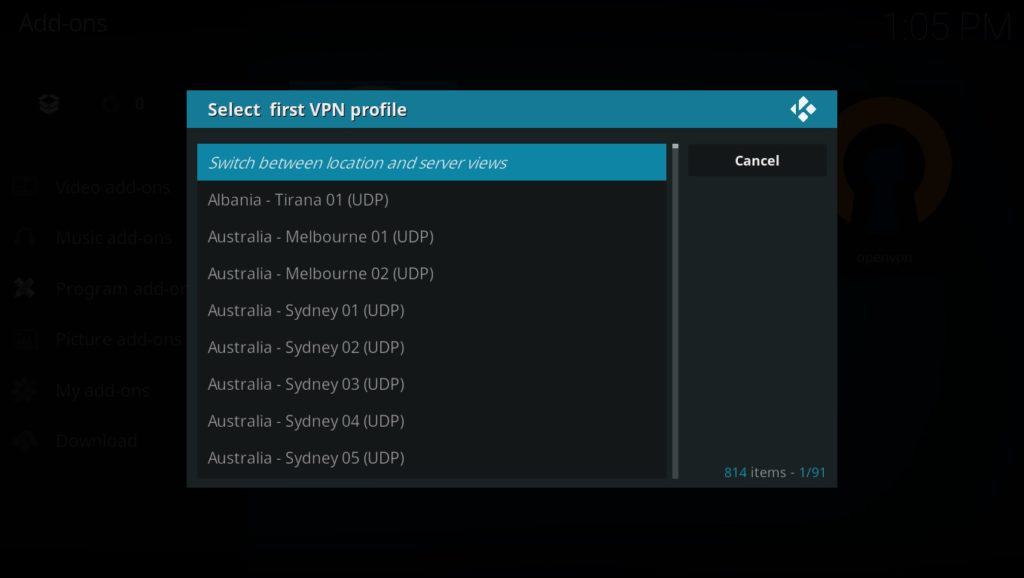
- Open VPN Manager for OpenVPN and click the Wizard button
- Select your VPN provider from the list
- Enter your username and password, then decide whether you’d like the VPN to connect automatically when you start Kodi
- Choose one of the available countries to connect to
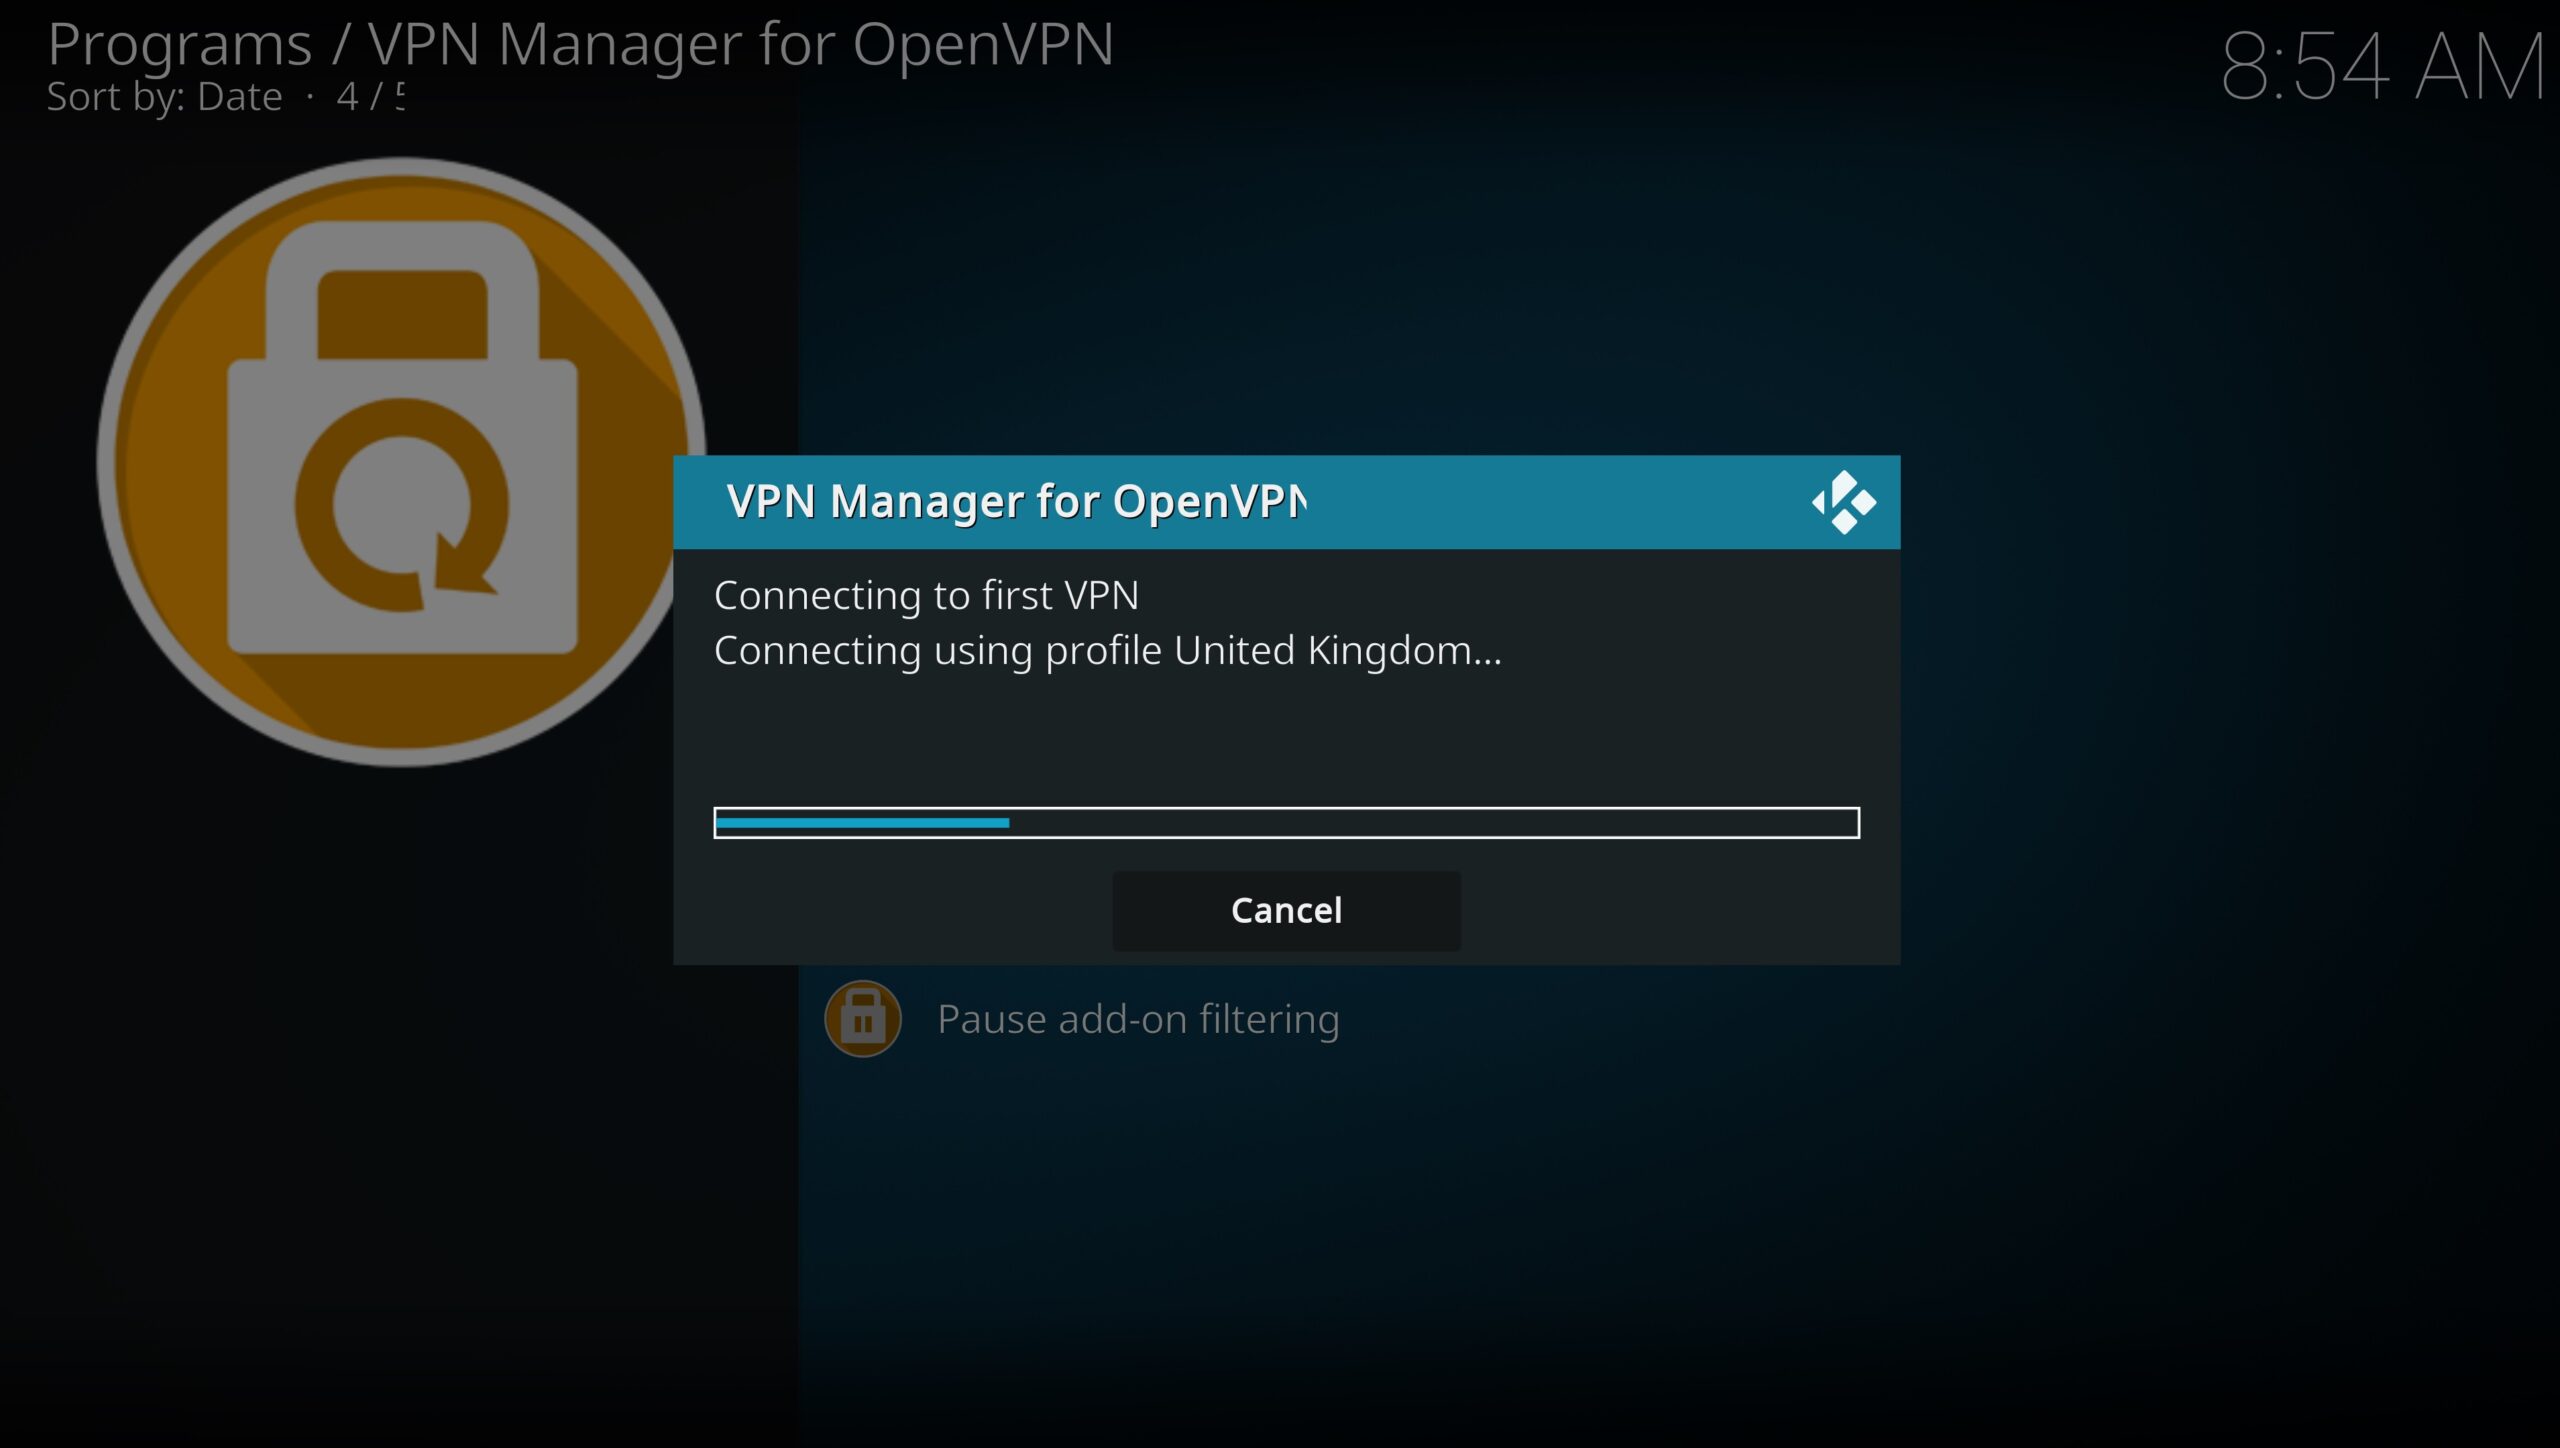
- After a moment, you’ll be connected and you’ll see your new IP address. If it’s different from the IP address you noted down in step one, congratulations, you’re now free to stream safely and securely on Kodi!
Step 3: Configuring your VPN Manager
Since this VPN manager only supports OpenVPN connections, you won’t be able to switch to different protocols. However, you can activate a variety of other features for more control, and we’ll run you through the most important below:
- Right-click the VPN Manager’s icon and hit Settings
- Hover over VPN Connections on the left. You can now choose up to ten countries as favorites, making it much faster to switch between these locations
- In the Monitor tab, enable Force reconnect on wake and Try next connection if first connect fails. These reduce the chances of you streaming without actually being protected
- Select Add-on filter from the menu on the left. Here, you can choose specific VPN locations for individual addons. This is helpful, for instance, if you want to access region-locked content without manually switching servers first

How to transfer Kodi addons over SSH
You might be thinking that installing a Kodi addon from GitHub would be as easy as typing its address into Kodi’s file manager, but unfortunately, GitHub’s file structure means that this isn’t possible.
Instead, we’ll have to transfer the file from another device. The easiest way is by using a USB stick, SD card, or similar, but you can also send files straight over the internet (though this is a bit more tricky). Follow these steps to send files via SSH:
- First, download PuTTY. This is a Secure Shell (SSH) client that makes it very simple to connect to other devices on a network. We’ll be using it to transfer files to the LibreELEC device. Make sure Connection type is set to “SSH”.
- On your LibreELEC device, go into the settings menu by clicking on the gear icon on the home screen. Next, click on System Settings.
- Click on the Add-ons tab on the left, then Unknown Sources. The button to the right should turn white to confirm that this setting is enabled.
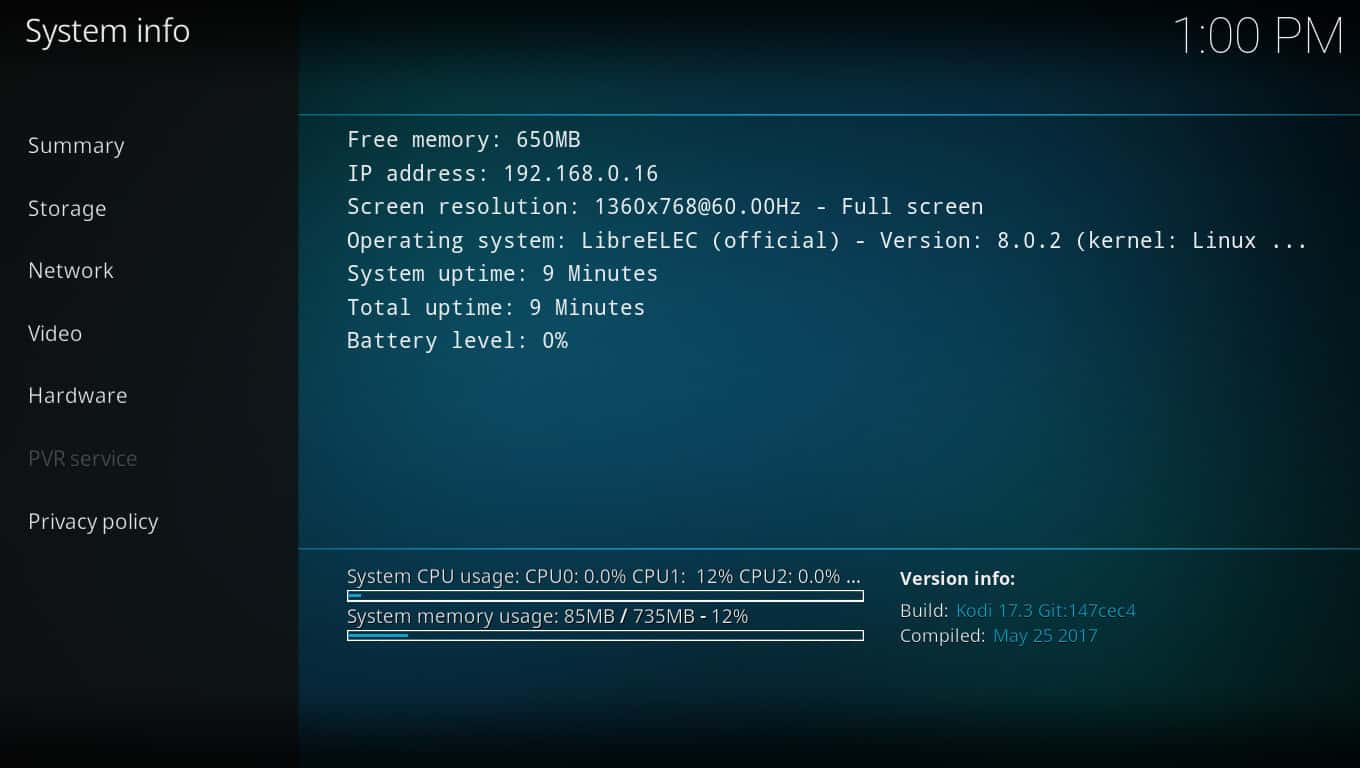
- Next, return to the Settings menu. This time, choose the System information tab.You’ll see the IP address that your device is using.

- Enter this address into the Host Name field in PuTTY, then click the Open button at the bottom of the screen.

- A terminal will appear and you’ll be asked to log in. By default, LibreELEC’s SSH login username is “root” and its password is “libreelec,” so use these to connect unless you’ve previously changed them to something else. Linux does not show asterisks as you type your password, but rest assured, it is being entered.
- Once you’ve connected, enter the following text, without the speech marks: “wget https://github.com/Zomboided/service.vpn.manager/archive/refs/heads/master.zip”
- On your LibreELEC device, click the Add-ons tab on the home screen, then click the box icon in the top-left. Select Install from zip file, then Home Folder, and finally, master.zip. The VPN Manager for OpenVPN addon should now begin installing
Importing a VPN with the User Defined Wizard
If your VPN provider isn’t in the VPN Manager’s list, you can import it manually instead. To do this, you’ll have to download specific files from your VPN provider that allow you to connect to it. We’ll need the .crt file and at least one server file with the .ovpn filetype. You can usually find these files linked to in your VPN provider’s Linux installation guides.
From the Kodi main menu, click the gear icon in the top-left. Next, select the File Manager option and click Add source. In the box that appears, add the location of your VPN’s configuration files and give the source a name. In our example, we’ve used the location of IPVanish’s files, but this will differ from provider to provider.

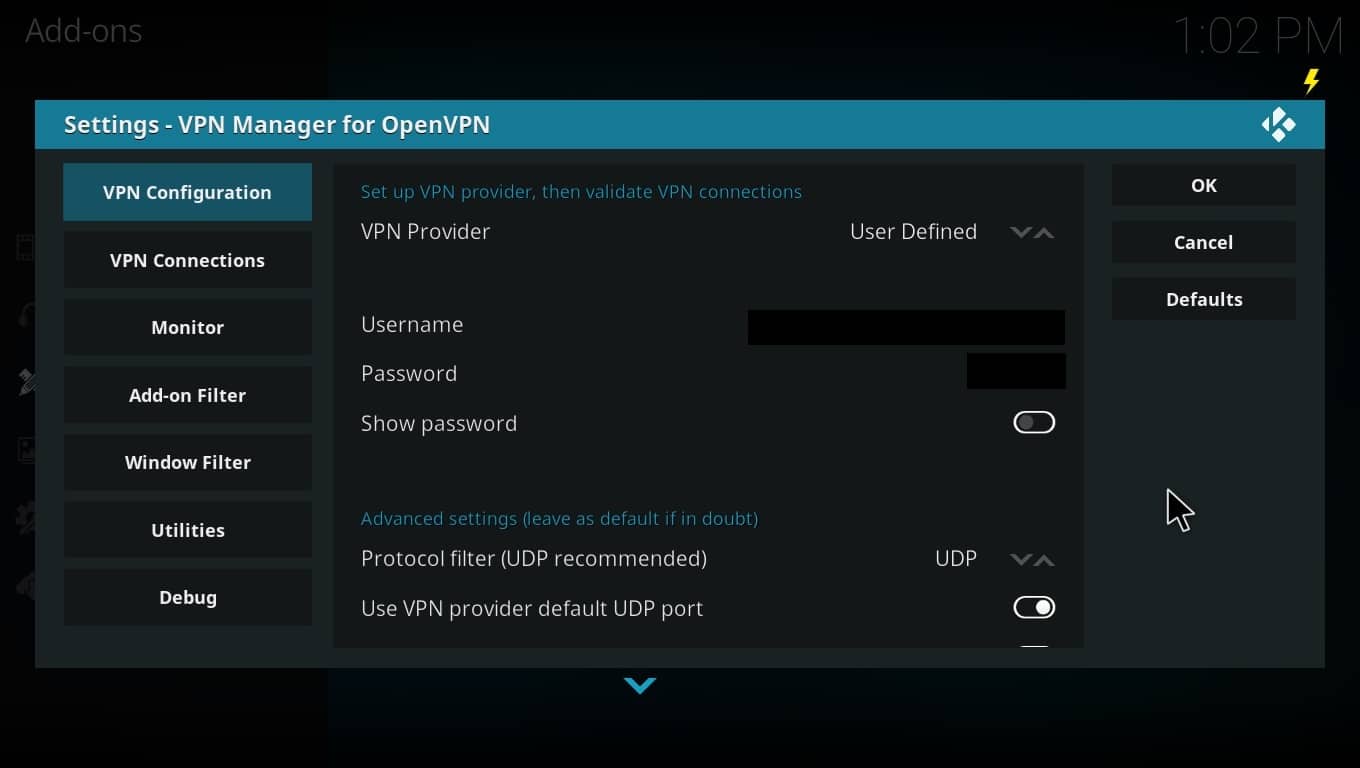
On your LibreELEC device, open the VPN Manager for OpenVPN’s settings page. Under VPN Provider select User Defined. Scroll down and click User Defined import wizard.
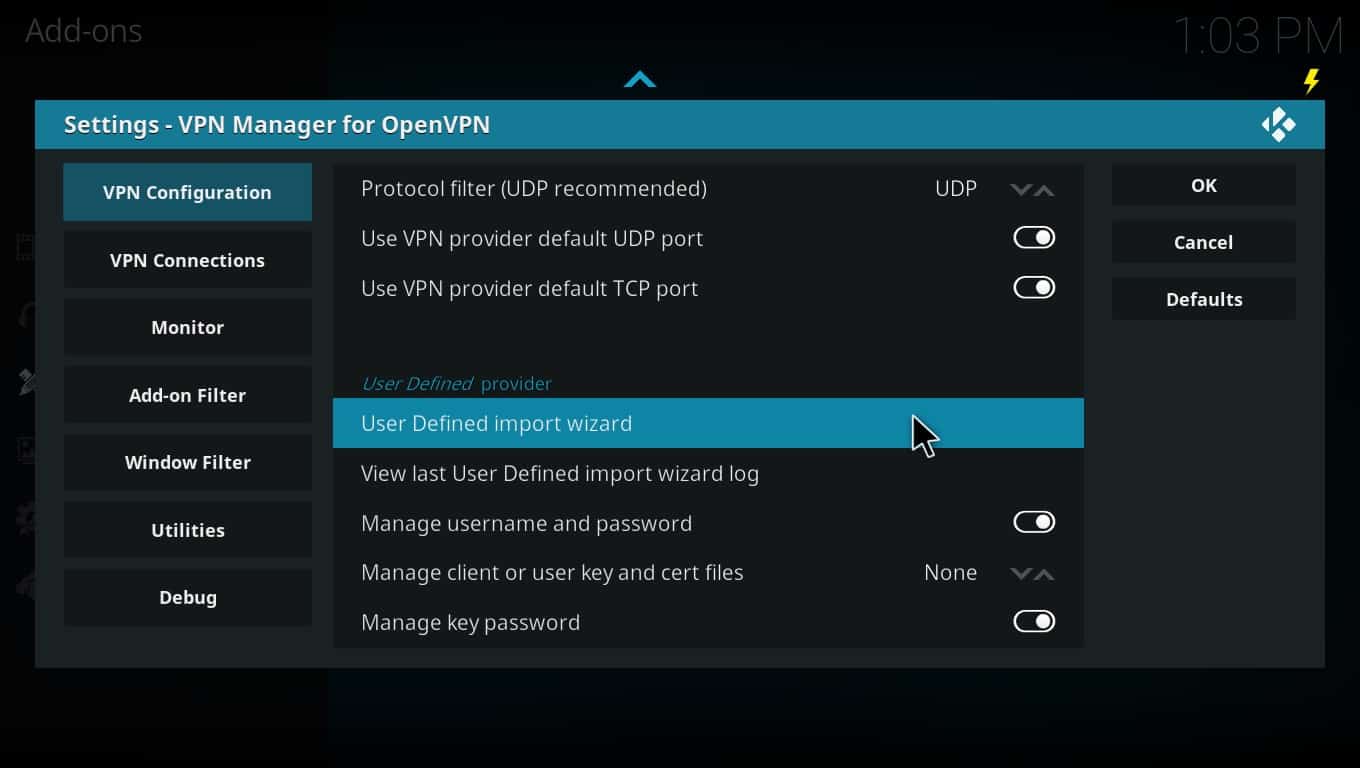
Next we have to tell the VPN Manager where to find these files. By default, they should have been downloaded to the Home folder, so navigate there and upload both of them. You’ll be asked whether you’d like to update the server files – this tries to automatically fix any broken links and can save you from manually editing them, so we recommend it.
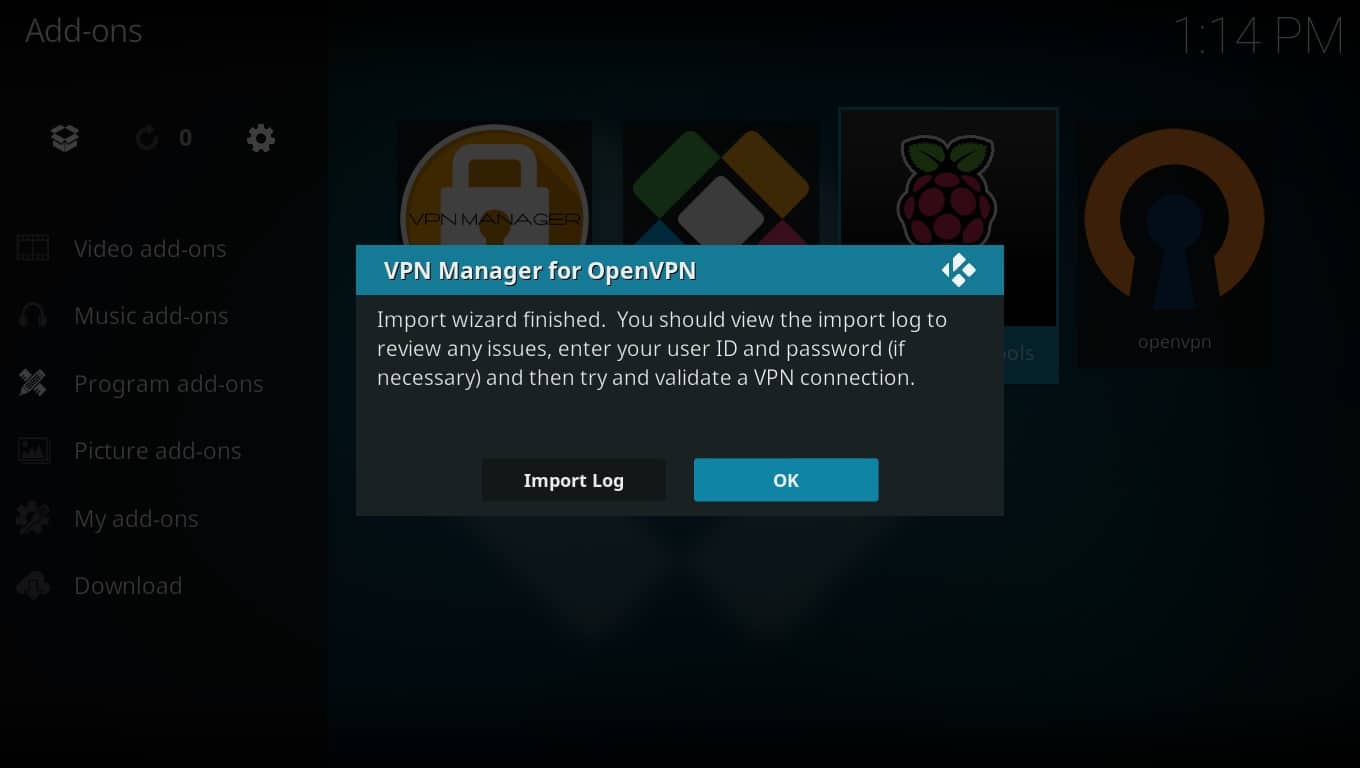
Afterwards, go to the VPN Connections tab and add your servers in order of preference.
Frequently Asked Questions
Will a VPN work on any device that can run Kodi?
The vast majority of platforms that support Kodi also support VPN connections. For instance, you can install a VPN app directly onto your PC, Android box, iPhone, Amazon Fire TV, Raspberry Pi, and more.
In fact, even if you have Kodi on a device that doesn’t support VPN apps (like an Xbox console), you can still share your encrypted connection from another device or simply have the Xbox connect to a VPN-secured router. The only limit is your imagination!
Does Kodi support WireGuard connections?
Kodi doesn’t actually know anything about your VPN connection. It handles your traffic the same way, no matter whether it’s encrypted or not. As such, you can use whichever VPN protocol you like, with no worries.
There are limitations if you’re using a “just enough OS” platform like LibreELEC, though. Because all of your VPN management has to be done through Kodi addons, you’re limited in this regard. Until someone creates an addon that supports newer protocols, LibreELEC users have to rely on OpenVPN connections.