
If you don’t feel like installing a Virtual Private Network (VPN) on individual devices or are looking to protect an entire wifi network, router VPNs are a solid choice. However, every router model is configured differently, and switching server locations can be a bit of a chore if you go down this route. Instead, we’d suggest creating a virtual wifi router on your Mac, as this maintains all of the online security benefits of a router VPN while actually being easier to set up.
So why would anyone need to install a VPN on their router anyway? Well, while the vast majority of VPN providers offer apps for major platforms, it’s not normally possible to encrypt traffic from games consoles, Smart TVs, or other internet-connected devices like Roku sticks. With a VPN on your wireless router, any device that connects to the network is protected.
Can’t I just buy a pre-flashed router?
Of course! Certain VPN providers (including our top pick, NordVPN) let you skip the manual configuration with wireless routers that have their software pre-installed. Alternatively, you can spend an afternoon setting the service up yourself. This is a bit more involved but much cheaper, and as long as you have a semi-modern router, you should be fine.
How to turn your MacBook into a virtual router
This guide will explain how to create a virtual router on your MacBook. This allows users to share their encrypted connection across all of their individual devices while only having to install the VPN once. You’ll also maintain access to features that aren’t available on routers, like tracker-blocking, obfuscation, or malware-detection.
IMPORTANT: In order to share your VPN with other devices connected to your Macbook’s wifi network, you need a VPN that supports the L2TP and/or IPSec protocols. Many popular VPNs have dropped support for these protocols in recent years, including NordVPN, but not all. We recommend PrivateVPN or VyprVPN if you want to use L2TP, and IPVanish if you prefer IPSec.
Here’s how to set up a virtual router on your Macbook:
- Connect your Mac to the internet
- Install the VPN on your Mac
- Configure the Mac to share the VPN connection
- Setup the Mac’s wifi to host a wireless network
- Connect all your devices to the wireless network hosted by your Mac
First and foremost, to share your Mac’s VPN connection over wifi, you need to connect your Mac to the internet with an ethernet cable, which frees up the wifi to broadcast instead of receive. Once you have the cable connected and the wifi disconnected, you can start configuring your VPN-secured internet connection.
WANT TO TRY OUR #1 RECOMMENDED VPN RISK FREE?
NordVPN is offering a fully-featured risk-free 30-day trial if you sign up at this page. You can use the VPN that we rate #1 with no restrictions for a month—great if you're unsure about making a long-term commitment.
There are no hidden terms—just contact support within 30 days if you decide NordVPN isn't right for you and you'll get a full refund. Start your NordVPN trial here.
Step 1: set up the VPN
Just about every major VPN has a Mac app, so you can just download and install this like you would any other software. Once you’re done, congratulations, you can skip to the next step.
It’s also possible to manually setup a secure connection for providers that don’t officially support Mac. Here’s how:
- Click the Apple logo in the top-left and select System Preferences
- Hit the Network icon
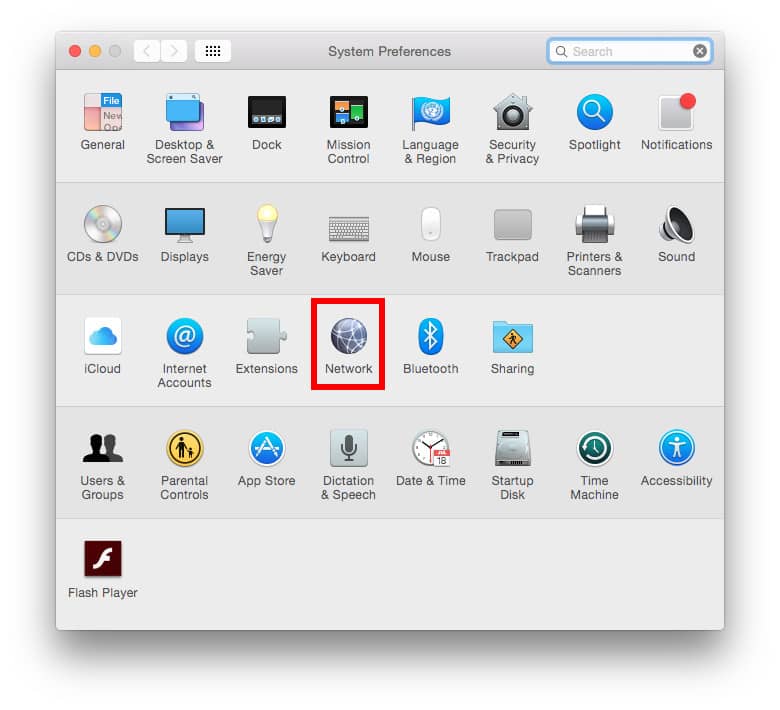
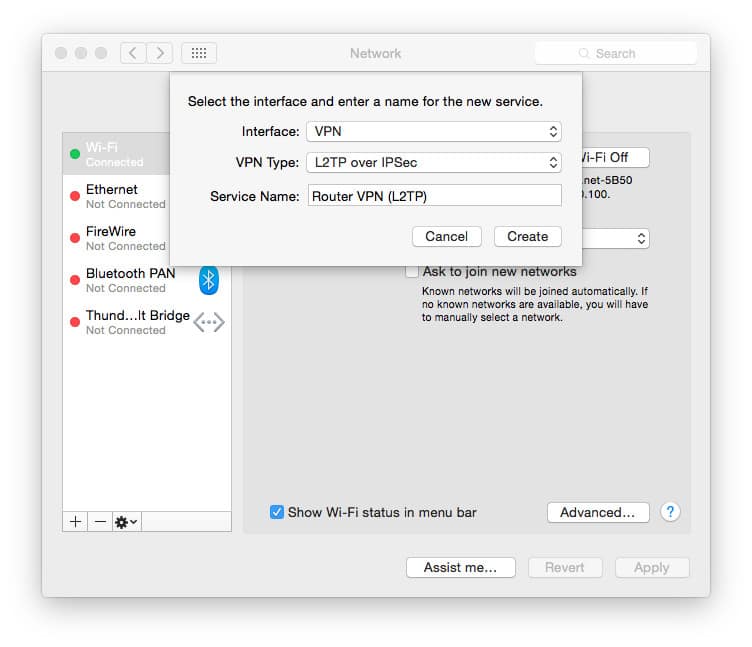
System Preferences Window - Click on the plus (+) sign at the bottom of the left panel to add a new service. In the pop-up window, select the following options then click Create:
-
- Interface: VPN
- VPN Type: L2TP over IPSec
- Service Name: [choose a name for your VPN connection]
Step 2: configure the VPN
For the next steps, you’ll need your VPN login details and the address of the server you’d like to use. Depending on your VPN provider’s settings, you may also need an IPSec key. This can also be referred to as a Shared Key or Shared Secret. You can find these under the Manual Configuration section of the VPN provider’s support website.
- Choose the following options:
- Configuration: Default
- Server Address: [server address of your choice]
- Account Name: [username]
- Encryption: Automatic
- Check the box next to Show VPN status in menu bar to see your VPN connection status in the menu bar.
- Next, click on Authentication Settings. Enter your password and the IPSec key in the Shared Secret box under Machine Authentication, then click OK.
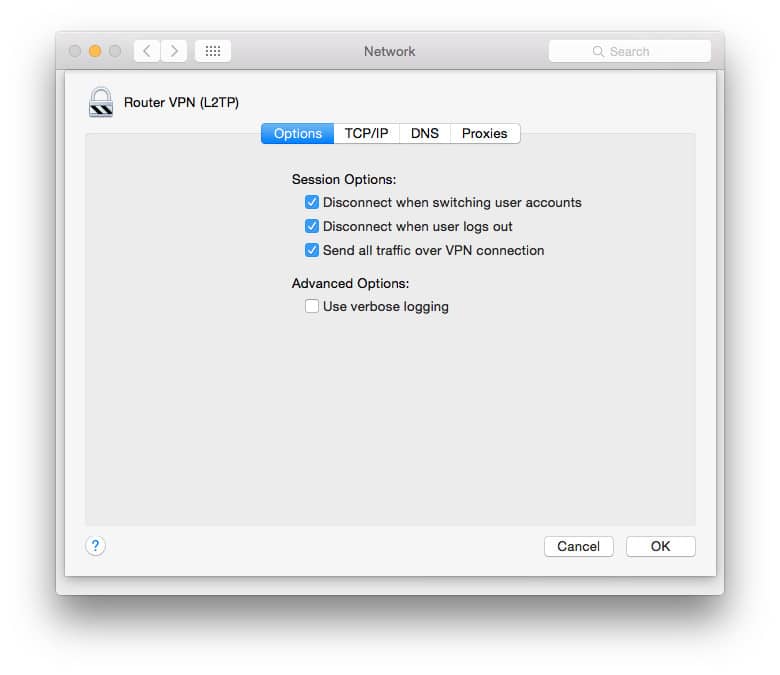
- Click on Advanced. Check the box labelled Send all traffic over VPN connection then click OK
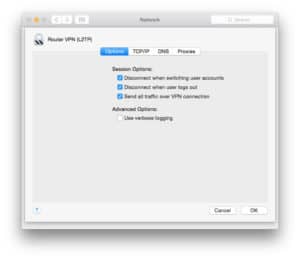
Network Advanced Settings - Click Apply to save your settings, and then connect to your VPN with the Connect button. You are now connected to a VPN server. Now you just need to set up your VPN for sharing.
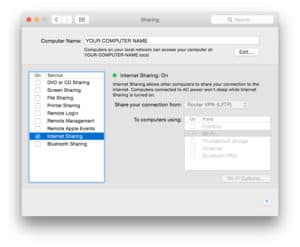
- Return to the System Preferences menu, then click on Sharing.
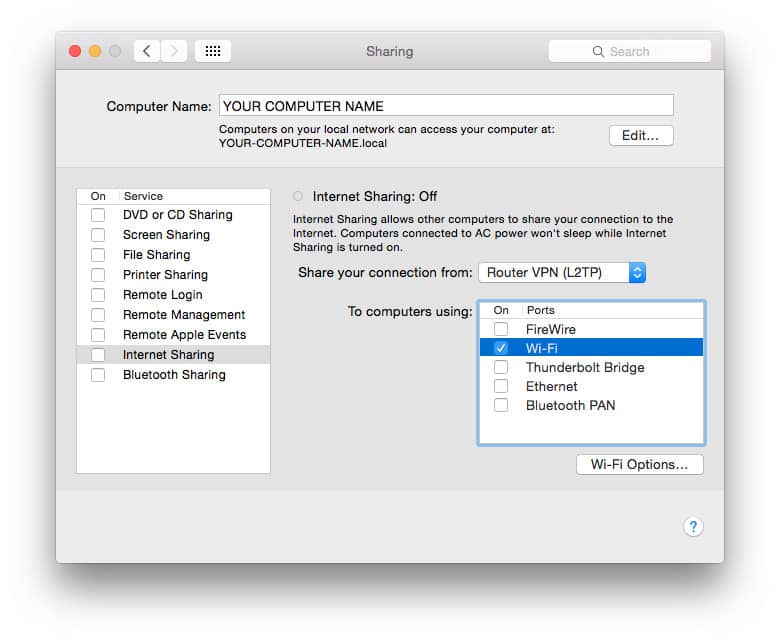
- Select Internet Sharing from the left panel. Set the following settings:
- Share your connection from [the VPN PPTP connection you just created
- To computers using: Wi-Fi
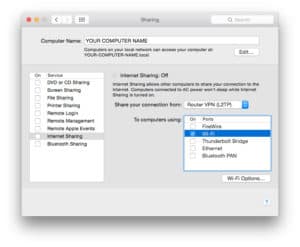
Network Sharing Screen
- Select Wi-Fi Options… and enter the following details:
- Network Name: [choose a network name also known as an SSID]
- Channel: [leave as default]
- Security: WPA2 Personal
- Password: [choose a password]
- Verify: [re-enter your password]
- Click OK
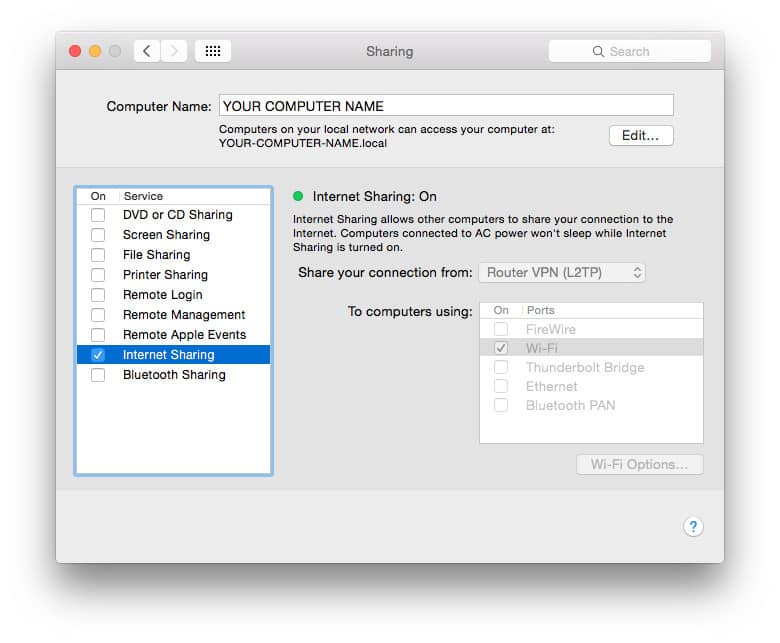
- On the Sharing menu, check the box next to Internet Sharing. You will see a prompt asking you to turn on Internet sharing. Click Start. When Internet Sharing has been activated, a green light will appear next to the text: “Internet Sharing: On”.
Internet Sharing is now on - You will now see two new icons in your menu bar. The first icon shows your VPN connection status. The other shows your Internet Sharing status.
Step 3: Connecting devices
- If you select the wifi icon by clicking on it, you will see that it is no longer searching for available wifi signals. Instead, it tells you that wifi internet sharing is on. The name of the wifi signal that the Mac is broadcasting–“Virtual VPN Router” in this example–is our SSID and the wifi channel the signal utilizes.
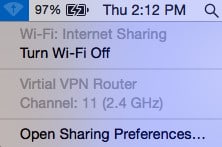
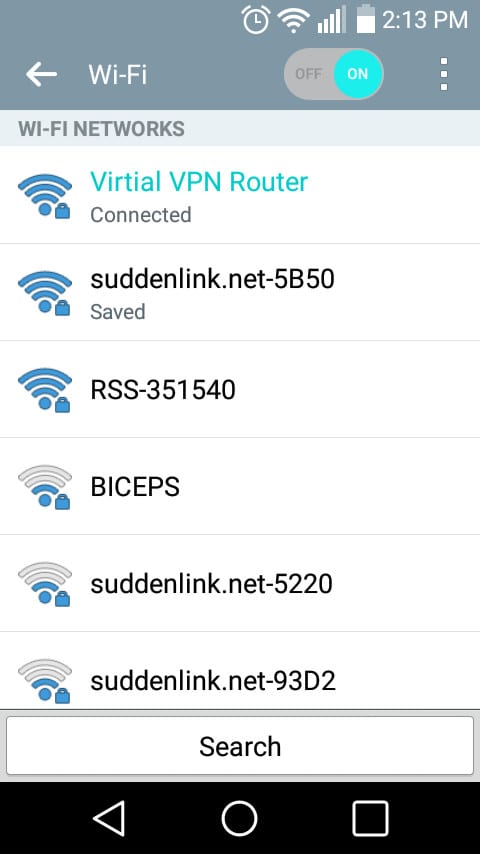
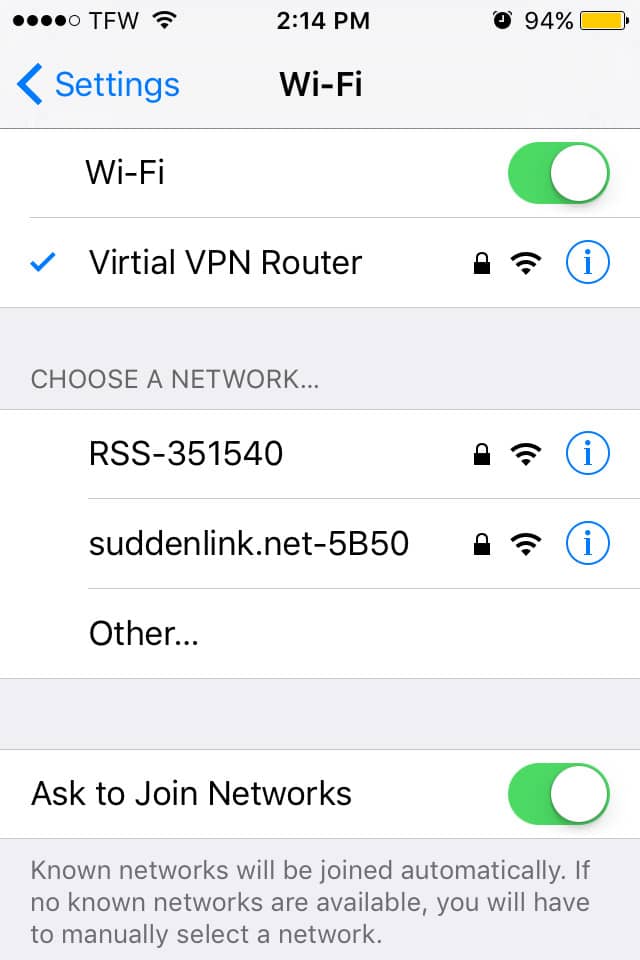
Wifi : Internet Sharing - Finally, we have a couple of devices connected to our “Virtual VPN Router” over wifi, an Android phone and an iPhone. You connect your devices to this wifi router the same way as you would any other wifi, using the SSID and password you put into the wifi settings screen above.

Android device connected to Mac 
iOS device connected to Mac
How to stop internet sharing
If you should want to stop Internet Sharing or stop using your Mac as a VPN-secured router, simply go back to the System Preferences window and select the Sharing icon again. In the sharing window, uncheck the box next to Internet Sharing.
How to disconnect your VPN
To disconnect your VPN, go to System Preferences > Network and click the Disconnect button.
This setup is fundamental and should work for any VPN service. The real test is when you click the Connect button in the Advanced Network settings window. If it cannot connect, you will want to verify the username, password, and especially the IPSec key provided by your VPN service provider.
As the VPN server you are connecting to gets more and more traffic routing through it, all that traffic can get bottlenecked. Be wary of connecting too many devices to your VPN-secured wireless network. Start with just a handful of devices and work up from there. If you notice any lag, remove any unnecessary devices or try switching your VPN connection over to another server.
Creating a virtual VPN router FAQs
What is a virtual router?
A virtual router is software that allows you to emulate a physical router on another device. Setting up a virtual router on your device turns it into a Wifi hotspot with VPN encryption. This makes it easier to switch between server locations and take advantage of online privacy tools that usually aren’t available on regular wifi routers.
Why do people use a VPN on a virtual router?
Lots of people install Virtual Private Networks on virtual routers as it allows them to bypass simultaneous connection limits and encrypt their entire network’s data with a single account. It can be especially useful in places like hotels when you don’t have a normal router or don’t want to connect to an insecure public wifi hotspot.
Can I do this with any VPN?
No, not all VPNs support the configuration of virtual VPN routers. Macs require the VPN use either the L2TP or IPSec protocols in order to share VPN connections. We recommend PrivateVPN, IPVanish, and VyprVPN for this purpose.
Can I use a free VPN to set up a virtual router?
Free VPNs rarely allow you to set up a virtual router, but even if they do, we’d advise against it. That’s because these providers tend to have inferior encryption and intrusive logging policies.
Instead, a premium VPN service is your best bet for secure web browsing. These live and die by their reputations and are often audited by independent experts so that you don’t have to take their privacy claims at face value.
See also: How to set up a Windows virtual router.


By the help of this article, I come to know how we can change your mac into a VPN secured router here are some steps-
Connect your Mac directly to your modem
Install the VPN on your Mac
Configure the Mac to share the VPN connection
Setup Mac’s wifi to host a wireless network. and enjoy