
When you first install Kodi, its main menu comes with a default layout that allows you to play any kind of media you want. However, everyone’s media habits are different. Not everyone wants to see the day’s weather or look at pictures on their media center, after all.
Thankfully, Kodi is endlessly customizable, and this applies to the look and feel as well as the content you can access. Below, we’ll walk you through the process of adding, removing, and editing Kodi’s menus so you can make a media hub that really speaks to your own needs.
What is Kodi?
Kodi is a software media player from the Kodi Foundation. It runs apps called “addons” that allow users to stream video from virtually any website. It can be installed on Apple TV, Amazon Fire Stick, PC, Mac, and Android or iOS. Unlike the default software that comes with Apple TV or Amazon Fire Stick, Kodi is open-source, and its add-ons are created by independent developers. Many streaming-video users prefer Kodi for this reason.

At the time of this writing, the latest version of Kodi is version 2.12 Omega. In addition to the current public version, nightly builds are also available. Kodi is available for Windows, Linux, macOS, iOS, Android, tvOS, Raspberry Pi, and webOS platforms.

Kodi is often accused of being used for online piracy. This reputation is undeserved since the official Kodi repo only includes addons that use properly licensed sources, with piracy-minded users having to find unlicensed addons elsewhere.
Warning: Kodi should only be used for content to which you have the legal right to access. Neither the Kodi Foundation nor Comparitech advocates the use of Kodi for piracy.
Before we start: Always use a VPN wth Kodi
Many people who stream video from unlicensed sources use Virtual Private Networks (VPNs) to hide their activity. But VPNs should actually be used by all streaming-video users, even ones who only access legal websites.
Many VPNs are not very effective for Kodi users, though. Some keep logs of users’ streaming habits, which creates a privacy risk. Most do not have native apps for popular streaming devices like Amazon Fire TV and Fire Stick. Further, many VPNs do not have servers in enough countries to consistently get around geoblocks.
We recommend NordVPN for Kodi users. It has extremely high speeds, offers native app support for several Kodi-compatible platforms, including Windows, macOS, iOS, Android, Amazon Fire TV, Amazon Fire Stick, Nvidia Shield, and several other platforms. The provider has a zero-logs policy, and has diskless VPN servers in more than 120 countries.
If you’re on a tight budget, you might want to take a look at Surfshark, which is an excellent low-cost alternative. In addition to providing app support for most of the same platforms as NordVPN, it also follows a strict no logs policy, also runs all of its servers solely from RAM, and has servers based in around 100 countries.
TRY THE BEST VPN FOR KODI RISK-FREE
NordVPN is offering a fully-featured risk-free 30-day trial if you sign up at this page. You can use the VPN rated #1 for Kodi with no restrictions for a month.
There are no hidden terms—just contact support within 30 days if you decide NordVPN isn't right for you and you'll get a full refund. Start your NordVPN trial here.
How to delete menu items you don’t want
If you want to get rid of some menu options you never use, here’s how to do it:
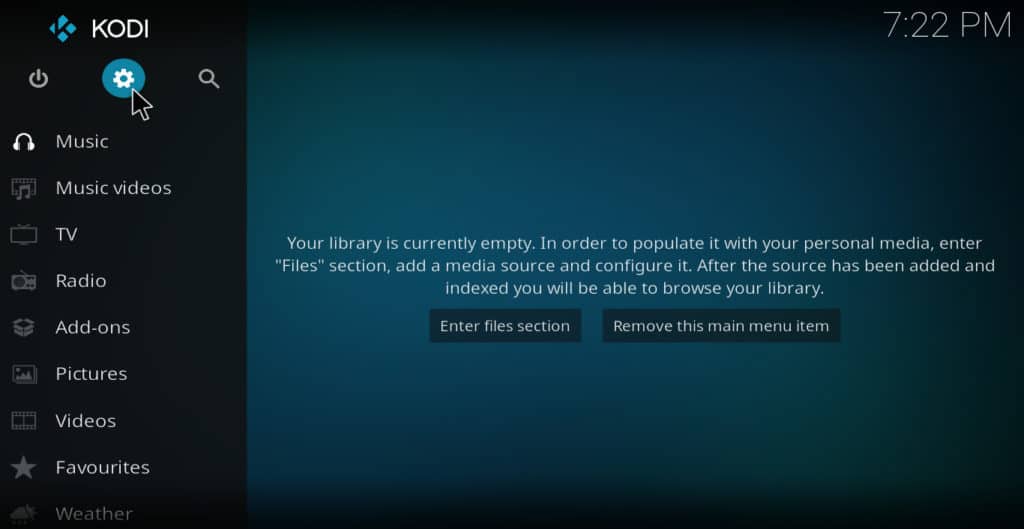
- From the main menu, click the gear icon in the upper-left corner
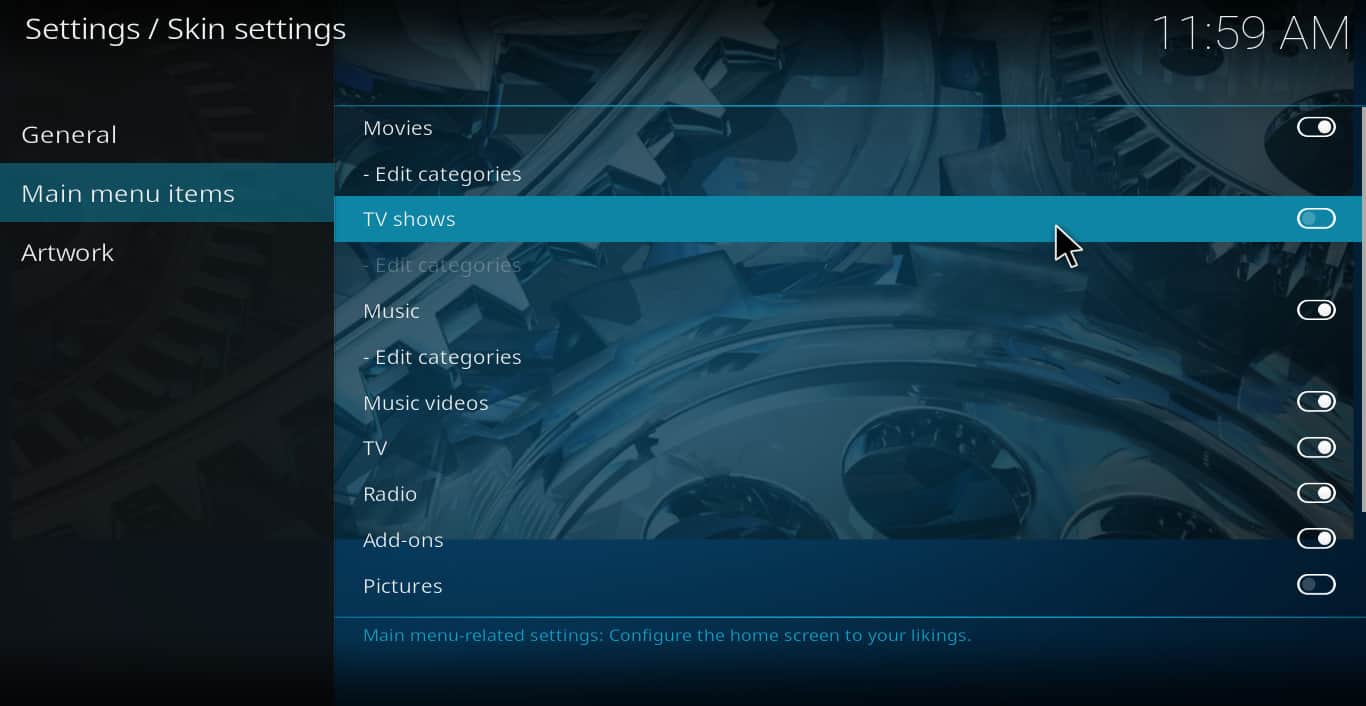
- Select Interface, then Configure skin under the Skin tab
- On the left side of the screen, select Main menu items
- Using the toggle buttons on the right side of the screen, deselect all of the menu items that you want to get rid of
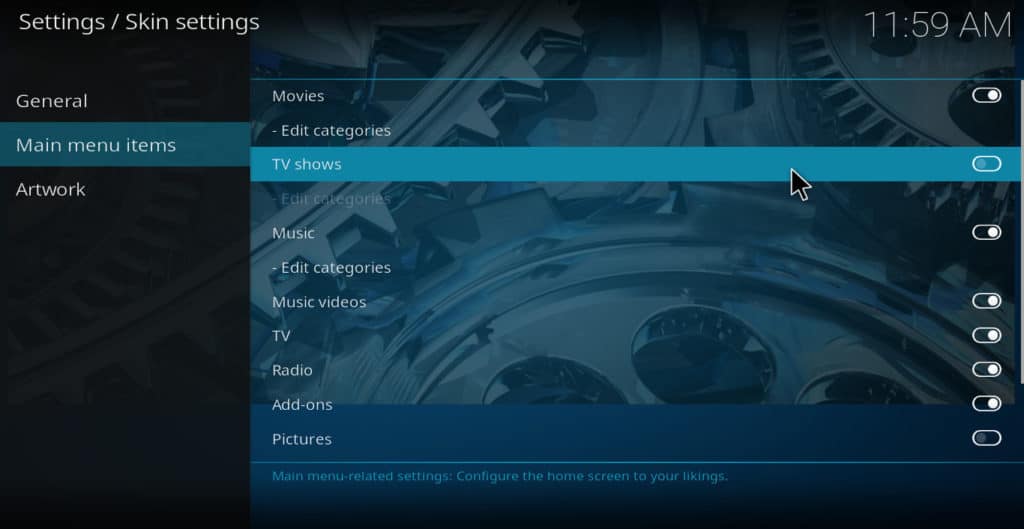
- Hit escape several times to back out to the main menu. The items will no longer be there, so you’ll have a shorter menu that is easier to navigate


Change the background
Besides customizing the actual menu items, you can also change the background images that appear when you move your cursor over these items. There are two ways to do this.
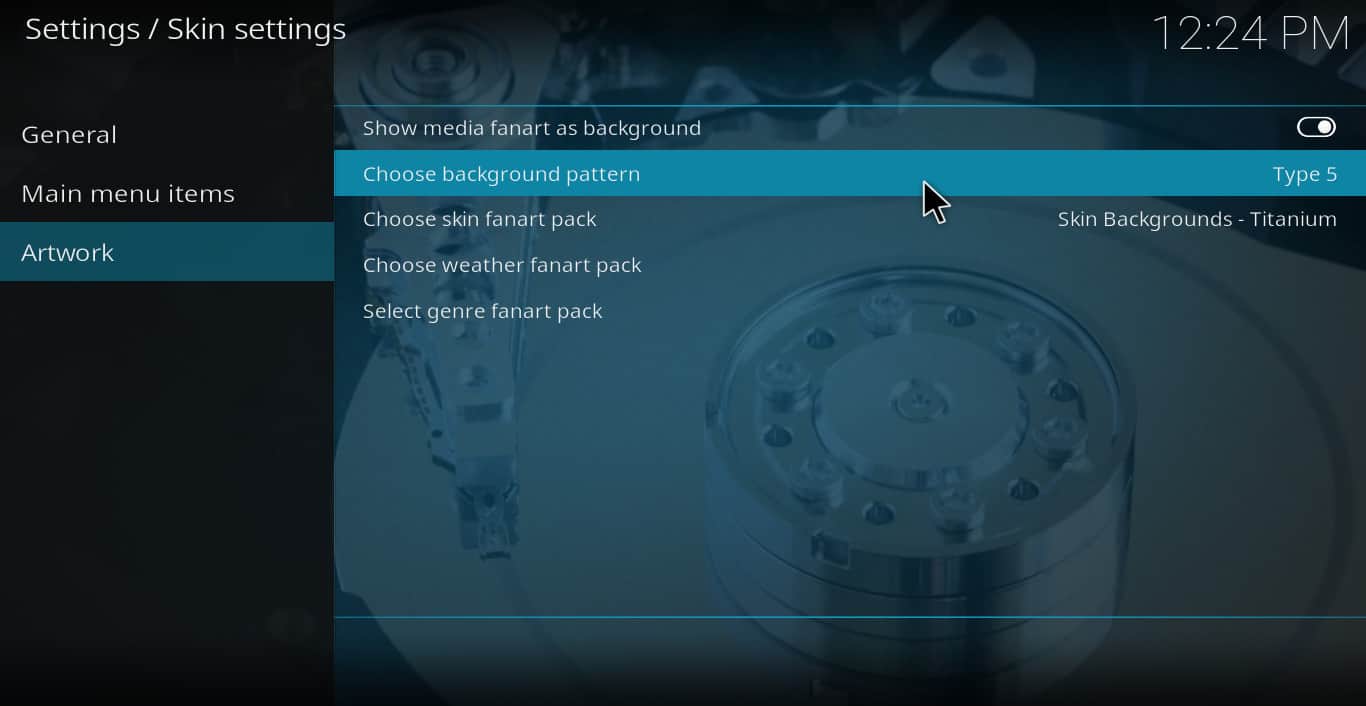
The first way is to click the gear icon, then choose Interface → Configure skin → Artwork → Choose background pattern. Each time you click Choose background pattern, a new piece of background art will appear. There are seven available by default.

The second way is to install a new set of background images. You can do this by navigating to Skin settings → Artwork → Select genre fanart pack. After installing the required addon, click this again and choose Get more… and scroll down until you find the Skin Backgrounds section.
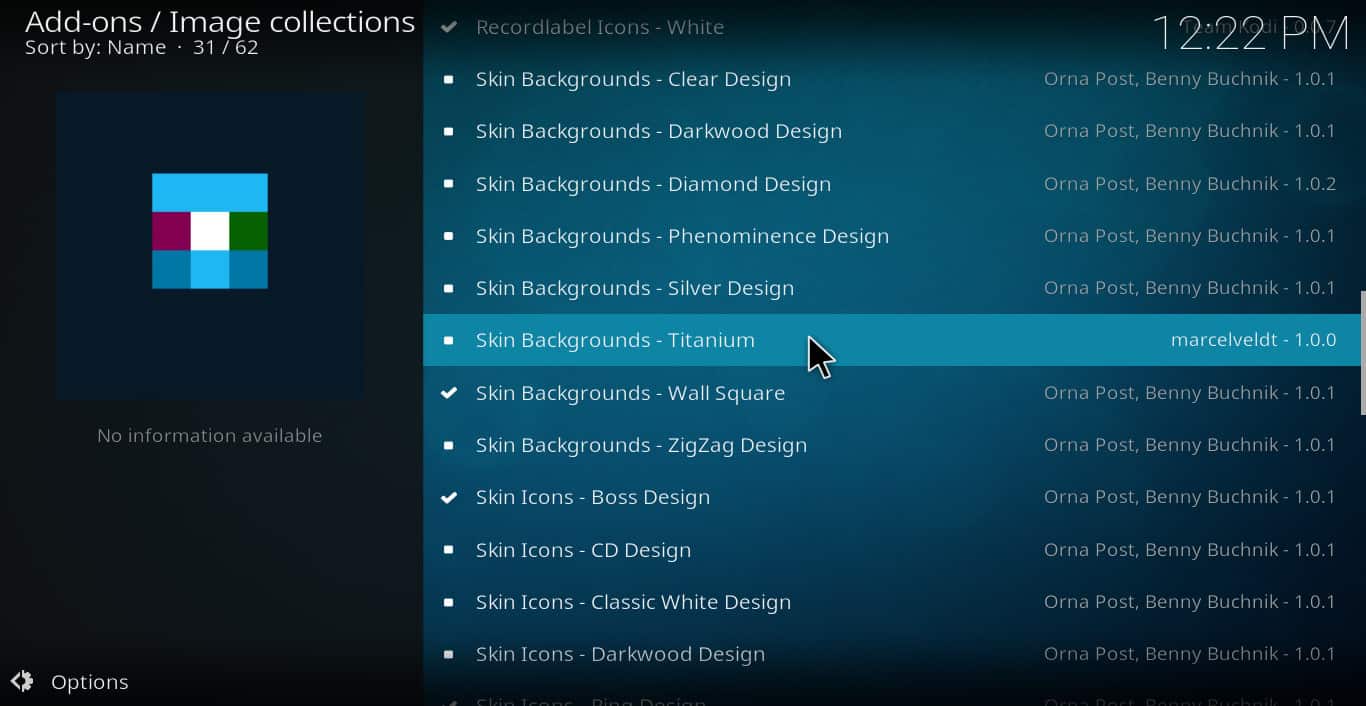
After selecting the package you’re most interested in, click Install. Go back to the Skin settings page, enable Show media fanart as background, and select your preferred pack from the Choose skin fanart pack option. Now, repeatedly click Choose background pattern until you find the pattern you like the most.
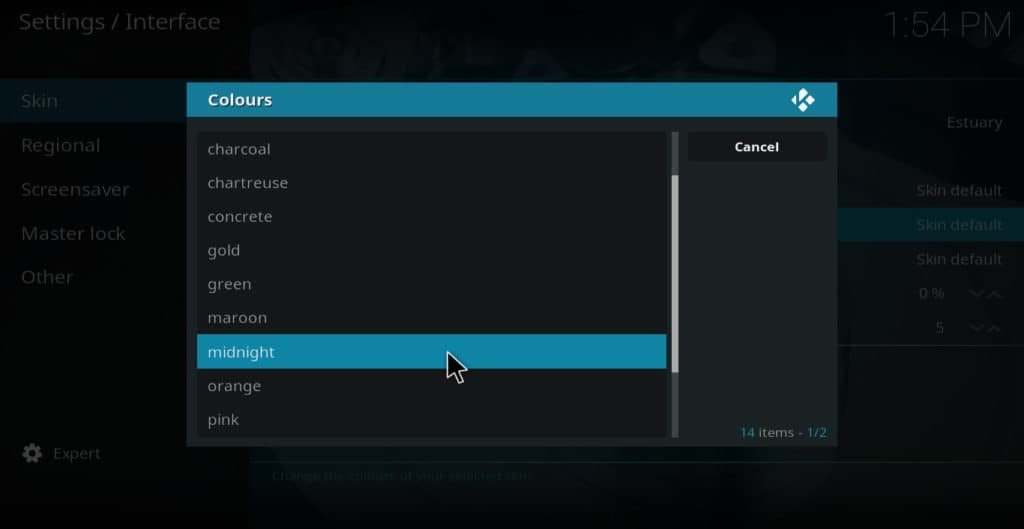
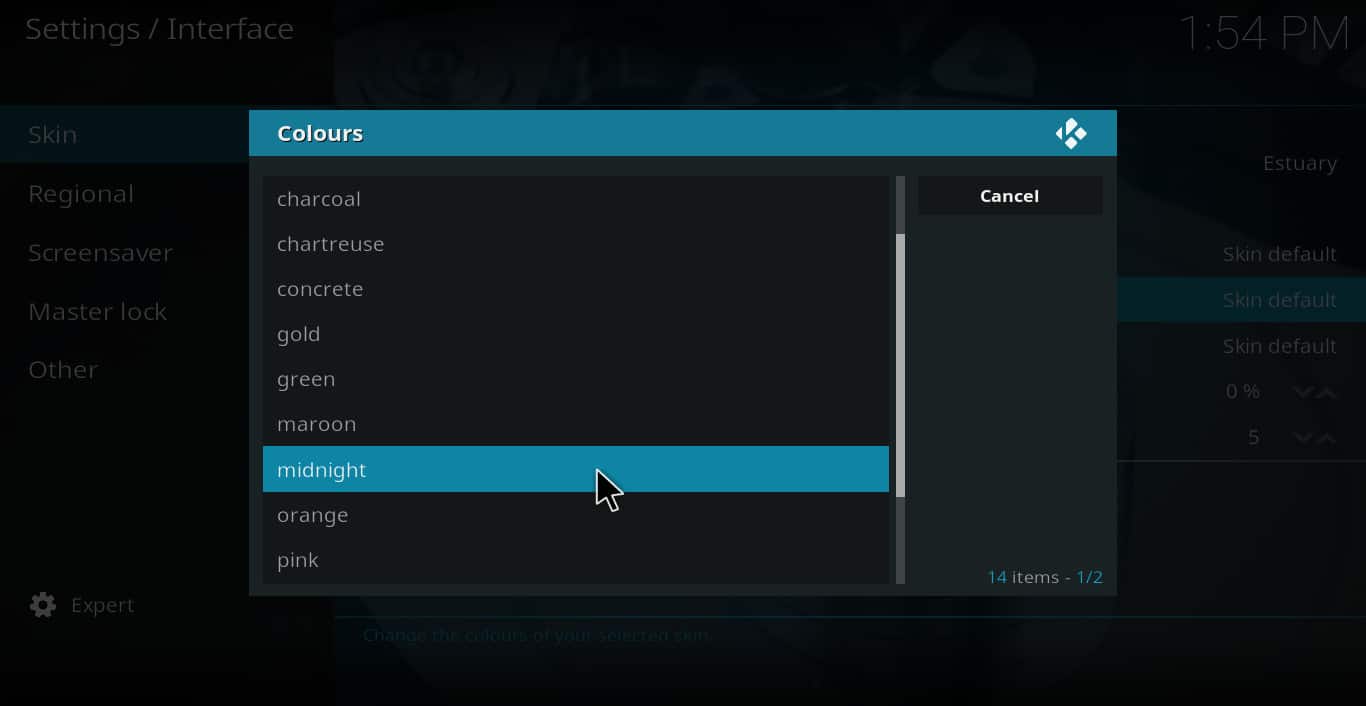
How to change Kodi’s color scheme
To change the colors of the menu, follow these steps:
- Click the gear icon
- Select Interface
- On the left side, select Skin
- On the right side, underneath Skin, select Colours

- Choose the color package you want from the list of options
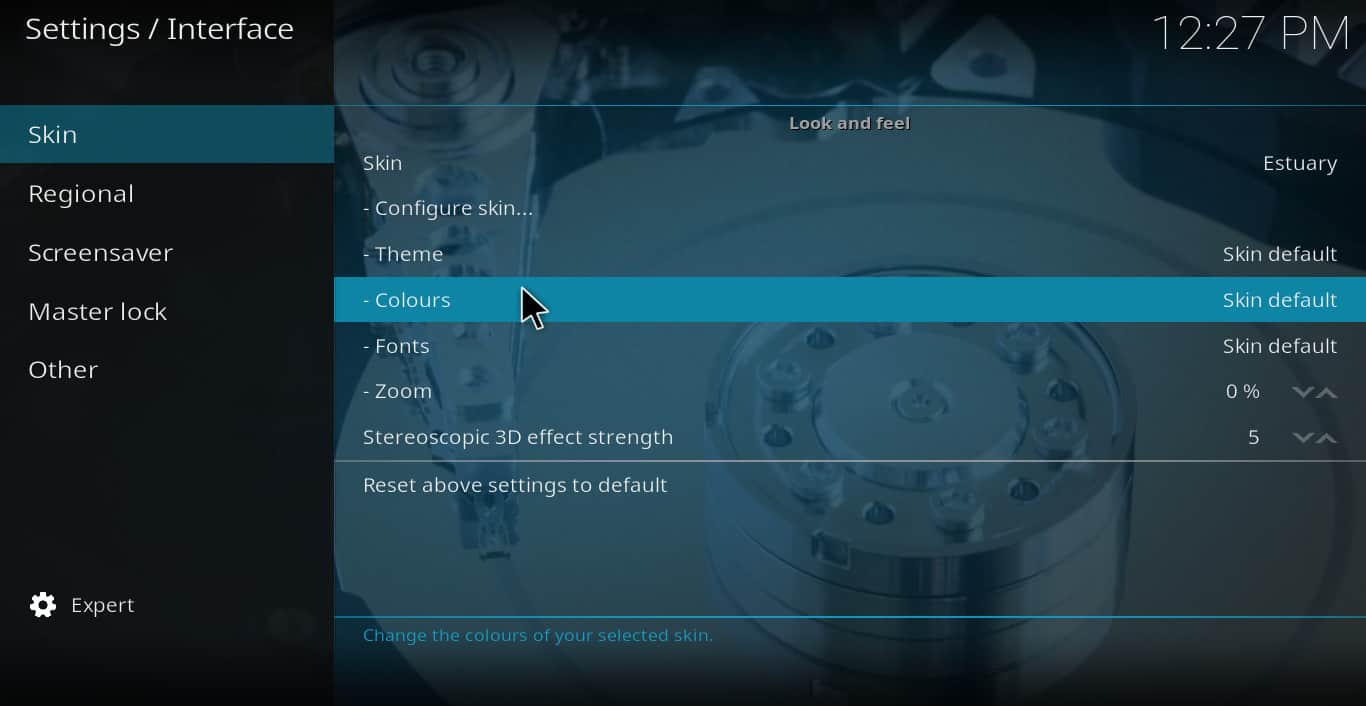
Note: If you don’t see “skin” as an option under “interface settings,” make sure it says “expert” beside the gear icon in the lower-left of the screen. If it does not, click it until it does.
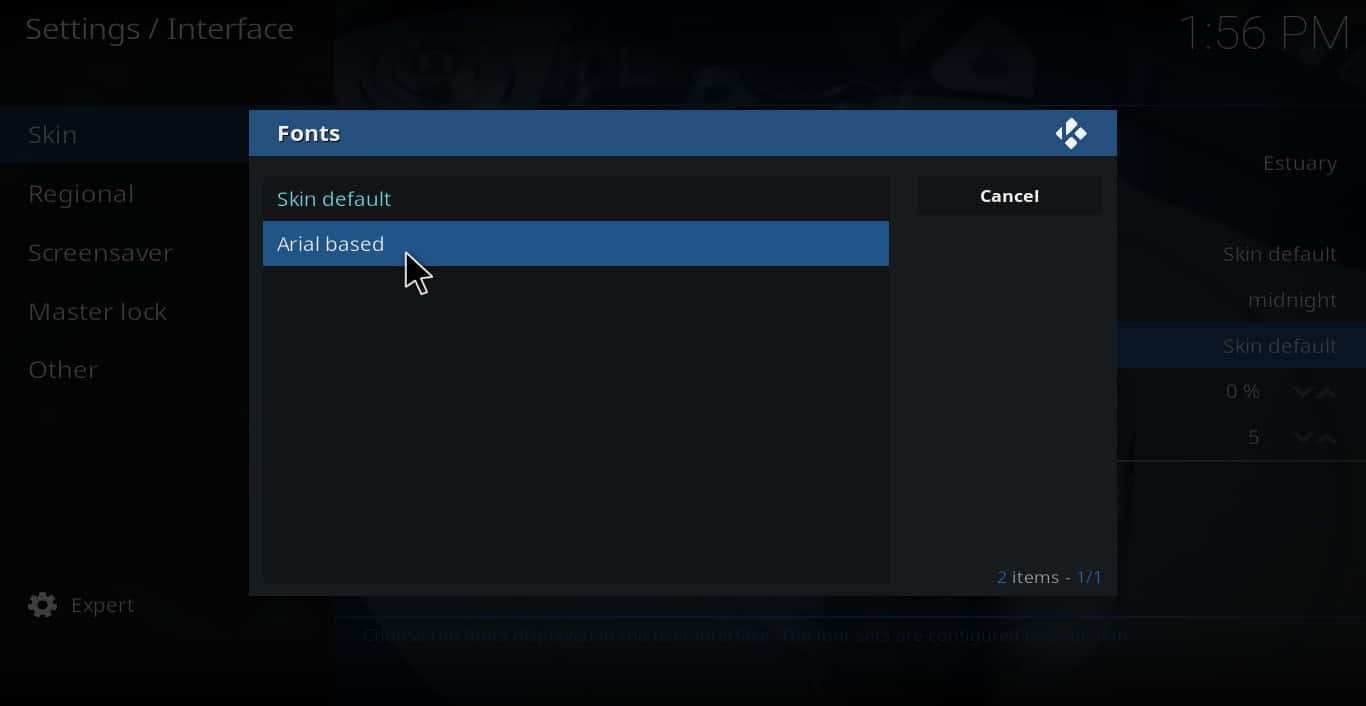
How to change Kodi’s default fonts
The default Kodi Estuary skin comes with two different font packages. The first one is called “Skin default,” and the second one is called “Arial based.” To switch to the “Arial based” font, click the gear icon, then select Interface → Skin → Fonts → Arial based.
See also: How to share Kodi libraries using UPnP
If you want even more options for customizing the Kodi menu, you can install the Estuary Mod v2 skin. This will allow you to add new menu items that are not even available by default.
Keep in mind that despite having the name “Estuary” attached to it, this skin is not part of the official Kodi repository. Instead, you can find the latest working source from the addon’s post on the Kodi forum. Here’s how to install Estuary Mod v2:
-
- Find a suitable source from the Estuary Mod v2 forum page and download the ZIP file
- From the Kodi main menu, click Add-ons
- Select the box icon in the upper-left corner of the screen

- Select Install from zip file. When the installation has finished, you’ll be asked whether you want to switch immediately. Click Yes
- Now, when you return to the Skin settings page, you should notice significantly more customization options

How to use the Estuary Mod v2 skin to add menu options
Once you’ve got the Estuary Mod installed, you can add new menu items by taking the following steps:
- Start by highlighting the Home menu tab and click on Customize main menu
- Click the plus sign in the middle
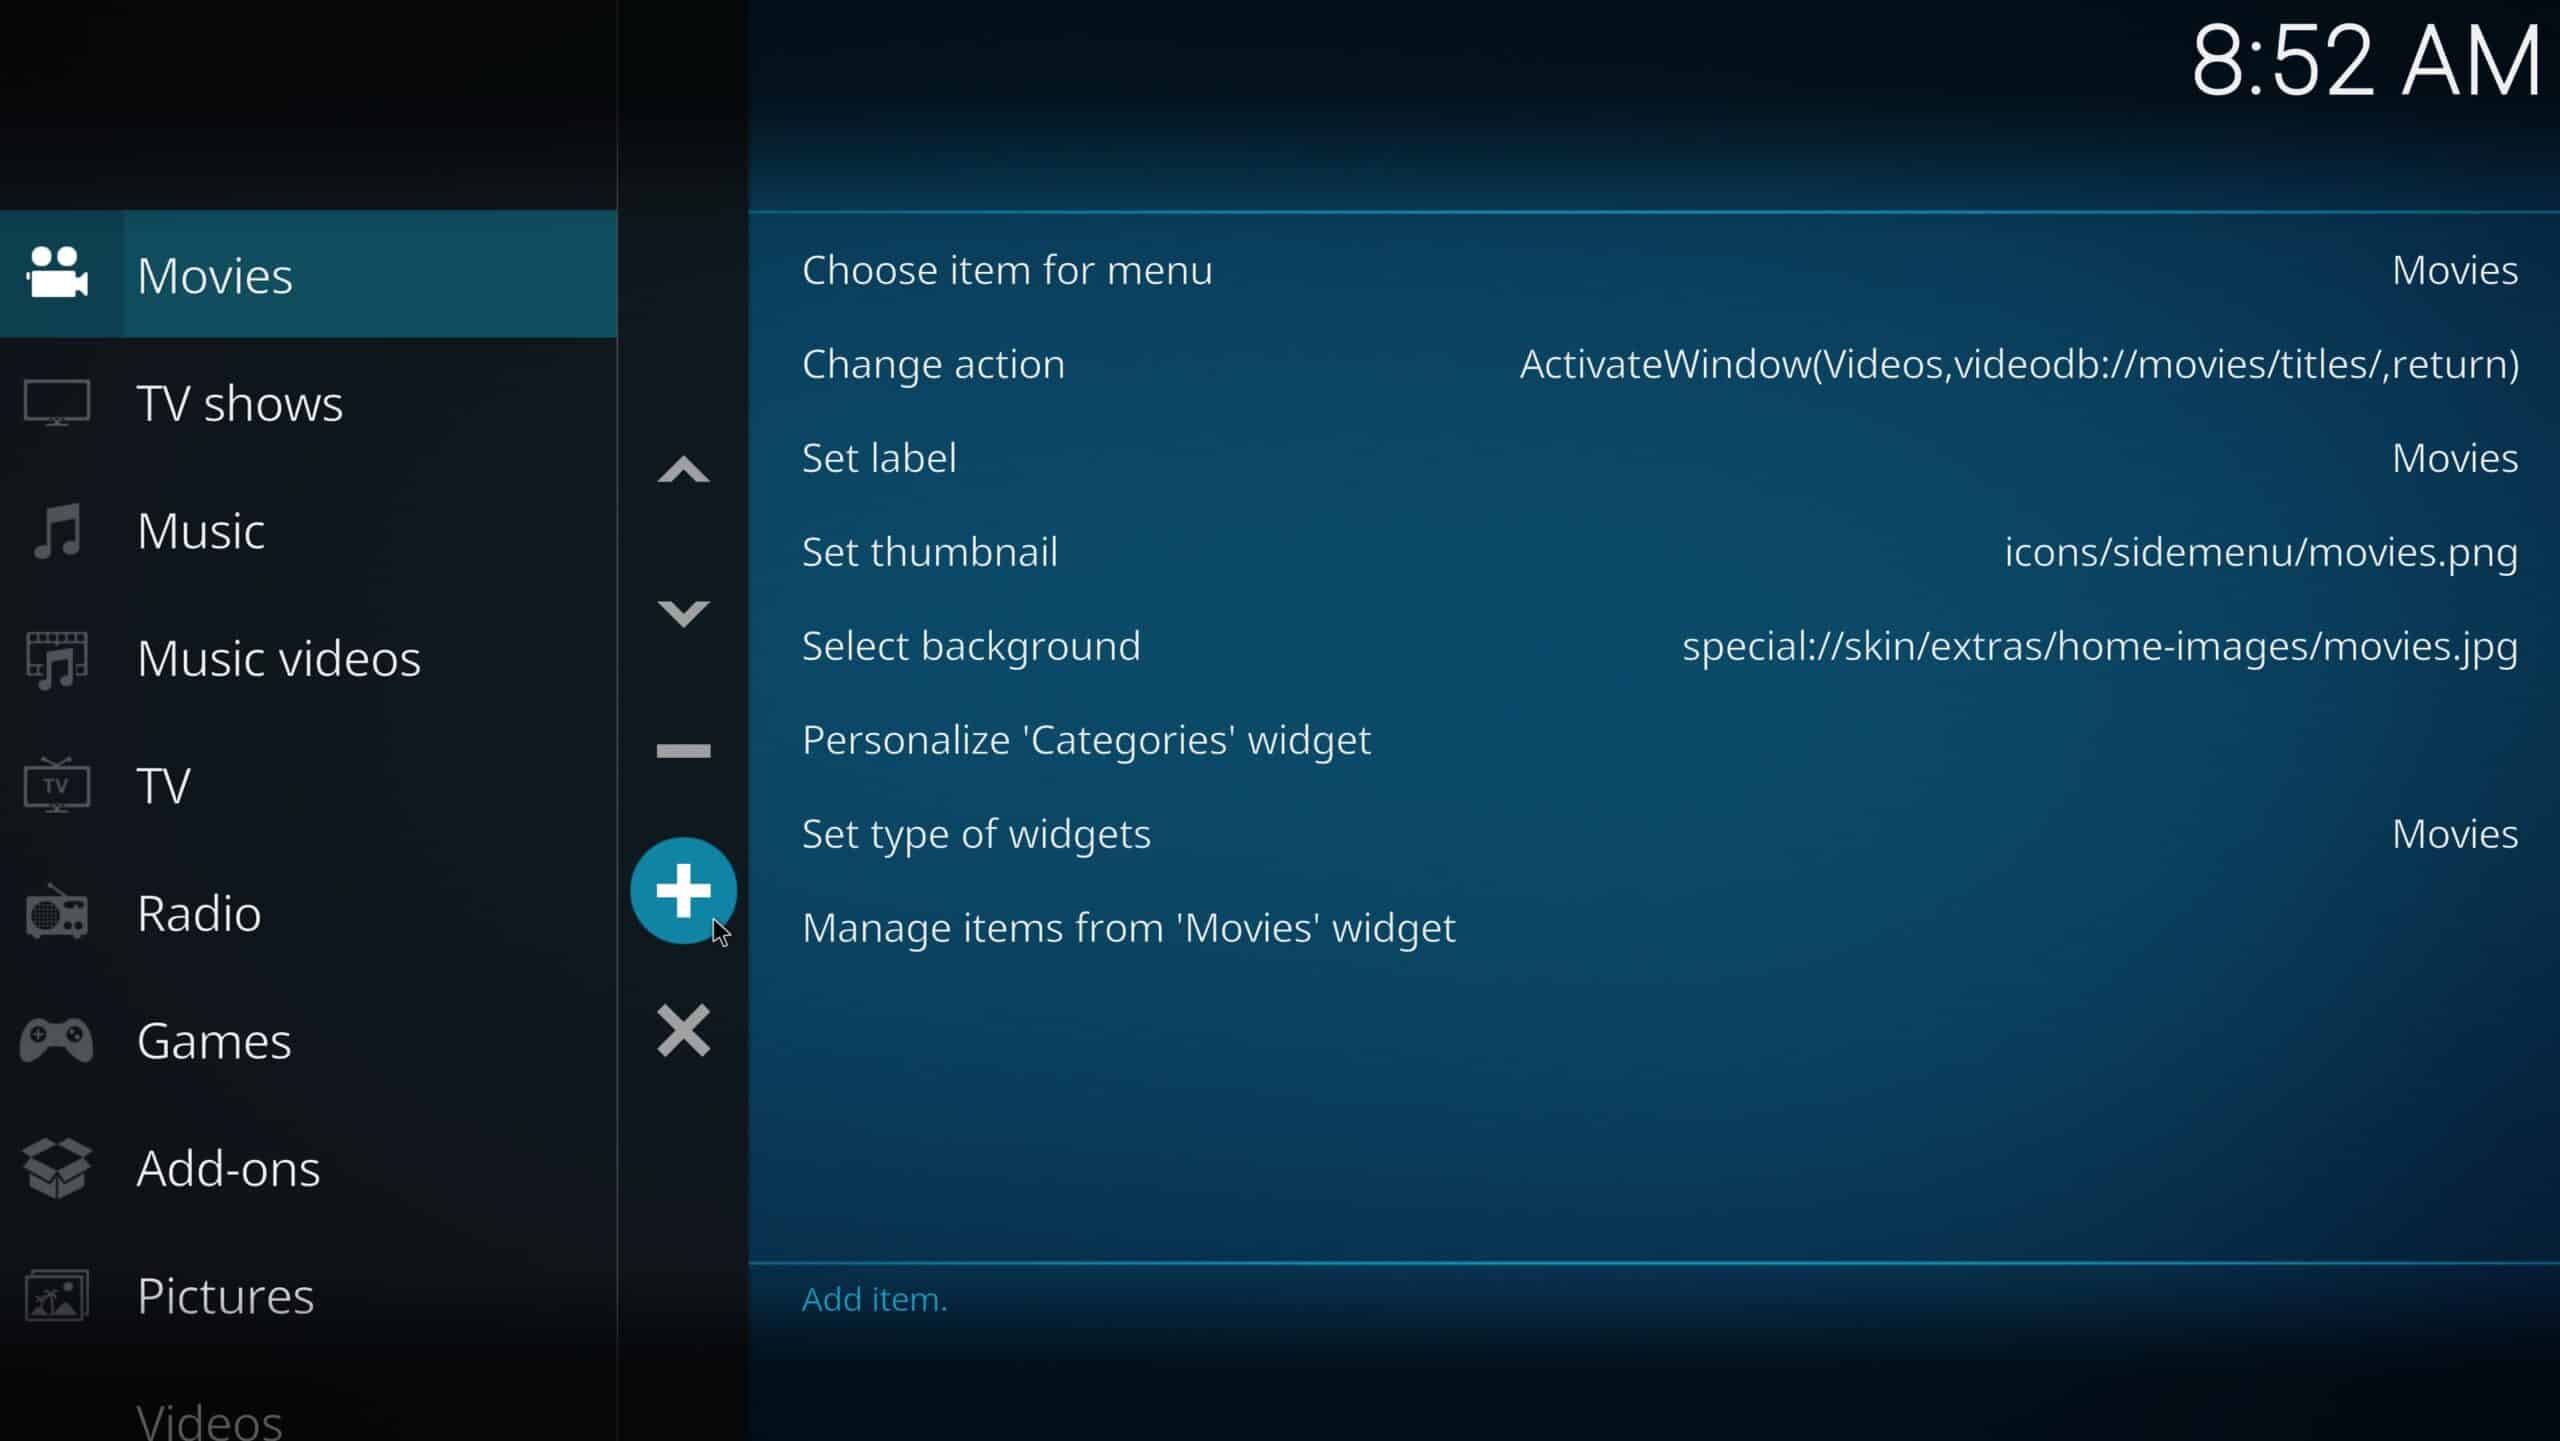
- A new menu called “<None>” will appear on the left. Click it, then choose what type of content it’ll display over on the right.
- Finally, you can change the button label or add a background to your new option if you’d like. When you’re done, return to the main screen to see whether you like the result

The possible actions you can make a menu item out of are divided into ten folders, each with multiple options. Here is a list of some of the most interesting actions we found:
- Hide episode plots to avoid spoilers
- Greyed out watched items
- Show music visualization screen when playing song
- Show actors list
- Enable gradient colors
- Show, add, and remove animated posters
Related article: The best Kodi skins
Conclusion
Using these methods will allow you to customize Kodi’s menu to fit your personal preferences. If you don’t want to add any new menu options, you can use the “basic” methods described to delete menu options or change the background art, colours, or fonts. If you want to add menu items, you can do so using the Estuary Mod v2 skin described here.
If you’ve found this tutorial to be helpful, you may also want to read our other Kodi guides, such as how to watch HD movies on Kodi.
Customizing Kodi’s look and feel: FAQs
How do I reset Kodi's skin to default?
Change Kodi’s skin and now regret the decision? No problem, you can get back to the default Estuary skin in under a minute. Here’s how:
- Click the gear icon at the top-left of Kodi’s main page
- Select Interface
- Under the Skin tab, click Skin
- Choose Estuary, then hit OK
- You’ll be asked if you want to keep this change, so click Yes
Will I lose my Kodi addons if I add a new skin?
Kodi skins only change the way the software looks and what information is displayed. As such, installing skins should never cause you to lose any addons.
That said, you might lose them if you inadvertently install a build instead of a standalone skin. That’s because builds are effectively heavily-modded Kodi installations that come with their own look and bundle of (usually piracy-focused) addons. We advise against using builds but have no issue with custom Kodi skins on their own.
I've accidentally deleted a Kodi menu item, how do I get it back?
First of all, don’t panic! Restoring hidden menu items is really straightforward. All you have to do is navigate to the skin settings menu (Gear icon > Interface > Skin > Configure skin > Main menu items) and toggle the button for whatever you disabled back on.