
Plex’s all-in-one streaming and easy setup has made it the media server of choice for a lot of users, but having all of your movies and music in one place doesn’t mean much if you can’t connect.
Private and encrypted connections are more popular than ever, but if your Plex server gets on the web through a VPN, you won’t be able to access it through the layers of security.
Here’s everything you need in order to get your Plex server streaming through your VPN without sacrificing any protection.
Getting started routing Plex through your VPN
It takes a few steps to get Plex streaming over a VPN. Here’s what you can expect:
- Give your Plex server a static IP address
- Make a note of a few Plex settings
- Enable port forwarding in your router
- Configure your VPN to allow unrestricted access to plex.tv
After that, you can seamlessly connect to your private Plex server from anywhere in the world using the app or a web browser, regardless of how secure your home internet connection is.
This whole process is called selective routing, and it’s a powerful networking tool to know. If you want to know which VPN we recommend we’ll cover this a little later in the article.
Setting up Plex server
There are a few things you’ll need to do before you get started making changes to your network. Please note that all of these steps should take place on your Plex streaming media server.
Give your Plex server a static IP address
If you haven’t done so already, make sure to give your Plex server a static IP address. This will let you setup port forwarding properly, and ensure that any changes you make to the VPN configuration or your router will continue to work after a reboot.
To set a static IP address, first open the Control Panel.
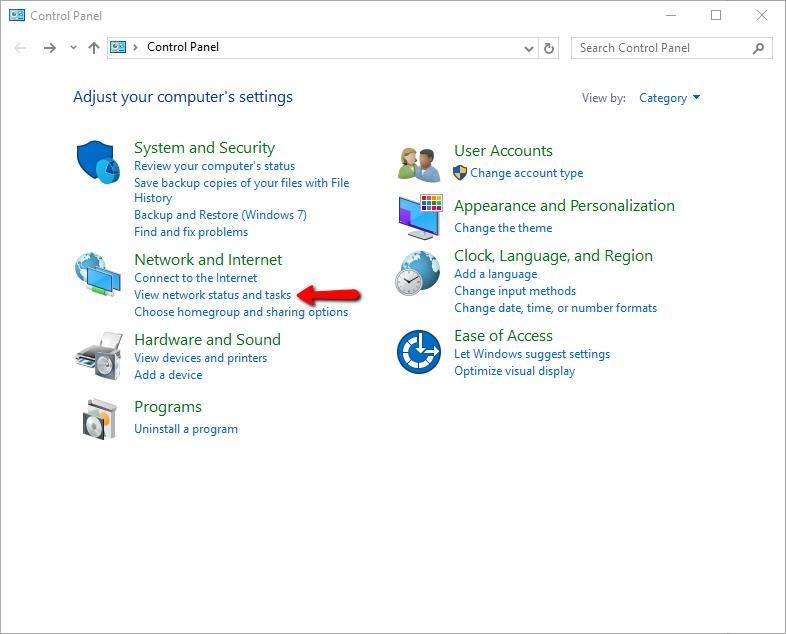
Then click View network status and tasks in the Network and Internet category.
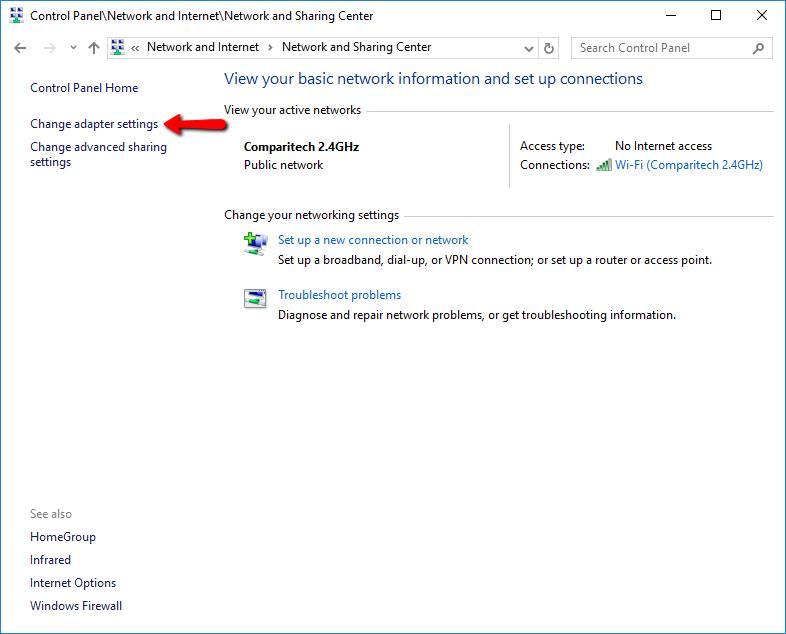
On the sidebar, click the Change adapter settings link.
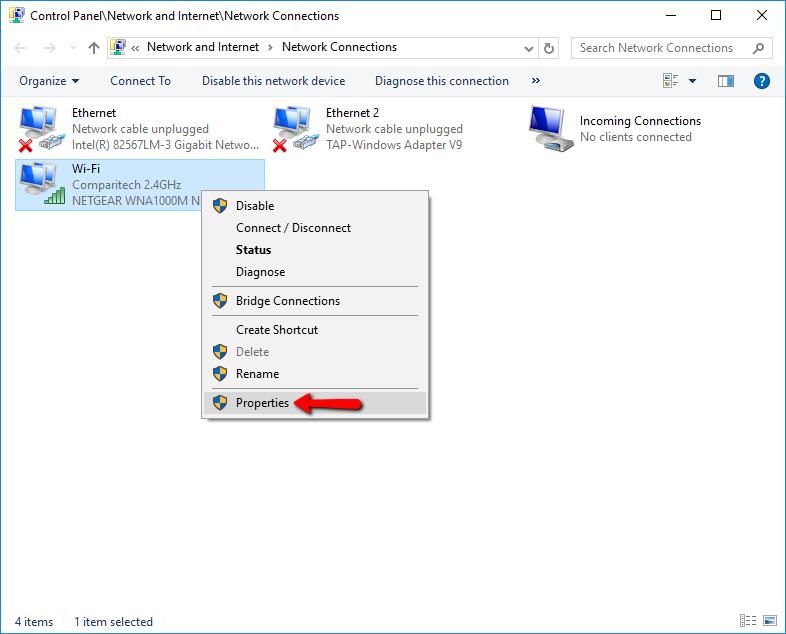
Right-click the primary network connection for your computer and click the Properties menu item.
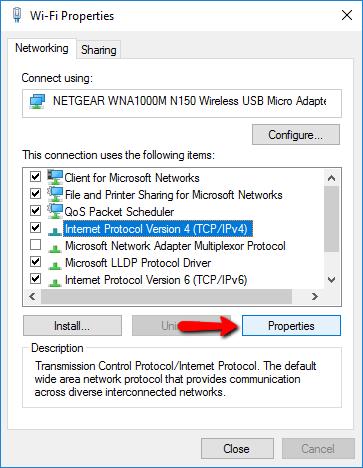
Highlight Internet Protocol Version 4 (TCP/IP 4) and click the Properties button.
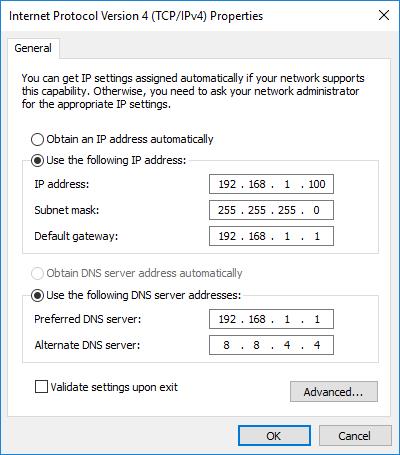
Finally, select a static IP address for your Plex server, fill out the gateway and DNS information, and click the OK button. Take note of the IP address, you’ll need it later to setup your VPN.
Note that a good static IP address will be outside of your router’s DHCP range. In this case, my router hands out addresses from 192.168.1.150 to 192.168.1.254, so choosing 192.168.1.100 is safe.
When a router assigns an IP address that’s already in use on the network, it causes a conflict, so double-check your router’s DHCP settings before you assign a static address.

When choosing static DNS servers, it’s a good idea to use a mix. In this configuration, I use my router first, 192.168.1.1, which forwards DNS lookups to my internet service provider. As a backup, I chose a free and secure Google server at 8.8.4.4 or 8.8.8.8
You’re finished setting a static IP.
Make a note of your Plex settings
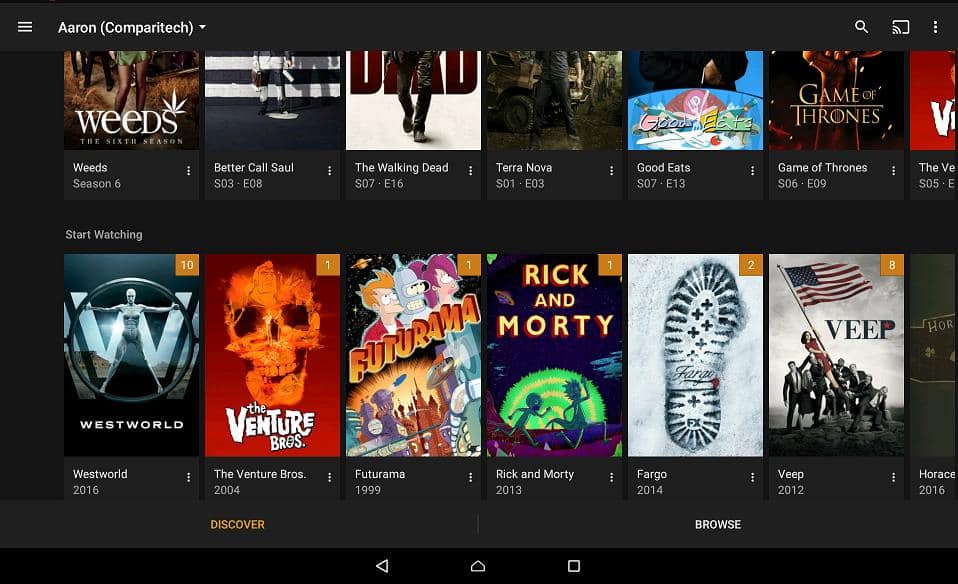
Before you configure your VPN to pass Plex traffic directly to your server, you’ll need to connect to Plex through the web interface in order to confirm your settings.
The Plex web client is accessible through this link, or by right-clicking the tray icon and selecting the Open Plex… menu item.
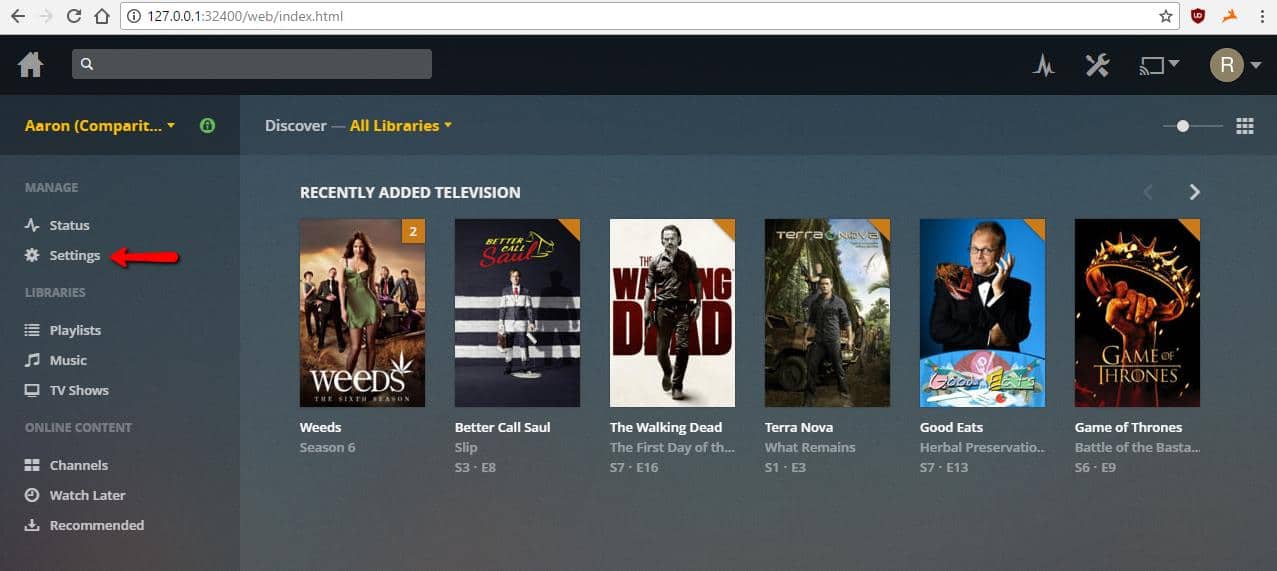
Once the console is open, click the Settings link on the left sidebar.
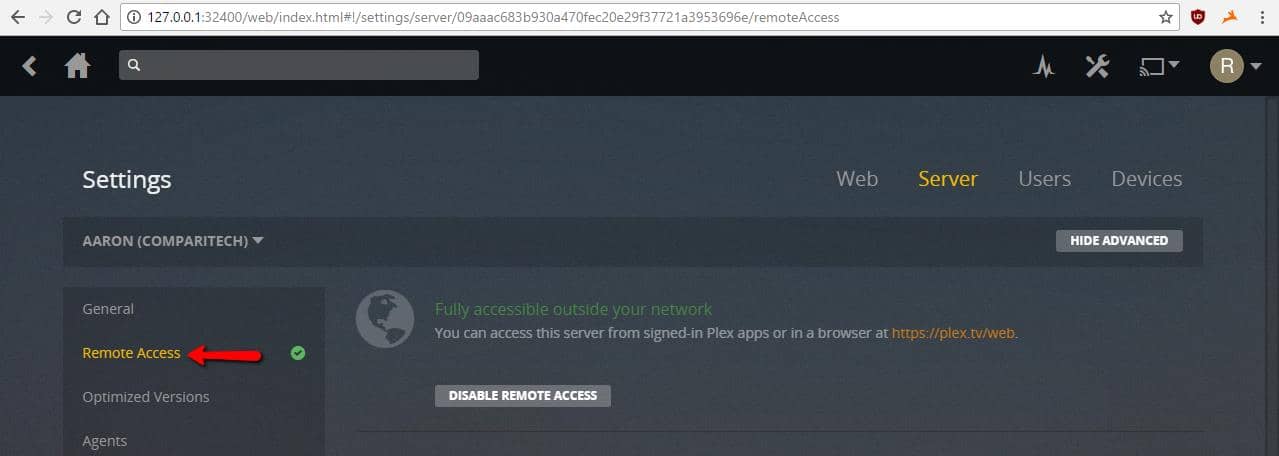
Click Remote Access on the left sidebar.
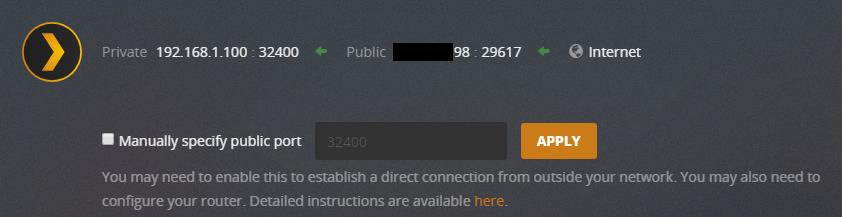
Make a note of the port that Plex uses for remote access so that you can use it, along with your static IP address, to setup your router in the next step. In most cases, this will be port 32400.
Now that your Plex server has a static IP address, OpenVPN has been installed, and you’re sure of the proper port settings, you can move on to setting up your local network.
Setting up your local network
The next step is to tell your router where to send incoming Plex connections. In this case, it will be to the static IP address of your Plex server.
Enable port forwarding in your router
First, connect to the web interface of your router. This link or this link will work for the majority of readers. You’ll need to login with the proper username and password.
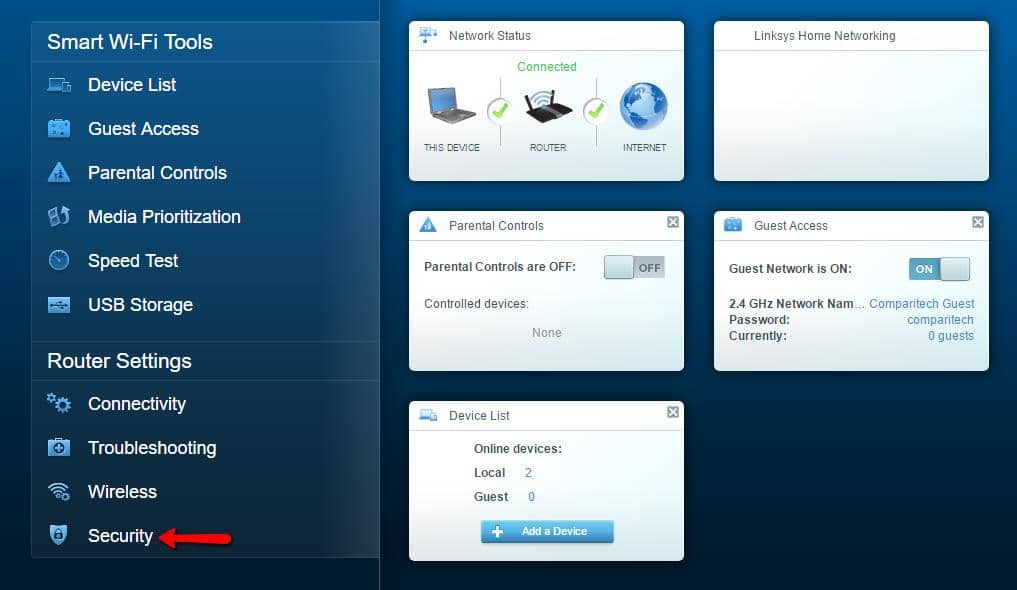
Once you have logged in to your router, you’ll need to find the settings for port forwarding. In this Linksys router, it’s found under Security on the left sidebar, then on the Apps and Gaming tab. Your router may be different.

After finding the port forwarding settings for your router, fill it out with your Plex server information.
Application Name is meaningless, and only makes it easy to identify which application we’re working with. You can set it to anything, but Plex makes sense.
External Port tells the router exactly where to look for Plex traffic on the internet. It can be set to anything aside from a handful of reserved numbers. It’s convenient to use 32401.
Internal Port tells the router exactly where to send Plex traffic on the LAN. You made a note of this port while setting up the Plex server. The default is 32400.
Protocol dictates what kind of traffic is allowed to be forwarded. Set it to ‘TCP’ or ‘Both,’ but only TCP is needed.
Device IP specifies your Plex server’s static IP address. You made a note of this number while setting up your Plex server.
The Enabled check box allows you to turn port forwarding for Plex on and off. Make sure it’s on.
When you’re finished, click the OK button and exit the web interface for your router.
Setting up your VPN
Now that the router has been set to forward the proper port, you can configure your VPN.
IPVanish is a paid VPN service with with server locations all over the world.
We strongly recommend it for anyone who needs to be able to browse the web anonymously, and do it without slowdowns or complicated config files associated with many VPNs. IPVanish is one of the few VPNs that doesn’t keep any form of log files so your activity is truly private and you won’t have to worry about your ISP or others spying on your online activity.
Reader deal: Save up to 60% on IPVanish plans
If you have config files for another VPN server, you can connect using OpenVPN. We’ll show you how to set up Plex over VPN using both IPVanish and OpenVPN.
Install and configure IPVanish
IPVanish is much easier then OpenVPN to install and configure.
If it’s already installed on your Plex server, you can skip over the installation guide and download Comparitech’s edited version of IPVanish.config right here. Just make sure to save it to the proper place, usually C:\Program Files\IPVanish\OpenVPN\
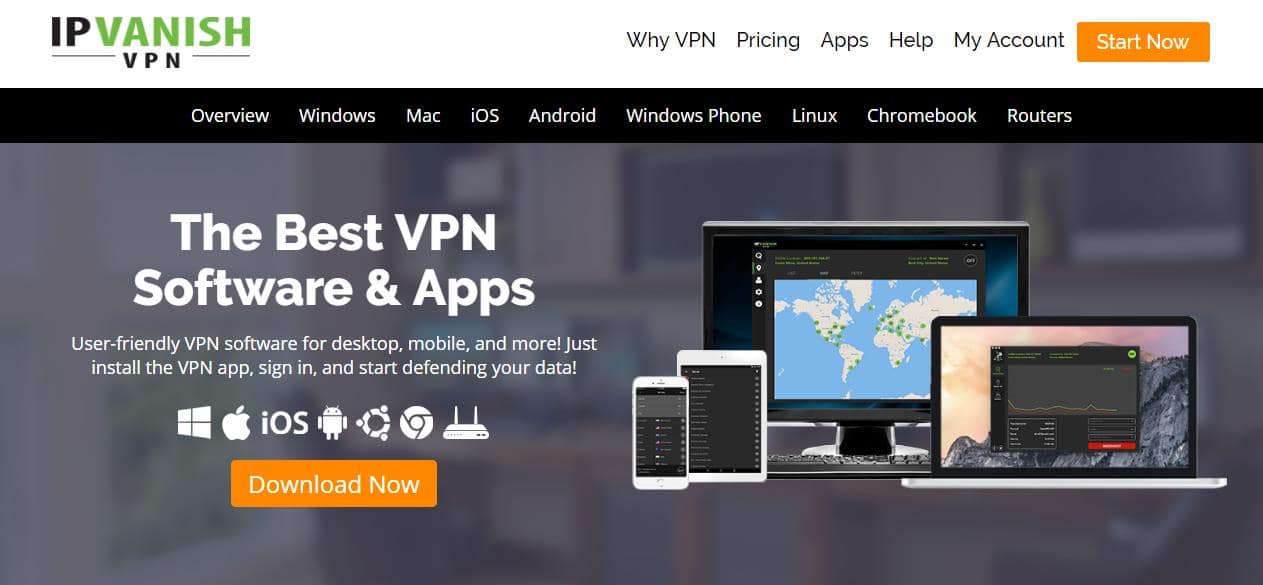
To install IPVanish, visit this link and click the Download Now button. You will have to be logged in to your account in order to download the IPVanish installation.
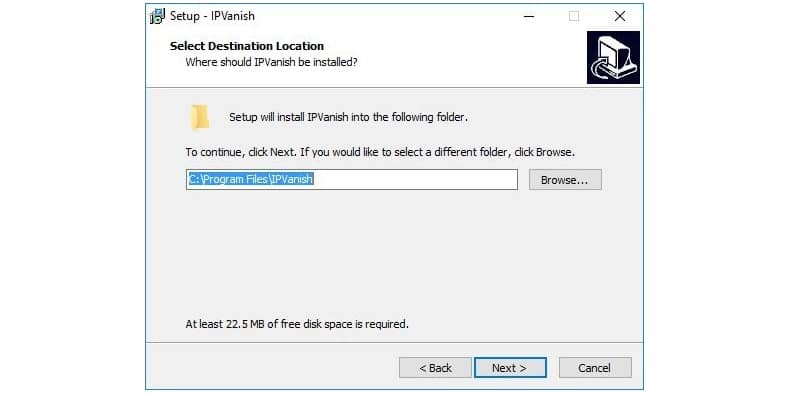
Take note of the path, because you’ll need to edit a configuration file where you choose to install IPVanish. The default path in Windows is C:\Program Files\IPVanish and that’s where you should install it.
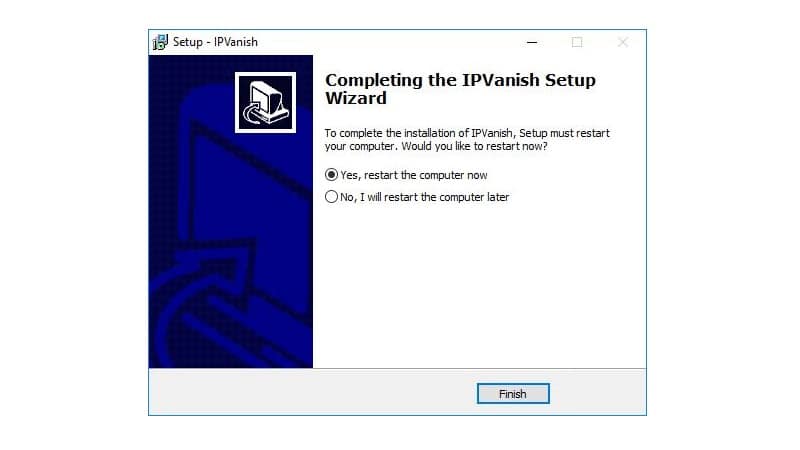
Next, your computer will need to be restarted after installing IPVanish.

After restarting your computer, open an explorer window to the path that you installed IPVanish. If you’re following along step-by-step, it will be C:\Program Files\IPVanish and you’ll need to locate the OpenVPN directory in order to edit a file.
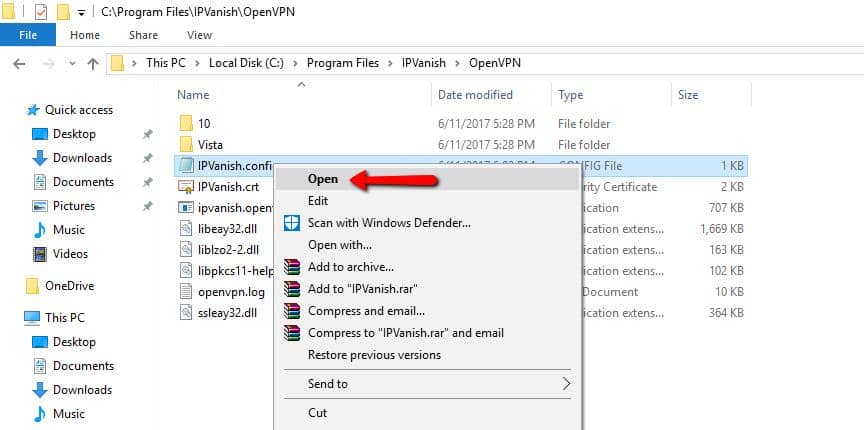
Now, open up the OpenVPN directory and right-click on IPVanish.config and then select the Open menu item.
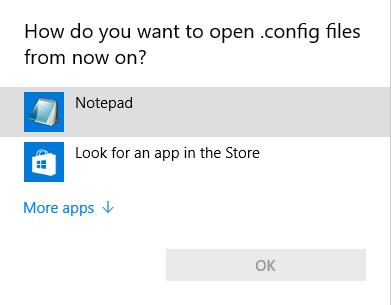
You’ll need to tell Windows to open IPVanish.config using Notepad.

Once IPVanish.config is open for editing, add route plex.tv 255.255.255.0 192.168.1.1 to the end of the config file, then save your changes.
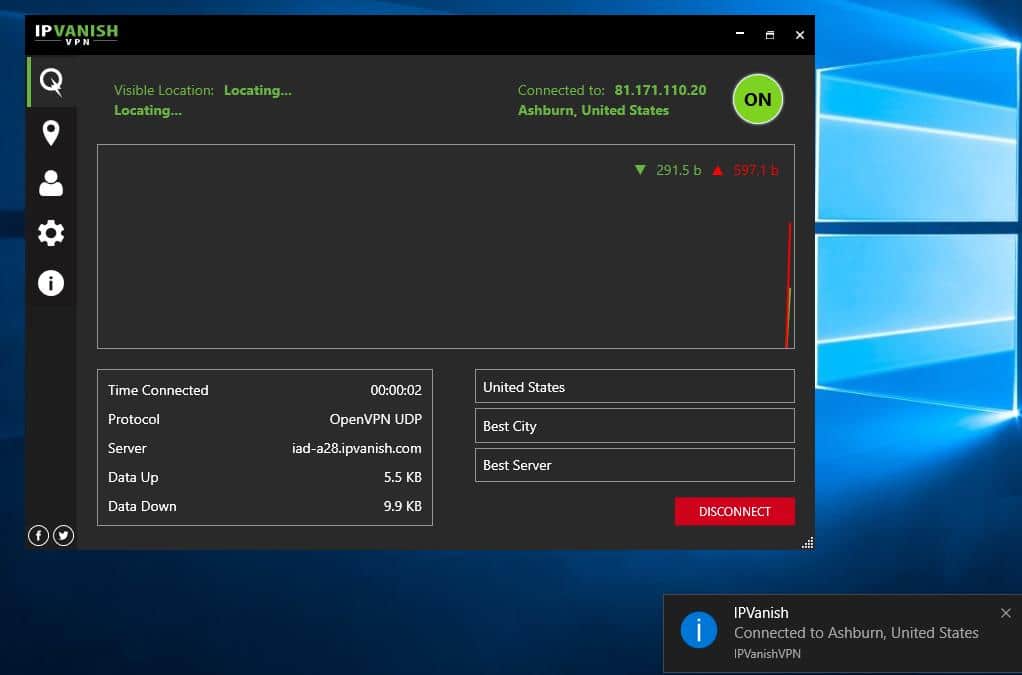
Then start IPVanish using the shortcut on your desktop, and connect to a VPN server as usual. The script that you saved in your IPVanish.config file will tell your VPN connection to ignore Plex traffic and route it as usual.
If you’re using IPVanish as your VPN provider, you can skip to the final step.
Install and configure OpenVPN
Installing OpenVPN is pretty straightforward. You’ll want to download the Windows installer here. Skip this section if you’re using IPVanish or another VPN provider’s app.

Make sure you get the OpenVPN Windows installer from the website, and not the source code.
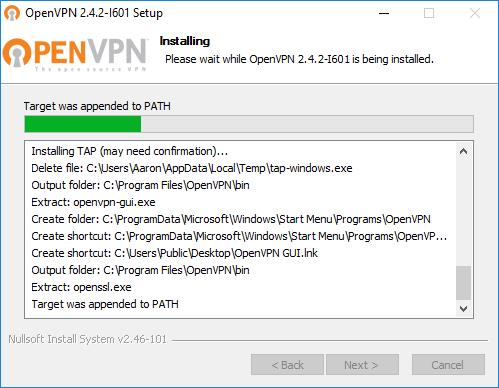
After downloading, open up the file and give it permission to run. The install wizard will start, and it’s fine to click through using the default options. When the OpenVPN installer is done, click Finish and move on to the next step.
Once OpenVPN is installed, you can set it up. The process can be complicated, so we’ve pre-made a secure configuration file to be imported and used right away. It will automatically connect you to a free OpenVPN tunnel in the United States.
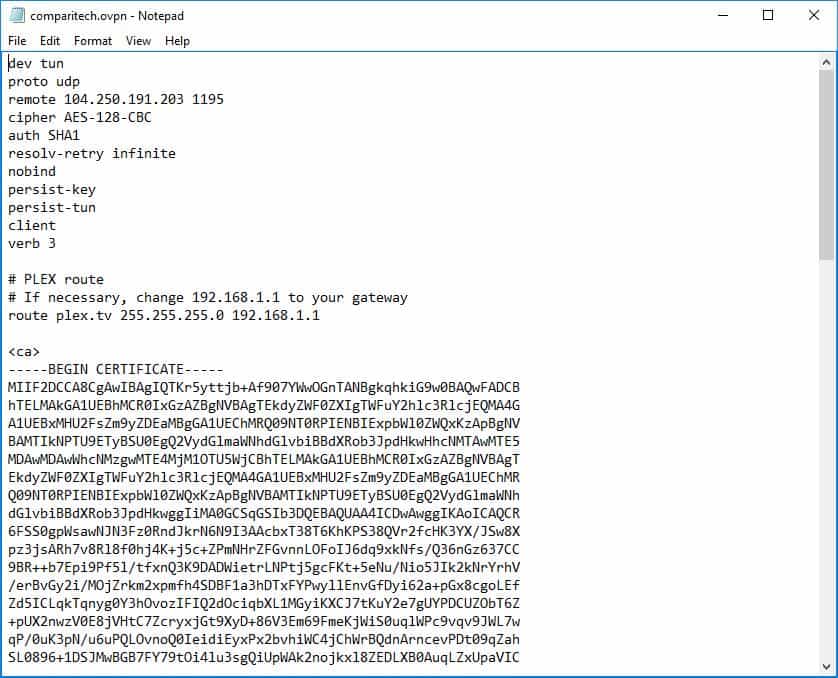
Our OpenVPN configuration file can be downloaded here. If necessary, the configuration file can be edited in Notepad. Once you’ve downloaded the configuration file, you need to make a few quick changes to OpenVPN and then you can import it.
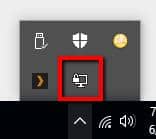
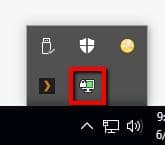
Look for the OpenVPN icon in the system tray.
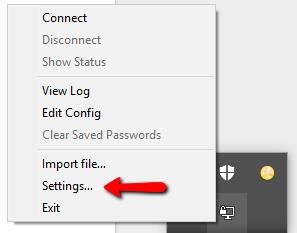
Right-click on the icon and select the Settings… menu item.

Then, click on the Advanced tab.
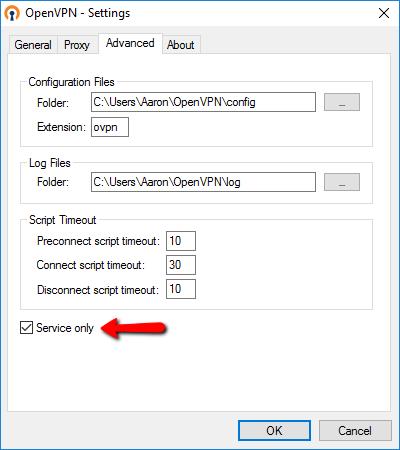
Next, check the Service only box, and click the OK button to exit.
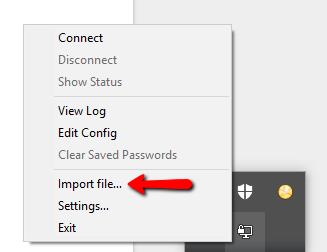
Right-click the tray icon again, but this time select the Import file… menu item.
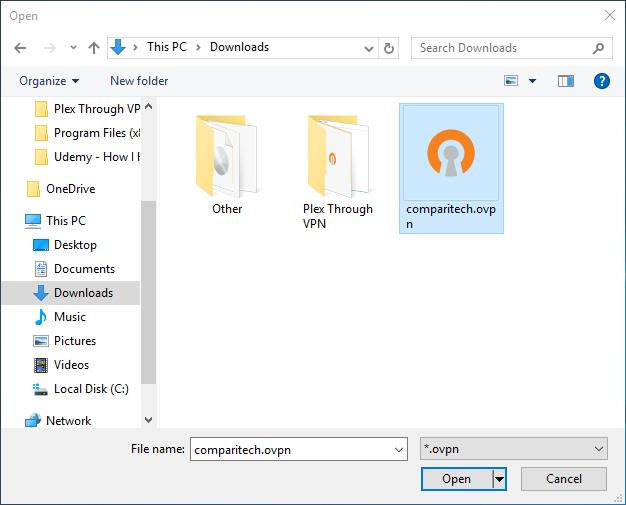
Then select the Comparitech configuration file you just downloaded, and press the Open button to import it.
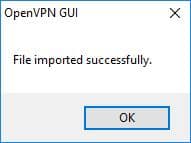
You’ll see this message when the file has been imported successfully.
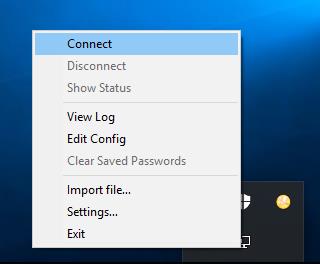
Now, right-click the OpenVPN tray icon again, and this time select the Connect menu item.

Then a message will appear and tell you that you’ve established a VPN tunnel and your public IP address has changed.
Setting up your mobile device
The best part about this method is that there’s absolutely no setup to do on your device. Your Plex server will be able to browse the rest of the internet anonymously but, when it comes to streaming media, things will work as usual.
Now each and every Plex client — whether it’s an Android tablet, an iPhone, XBox, Smart TV, or streaming stick — can now connect seamlessly to your server, even if you use a VPN.
So one of the main reasons for using a VPN to access your Plex server is so you don’t have to port forward.
I eventually got it to work without opening a port. But I am not willing to spell out in great detail what I did (seriously I had years of computer science schooling to help me out and I don’t want to explain everything in enough detail that even a non-pro could get this to work as that would take dozens of pages as everyone has a different setup and you truly need some amount understanding to cover the common gotcha). With that said, For other computer professionals here is a summary of what I did: I created a wireguard server on AWS (are use the cheapest graviton2 instance). I connected my iPhone and my home network to wireguard. I used a raspberry pi as a gateway from my home lan to the vpn. And I created a static route from my home router to my pi so that any traffic destined for the vpn goes through the pi (I needed to enable some special iptable rules on the pi too). Wireguard has crypto key routing so I didn’t need a static route from the VPN back to my home lan (but I did have to setup the “allowed ips” correctly and I needed firewall rules on the server too). Here’s the big gotcha: The first time you connect your phone to Plex make sure you’re connected to your home lan. You need to give the app permission to access local IP addresses. There’s some kind of weirdness with Apple‘s new local IP permissions and Plex trying to be smart about when it is co necked to WiFi. Also in Plex settings, you must enable remote access. Plex is going to complain that your server isn’t reachable over the Internet but you can just ignore it. After that if you’re connected to the vpn it should work over cellular.
If you are not a computer pro and you’re reading this, you could always hire a consultant to set this up for you. The Lawrence systems YouTuber does consulting but I have no idea how much he would charge. However, the set up I’m describing really is the type of set up you might see in a business. so you should expect to hire a managed IT services company to get this working (your tech savvy family member is unlikely to know what I’m talking about). I was able to get this to work with Plex running on synology though.
Nice guide but 1) I use Plex on Synology, where the VPN setup is much more basic. It works but I can’t see any route options. 2) I use Gyberghost VPN, that, again, shows not many options to choose from.
Is it possible to add this route editing some config file on the NAS?
Have we figured out a workaround for ExpressVPN yet? I like to keep Aaron busy, ya know, for job security and all. Thanks!
Do you have a guide for using ipvanish with Debian based Linux?
Any chance we could get some instruction for setting up for Nord VPN?
Great writeup, but I can’t find the OpenVPN config file.
After I install IPVanish, I navigate to the OpenVPN folder and there is no config file there.
The only config file I can find at all in the program is in the primary IPVanish directory, a file called IPNVanish.VPNClient.exe.config.
When I try and update that config file with the route plex… code, then the IPVanish app won’t start, I get some windows error message, but it’s because I’m editing the IPNVanish.VPNClient.exe.config file instead. When I remove the Plex code from the config file, the IPVanish app runs just fine.
I see that IPVanish now has a walkthrough to install OpenVPN and a config list that has config files for all their servers (over 100 of them) and instructions to manually add up to 50 config files. I’m assuming that this is what we have to do now, and manually update each config file. So much for the central config file that was the primary benefit of this VPN for Plex.
Any input or ideas?
Thanks for the great writeup, but it needs an update to be useful.
I have the same problem. No reply for 5 months is no good sign…
Yep, it’s a bad sign! The only option I can find is invoking the VPN using PowerShell and running the route command using VPN Post-Up. The PowerShell PostUp not the OpenVPN PostUp in the config file. That’s the only thing that will work w/all VPN providers and it’s perfectly doable but it’s going to take a pretty big update to detail the solution and I just don’t have the time yet.
So I’d use Google to help you make a PowerShell script, download an ovpn file from your VPN provider instead of using their app, and then use that to connect w/the appropriate PostUp route command. Then stash the script somewhere safe and make a shortcut on your desktop and use it to connect. Works every time.
My understanding is that it’s a bit easier on Mac and dead simple in Linux to do about the same. The key is you have to execute that route command after the provider pushes theirs.
You miiiight also be able to remove the push line from the ovpn file and connect using the OpenVPN tray app but chances are you’d have to do static configuration first or like, not have a gateway and DNS. Since nothing gets pushed you have to fill out the name server and gateway yourself in the adapter properties menu. You can run ipconfig when the VPN is up and note the info and fill it out as static. It’s kind of bad form to claim a dynamic IP like that but realistically you won’t mess anything up. Config file may need other edits as well, manually adding other routes, needs testing.
Good luck! I’ll pick this back up as soon as I can.
the link to the config file for openvpn doesn’t actually work. anyone have this?
Hi,
Thanks for the great guide and installation instruction. I did an attempt with the Open VPN client, but I think the link to your config is corrupt. Is it possible to check this and get the config back online?
Thanks for the support.
Kind regards,
Perry
Hey, great guide! It looks like the link for the openvpn config file may have expired, I just see “insertlink.here.com” in place of the intended hyperlink. Could you repost it? Thanks in advance.
Thanks for the guide this looks like just what I’m after to have my Plex bypass the VPN.
Been having some problems. I’m using the IPVanish, I have changed the openvpn.config file. However, as soon as I run IPVanish and connect the config file gets re-written and the route line removed. It looks like the config is re-created each time IPV creates a connection. Any Suggestions?
Hi Martyn, thanks for commenting. You’re right! It’s possible for a VPN server to push routes to the clients that overwrite their configuration, and I’ve confirmed that IPVanish is now doing this with routes. I will need to update the article.
For now, after you connect to IPVanish, please open a command prompt and type:
route add plex.tv mask 255.255.255.255 192.168.1.1
(Assuming your gateway router has a local IP of 192.168.1.1, change if necessary)
That will add the necessary static route, but is a temporary fix. I’ll update you with an automated solution.
Any update?
Thanks!!
Thanks again for your help. I tried your suggestions but could not ge the route command to work with a symbolic ip address.
I have managed to get things working to an extent by looking at my outgoing connetions when I enable the plex server and route these specifics direct to my router rather than the IPVanish.
This needs reset each connection which is a pain, do you have any other suggestions I could try?
I’ve got an update on this posting later today, hang in there.
Was there a permanant fix?
Thanks!!!
hi thanks for the guide when I try route add plex.tv mask 255.255.255.0 192.168.0.1 (my default gateway is 192.168.0.1) I get an error saying The route addition failed: The parameter is incorrect. I have double checked all my info and subnet mask and default gateway are definitely the above any idea or a permanent solution to this?
Sorry John, that’s my fault. I checked the command in Linux but ‘route’ in Windows won’t accept hostnames. I’ve got a permanent fix on this posting later today, hang in there.
Hey Aaron, I havent seen a fix for this updated yet. ANy update on that yet? Thanks!
Hi Aaron,
Did you find a permanent fix?
Thanks again. I have tried your suggestion but the CMD Route level command can’t deal with the symbolic names and as I think you have said yourself Plex uses a variable IP.
Any thoughts, I have basic networking but this is well above my level!
Thanks
Martyn
Worked a treat, but got confused initially.
Just had to reboot everything including Plex clients for it all to click together.
Thanks for the artical, been looking for a solution for this since setting up my PMS.
Do you know to get this to work with ExressVPN ?
Thanks
Mark
Waiting on this as well..ExpressVPN is proving troublesome
Thank you for this article.
Is it possible to route plex around NordVPN? And how would I do that? I asked them and they told me that its not possible. But after reading this guide, im thinking there might be a way.
Hi Jakob, thanks for reading! I have a workaround for you. There are two steps, and it will take about 10 minutes.
Plex.tv uses a thing called round robin DNS in order to split the load across multiple servers. In practice that means every time you go to plex.tv you’ll be directed to a different IP address. For our purposes that’s no good, since we need to know exactly which IP address is allowed to bypass the VPN. In order to force plex.tv to always resolve to the same IP, you should edit C:\Windows\System32\Drivers\etc\hosts with notepad. Add this line to the end of your hosts file:
52.51.75.18 plex.tv
Save your changes and restart your computer to make sure the changes have taken effect. When you’re back at your desktop, open the command prompt and check to make sure that the first step worked by typing ‘ping plex.tv’ You should see the IP address above. Keep the command prompt open for the next step.
In order to let plex.tv through the VPN, you’ll need to add a static route. You can do that with this console command:
route -p ADD 52.51.75.18 MASK 255.255.255.255 gateway_ip
where gateway_ip is replaced with your cable modem or router’s IP address. That’s usually 192.168.1.1 but your network may be different. You can check by typing ‘ipconfig’ on the console and looking for the default gateway.
Once you’ve added the route successfully, connect to NordVPN and try to access your Plex server. If you have problems, let me know.
Thanks,
Aaron
Hi Aaron,
Are you still supporting this thread? I had a question on the 2-step process above.
On the first step, ping is timing out. Should this be happening?
Microsoft Windows [Version 6.1.7601]
Copyright (c) 2009 Microsoft Corporation. All rights reserved.
C:\Users\media>ping plex.tv
Pinging plex.tv [52.51.75.18] with 32 bytes of data:
Request timed out.
Request timed out.
Request timed out.
Request timed out.
Ping statistics for 52.51.75.18:
Packets: Sent = 4, Received = 0, Lost = 4 (100% loss),
On step 2, do you add the (route -p ADD 52.51.75.18 MASK 255.255.255.255 gateway_ip) line to the IPVanish VPN>OpenVPN>openvpn.config file? Or do I have to manually do this from the command line every time I launch IPVanish?
HI Aaron,
Thank yo so much for this article, using this article i was able to enable remote access on my plex server and it is working fine.
I have NordVpn, and every time i connect to a vpn, remote access is not working.
I followed your 2 steps here making plex.tv static ip and then adding static route, but it did not help.
Do you have any suggestions ?
Please let me know.
Thanks,
Sandy
Hi Aaron,
Thanks for all the great help on this. I added the 52.51.75.18 plex.tv line to my host file. I rebooted and went to the cmd prompt and tried to ping it, but it timed out each time.
Thanks,
Mike
It says I do not have permission to add this to the file? Is there a way that i can change this?
Hi Davis, make sure OpenVPN isn’t running when you edit the config files.
The tutorial went great, however When I go to my OpenVPN folder inside IPVanish, there is no ipvanish.config file. The only config file in there is openvpn.config and that does not allow you to add anything to it. “You do not have permission to open thsi file. See the owner of the file or an administrator to obtain permission.
Hi James, you’ll need to make sure OpenVPN isn’t running when you edit the config file. The name of the config file will change depending on the name of the connection, so that’s expected.
Thanks for reading, let me know if you have any issues editing the file.
I do not see any type of config file in the folder.
Hey Aaron,
This is exactly what I’m looking for, thanks. Very clear.
I am having issues setting the static IP, though, in that it’s knocking me off the internet as soon as I hit OK. Any ideas?
Cheers
Nick
Hi Nick, thanks for reading. My guess would be that your static IP address is being set incorrectly. You’ll want to double-check that your default gateway is set properly.
In general, take a look at your network properties when your computer is connected and working. You’ll need to match those settings exactly, changing only the IP address.
I know that could be a bit clearer. If you’re still having problems, you might try linking a screenshot of your network settings and I’ll take a look. Probably just have the wrong number typed in somewhere.
instead of adding plex.tv to the config file could i add the static IP for my firestick?
Hi M,
No, I’m afraid that won’t work. The reason we add an exception to plex.tv is so that your Plex server can talk directly with Plex’s website. That lets a Plex client, like your firestick, find your home Plex server.
Aaron,
A great article – Thanks. One variance for my setup is that I have IPVanish operating through my Synology Router (So in effect all traffic in and out of the house is covered for all devices) and my Plex operates through a Synology NAS which has a static IP address.
How would these instructions differ to get the VPN to accept the Plex settings? (With the VPN off I can access Plex remotely – with the VPN on – no luck)
Thanks in advance
Hi Tim, thanks for reading. Sorry it’s taken me so long to get back with you. I don’t have access to a Synology box right now, so I’ll install DSM on a virtual machine and see if I can give you and other Synology users some tips for getting things working.
Thanks Aaron for this. I recently purchased IP Vanish and currently us Plex. I have had the darnest time trying to connect remotely. I have gotten everything in all the steps done up until the IPvanish.config file. The link doesnt seem to work for me. Can you help? Otherwise, I have everything else changed over above that. (Note: I still dont have remote access even without the IPVanish VPN up and running, so I am still concerned about this. So I guess I need the IPVanish config file and perhaps additional help understanding why my remote access in Plex still isnt working. Thank you in advance,
great article
can you update the link to the ipconfig file for IPVanish
thanks,
great article
the ipconfig file that you posted a link too is no longer available. can you update that link?
Hi Aaron,
Thanks for your article, great stuff. Just one simple question if I start using IPVanish with the workaround in the config file as described. Is traffic going to plex.tv still secured and connected over the VPN with the exception in the config file?
Thanks,
John
Hi John, thanks for reading. The answer to your question is yes and no. The traffic to plex.tv is secure and encrypted because it goes out over HTTPS, but it is not going through your VPN. The rule that is added to the config file tells IPVanish to allow your computer to connect directly to plex.tv.
In order to protect your privacy, Plex issues an SSL certificate to every account and turns on encryption by default. You can read more about how they secure your streams here: https://www.plex.tv/blog/its-not-easy-being-green-secure-communication-arrives/
There are a few reasons why I recommend doing things this way, but the biggest one is speed. Streaming videos takes a lot of bandwidth, and encrypting big streams takes tons of processing power. Encrypting a 10Mbps 1080p stream with standard 2048-bit RSA encryption is going to be difficult unless you have an expensive processor. It’s also redundant, since we’re already using SSL over HTTPS.
If you absolutely want a double layer of security and you don’t have a pretty fast 6th gen i7 processor, I’d recommend lowering your remote stream bitrate to 4Mbps 720p in Plex’s Remote Access settings.
I appreciate the question. I feel like I could have probably made this more clear in the guide and I’ll probably end up revising it.
Thanks for the reply, very clear now. Good one, keep it up!
Thanks for posting such a great article!
Without getting into details or preferred VPN’s. I currently use ExpressVPN, but I’m not sure about the config file. There is an option in the app to allow/deny some or all apps. Is this VPN sufficient for my Plex server or would you recommend changing to something else?
Hi! Thanks for reading, I appreciate it.
You absolutely should allow the Plex app, but it won’t solve the entire problem. You’ll also need to manually add a route for plex.tv in your config file. You’ll probably need to search their site for info on how to edit ExpressVPN config files.
I haven’t heard anything bad about ExpressVPN, but I think it’s too hard to work with sometimes. We like IPVanish better. It uses a single, master IPVanish.config file, so you can add a static route like this in one place and be done with it. I’m not super familiar with ExpressVPN, but I think you’ll need to add the static route to plex.tv in every VPN server’s config file.
Let me know if I can help with anything else.
I thought I’d give IPVanish a try, and I really like the service (plus it may save me a few bucks each month), however, when I try to edit the config file I get access denied. I’m an administrator on this computer. All efforts to change permissions have failed – any ideas?
Glad you gave it a shot! I’d make sure that IPVanish isn’t running when you edit the main config file. If that fixes it, I should make it clearer in the guide.
I had the same issue, and simply opening notepad with ‘run as administrator’ then opening the config file worked for me.
Hey Aaron, would it be possible for you to explain this process for purevpn?
Hi Sean, thanks for reading and commenting. I’d really rather not get into stuff for PureVPN, and I wish you’d stop using it. They advertise themselves as not keeping any logs on their users, but they apparently do and are willing to turn them over https://torrentfreak.com/purevpn-logs-helped-fbi-net-alleged-cyberstalker-171009/
I don’t want to turn this into a sales pitch for IPVanish, but we recommend it for a reason. At the very least I hope you’ll think about finding a better VPN provider.