

To get started with Usenet, you’ll require three things:
- A Usenet provider subscription
- A newsreader app
- An indexer/search engine
In some cases, the provider will supply subscribers with all three components in a single bundle. Other times, you will need to find them yourself. This tutorial will guide you through a basic setup and the process of downloading a file from Usenet on a desktop PC.
Let’s start with the provider.
The big Usenet providers
UsenetServer, Newshosting, EasyNews, Astraweb, and Giganews are among the largest Usenet providers.
Finding the Usenet provider that best suits you depends on a number of variables including retention period, transfer limits, server connections, security, price, and location. You can read more about each of these in our Usenet overview page. After you know what to look for, it’s best to choose from one of the big guys to get started. They include UsenetServer, Newshosting, EasyNews, and Giganews. Click on any of those links to go to the respective full review of each service.
For demonstration purposes, we’re going to sign up with Newshosting. New users receive a free two-week trial and up to 30GB of downloads. After signing up, you can either download the Newshosting Newsgroup Reader or opt for a third-party option. If you just want something quick and easy to set up, by all means go for Newshosting’s Reader. It’s a native desktop app that wraps searching and downloading all into one tidy manager.

All you need to do from here is type in what you’re looking for in the search bar to return a list of results similar to what you would find on a torrent browser like ThePirateBay or KickassTorrents. The flag indicates the language, and you can filter by file type. Double clicking a file will give you the option of either downloading it or seeing more information. More information will often allow you to preview the file in some form. Once downloading starts, the file ends up in the Newshosting downloads folder created on your computer. You don’t even need to bother with NZB files. Easy peasy.
Choosing an indexer
If you’re not satisfied with Newshosting’s app or you go with a different provider, you’ll need to find an indexer and newsreader app. An indexer is basically a search engine for files in the .NZB format. NZB files are sort of like torrent files for Usenet that tell your newsreader app where to find all the parts of a file that are scattered around different servers.

The best free, no registration-required indexer is probably Binsearch. By default, it only searches the 400 most popular newsgroups. It’s not particularly well organized, with no sorting or filtering options. Still, it works for a quick and dirty search. Check the post you want to download and click “create NZB” to download the NZB file to your computer. You can then add that NZB file to your newsreader, which we’ll talk about in the next step.

While Binsearch is palatable, better indexers are available. OZnzb, NZB.is, and NZBGeek all allow open registration, for instance, and are free to use. Many others are premium or invitation only. These tend to be much easier to navigate, sort, and browse than the very basic Binsearch. Their function is the same however: choose from the search results to download an NZB file.
Using a newsreader
You’ve signed up with a Usenet provider and you have the NZB file that you found and downloaded from an Indexer. Now you need to use the NZB file to download the actual media. For that, you’ll need a newsreader. Think of a newsreader as a download manager like Azureus Vuze or uTorrent. SABnzbd is widely regarded as the best free Usenet newsreader app around. It’s lightweight, simple, and runs in your browser.
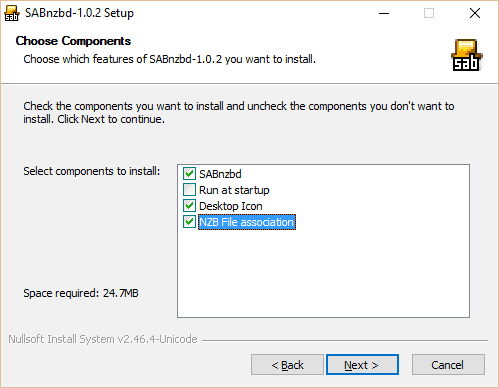
Download and install SABnzbd, making sure to check the box to associate it with NZB files. This will initiate a lightweight server on your computer.
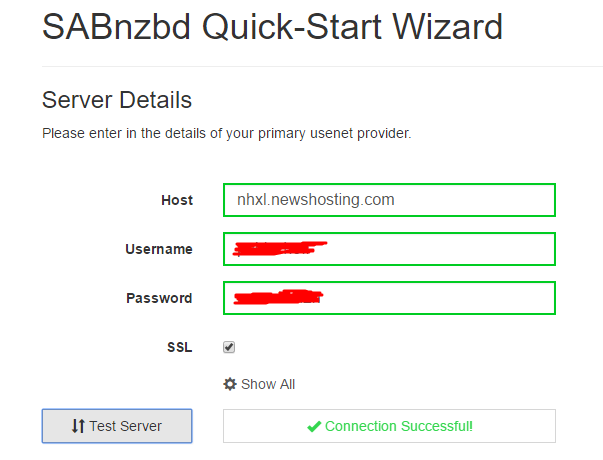
Upon first running the program, you’ll automatically be guided through a quick setup. Input the hosting domain provided by your Usenet provider, in this case nhxl.newshosting.com, along with your login details for that provider. We recommend you check the box for SSL, as this will encrypt transfers and keep them private from your ISP and other snoops. Test the server to make sure your info was entered correctly, and hit Next.
That should be all you need to get started, but you can enter more information as specified by your Usenet provider by clicking the cog icon in the top right and tapping the Servers tab. Hit “Show details” to add more servers, adjust ports, change security settings, etc. You can also specify the downloads folder under Folders.
Under General, note the SABnzbd port is 8080. This is fine in most cases and is not the port over which your transfers take place. If you’ve selected SSL as we recommended, the transfer port should be automatically set to 563, 119, or 443 under Servers. If you prefer the local SABnzbd server to run on an HTTPS port, you can say so in the General settings.
To get back to the SABnzbd app in the future, just go to 127.0.0.1/8080 while SABnzbd is running or simply use the desktop shortcut provided.

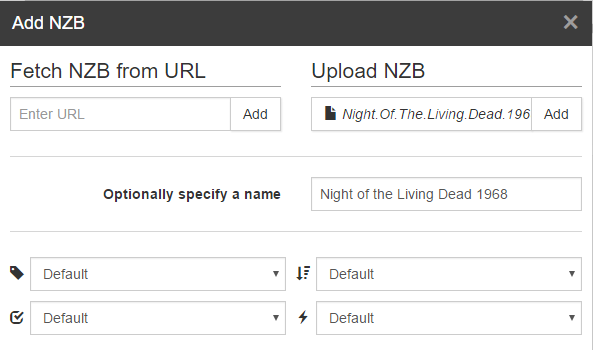
Once the initial setup is complete, you’ll be greeted with a blank queue. Click “Add NZB” and click Browse to navigate to the NZB you downloaded from the Indexer. You can optionally add a name and set the tag, priority, post processing, and scripts. Hit Add to initiate the download.
When it’s finished, just click the file in SABnzbd to open it!
SABConnect
Chrome users can avail their browsers of SABConnect, an extension that speeds up the process of downloading NZB files.
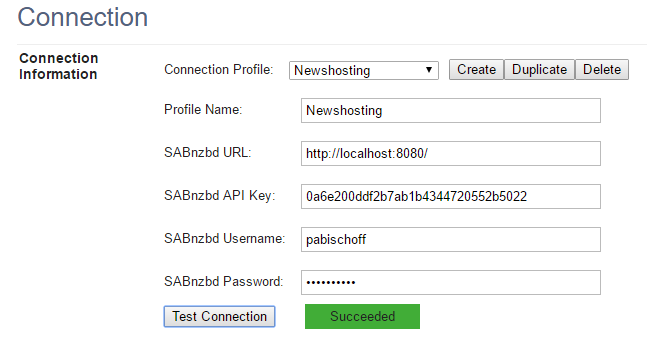
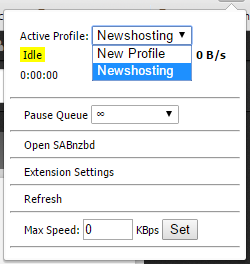
After installing, click the icon that appears at the top right of your browser and go to Extension Settings. Change the profile name to whatever you like. The URL should already be set to 127.0.0.1:8080. For the API key, go back to SABnzbd and click on the cog to open the settings. Click the General tab and scroll down to find the API key. Copy and paste it into the SABConnect settings. The username and password are the same credentials you use to log into your Usenet provider. Hit Test Connection to make sure everything is shipshape, then hit Create.
Now click on the icon again and select your new profile from the dropdown menu.
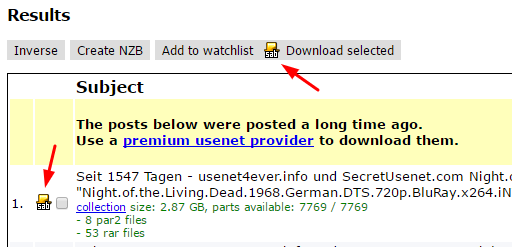
From this point on, you’ll see the SABnzbd icon in indexer search results. Clicking on it will automatically add the NZB file to your download queue without having to download it separately.
SABConnect also lets you monitor and manage downloads. This same process can be used to add more functionality to SABnzbd via extensions and other tools.
SABnzbd has many more features and functions that we didn’t touch on here. A download scheduler, notifications, sorting, and compatibility with other Usenet-related apps are all at your disposal.
Use a VPN
Even if you set up transfers over SSL and your SABnzbd server on HTTPS, it’s still a good idea to use a VPN when downloading from Usenet. Newshosting accounts come with a VPN included, but many others do not. A VPN not only encrypts all your internet traffic, it also hides your IP address and true location, adding a significant layer of anonymity and security to your activity. Check out all our VPN reviews here.