
Apple TV is a digital media player that, since the introduction of the second generation of the device, runs a special version of Apple’s iOS operating system. You can view digital content from the iTunes store or through apps such as Netflix and Hulu. Providers like Disney XD and ESPN also allow for the viewing of live content on the device.
Apple TV is capable of running Kodi with a little work. Stay tuned for a tutorial on how to carry this out. There is not currently a solution for Apple TV 3 so this article focuses on Apple TV 2 and 4. We’ll continue to look for a working solution to Apple TV 3 so you may want to bookmark this page and check back at a later date.
Kodi is a free open source media player application which was developed by the XBMC Foundation. It is available for a wide range of devices such as Windows and Mac computers, Android devices, jailbroken iOS devices, Raspberry Pis, and many more. You can conveniently control Kodi with a remote control or gamepad to stream both audio and video from a variety of sources.
Before we begin, get a VPN
When using Kodi, we recommend connecting to a VPN. VPNs encrypt your internet traffic and route it through a server in a location of your choice. One of the biggest concerns many Kodi users may have is internet speed throttling. ISPs will often discriminate against your data usage, putting caps and throttling speed when users eat up too much bandwidth on streaming or torrenting.
Some streaming and torrenting through Kodi may get flagged targeted by your ISP as well. While there are many legitimate streaming and torrenting methods available through Kodi, some users have found they’ve unknowingly torrented or streamed content that was pirated. ISPs may send users anti-piracy notifications in those instances.
Additionally, security risks can arise when using Kodi. Some add-ons can get hijacked, hacked, and re-uploaded as if they were legitimate. Hackers can then use the hijacked add-ons to perform man-in-the-middle attacks on your computer system, allowing them to spy on your activity. A VPN can help secure your system and help avoid some privacy-related issues with Kodi add-ons.
Please note that VPNs also allow for access to geo-restricted content.
In order to prevent any issues with your ISP, bypass geographic content locking, and protect against some Kodi add-on privacy issues, a reputable VPN such as IPVanish is recommended when using Kodi. IPVanish provides the necessary sturdy connection, plentiful capacity and a high level of privacy protection, for Kodi use.
Apple TV does not have built-in support for VPNs, so you have a few options. You can install the VPN on an iPhone or iPad and stream content through it using Airplay. You can configure the VPN on a compatible wifi router. Or you can install the VPN on a laptop and set up a virtual router on it to create a secure wifi hotspot. Check out our tutorials for how to set up virtual routers on Windows and MacOS.
We can confirm that IPVanish works with all Kodi Addons we’ve tested and is very popular within the Kodi community. You can find our full list here of recommended Kodi VPN services.
Deal alert: IPVanish is offering Comparitech’s readers up to 60% off here.
Compatible Versions
We have only been able to find reliable methods of installing Kodi, without making significant modifications to the device, for two versions of the Apple TV. These are:
- The second generation Apple TV
- The fourth generation Apple TV
Sadly, we haven’t been able to find a viable solution for the third generation Apple TV. We will be sure to update this article if we do find a solution.
Comparitech does not condone or encourage any violation of copyright restrictions, including illegal streaming through Kodi. Kodi can be used for many excellent, legal online streaming purposes. Please consider the law, victims, and risks of piracy before downloading or streaming copyrighted material without permission.
Kodi v17.3 “Krypton” is the latest stable version of Kodi available for download
Installation Instructions
Second Generation Apple TV
Please note that your Second Generation Apple TV will need to be jailbroken in order for the process outlined below to work.
Unfortunately, the later versions of Kodi are incompatible with the second generation Apple TV. However, Kodi Helix 14.2 will work on this device. Before you begin, make sure that you have a Mac computer handy with an open Terminal window. You should also have both the Apple TV and your computer connected to the same network.
In order to complete the installation do the following:
- In terminal enter “ssh root@YOUR.ATV2.IP.ADDRESS” making sure to replace YOUR.ATV2.IP.ADDRESS with the IP address of the Apple TV. There will be a prompt asking for a password which is “alpine” by default.
- You will now need to enter the following commands one at a time:
- apt-get install wget
- wget -0- http://apt.awkwardtv.org/awkwardtv.pub | apt-key add – echo “deb http://apt.awkwardtv.org/ stable main”> /etc/apt/sources.list.d/awkwardtv.list
- echo “deb http://mirrors.kodi.tv/apt/atv2 ./” > /etc/apt/sources.list.d/xbmc.list
- apt-get update
- apt-get install org.xbmc.kodi-atv2
- Reboot
After completing step 6 you should be able to use Kodi from the home screen of your second generation Apple TV.
Fourth Generation Apple TV
Kodi can be installed on the fourth generation Apple TV using either Mac or Windows based computers.
Mac Only Option
You will need the following for the install using a Mac:
- The latest Kodi .deb file for tvOS(direct download via FTP)
- An Apple developer account(This can be obtained for free)
- A USB-C to USB-A cable
After you have gathered those tools, you are now ready to begin. Follow these steps to complete the install:
- First, you need to connect your Apple TV to your Mac computer with the USB-C to USB-A cable.
- Next, open Xcode and from the software’s main menu, select Create a new Xcode project.
- Under the tvOS section, choose Application, followed by Single View Application and then Next.
- You will now need to enter the relevant information in the product name, organization name, and Bundle Identifier fields. You don’t need to be too stringent with what you enter here but they need to be filled out. Click next after filling these fields.
- You should see an error popup after completing the previous step but this is not a big issue. The error will communicate something along the lines of “No matching provisioning profiles found”. Simply select Fix Issue.
- You will need to login to your Apple Developer account, however, before the issue is resolved. Xcode will prompt you to login with the Apple ID connected to your developer account. Hit Add and then enter your sign-in information. If you are asked for your sign-in information again, just select your Apple ID from the available drop-down box and hit Choose in order to move forward. Xcode should then create the necessary provisioning profile.
- Now select your Apple TV device from the drop-down box located at the top of the Xcode window. This menu is found next to the play and stop buttons which are located in the top left region of the window.
- Launch the iOS app signer utility and select the corresponding certificate under the Signing Certificate field. Now under the Provisioning Profile field, select the name of the Xcode project created in step 2 above. For the Input FIle field, simply select the .deb file you would have downloaded from the list of requirements above. After filling these fields hit Start. The iOS App signer will then package the file into a .IPA file.
- Back in Xcode, select Window>Devices, select your Apple TV, and click the + button under Installed Apps.
- Locate the .IPA file created in step 8 and it will then be installed on your Apple TV. The app should now be visible on the home screen of the device.
Windows + Mac Option
This process also works on both Windows and Mac computers. To complete the install you will need the following:
- Windows 7 or higher/Mac OSX
- Latest version of .deb file of Kodi for TV OS
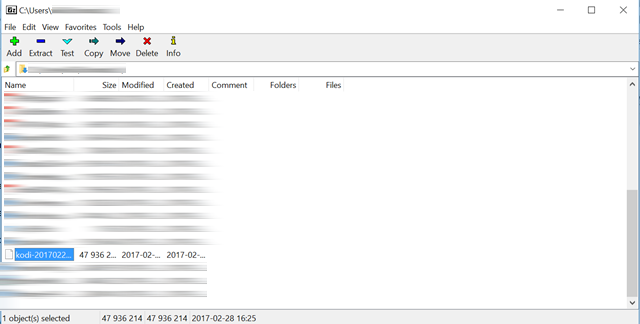
Before beginning, you will need to convert the Kodi .deb file into a .ipa file since Cydia Impactor only accepts .ipa files. To do this 7zip needs to be installed. The process is as follows:
- Open the .deb file from within 7zip.
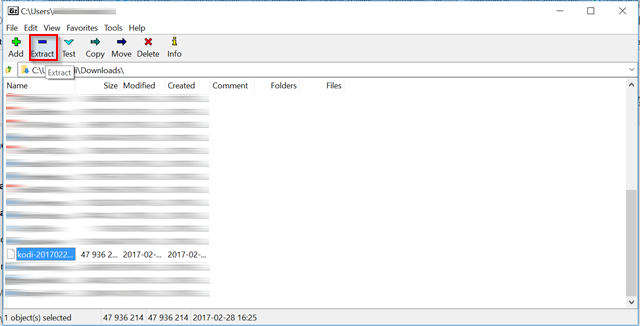
- Extract the .deb file
- Extract the resulting data.tar file with 7zip as well.
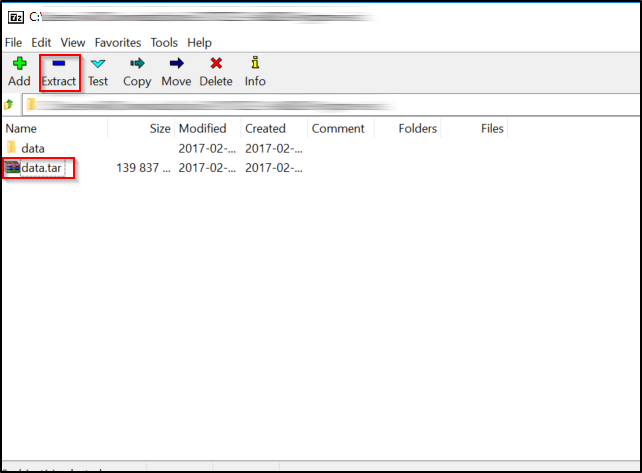
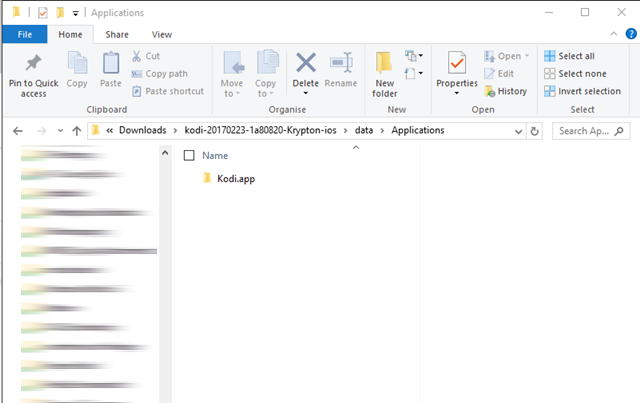
- Extracting the data.tar file should have resulted in a data folder. Open this folder and you should see a folder named Applications which will, in turn, contain a folder called Kodi.app.
- Create a folder named Payload inside of the Applications folder.
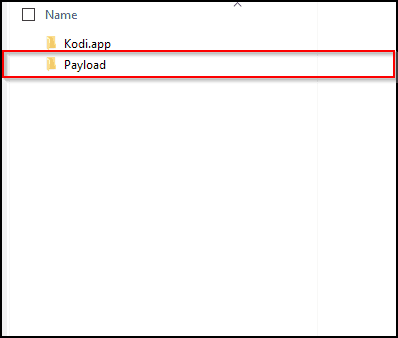
- Drag and drop the Kodi.app folder into the Payload folder.
- Access the Payload folder from within 7zip and hit the Add button. Make sure that the Archive format is set to zip and set the archive name to Kodi.ipa.
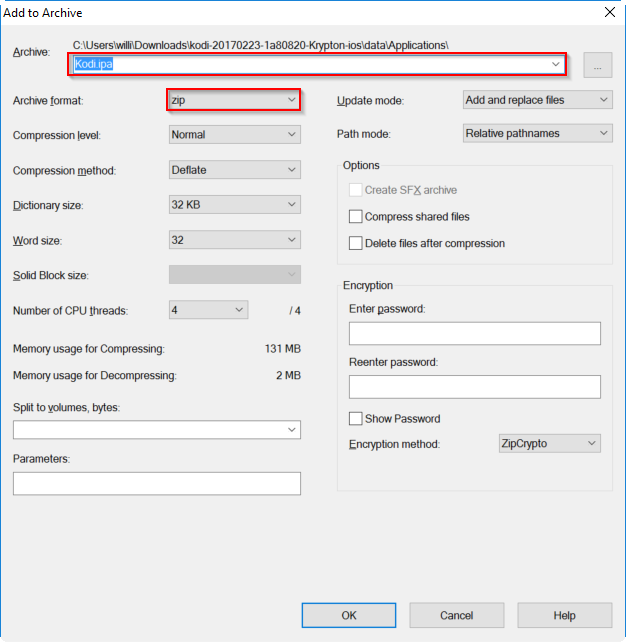
- Hit ok and the Kodi.ipa file will now be created and ready for installation.
After the creation of the .ipa file, you are now ready to install it onto your Apple TV using Cydia Impactor. To complete the install do the following:
- Connect your Apple TV to your computer using a USB-C to USB-A cable.
- Extract the Cydia Impactor to a location of your choice on your computer.
- Open Cydia Impactor, and make sure that it detects your Apple TV.
- Drag and drop the Kodi.ipa file into the Cydia Impactor window.
- Cydia Impactor will now ask you to enter your Apple ID. Enter a valid Apple ID associated with a developer’s account. Click OK and Cydia Impactor will then install Kodi to the Apple TV.
- You will now be able to access Kodi from the main screen of your Apple TV.
Please note that if you use a free Apple Developer account with either method above, you will, unfortunately, have to reinstall the Kodi app every 7 days. With a paid Developer account, you can have apps installed for an entire year.
Apple TV at Macworld San Francisco by pingping licensed under the Creative Commons Attribution-Share Alike 2.0 Generic license.


)
Awesome you have done all this work. First, most people don’t, myself included do not know most of the stuff you did here like “put in the IP address of the ATV” how do I find that?
This will be under Settings>Network. Make sure you’re connected to WiFi, go to this location and you will be able to see the IP address under Status.
I have jail broken through fire core seasopass, followed the exact instructions for ATV2 and it doesn’t reboot?
Did you try manually restarting it?
any update on apple tv3 ? when can kodi be installed on it ?
Hi Marc,
Currently there’s no solution for the Apple TV 3.
Your article title is rather deceptive with respect the the Apple TV3. And disappointing.
No support for the Apple TV 3 unfortunately.
How do I jailbreak and add Kodi to the 3rd generation of apple TV
how can you do this with apple TV 3
Hi keys,
Currently there’s no solution for the Apple TV 3.
How hard is it to jailbreak A APPLE TV 3?
Hi Lance,
Currently there’s no solution for the Apple TV 3.
Bad job at titling this article. Title says how to install on Apple TV 3. Then, I read the article and it says it can’t be done. #misleading
You have my apologies Donnie, I will look into this.
I have used Cydia to install kodi on my iPad Pro 12 inch gen 1 and it worked great… My question is why I need a developer account to access Cydia for installing Kodi to Apple TV gen 4 since it worked fine without this on the iPad… Reinstalling every 7 days is a definite no and I don’t really want to pay 99 dollars for a year just to install a program and keep it installed. And if this is an issue I have to abide by would jail breaking be a better option… Also I have heard that when you stream from Kodi that this does not seem to matter to ISPs though this article says otherwise, are there certain ISPs who are cracking down on this more than others or should I just use a VPN to be safer than sorry.
Hi Jeremy,
With regards to having to reinstall every 7 days or paying for the develper’s account, we haven’t found a better option. With regards to the ISPs, you are correct. The response depends on the ISP, but you should use a VPN to be safe.
Hi Willian Elcock
I’m trying to install code 17.3 inside Apple TV 2
But I do not get it. How to install Codei 17.3 on Apple TV 2
Can you please someone tell me
Regards
Sasikumar
Hi Sasikumar,
My aplogies for the late response. Xcode needs to be installed on a Mac computer.
William,
Trying to work on an Apple TV 4. I have the latest version of xcode 8.3. I am not getting the error code. Also, just doing Cydia Impactor and everything works until I get an error code. :/plist hpp92 plist string error.
Stumped. Hopefully you can help
John
Hi,
when installing for my apple tv 2 it comes up with port 22 connection refused when entering the first step into terminal
You will also need to jailbreak using Seasonpass.
Hi Louis,
My apologies for the late response. Try Activating Remote Login by going to System Preferences > Sharing > Remote Login > Start.
William,
Cydia wont recognize my Apple TV2. Your last response mentioned allowing remote login. Would you mind walking me thru activating Remote Login in Windows.
Thanks,
Hi Dave,
Try the following:
-Check to see if you are on the latest version of Cydia Impactor. If not, please update it.
-Install/Update iTunes.
I hope this helps. My apologies for the late response.
Hi Louis,
I will look into this for you.
Hi William, any update on this? Does the device need to be jailbroken to SSH into it? Thank you!
Hi Brad,
Yes it will need to be jailbroken.
you need to have jailbroken it first using SeasonPass