

There are two ways to handle authentication with OpenVPN. The static encryption method is easiest to set up, but it is very limiting. We’re going to use the Private Key Infrastructure (PKI) method using the Easy RSA scripts. The PKI method allows multiple clients to connect, and it also employs more robust encryption to protect your traffic.
- Create an AWS instance
- Why use PKI instead of static encryption?
- What are all these files?
- Installing the OpenVPN Server
- Configure a Linux OpenVPN client
Create an AWS instance
We’ll build the server first, so step one is to create an AWS account. You’ll have to supply a credit card during signup, but you’ll be able to use a free micro instance for a year. If you already have an account that is over a year old, you won’t be able to take advantage of the free tier.
Once you have an account, log in and create a EC2 instance. There are a few steps to this.
Name your instance. The instance name has no effect on anything, it just makes it easier for you to find. Pick something memorable.

Select Ubuntu 14.04. It’s possible to build an OpenVPN server on other types of Linux, but different distros have different commands and store their files in different spots so you may have to modify the commands I’ve provided to get it working.

I’m using a t2.micro instance. It is free if you’re within the first 12 months of your Amazon account but limited to 15GB per month, which is plenty if you’re not planning to torrent. Once that expires, it will run you about $8/US per month.

You will need to SSH in to this server to configure it. In order to connect, you’ll need to authenticate over SSH with a key. This page allows you to name this key so that you can identify it for use later. Give it a memorable name and download it.

This is the final step. Click the Create button to make your new instance available.

Your instance will now launch and be ready for your first login shortly. Click the Proceed to EC2 console button to continue setting up your server.

Prepare your key for use
You now need to prepare the private key you downloaded during the creation process. First, move it out of your Downloads directory to some safer place. Normally, keys going in the ~/.ssh/ directory on Linux and macOS.
Next, change its permissions to ensure only you, the owner, can read the key. It is a private key so should only be readable by the owner. Attempting to log in with a key that is not secured properly ends up with this type of error:
$ ssh root@54.186.178.243 -i .ssh/amazon-openvpn.pem
The authenticity of host ‘54.186.178.243 (54.186.178.243)’ can’t be established.
ECDSA key fingerprint is SHA256:sfxYZbKNf/Bfrz2zsfMLUcpS7ujaN+Dp5KjuWyLmM70.
Are you sure you want to continue connecting (yes/no)? yes
Warning: Permanently added ‘54.186.178.243’ (ECDSA) to the list of known hosts.
@@@@@@@@@@@@@@@@@@@@@@@@@@@@@@@@@@@@@@@@@@@@@@@@@@@@@@@@@@@
@ WARNING: UNPROTECTED PRIVATE KEY FILE! @
@@@@@@@@@@@@@@@@@@@@@@@@@@@@@@@@@@@@@@@@@@@@@@@@@@@@@@@@@@@
Permissions 0644 for ‘.ssh/amazon-openvpn.pem’ are too open.
It is required that your private key files are NOT accessible by others.
This private key will be ignored.
Load key “.ssh/amazon-openvpn.pem”: bad permissions
Use the chmod command to change the permissions.
$ chmod 600 .ssh/amazon-openvpn.pem
$ ssh root@54.186.178.243 -i .ssh/amazon-openvpn.pem
Please login as the user "ubuntu" rather than the user "root".
Connection to 54.186.178.243 closed.
Also, for Ubuntu instances, the username is ubuntu, and not root as it is in other versions of Linux.
$ ssh ubuntu@54.186.178.243 -i .ssh/amazon-openvpn.pem
Welcome to Ubuntu 16.04.2 LTS (GNU/Linux 4.4.0-1016-aws x86_64)
On the AWS instance itself, you’ll find your public key in /home/ubuntu/.ssh/authorized_keys. You don’t need that public key for anything, but don’t remove it from the server or you won’t be able to log in.
ubuntu@ip-172-31-26-112:~/.ssh$ pwd

/home/ubuntu/.ssh

ubuntu@ip-172-31-26-112:~/.ssh$ cat authorized_keys

ssh-rsa AAAAB3NzaC1yc2EAAAADAQABAAABAQCEt3CLnIsOe9IY5DUAmLD9YUsPwk2GsdTuzHF9PdH+LVCnYjQnKp8DIy//i8hM5CANPm6TtKFxaPt+BgUbK51SDn1Q2DIEsbC6qrBdviJ13TjLv44TStATEA5/cSaZRt9xsmz3Ajqw6KVzvU0O8Ql7wChsEFicd34YrglXYTrcRvjyFT6NApugHmfjbIOgxfcDwHl6RgDM6OBPBWXUJGt/c8KF0XVrq7QGtD89mhiMIaPuvDk2frMJywHNvPHQQZPzckOf2g1ptsRlKQL270WBqfXEL+UwkwitfJ0yzDyKkRmHDuuaElOD4MFx5Vr/VE7qV5wv6FUsz4Z+Y+yme6Yr amazon-openvpn
Now we’re in. The system says that no updates are needed, but I want to make sure.

Running sudo apt-get upgrade and then sudo apt-get update shows there are indeed some updates available, so I install them.

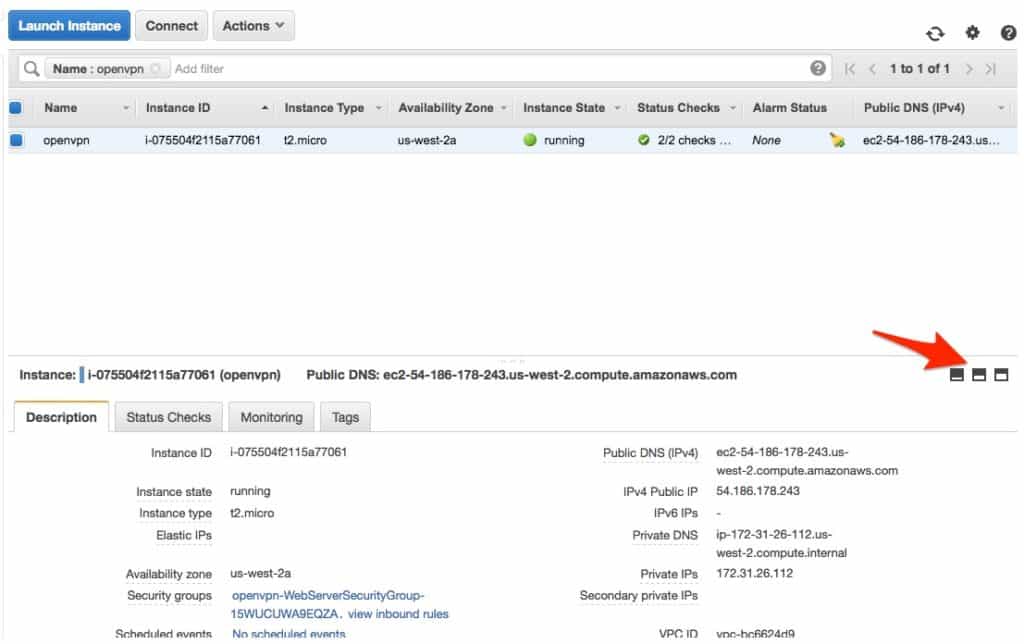
We can now see our machine in the AWS Management Console. Each instance is listed in the top table. Clicking on any instance will populate the pane at the bottom of the page with more information about that instance.
There are some viewing options at the top-right of that information pane which will expand or contract the view. If you can’t see enough information about your instances, use those options to open up the pane some more.
Now we have a working AWS instance ready for the installation of OpenVPN.
Why use PKI instead of static encryption?
Static encryption uses static keys. It’s very easy to set up but the downsides are:
- only one client can use the server at a time
- if the key is ever compromised, it can be used to decrypt all traffic, even captured traffic from some time in the past
Using PKI allows multiple clients at once and each has their own key. The server doesn’t have to have any special knowledge about the clients that may connect to it. They just need to present a certificate signed by the OpenVPN CA that we’re about to set up. The opposite is also true; the client will authenticate the server’s certificate as well.
The OpenVPN CA key should not be placed on the OpenVPN server. It is only used to sign client certificates so should be stored somewhere where it can do that, but not be stolen. Once a CA key is stolen, you will no longer be able to trust any certificates issued by that CA.
What’s a Certificate Authority (CA)?
You may have come across this phrase before in the context of TLS website certificates. In general, certificates have two jobs in the web context:
- Encrypt the traffic between the browser and web server, and
- Provide assurance that the browser is connecting to the intended website.
The second task can only be done if the certificate was issued by some certificate authority that the browser trusts. Anyone can make a certificate for any purpose, so the mere presence of a certificate doesn’t provide any confidence that the certificate holder is legitimate. It’s the additional assurance from the trusted certificate authority that brings that credibility. If a trusted CA says that certificate is valid, then your browser trusts it.
In the same way, creating your own CA to sign your OpenVPN client certificates is a method where you can control who can connect to your OpenVPN server. Your server will only trust client certificates signed by the CA you’re about to create.
Perfect Forward Secrecy
Perfect Forward Secrecy refers to the use of ephemeral keys for encryption. With the static key model, a single key is used for everything, which means that if that key is compromised at any time, all captured traffic from the dawn of time will be able to be decrypted with that key.
The OpenVPN configuration we’re going to set up in this article uses Perfect Forward Secrecy, which means that the encrypted data will still be secret even going forward
in time. The certificate and keys used to connect are not used to encrypt your actual traffic. They are used to securely pass a temporary encryption key which is used to perform the actual encryption. By default, this temporary key is rotated every hour. In this way, it would not be possible for an adversary who has collected all of your VPN traffic to decrypt it at some later date if she were to obtain the temporary key. All she would be able to decrypt with that key is your traffic from the last hour.
Once you have your OpenVPN server running using the config files I’ve provided, you will be able to see PFS in action in your server log. Every hour you will see lines like this in your logs showing the data channel encryption being reset.
Tue Jun 13 01:51:20 2017 client/142.68.135.226:53504 TLS: soft reset sec=0 bytes=51538/0 pkts=255/0
Tue Jun 13 01:51:20 2017 client/142.68.135.226:53504 VERIFY OK: depth=1, C=US, ST=RI, L=Quahog, O=Happy Go Lucky Toys, OU=Inspections, CN=Happy Go Lucky Toys CA, name=EasyRSA, emailAddress=ca@happygoluckytoys.com
Tue Jun 13 01:51:20 2017 client/142.68.135.226:53504 VERIFY OK: depth=0, C=US, ST=RI, L=Quahog, O=Happy Go Lucky Toys, OU=Inspections, CN=client, name=EasyRSA, emailAddress=noreply@happygoluckytoys.com
Tue Jun 13 01:51:20 2017 client/142.68.135.226:53504 Data Channel Encrypt: Cipher 'AES-256-CBC' initialized with 256 bit key
Tue Jun 13 01:51:20 2017 client/142.68.135.226:53504 Data Channel Encrypt: Using 512 bit message hash 'SHA512' for HMAC authentication
Tue Jun 13 01:51:20 2017 client/142.68.135.226:53504 Data Channel Decrypt: Cipher 'AES-256-CBC' initialized with 256 bit key
Tue Jun 13 01:51:20 2017 client/142.68.135.226:53504 Data Channel Decrypt: Using 512 bit message hash 'SHA512' for HMAC authentication
Tue Jun 13 01:51:21 2017 client/142.68.135.226:53504 Control Channel: TLSv1.2, cipher TLSv1/SSLv3 DHE-RSA-AES256-SHA256, 2048 bit RSA
OpenVPN allows you to control the key rotation cycle to match your paranoia level. Use reneg-sec xx in your server.conf file to control how frequently the key cycles where xx is some seconds.
What are all these files?
Key file (*.key)
This is the private key file that should be kept secret. Only the owner ever needs to use the private key, so it should not be transferred to any other system at any time. It can be used to encrypt, decrypt, and sign files on behalf of its owner.
Certificate file (*.crt)
This is the public key file which is publicly available. The certificate file can only be used to encrypt or verify files signed by the private key owner, so it can be widely shared. In the context of OpenVPN, the certificate file is used to verify the identity of the OpenVPN server itself, and the identify of connecting clients. Since these certificate are signed by our trusted CA, both sides will trust it.
Certificate Signing Request (*.csr)
The CA does not need the client’s private key in order to generate a certificate. It only needs a CSR from the client in order to do so. The CSR is signed by the client so the CA trusts that it is a legitimate request and returns a signed certificate file. A more familiar use of CSRs is demonstrated in the purchase of SSL certificates. You generate a CSR on your server and provide it to the SSL vendor and they return a certificate file to you which you then install on your server.
Installing the OpenVPN Server
The version of OpenVPN in the Ubuntu repository is a little out of date. I’m going to use it anyhow because this is a Long Term Support (LTS) version of Ubuntu so it will be updated as needed. If you’d like to run the most current version of OpenVPN you’ll need to get the packages from the OpenVPN site and then solve any potential dependency installation issues as you go.
sudo apt-get install openvpnWe need to create configuration files for both the server and our clients. To do that we’re going to need certificates, so we’ll set up easy-rsa first.
Generate the necessary CA, server, and client credentials
I did not install easy-rsa on my OpenVPN server because I never want my CA key to be present on the server itself. I installed easy-rsa on my own Ubuntu desktop and ran the following commands.
$ sudo apt-get install easy-rsa
$ /usr/bin/make-cadir CA
This command prepares a directory with all the working files we’ll need to set up the CA.

Note the vars file. Among other things, it contains the defaults that will be used to generate new certificates. You may wish to change those, although there is no technical reason that you have to. I’ve set those values on lines 53, and 64 to 69 as follows:
 53 export KEY_SIZE=2048
 64 export KEY_COUNTRY="US"
 65 export KEY_PROVINCE="RI"
 66 export KEY_CITY="Quahog"
 67 export KEY_ORG="Happy Go Lucky Toys"
 68 export KEY_EMAIL="ca@happygoluckytoys.com"
 69 export KEY_OU="Inspections"
Next, the following command will generate the CA certificates and keys in the keys/ subdirectory. First, source the vars file to get those values into the environment, run the clean-all command and then run the build-ca script:
[ ~/CA ]$ source ./vars
NOTE: If you run ./clean-all, I will be doing a rm -rf on /CA/keys
[ ~/CA ]$ ./clean-all
[ ~/CA ]$ ./build-ca
Generating a 2048 bit RSA private key
.........................................................................................+++
..........+++
writing new private key to 'ca.key'
-----
You are about to be asked to enter information that will be incorporated
into your certificate request.
What you are about to enter is what is called a Distinguished Name or a DN.
There are quite a few fields but you can leave some blank
For some fields there will be a default value,
If you enter '.', the field will be left blank.
-----
Country Name (2 letter code) [US]:
State or Province Name (full name) [RI]:
Locality Name (eg, city) [Quahog]:
Organization Name (eg, company) [Happy Go Lucky Toys]:
Organizational Unit Name (eg, section) [Inspections]:
Common Name (eg, your name or your server's hostname) [Happy Go Lucky Toys CA]:
Name [EasyRSA]:
Email Address [ca@happygoluckytoys.com]:
Now create the server’s key. You probably do not want to specify a password challenge at the end. While that can seem like a good idea, it means that your OpenVPN server will not be able to start up unattended because someone will need to type in the key password. Unless you are going to be there every time your server restarts, you probably don’t want this.
Note that you can specify any name you’d like for the name of the server. That name will be used as the file name for the resulting key, crt, and csr files. I’ve just used the name server.
Also, in order to make things clearer down the road, I have edited the vars file and changed the email address on line 68 to noreply@happygoluckytoys.com
68 export KEY_EMAIL="noreply@happygoluckytoys.com"
[ ~/CA ]$ ./build-key-server server
Generating a 2048 bit RSA private key
..........+++
.......+++
writing new private key to 'server.key'
-----
You are about to be asked to enter information that will be incorporated
into your certificate request.
What you are about to enter is what is called a Distinguished Name or a DN.
There are quite a few fields but you can leave some blank
For some fields there will be a default value,
If you enter '.', the field will be left blank.
-----
Country Name (2 letter code) [US]:
State or Province Name (full name) [RI]:
Locality Name (eg, city) [Quahog]:
Organization Name (eg, company) [Happy Go Lucky Toys]:
Organizational Unit Name (eg, section) [Inspections]:
Common Name (eg, your name or your server's hostname) [server]:
Name [EasyRSA]:
Email Address [noreply@happygoluckytoys.com]:

Please enter the following 'extra' attributes
to be sent with your certificate request
A challenge password []:
An optional company name []:
Using configuration from /home/jdw/CA/openssl-1.0.0.cnf
Check that the request matches the signature
Signature ok
The Subject's Distinguished Name is as follows
countryName           :PRINTABLE:'US'
stateOrProvinceName   :PRINTABLE:'RI'
localityName          :PRINTABLE:'Quahog'
organizationName      :PRINTABLE:'Happy Go Lucky Toys'
organizationalUnitName:PRINTABLE:'Inspections'
commonName            :PRINTABLE:'server'
name                  :PRINTABLE:'EasyRSA'
emailAddress          :IA5STRING:'noreply@happygoluckytoys.com'
Certificate is to be certified until Jun  3 12:26:04 2027 GMT (3650 days)
Sign the certificate? [y/n]:y


1 out of 1 certificate requests certified, commit? [y/n]y
Write out database with 1 new entries
Data Base Updated
Generate Diffie-Hellman data
We now need to create some Diffie-Hellman data. This data is used to generate the ephemeral key that will be used during OpenVPN sessions to create Perfect Forward Secrecy. I am a fan of 4096-bit keys, but you can use 2048 with a reasonable amount of security still. I will use 2048-bits in this article because it takes much longer to generate longer keys. To force a longer key, change line 53 of the VARS file to your desired key length.
 $ ./build-dh 2048
Generating DH parameters, 2048 bit long safe prime, generator 2
This is going to take a long time...
It actually only took a few minutes, but the time it takes is highly dependent on the amount of entropy on your system.
What is entropy?
In computing, entropy is defined as the amount of available randomness on a system that can be drawn upon by processes that need random data. Cryptography is a great consumer of entropy. Computer systems draw entropy from their environment from things like mouse movement, fan noise, any anything else that is suitably random in nature. Idle systems generally have less entropy available and therefore key generation can take longer. Also, entropy is not finite. A system with lots of entropy may ‘run out’ after creating many keys, so subsequent keys may take longer to generate. In extreme cases, a system with no or low entropy can actually create less secure keys.
To recap: we now have two of the three things we need. We have a CA setup with a signing key and we have a set of server credentials (a key and a crt) and the cert is signed by the CA. That is all we need to get the OpenVPN server running, but if we want any client to be able to actually connect to the server, we also need a set of credentials for each of those. I am only going to create one set of client credentials, but you can re-run the build-key command as many times as necessary to create as many client credentials as needed.
Also, unlike the server key, there are good reasons for specifying a key passphrase for the client keys. When a user wishes to connect, he will have to supply that passphrase in order to use the private client key we’re about to create. Your use case will determine whether you want to password-protect the client key. I am not going to in this example.
[ ~/CA ]$ ./build-key client
Generating a 2048 bit RSA private key
.........................................+++
....................................+++
writing new private key to 'client.key'
-----
You are about to be asked to enter information that will be incorporated
into your certificate request.
What you are about to enter is what is called a Distinguished Name or a DN.
There are quite a few fields but you can leave some blank
For some fields there will be a default value,
If you enter '.', the field will be left blank.
-----
Country Name (2 letter code) [US]:
State or Province Name (full name) [RI]:
Locality Name (eg, city) [Quahog]:
Organization Name (eg, company) [Happy Go Lucky Toys]:
Organizational Unit Name (eg, section) [Inspections]:
Common Name (eg, your name or your server's hostname) [client]:
Name [EasyRSA]:
Email Address [noreply@happygoluckytoys.com]:

Please enter the following 'extra' attributes
to be sent with your certificate request
A challenge password []:myawesomepass
An optional company name []:
Using configuration from /home/jdw/CA/openssl-1.0.0.cnf
Check that the request matches the signature
Signature ok
The Subject's Distinguished Name is as follows
countryName           :PRINTABLE:'US'
stateOrProvinceName   :PRINTABLE:'RI'
localityName          :PRINTABLE:'Quahog'
organizationName      :PRINTABLE:'Happy Go Lucky Toys'
organizationalUnitName:PRINTABLE:'Inspections'
commonName            :PRINTABLE:'client'
name                  :PRINTABLE:'EasyRSA'
emailAddress          :IA5STRING:'noreply@happygoluckytoys.com'
Certificate is to be certified until Jun  3 12:34:55 2027 GMT (3650 days)
Sign the certificate? [y/n]:y


1 out of 1 certificate requests certified, commit? [y/n]y
Write out database with 1 new entries
Data Base Updated
Now that we have all the pieces, let’s take a tour of the files we’ve created. In our keys directory, we can see the following files:
[ ~/CA ]$ ls -l keys
total 220
-rw-r--r-- 1 jdw jdw 5750 Jun  5 09:26 01.pem
-rw-r--r-- 1 jdw jdw 5628 Jun  5 09:34 02.pem
-rw-r--r-- 1 jdw jdw 1834 Jun  5 09:25 ca.crt
-rw------- 1 jdw jdw 1704 Jun  5 09:25 ca.key
-rw-r--r-- 1 jdw jdw 5628 Jun  5 09:34 client.crt
-rw-r--r-- 1 jdw jdw 1143 Jun  5 09:34 client.csr
-rw------- 1 jdw jdw 1704 Jun  5 09:34 client.key
-rw-r--r-- 1 jdw jdw  424 Jun  5 09:29 dh2048.pem
-rw-r--r-- 1 jdw jdw  302 Jun  5 09:34 index.txt
-rw-r--r-- 1 jdw jdw   21 Jun  5 09:34 index.txt.attr
-rw-r--r-- 1 jdw jdw   21 Jun  5 09:26 index.txt.attr.old
-rw-r--r-- 1 jdw jdw  151 Jun  5 09:26 index.txt.old
-rw-r--r-- 1 jdw jdw    3 Jun  5 09:34 serial
-rw-r--r-- 1 jdw jdw    3 Jun  5 09:26 serial.old
-rw-r--r-- 1 jdw jdw 5750 Jun  5 09:26 server.crt
-rw-r--r-- 1 jdw jdw 1102 Jun  5 09:26 server.csr
-rw------- 1 jdw jdw 1704 Jun  5 09:26 server.key
The server and client files are in sets of three. A crt file, a key file, and a csr file. These were all explained earlier in the article. The ca files have only two types, a crt and a key. This is because the CA signs its own certificates so there is no need to generate a csr to request it to sign its own certificate.
Astute readers may infer that since certificates to be signed by the CA need to provide a CSR, it is possible to create the client and server keys and CSR files on isolated systems then submit only the CSR to the CA to get a certificate. This means that client keys do not ever need to known by the CA. However, easy-rsa is just that, easy. Advanced configurations like that will need to use openssl directly instead of the easy-rsa scripts.
If we look at the top of the server.crt and client.crt files we can see that those certificates have been signed:
[ ~/CA/keys ]$ head server.crt
Certificate:
    Data:
        Version: 3 (0x2)
        Serial Number: 1 (0x1)
    Signature Algorithm: sha256WithRSAEncryption
        Issuer: C=US, ST=RI, L=Quahog, O=Happy Go Lucky Toys, OU=Inspections, CN=Happy Go Lucky Toys CA/name=EasyRSA/emailAddress=ca@happygoluckytoys.com
        Validity
            Not Before: Jun  5 12:26:04 2017 GMT
            Not After : Jun  3 12:26:04 2027 GMT
        Subject: C=US, ST=RI, L=Quahog, O=Happy Go Lucky Toys, OU=Inspections, CN=server/name=EasyRSA/emailAddress=noreply@happygoluckytoys.com
The Issuer line contains the information from our CA – remember how I changed the email address after creating the CA? In the server and client certs that I created, we can see that the Issuer is the CA that has the email address ca@happygoluckytoys.com. The owner of the certificate itself is contained in the ‘Subject line. It shows it is owned by noreply@happygoluckytoys.com, which is the email address our clients and server are using. There’s no technical reason to use separate email addresses for the CA and server/client configurations; I did it mostly for demonstration purposes.
The last thing we need is a TLS key that OpenVPN will use for Perfect Forward Secrecy. Use OpenVPN for this step.
openvpn --genkey --secret pfs.key
This will generate a key named pfs.key that will be needed on both the client and server.
Recall that all of these files reside on my local system, not the server. In order to get the OpenVPN server running we need to transfer the necessary files to the OpenVPN server. The OpenVPN server only needs the following files:
- The Diffie-Hellman file (dh2048.pem)
- The server key
- The server certificate
- The CA certificate
- The Perfect Forward Secrecy key
Use whatever file transfer method you wish, using the ubuntu user to transfer the files (I am using scp which is available on Linux and macOS machines.
for file in server.crt server.key ca.crt dh2048.pem pfs.key; do scp -i ../../.ssh/amazon-openvpn.pem $file ubuntu@54.186.178.243:~; done
server.crt        100% 5750     5.6KB/s   00:00
server.key        100% 1704     1.7KB/s   00:00
ca.crt            100% 1834     1.8KB/s   00:00
dh2048.pem   100%  424     0.4KB/s   00:00
pfs.key            100%  636       1.6KB/s  00:00
Now log in to the Amazon OpenVPN server and copy the keys to the /etc/openvpn/keys folder.
ubuntu@ip-172-31-26-112:~$ for file in server.crt server.key ca.crt dh2048.pem pfs.key; do
> sudo mv $file /etc/openvpn/keys/
> done
ubuntu@ip-172-31-26-112:~$ ls -l /etc/openvpn/keys/
total 32
-rw-r--r-- 1 ubuntu ubuntu 1834 Jun  6 12:13 ca.crt
-rw-r--r-- 1 ubuntu ubuntu  424 Jun  6 12:10 dh2048.pem
-rw-r--r-- 1 ubuntu ubuntu 5750 Jun  6 12:10 server.crt
-rw------- 1 ubuntu ubuntu 1704 Jun  6 12:10 server.key
-rw------- 1 ubuntu ubuntu  636 Jun  6 12:10 pfs.key
Now that we have all our credential files in place, we need to build a simple OpenVPN configuration file to tell OpenVPN where to find these files, and also specify some basic configuration it will need to run. OpenVPN ships with a sample server configuration file which we can copy into our OpenVPN directory and use.
ubuntu@ip-172-31-26-112:/etc/openvpn$ sudo cp /usr/share/doc/openvpn/examples/sample-config-files/server.conf.gz . && sudo gunzip server.conf.gzWe can see the default credential lines 78 to 80:
 75 # Any X509 key management system can be used.
 76 # OpenVPN can also use a PKCS #12 formatted key file
 77 # (see "pkcs12" directive in man page).
 78 ca ca.crt
 79 cert server.crt
 80 key server.key  # This file should be kept secret
Let’s change them to match the path where we put our credentials and a few other configurations as well. The path to the Diffie-Hellman file needs to be corrected and we should get some logging to help with debugging. Here’s what I ended up with:
port 1194
proto udp
dev tun
ca /etc/openvpn/keys/ca.crt
cert /etc/openvpn/keys/server.crt
key /etc/openvpn/keys/server.key # This file should be kept secret
dh /etc/openvpn/keys/dh2048.pem
cipher AES-256-CBC
auth SHA512
server 10.8.0.0 255.255.255.0
push "redirect-gateway def1 bypass-dhcp"
push "dhcp-option DNS 8.8.8.8"
push "dhcp-option DNS 8.8.4.4"
ifconfig-pool-persist ipp.txt
keepalive 10 120
comp-lzo
persist-key
persist-tun
status openvpn-status.log
log-append  openvpn.log
verb 3
tls-server
tls-auth /etc/openvpn/keys/pfs.key
If you’re having trouble getting the OpenVPN server to start, you can increase the logging verbosity from the default of 3, to 6 or more. This will give a more detailed log for better troubleshooting.
This is enough to allow an OpenVPN client to connect to the server, but the server won’t be able to proxy any internet traffic yet, which is probably the whole reason you want to do this. To allow this, you will need to issue two commands on the server:
sudo iptables -t nat -A POSTROUTING -s 10.8.0.0/24 -o eth0 -j MASQUERADE
sudo echo 1 > /proc/sys/net/ipv4/ip_forward
Those settings do the following:
- The iptables command is responsible for allowing clients to use the server as an internet proxy. It routes the internal client traffic (on network 10.8.x.x) to the eth0 network interface on the server. That is the interface that is generally attached to the WAN (internet) network interface. If your server is set up differently for some reason, use the proper VPN network and network adapter.
- The second command allows the kernel to forward IPv4 traffic, which is necessary for a VPN to function.
I can now start the OpenVPN server like so:
sudo openvpn server.confI can check it is running in a variety of ways, but the easiest is probably to just look at the /etc/openvpn/openvpn.log. If you’ve reached the Initialization Sequence Completed message, then it is running.
ubuntu@ip-172-31-26-112:/etc/openvpn$ sudo tail openvpn.log
Tue Jun  6 12:45:13 2017 us=559538 /sbin/ip link set dev tun0 up mtu 1500
Tue Jun  6 12:45:13 2017 us=560133 /sbin/ip addr add dev tun0 local 10.8.0.1 peer 10.8.0.2
Tue Jun  6 12:45:13 2017 us=560665 /sbin/ip route add 10.8.0.0/24 via 10.8.0.2
Tue Jun  6 12:45:13 2017 us=561105 Data Channel MTU parms [ L:1542 D:1450 EF:42 EB:143 ET:0 EL:3 AF:3/1 ]
Tue Jun  6 12:45:13 2017 us=561125 UDPv4 link local (bound): [undef]
Tue Jun  6 12:45:13 2017 us=561131 UDPv4 link remote: [undef]
Tue Jun  6 12:45:13 2017 us=561139 MULTI: multi_init called, r=256 v=256
Tue Jun  6 12:45:13 2017 us=561157 IFCONFIG POOL: base=10.8.0.4 size=62, ipv6=0
Tue Jun  6 12:45:13 2017 us=561169 IFCONFIG POOL LIST
Tue Jun  6 12:45:13 2017 us=561184 Initialization Sequence Completed
Open the OpenVPN port on your EC2 instance
Your new EC2 instance will only allow connections on port 22 (SSH) by default. The default OpenVPN port is 1194, although you can change that port to whatever you’d like in your server.conf and client.conf files. Regardless of what port you use, you will need to open it to allow inbound connections.
Amazon EC2 uses something called a security group to do this. Without going into the complexities of it, if you think of a security group as a firewall, you’ll have enough knowledge to configure it.
Access your EC2 instance to see what security group it is using. Click on the name of your security group to get into edit mode.

You’ll see that the only inbound rule in place is the default SSH rule on port 22. I am using the default OpenVPN port, so I need to add an inbound rule for port 1194. Click the Edit button:

Click the Add Rule button:
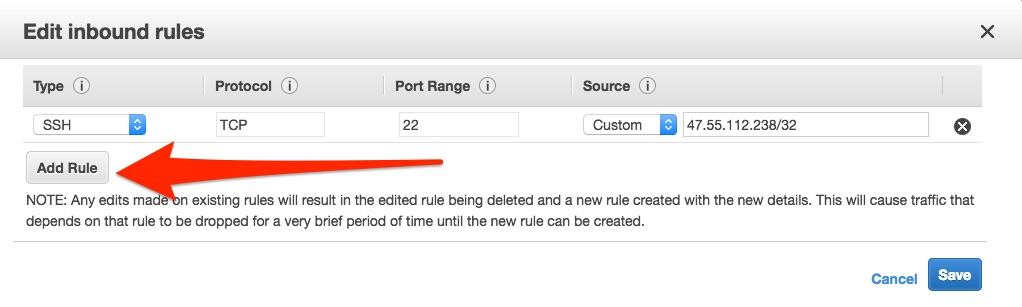
Recall that we’re using UDP, so select the Custom UDP Rule

Fill in port 1194 and select a Source. The Source is an interesting field. If you’re going to want to connect to your OpenVPN from arbitrary places, then you will want to select Anywhere. If you only intend to use your VPN from the place you’re currently at, then select My IP and your current IP will be populated into the text field to the right. If you want some other IP or range, select Custom and enter something applicable in the text field.
Choosing Anywhere means any IP address can connect to your OpenVPN instance, but since every connection needs to present a certificate signed by your CA, it’s not likely a connection can be made. An attacker could plausibly launch a denial of service attack against your server, though, and make it unavailable to use through repeated connection attempts. It’s always best to limit access to your services as much as is practical for each situation.
For Custom, you have the following options:
- Add another existing Amazon security group
- Add a single IP address (ie – 11.22.33.44/32)
- Add a range of IPs using CIDR notation (ie 11.22.33/24)
If you want to specify a few IPs only, perhaps just your work and home IPs, you can do that by creating two separate inbound Custom UDP rules. One for each IP you would like to be able to use.

I selected the Anywhere option and saved the new rule. Note that I ended up with two new rules, one for IPv4 in CIDR notation, and one for IPv6. If you will not be using one of those IP types, you can delete the unnecessary one by going back into the Edit screen and clicking the X button to the right of the one you do not want.

Now that we have the server running and the port open, that is all we should need to do on the server itself.
Configure a Linux OpenVPN client
The final part of this process is to configure a client to connect to the OpenVPN server. If you don’t already have OpenVPN installed on your computer, install it now using your package manager. For Ubuntu and most Debian strains apt-get will do that.
sudo apt-get install openvpnThere are two methods to use your OpenVPN server; through a desktop client or through the command line. In either case, you’ll need a client.conf file. The settings in the client.conf file work in tandem with the settings in the server.conf file so if you change anything in either file, it’s important to determine if a complimentary setting in the other conf file needs to be changed. This client.conf file works with the server.conf file I provided earlier.
client
dev tun
proto udp
remote 54.186.178.243 1194   ←-change the IP address to your AWS IP address
ca ca.crt
cert client.crt
key client.key
tls-version-min 1.2
tls-cipher TLS-ECDHE-RSA-WITH-AES-128-GCM-SHA256:TLS-ECDHE-ECDSA-WITH-AES-128-GCM-SHA256:TLS-ECDHE-RSA-WITH-AES-256-GCM-SHA384:TLS-DHE-RSA-WITH-AES-256-CBC-SHA256
cipher AES-256-CBC
auth SHA512
resolv-retry infinite
auth-retry none
nobind
persist-key
persist-tun
ns-cert-type server
comp-lzo
verb 3
tls-client
tls-auth pfs.key
Command line usage
On the command line you’ll need to issue the OpenVPN command as root, and specify your client configuration file.
sudo openvpn client.conf
This command assumes you are in the same directory as your client.conf file. If that’s not true, then you will have to specify the path to the client.conf file. You will end up with a lot of output, but the important thing to look for is the same line that the server printed when it was ready to go: Initialization Sequence Completed
.
$ sudo openvpn client.conf
Sun Jun 11 19:35:25 2017 OpenVPN 2.3.10 x86_64-pc-linux-gnu [SSL (OpenSSL)] [LZO] [EPOLL] [PKCS11] [MH] [IPv6] built on Feb  2 2016
..
..
..
Sun Jun 11 19:35:28 2017 Initialization Sequence Completed
The output will continue as long as your connection is active. To stop the connection, you can simply just hold down the control key and press the C key. This will disconnect the VPN.
If you don’t want to have a terminal window filling with output, you can send the program to the background using the & sign after the command. You’ll still get the initial output, but you can press the enter key to get back to a command prompt and carry on with other work.
$ sudo openvpn client.conf &
[1] 4164
Sun Jun 11 19:39:57 2017 OpenVPN 2.3.10 x86_64-pc-linux-gnu [SSL (OpenSSL)] [LZO] [EPOLL] [PKCS11] [MH] [IPv6] built on Feb  2 2016
..
..
..
Sun Jun 11 19:40:00 2017 Initialization Sequence Completed
The first line of output shows the process identifier (PID) for your new process which is 4164 in this case. You can look at the running process table to confirm that the openvpn call has indeed been assigned 4164.
$ ps -ef | grep openvpn
root      4164 22329  0 19:39 pts/5    00:00:00 sudo openvpn client.conf
root      4167  4164  0 19:39 pts/5    00:00:00 openvpn client.conf
Because we’ve sent the openvpn process to the background, we can’t kill it with the control-C combination. If you want to shut down this connection, you’ll need to kill the process.
sudo kill 4167
Implement a kill switch
If your VPN connection drops your computer will carry on sending traffic over your ISP’s network unprotected and you probably will not notice. If this is not acceptable, you can engineer a pretty simple kill switch on your Linux client. To do so, we’ll use IPTables and the Ubuntu Ultimate Firewall (UFW) application to write some easy rules.
I’ve created a startvpn.sh script that puts firewall rules in place. These firewall rules ony allow traffic over the VPN’s tun0 network interface, and they only allow traffic over that interface to go to your VPN’s server.
$ cat startvpn.sh
sudo ufw default deny outgoing
sudo ufw default deny incoming
sudo ufw allow out on tun0 from any to any
sudo ufw allow out from any to 54.186.178.243 # <-- note this is the IP from the "remote" field of your configuration file
sudo ufw enable
sudo ufw status
sudo openvpn client.conf &
With these firewall rules in place, network traffic cannot pass over any other network interface. When your VPN drops, it removes the tun0 interface from your system. Therefore, there is no allowed interface left for traffic to pass, and your internet connection will die.
When you’re done with your VPN session, you need to remove those rules in order to allow normal network traffic over your actual network interfaces. The easiest way to do that is to just disable UFW entirely. If you have existing UFW rules running normally, then you’ll instead want to craft a more elegant tear down script. Mine just removes the firewall rules and then kills openvpn with a script called stopvpn.sh
$ cat stopvpn.sh
sudo ufw disable
sudo ufw status
sudo kill `ps -ef | grep openvpn | awk '{print $2}'`
If you’re using some other method to connect to your VPN, you can eliminate the last two lines of each script. In that configuration, you would have to remember to manually run the startvpn.sh script prior to starting your VPN by some other means. On the other end, once you’ve finished your VPN session it won’t be hard to remember to run the stopvpn.sh script since you’ll likely notice the lack of internet connectivity until you do.
Graphical usage
Ubuntu
There is no OpenVPN client per se, but as the most widely used VPN app on the planet, it’s not too hard to get it working.
sudo apt-get install network-manager-openvpn
If the OpenVPN network manager is not already installed, it will install a few other programs including a Gnome desktop package. If the OpenVPN network manager is already installed you may have to manually install the Gnome package.
sudo apt-get install network-manager-openvpn-gnome
Open the Ubuntu menu and find the Network applet.

Click the + button to add a new connection:

VPN is the default selection so just click the Create button.

Select the option to import a configuration. You can import your existing client.conf file so you don’t need to recreate everything. If you don’t see that option, that’s a clue that the network-manager-openvpn-gnome package is not installed.

A file browser window will open; select your client.conf file.

If you have added a password to your client.key file you can supply it now at the bottom of the conjuration window.

The VPN connection should work without any further configuration but you can visit the various setting tabs by clicking the Advanced tab if there is more you’d like to change.
To activate the connection, click the slide to the On position. A toaster message will let you know when the VPN is active. To disable the VPN, simply click the slider back to the Off position.
Kubuntu
The Kubuntu network manager looks a little different, but the steps are essentially the same. First, install openvpn and the network-manager-openvpn package.
sudo apt-get install openvpn network-manager-openvpn
Find the Connections menu item and select the plus sign to add a new connection.

Scroll to the bottom of all the options and select the Import VPN Connection option.

Browse to the client.conf file and select it.

Kubuntu will offer to copy your credentials into the KDE certificate store. The sensitive client key will also be copied if you click OK. There are arguments both for and against saving these credentials in the certificate store, so choose the option that best fits your security model.
Right-click the new VPN connection and select Connect to connect to your VPN.

To disconnect, right-click again and select Disconnect.
Testing your connection
People have a variety of reasons for choosing to use a VPN. If your reasons include privacy and anonymity, then you’ll want to check your connection before using it. The Comparitech Leak Test is a one-stop page to test what information may still be leaking from your system.
The OpenVPN connection I have configured protects my IP and my DNS. I pushed Google DNS in my server.conf file, but you can use any DNS servers you’d like; or specify none to continue using your ISP’s DNS servers. Change or remove the dhcp-options in your server.conf file to do that.
push "dhcp-option DNS 8.8.8.8"
push "dhcp-option DNS 8.8.4.4"
If you’re an advanced DNS user and want to use specific DNS servers on a country basis, you can consult openic.org for suitable name servers.

Technically, my IP is being leaked over WebRTC but since it is only reporting my internal VPN IP address, it doesn’t identify me in any way. Since WebRTC queries your browser, there’s not much a VPN can do to help with that. You’re best disabling WebRTC with a plugin

Speed test
A VPN will add latency to your connection. If speed is very important to you, an AWS micro may not be the best choice for you. Speeds vary greatly because there are so many factors affecting it. My initial speed tests show that my download speeds suffered greatly, but my upload stayed relatively the same. If my AWS instance was closer to me, the speeds may be better.
Speed test with VPN active

Speed test without the VPN active

OpenVPN is a very flexible and powerful VPN system. We’ve just touched on the bare bones to get it up and running. There are very active OpenVPN forums and extensive documents on the OpenVPN site if you’d like to learn more.


Good article, helped me to switch traffic by OpenVPN
Hi,
I set up a VPN server to allow users to have secure access to several VMs (EC2-Instances) using OpenVPN ami.
Now my next step I am trying to accomplish is to have users be able to connect to the VPN server then be able to ssh into the AWS servers we have. Not sure how to go about doing this
Many thanks Jon. It took a while to me but your superb guide helped a lot.
Really appreciated your efforts for the wonderful drafted doc.
Hi,
Thanks for the detail information.
If I like to setup an iPhone VPN client to connect to this VPN server then do you have any information? Thanks advance!
Regards,
Jeff
Hello,
Search for OpenVPN in the app store.
Hi,
Thaks for your guide, I think I can review some parts of my VPN installation. I would also like to have host names associated to the machines in my VPN. I have one with some colleges so I could do:
$ ping johndoe.vpn
and this should resolve to his IP in the VPN. I have this on /etc/hosts but it’s hard to manage when a new member comes to our VPN. We all have to copy that file. I think one possible solution would be installing bind and having a DNS server, but is there a lighter solution?
Thanks
DNSMasq might work for you. It is a lightweight DNS server that can probably do what you want.
Hi,
Thanks for the detailed steps.
Quick question – How can i block DNS information?
Here are my openvpn.conf file contents
push “dhcp-option DNS 8.8.8.8”
push “dhcp-option DNS 8.8.4.4”
port 1194
proto tcp-server
dev tun1
ifconfig 10.4.0.1 10.4.0.2
status server-tcp.log
verb 3
secret ovpn.key
Hi,
I don’t understand what you mean by ‘block DNS information’. If you mean how do you use DNS servers other than your ISPs, then this should do it to use Google’s DNS.
push “dhcp-option DNS 8.8.8.8”
push “dhcp-option DNS 8.8.4.4”
Use our DNS checker to see if it’s working: https://www.comparitech.com/privacy-security-tools/dns-leak-test/