
In 2022, AVG discontinued its PrivacyFix browser extension, which helped thousands of people monitor and manage the privacy settings on their Facebook and Google accounts. AVG says old users might still be able to use the extension, but it will no longer receive support, updates, bug fixes, or maintenance. New users may no longer download the product.
A similar tool used to scan Facebook privacy settings, ReclaimPrivacy, was also recently discontinued. The old version no longer works with Facebook.
While many people found PrivacyFix and ReclaimPrivacy useful, they did not accomplish anything that everyday users could not accomplish themselves. We’ll guide you through the steps to secure your privacy on all accounts and apps in much the same way, manually.
Facebook’s privacy and security settings are actually quite thorough and granular, but they are scattered about among several different menus. On a desktop browser, start by opening Facebook, then:
- Click your user icon in the top right corner, then click “Settings & privacy” in the drop-down menu that appears.

- Click the “privacy shortcuts” option from the drop-down menu that appears.

- You’ll see a new screen appear, which includes five main options: “Who Can See What You Share,” “How People Can Find You on Facebook,” “Your Data Settings on Facebook,” “How to Keep Your Account Secure,” and “Your Ad Preferences on Facebook.”

- Click “Who Can See What You Share?”

- This will open a window showing what types of information you can control. Click the “Continue” button.

- On the next screen, you’ll see your profile information, such as your phone numbers, email addresses, your birthday, your relationship, your location, and more. Access to these bits of information can be set from “Public” (meaning everyone can see it), to “Only Me” (meaning only you can see it.) Click each item to set each access level. Then click “Next.”

- The next screen is “Audience.” Here you can control who gets to see your posts. Once you’re finished adjusting the access levels, click the “Next” button.

- The next screen is “Tagging,” which controls the audience that will see when you are tagged in another user’s post. Adjust the options here, and then you are finished.

Next, secure your log in information
On the left sidebar, click the link that says “Security and Login” with a shield icon. The privacy settings we’re most concerned with here are two-factor authentication, App Passwords, Your Browsers and Apps, and Where You’re Logged In.
- “Choose 3 to 5 friends to contact if you get locked out” — it’s a good idea to set this up. If a hacker somehow gains access to your account, the first thing they will do is attempt to lock you out by changing the password, recovery email, and other login details. This step will prevent that from happening.
- “Where you’re logged in” — If you get a new phone or log in on another person’s device, this list is important. It’s a log of devices that don’t require identity confirmations or send notifications when logged in. Remove any that aren’t among your current devices by clicking the three dots and selecting “log out”. If you don’t recognize a device at all, click the “Not you” option to alert Facebook.
- “Set up two-factor authentication” — Whenever logging in from a new device, a code will be sent to your phone as an extra layer of security. You will have to add a phone number if you haven’t already.
- “Get alerts about unrecognized logins” — In case your account gets hacked, this will alert you so you can respond as quickly as possible.
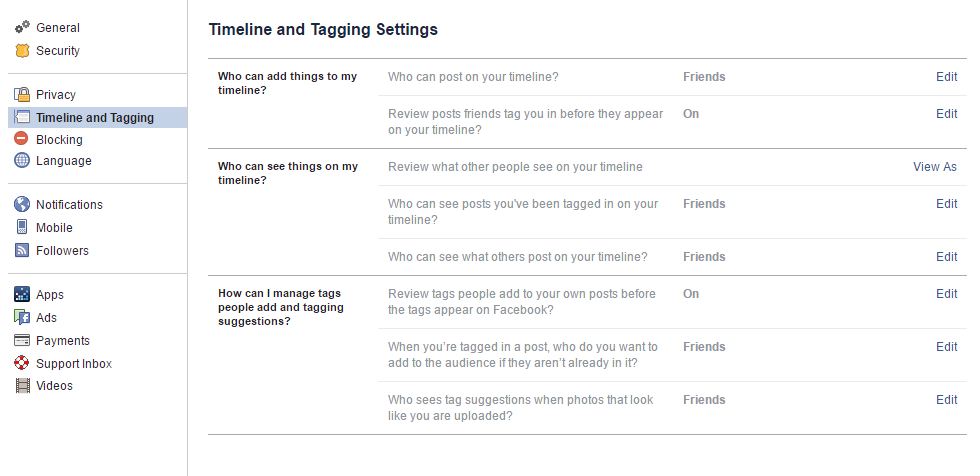
Now head to the “Timeline and tagging” tab on the left sidebar of this page. Change all of these settings to “Friends” when available. You may also opt to review any photos or statuses that you are tagged in before the tag appears publicly.
Onto the Public Posts tab. A follower is another Facebook member who can view your profile and posts but is not friends with you. Because I use Facebook to help promote the things I write, I left this one on. But for those of us without a public image to keep up, it’s best to turn it off.

Finally, the Apps section.
This is the most overlooked part of Facebook’s privacy settings, and that’s likely intentional. Apps collect users’ personal data and use it to target advertisements, recommendations, and promotions. Advertising is Facebook’s primary source of revenue, which is likely why this is tucked away in another section separate from the user-to-user privacy settings.
Every time you authorize an account on a third-party site or app with Facebook, i.e., you log into an app with Facebook instead of creating a new account with an email and password, it ends up here. You’ll want to remove apps you don’t use and limit the permissions on the ones you do. After that, you’ll probably want to block your friends’ apps from gathering info on you as well.
When logged into a Google service like Gmail or Google+ on a desktop browser, navigate to myaccount.google.com. Then click “Sign-in and security.”

Here you can set up two-step authentication, a recovery email, a recovery phone, and a secret question. A list of any security incidents will be shown under “Recent security events.” These include password changes and logins from new devices. Under “Recently used devices”, make sure you recognize all of the phones and computers used to access your account. Remove any that don’t seem familiar or that you no longer use. Under “Security alert settings,” you can decide how Google should contact you in case of an attempted breach and less critical account activity.
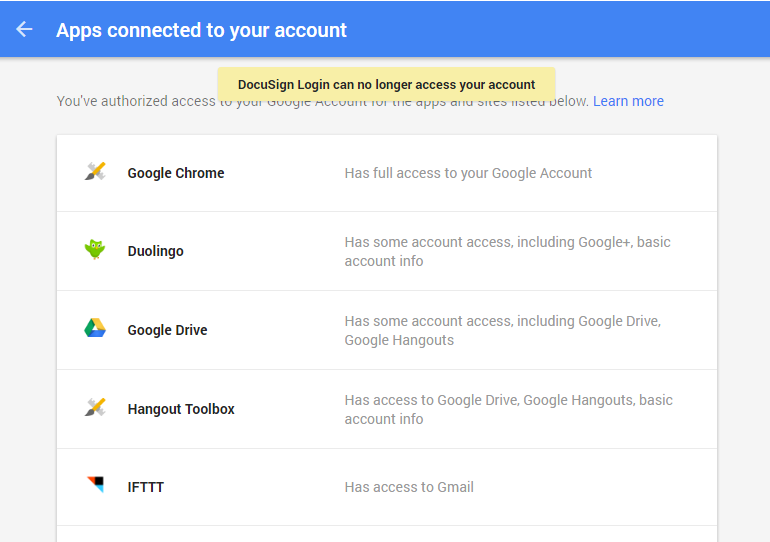
In the next section, “Connected apps and sites,” you can view a full list of all the places where you’ve logged in using your Google account, along with their associated permissions. Just like Facebook, remove any that you either don’t recognize or don’t use anymore. For those you do approve of, click on them to see a more detailed list of permissions. You can click “edit list” when it appears to get rid of as many of those permissions as possible, while still keeping the app functional. Not every app lets you do this, though.
At the very bottom of this page, you can choose to toggle off apps that use less secure sign-in technology. Unless you have a particular app or apps that need to use this, it’s best to turn it off.
In the left sidebar, we can move on to the next section: Personal Info and Privacy.
In the first section, “Your personal info,” you can set things like phone number, recovery email, screen name, and birthday. Excluding the “About Me” part, none of these details are made public by default and are only known to Google. We recommend you toggle off Location Sharing. If you click on Search Settings, you can opt out of personalized services like search history and private results. That doesn’t mean Google will stop collecting the information used to provide those services, however. The only way to do that is to stop searching with Google altogether.
Next, under Activity Controls, toggle off everything for maximum privacy. You can also delete past account activity by clicking “Manage activity,” checking all the boxes, and hitting “DELETE”. These include YouTube videos, locations, and searches.
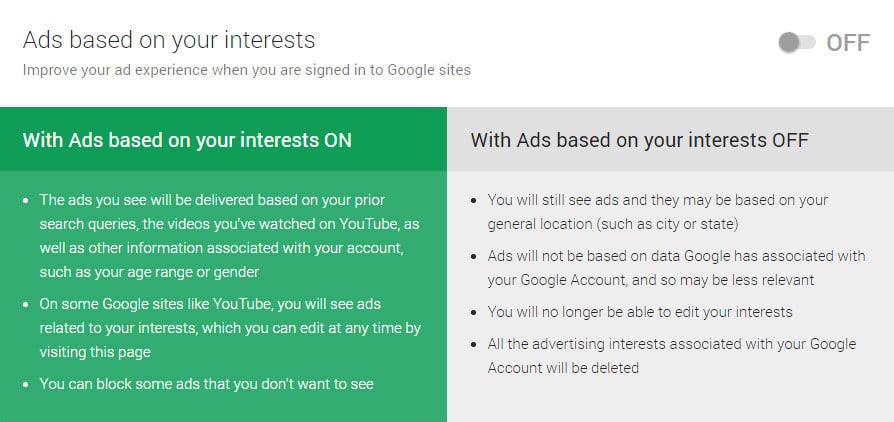
Click the link in the next section that says “Manage ad settings”, where you can toggle off interest-based ads. Again, this doesn’t mean Google will stop collecting the information needed to provide these ads, you’ll just stop seeing them. We’re not done yet, however, as this only changes what you see on web pages owned by Google. To stop interest-based ads on other sites, scroll down and click the button that says “Control signed out ads.” This will bring you to an almost identical-looking page, where you can again toggle the switch to opt out.
Finally, the next section will be the last we cover here. Under Account Overview, click the link for your Google dashboard. This will bring up a list of every Google service your account is connected to. Disconnect any that you no longer use or don’t recognize.
Anti-tracking
PrivacyFix’s other function was to show which websites are tracking you and stop them from doing so. Several anti-tracking extensions are available for both Firefox and Chrome browsers, but we highly recommend Disconnect. Just install it and let it do its thing. Clicking on the icon will show you relevant stats about the website you are currently visiting.


This is usefull, but I still want to be able to customise my privacy more. For example, if I post something on a public group page, I don’t necessarily want it to appear in my friend’s newsfeed. Is there a way to do this?
Hi Matt,
Facebook doesn’t really have a straightforward way to do this that I know of. The admin of the group can adjust the settings, or you can unfollow the group while still remaining a member. The latter will prevent you from getting group updates, however.
Hope that helps,
Paul